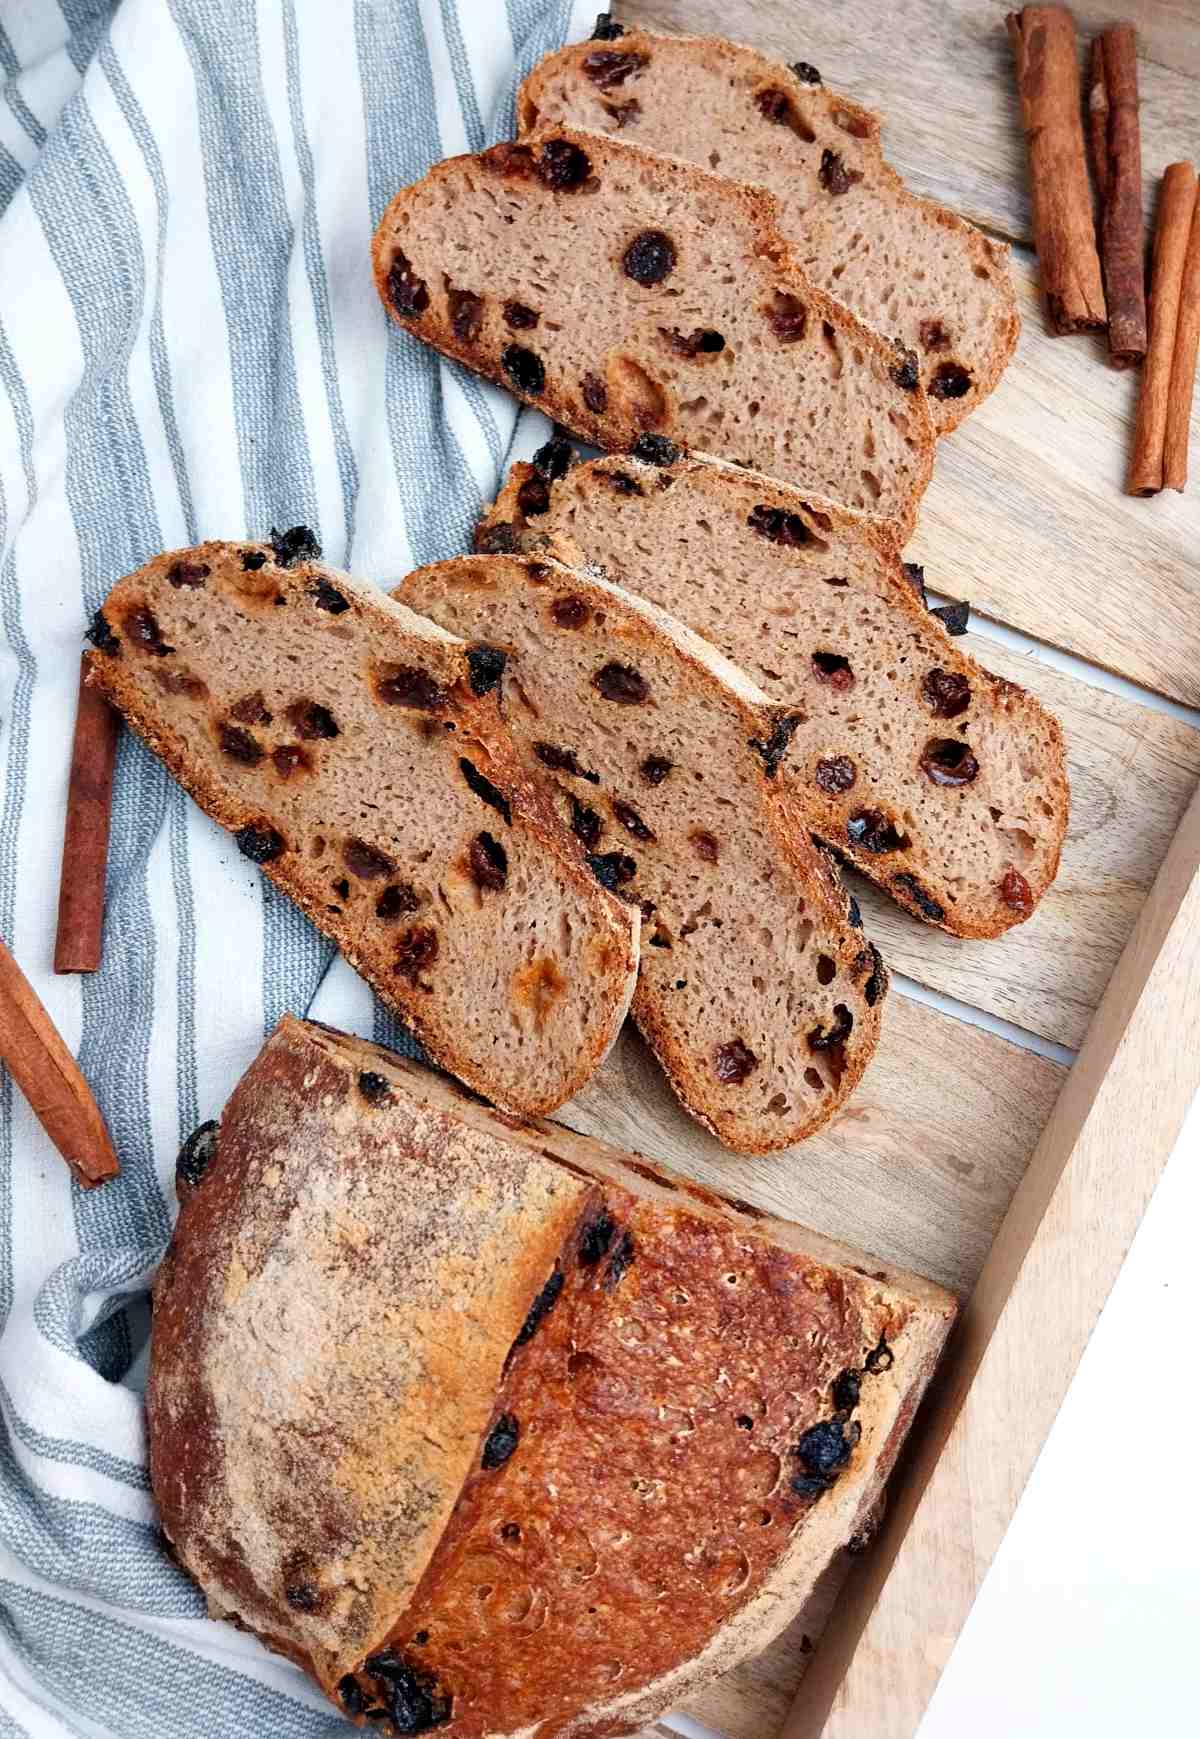
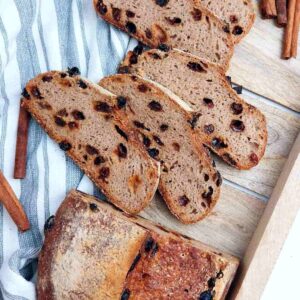
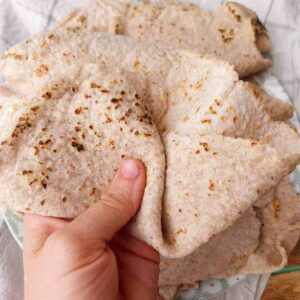
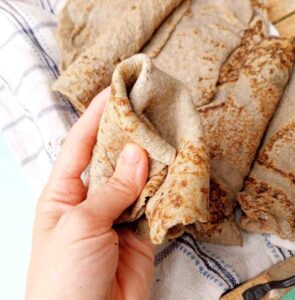
This gluten-free sourdough cinnamon raisin bread is sweet, soft, and perfectly crusty! The process is so much simpler than the regular sourdough, you will be coming back to this recipe again and again.
This recipe is a variation of my regular vegan gluten-free sourdough loaf. I use my brown rice flour starter, although sorghum and millet starters are a joy to work with as well!
I love the slow and thoughtful process of making gluten-free cinnamon rolls, sourdough hamburger buns, and these pillowy soft sourdough dinner rolls. Now I have this cinnamon raisin bread on my list, too!
On more rushed days I enjoy making quicker starter discard recipes like these sourdough flatbreads (great for pizza!), 3-ingredient banana pancakes, sourdough banana bread, and, of course, sourdough chocolate chip cookies.
Jump to:
Ingredients
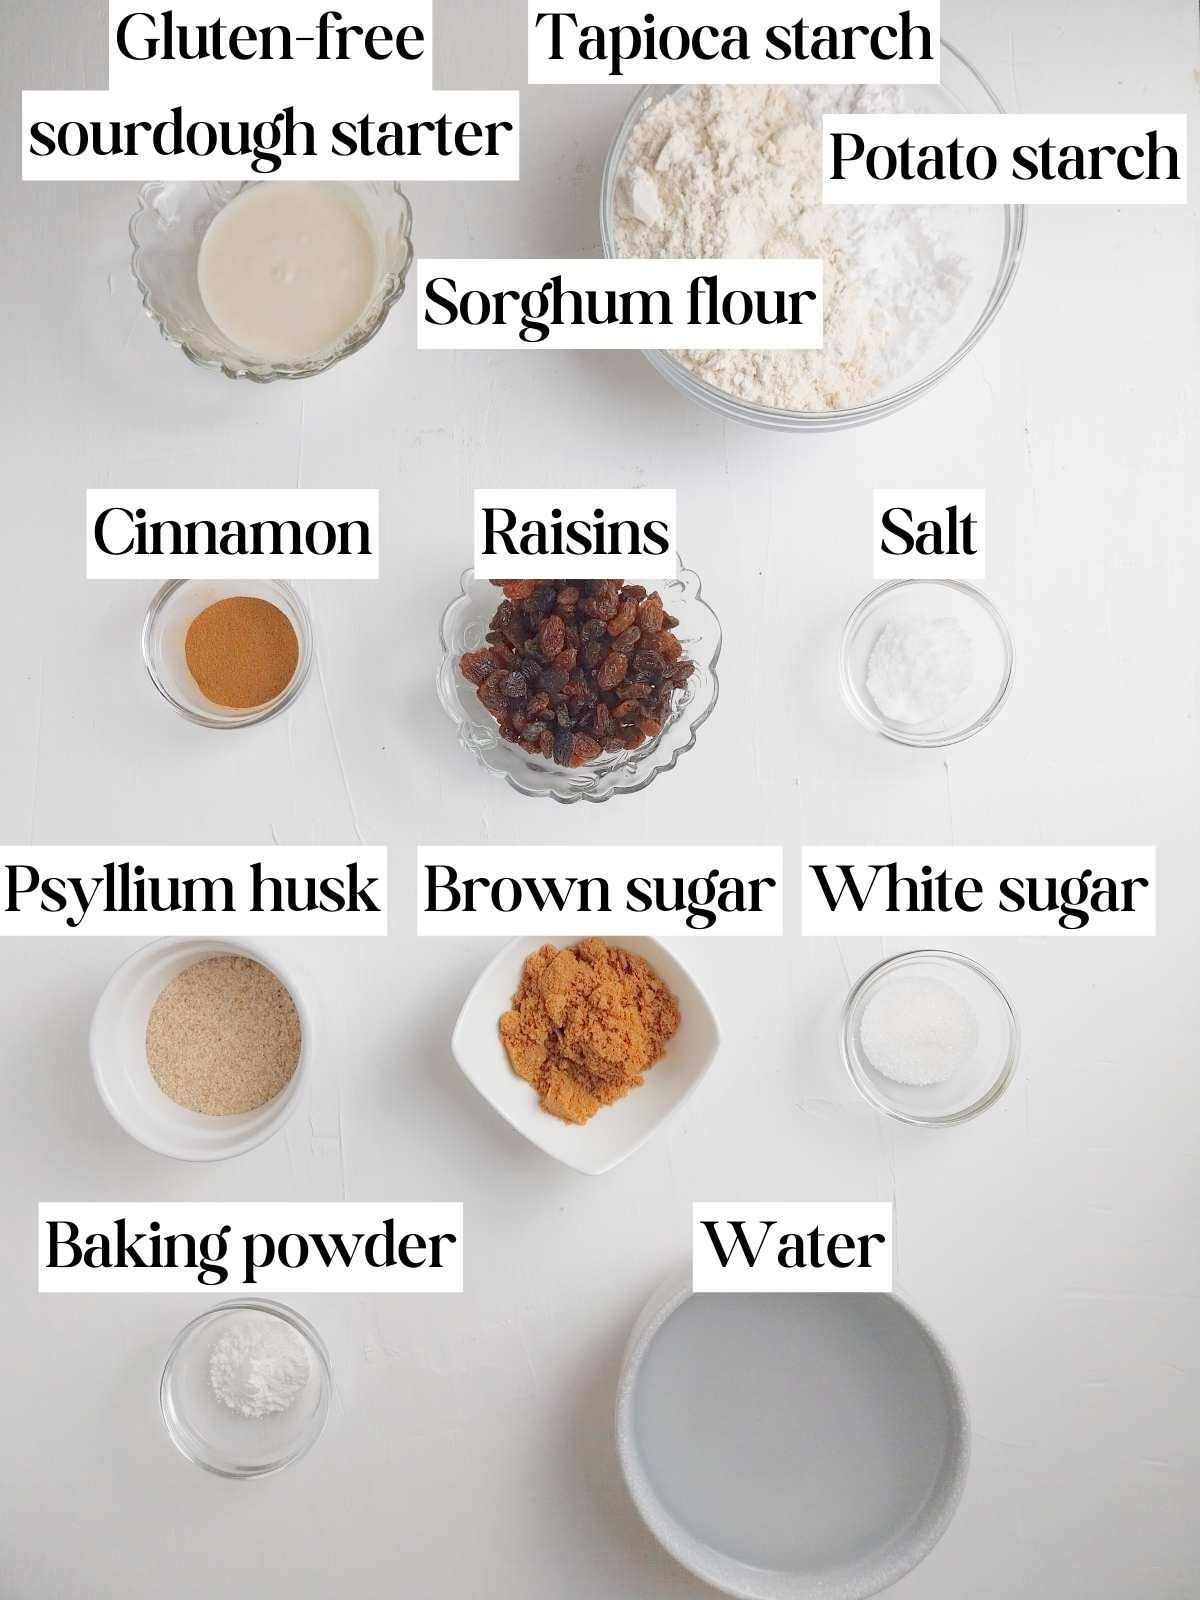
- Psyllium husk - creates a bready texture, holds the dough together, and hydrates the loaf.
- Tapioca & potato starches - make the crumb softer and allow for a better rise. Read about the difference between the two.
- Sorghum flour - adds nutrition and flavor to the dough as well as an airier crumb.
- Baking powder - assists the starter in expanding the bread during baking.
- Sourdough starter - ferments the bread. Here is an easy sourdough starter guide!
- Brown sugar - adds sweetness and flavor.
- White sugar - feeds the yeast bacteria in the starter.
Substitutes
- Tapioca starch - arrowroot starch can be used instead.
- Potato starch - cornstarch is a good substitute.
- Sorghum flour - you can use brown rice instead.
- Psyllium husk - although there are certain alternatives to psyllium, I don't recommend swapping it in this recipe. I have successfully made bread with Konjac before, but it wouldn't work in a sourdough recipe.
- Raisins - cranberries can be used instead.
- Brown sugar - use coconut or white sugar or skip this ingredient.
- White sugar - use maple syrup/honey instead.
- Baking powder - you can skip this ingredient, although the bread would turn out denser. Don't swap for baking soda.

my favorite
Banneton baskets
I recommend getting a round 9-inch basket and an oval one for more variety!
Step-by-step instructions
Step 1
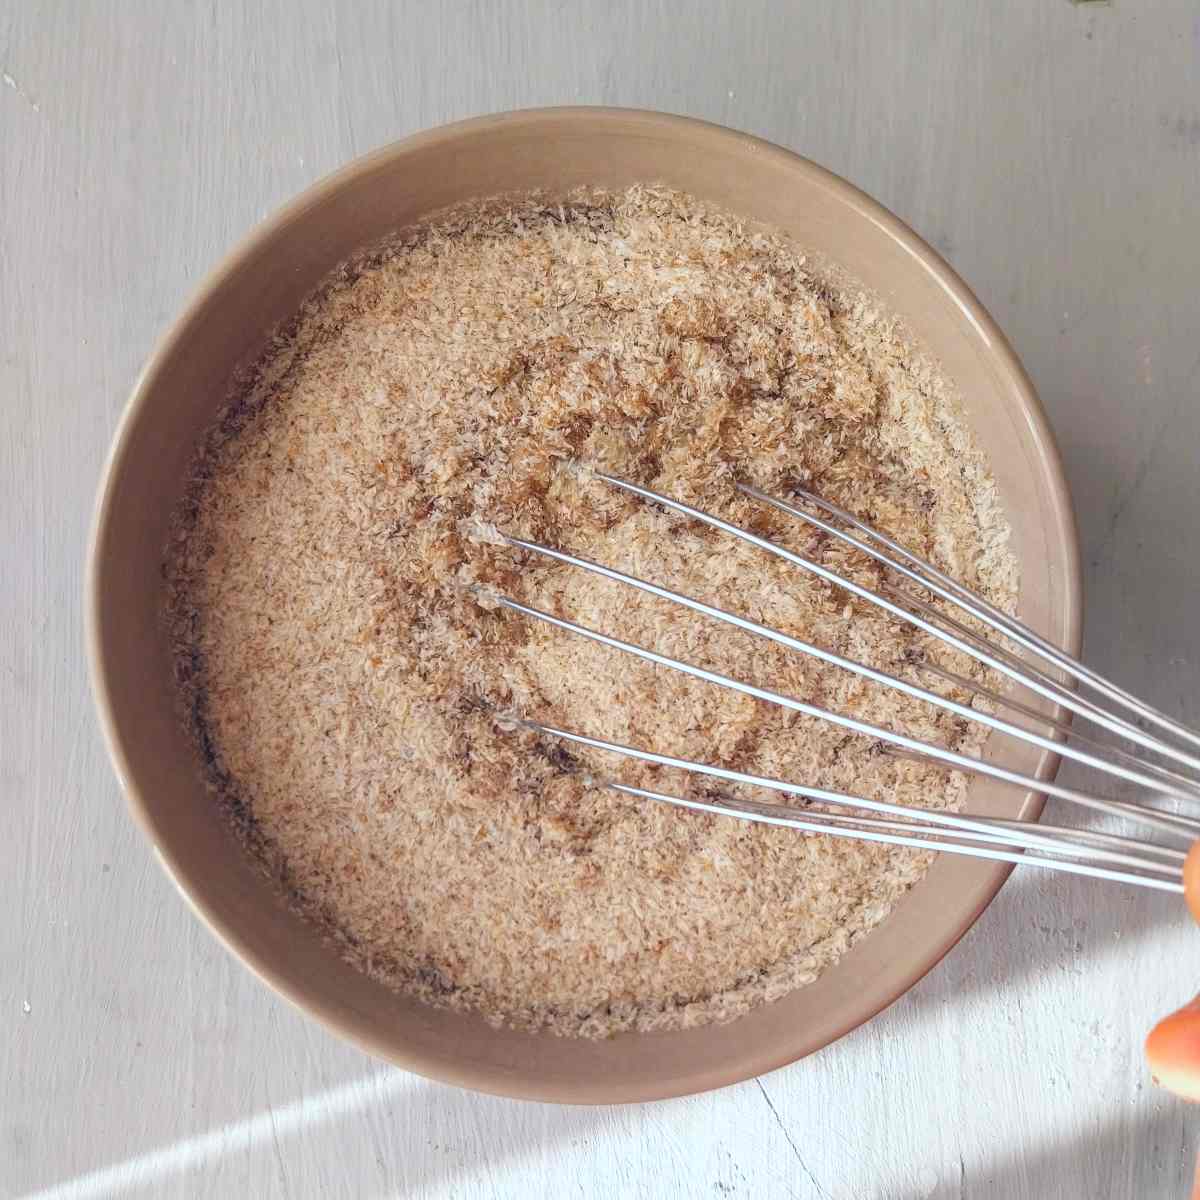
First, add psyllium husk, water, and white granulated sugar in a medium-sized bowl and whisk to incorporate.
Set the mixture aside for a few minutes to let the gel form.
Step 2
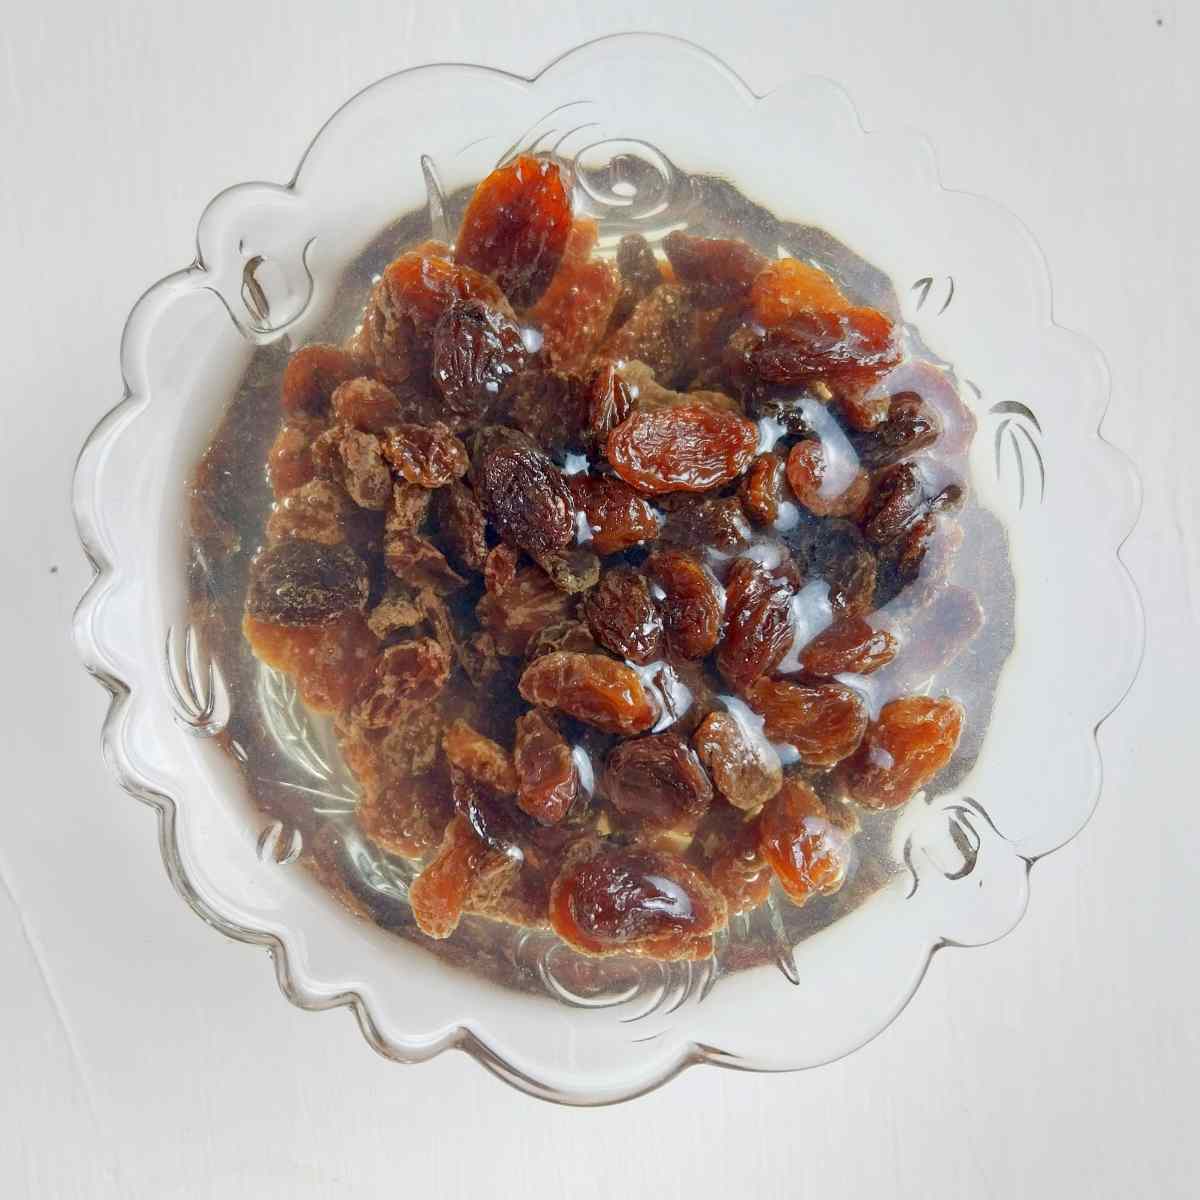
In the meantime, boil some water and soak the raisins in it for 10 minutes to hydrate them.
This step isn't necessary but it adds to juiciness to the raisins!
Step 3

Break up the lumps in the brown sugar before adding it to the bowl.
Then, mix all the dry ingredients in a large mixing bowl until well combined.
Step 4
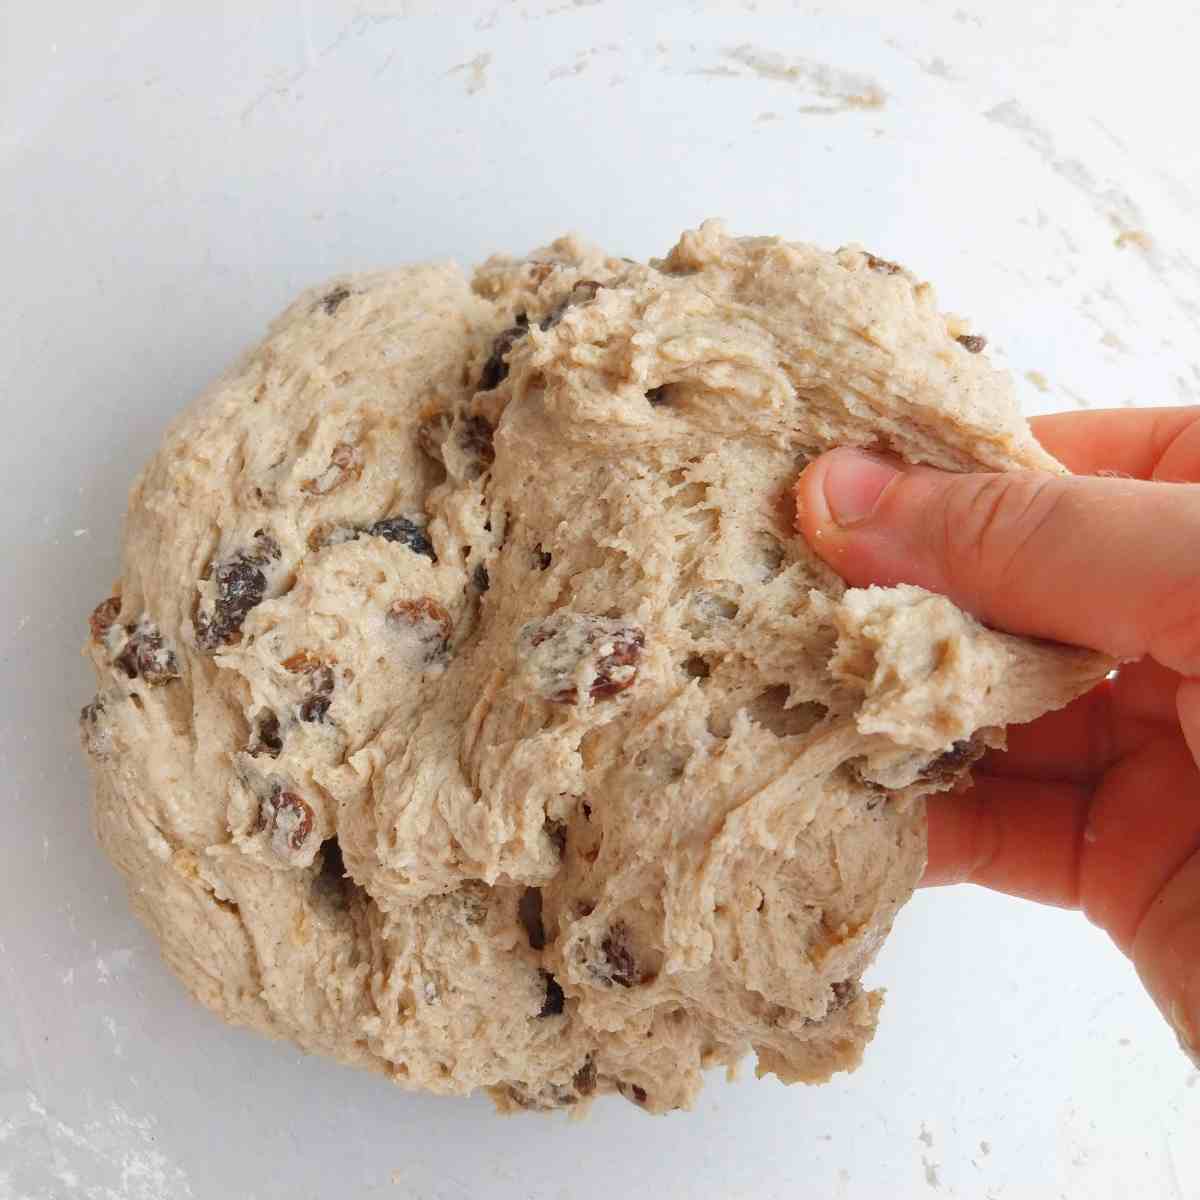
Finally, add the sourdough starter, psyllium gel, and strained raisins to the dry ingredients and mix the dough either by hand or an electric mixer with dough hooks attached.
The dough will be elastic and sticky.
Step 5

Turn the dough over onto a lightly floured working surface and shape it into a ball.
I use an oval banneton basket, so I shaped mine into a batard.
Step 6
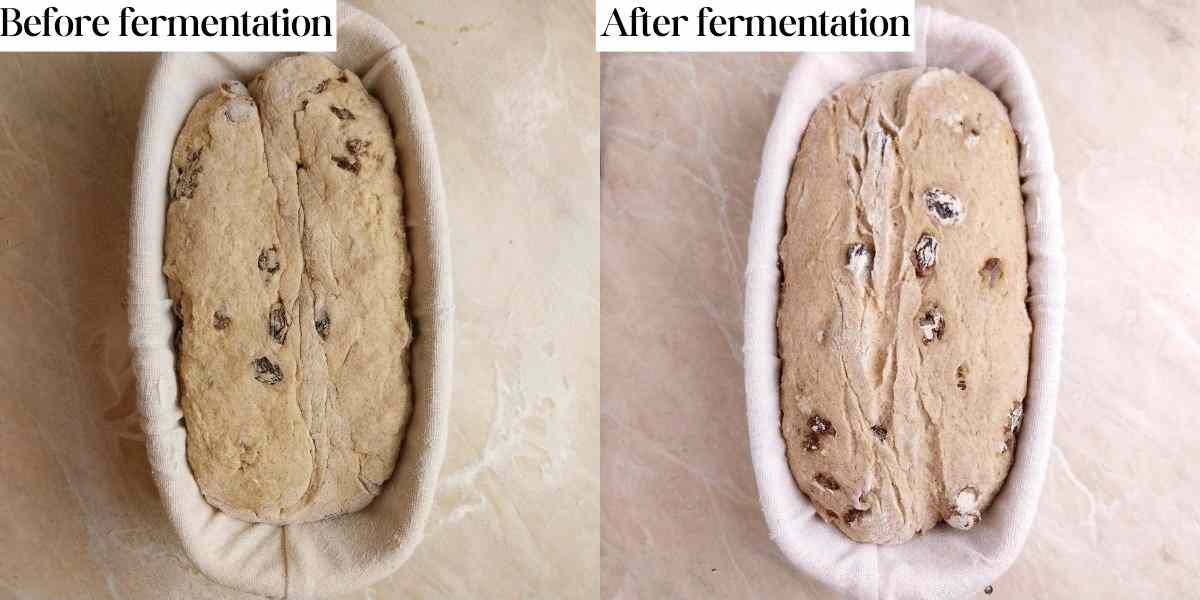
Place the dough upside down into a floured banneton basket or into a mixing bowl lined with a floured kitchen towel.
Cover the dough and let it ferment for 5-7 hours at room temperature. Keep in mind that cinnamon slows down the fermentation process, so the dough will need more time to proof than regular gluten-free sourdough.
If you do an overnight fridge fermentation, first let the dough sit at room temperature for 1-2 hours, then place it in the refrigerator for 12-18 hours and bake from cold.
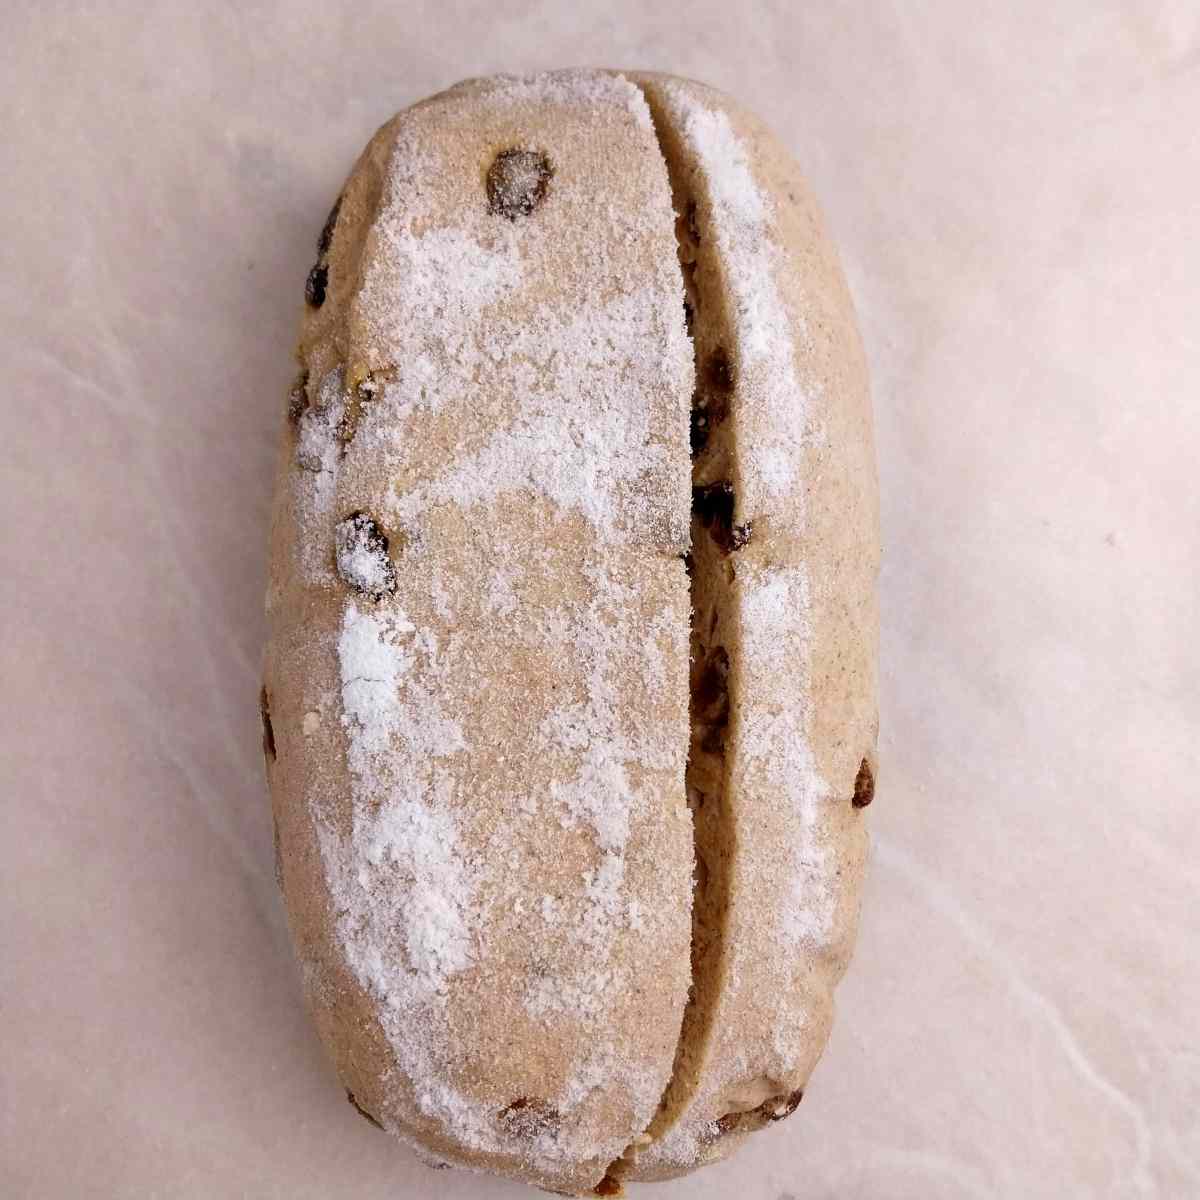
Once the dough is done fermenting, gently turn it over onto a piece of parchment paper and score it however you like. I usually make one deep cut close to the middle of the loaf.
Lower the parchment paper with the dough into a cold Dutch oven, cover it with a lid, and place it into a cold oven. Start preheating the oven to 450F/230C. Once the oven is ready, start the timer and bake for 40 minutes.
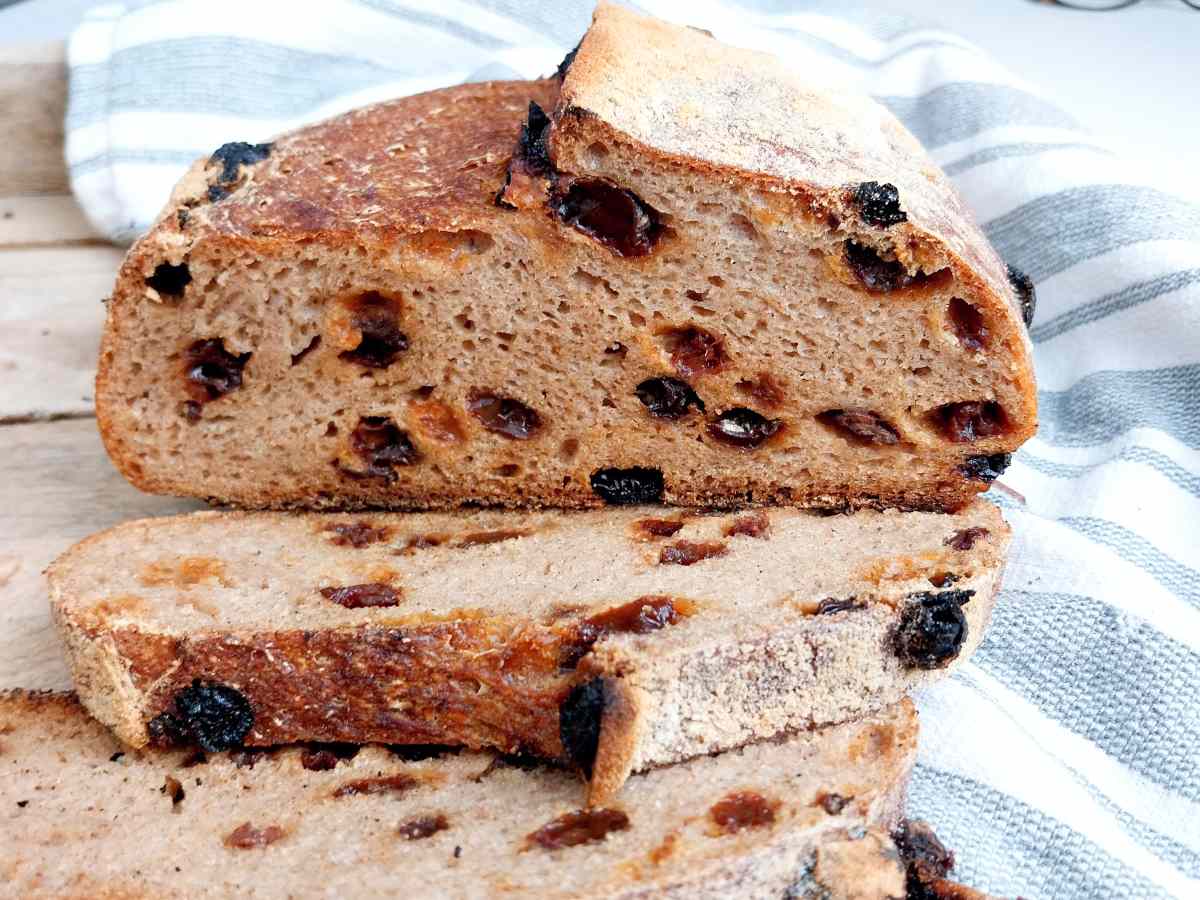
Then, lower the temperature to 350F/170C, remove the loaf from the Dutch oven, transfer it to the oven rack, and bake for another 30 minutes.
Transfer the baked loaf to a cooling rack and let it cool until no longer warm to the touch. Slice and enjoy!
Tip!
To prevent the bottom of the loaf from burning, place a baking sheet at the bottom of the oven once the loaf is out of the Dutch oven.
How to store
This cinnamon raisin sourdough will keep well at room temperature for up to 3-4 days, just make sure to cover it or place it in a bread box/bag.
To freeze, slice the bread and place a piece of parchment in between each slice, then transfer the loaf into a freezer bag/container. Freeze for up to 3 months.
To defrost, simply place the slices into the microwave until they get warm (1-2 min).
How to serve
Here are some ideas on what to put on your cinnamon raisin bread:
- Butter and jam: I love serving this bread with homemade plum apple or elderberry jam!
- Peanut or almond butter. I enjoy making my own peanut butter in a food processor!
- Cream cheese, plain or flavored.
- Honey or maple syrup.
- Nutella or chocolate spread.
- Yogurt and fresh raspberries or canned cherries.
Troubleshooting
- Large hole between the top crust and the crumb - this is a common sign of overproofing your dough. Next time bake the bread sooner!
- Dense crumb - there could be many reasons why your bread is dense, and some of them are not enough proofing, not using baking powder, not using a Dutch oven, or your starter not being established enough.
- Gumminess - try baking your loaf 15 minutes longer and see if it helps. Alternatively, reduce the water by 20g at a time.
- Burnt bottom - try using a Dutch oven liner and remove the bread from the Dutch oven after the first 40 minutes of baking. Place a baking sheet in the bottom of the oven for the last 30 minutes of baking.
- The dough didn't rise during fermentation - you could be proofing in a cold environment or your starter is not active enough. Make sure to use room temperature water, not hot water for the dough to avoid killing the yeast bacteria.
More gluten-free sourdough recipes:


Get my new gluten-free sourdough recipes eBook
The top 32 recipes of 2026!
Gluten-Free Sourdough Cinnamon Raisin Bread
Ingredients
- 20 grams whole psyllium husks, 18g if using powder
- 410 grams water, warm, not hot
- 15 grams granulated sugar, or honey/maple syrup
- 120 grams raisins, or cranberries
- 70 grams active gluten-free sourdough starter, it can be made of any GF flour
- 85 grams tapioca starch, or arrowroot starch
- 95 grams potato starch, or 95g (¾ cup) cornstarch
- 180 grams sorghum flour, or brown rice flour
- 10 grams sea salt
- 2 teaspoon baking powder, not baking soda
- 6 grams ground cinnamon
- 40 grams brown sugar, light or dark
SAVE THIS RECIPE!💌
Instructions
- First, add psyllium husk, water, and white granulated sugar in a medium-sized bowl and whisk to incorporate.Set the mixture aside for a few minutes to let the gel form.
- In the meantime, boil some water and soak the raisins in it for 10 minutes to hydrate them.This step isn't necessary but it adds to juiciness to the raisins!
- Break up the lumps in the brown sugar before adding it to the bowl.Then, mix all the dry ingredients in a large mixing bowl until well combined.
- Finally, add the sourdough starter, psyllium gel, and strained raisins to the dry ingredients and mix the dough either by hand or an electric mixer with dough hooks attached.The dough will be elastic and sticky.
- Turn the dough over onto a lightly floured working surface and shape it into a ball.I use an oval banneton basket, so I shaped mine into a batard.
- Place the dough upside down into a floured banneton basket or into a mixing bowl lined with a floured kitchen towel.Cover the dough and let it ferment for 5-7 hours at room temperature. Keep in mind that cinnamon slows down the fermentation process, so the dough will need more time to proof than regular gluten-free sourdough.If you do an overnight fridge fermentation, first let the dough sit at room temperature for 1-2 hours, then place it in the refrigerator for 12-18 hours and bake from cold.
- Once the dough is done fermenting, gently turn it over onto a piece of parchment paper and score it however you like. I usually make one deep cut close to the middle of the loaf.Lower the parchment paper with the dough into a cold Dutch oven, cover it with a lid, and place it into a cold oven. Start preheating the oven to 450F/230C. Once the oven is ready, start the timer and bake for 40 minutes. Then, lower the temperature to 350F/170C, remove the loaf from the Dutch oven, transfer it to the oven rack, and bake for another 30 minutes.Transfer the baked loaf to a cooling rack and let it cool until no longer warm to the touch. Slice and enjoy!
Notes
-
- Large hole between the top crust and the crumb - this is a common sign of overproofing your dough. Next time bake the bread sooner!
-
- Dense crumb - there could be many reasons why your bread is dense, and some of them are not enough proofing, not using baking powder, not using a Dutch oven, or your starter not being established enough.
-
- Gumminess - try baking your loaf 15 minutes longer and see if it helps. Alternatively, reduce the water by 20g at a time.
-
- Burnt bottom - try using a Dutch oven liner and remove the bread from the Dutch oven after the first 40 minutes of baking. Place a baking sheet in the bottom of the oven for the last 30 minutes of baking.
-
- The dough didn't rise during fermentation - you could be proofing in a cold environment or your starter is not active enough. Make sure to use room temperature water, not hot water for the dough to avoid killing the yeast bacteria.

Paige says
I have been making your regular sourdough for almost a year and we love it SO MUCH!! I have passed your page on to many others.
I just made my 3rd loaf of this cinnamon raisin in 2 weeks ( so good ) and I made the dough for an overnight proofing but didn't see to let it sit for 1-2 hours before putting in the fridge. Any thoughts on what to do this morning with the dough? It really hasn't risen at all 🙁
Thank you so much!!!
Natasha Levai says
Hi Paige! It is not a problem if gluten-free sourdough hasn't risen during proofing. It will do most of the rising in the oven anyway!
Aasa says
This looks like a perfect bread to make for Christmas! Can I ask why you haven't added xantan gum to this recipe? Will adding a few grams to some of your bread recipes help the texture even more?
Karen Murphy says
Came out great, my daughter who is gluten free hasn’t tried it but I think it tastes amazing. I loved that I could score it. Wish I could share a photo, to see if it has a good crumb.
Natasha Levai says
Hi Karen! Glad you enjoyed the rolls!
Brenda says
Loving all your recipes! I appreciate the nutritional information at the end of the recipes as well. I would like to know, however, what weight in grams those three slices are when you say a serving size is three slices out of one loaf. That would help me out greatly to know how much a slice or three slices weighs.
Natasha Levai says
Hi Brenda! My slices are about 1/2 inch thick!
Suzy Chaillou says
Hey Natasha! I am new to sourdough and tried several other recipes before I got to your GF sourdough and it is amazing. This is my first attempt at your Cinn Raisin one, is it not supposed to puff up as much as the plain GF sourdough recipe you have? And just curious for my own leaning experience, why do we take this one out of the Dutch oven when we put the temperature down to 350 and put it right on the rack when the plain GF sourdough we just take the lid off? Thank you!!!
Natasha Levai says
Hi Suzy! Placing the bread on the oven rack prevents the bottom from burning. If the bottom crust doesn't come out burnt, you can keep your bread in the Dutch oven! The Cinnamon Raisin loaf is made based on my vegan sourdough which is difference from the Soft and Fluffy recipe, so it won't puff up as much.
Stephanie says
Delicious! Turned out beautiful. A perfect way to use up some sourdough. Even my non-GF hubby loved it.
Ashley Lester says
I’ve made a few of your gluten-free sourdough recipes and I noticed this one didn’t have any xanthan gum in it. Was that right? I’m excited to see how it turns out tomorrow!
Natasha Levai says
Hi Ashley! Some of my recipes don't have xanthan gum and this is one of them!
Jami Powell says
amazing 👏 🙀 The best Gluten-free bread I have ever made!!!
Claire says
This bread is delicious!!! I’m hoping you can tell me how to do this in a loaf pan instead… Should I be proofing it in the pan then baking with water on the bottom of oven or just dry bake it… so many things I have found just say different things 🤦🏼♀️ Cheers Claire
Natasha Levai says
Hi Claire! I'm glad you are enjoying the bread! For the loaf pan you will need to add a dish with water to the bottom of the oven for the first part of baking and remove it for the second. You might also benefit from taking the loaf out of the bread pan for the second part to let the sides crisp up as well. If you notice that the bread is browning too much in the second half of baking, cover it with foil shiny side up.
Jenn Stoker says
Wow is all I have to say! This bread came out amazing! This was the first time I've made a GF sourdough bread and it truly is perfection. I didn't have a dutch oven handy, so I just the dough into a wide sauce pan and covered with foil and still came out perfect!
Krisztian says
Delicious!