This gluten-free sourdough pizza crust can be made thin or thick, it is vegan and freezer-friendly! You will need a gluten-free sourdough starter (you can use discard) to make this flavorful sourdough pizza crust. To make a pizza without a sourdough starter, check out my no-yeast cassava flour pizza crust!
Jump to:
Sourdough Starter
Sourdough starter is wild yeast that people used to bake bread before the invention of commercial yeast. It tends to be better for digestion as richer in flavor than bread made with regular commercial yeast.
You can easily make a starter at home with only water and gluten-free flour of choice! I have a detailed recipe for a starter using brown rice flour and another starter with millet flour.
I also make gluten-free sourdough vegan bread with my starter and love it! If you don't have a sourdough starter yet, you can make one from gluten-free flour and water. It will take 1-2 weeks for the starter to become active and fit for gluten-free sourdough recipes!
All you need to do is follow a few simple steps. It is easier than you think! If you would like to make pizza crust without sourdough, check out my no-yeast cassava flour pizza crust.
New to gluten-free sourdough? Watch my 16-minute video tutorial for beginners!
Ingredients
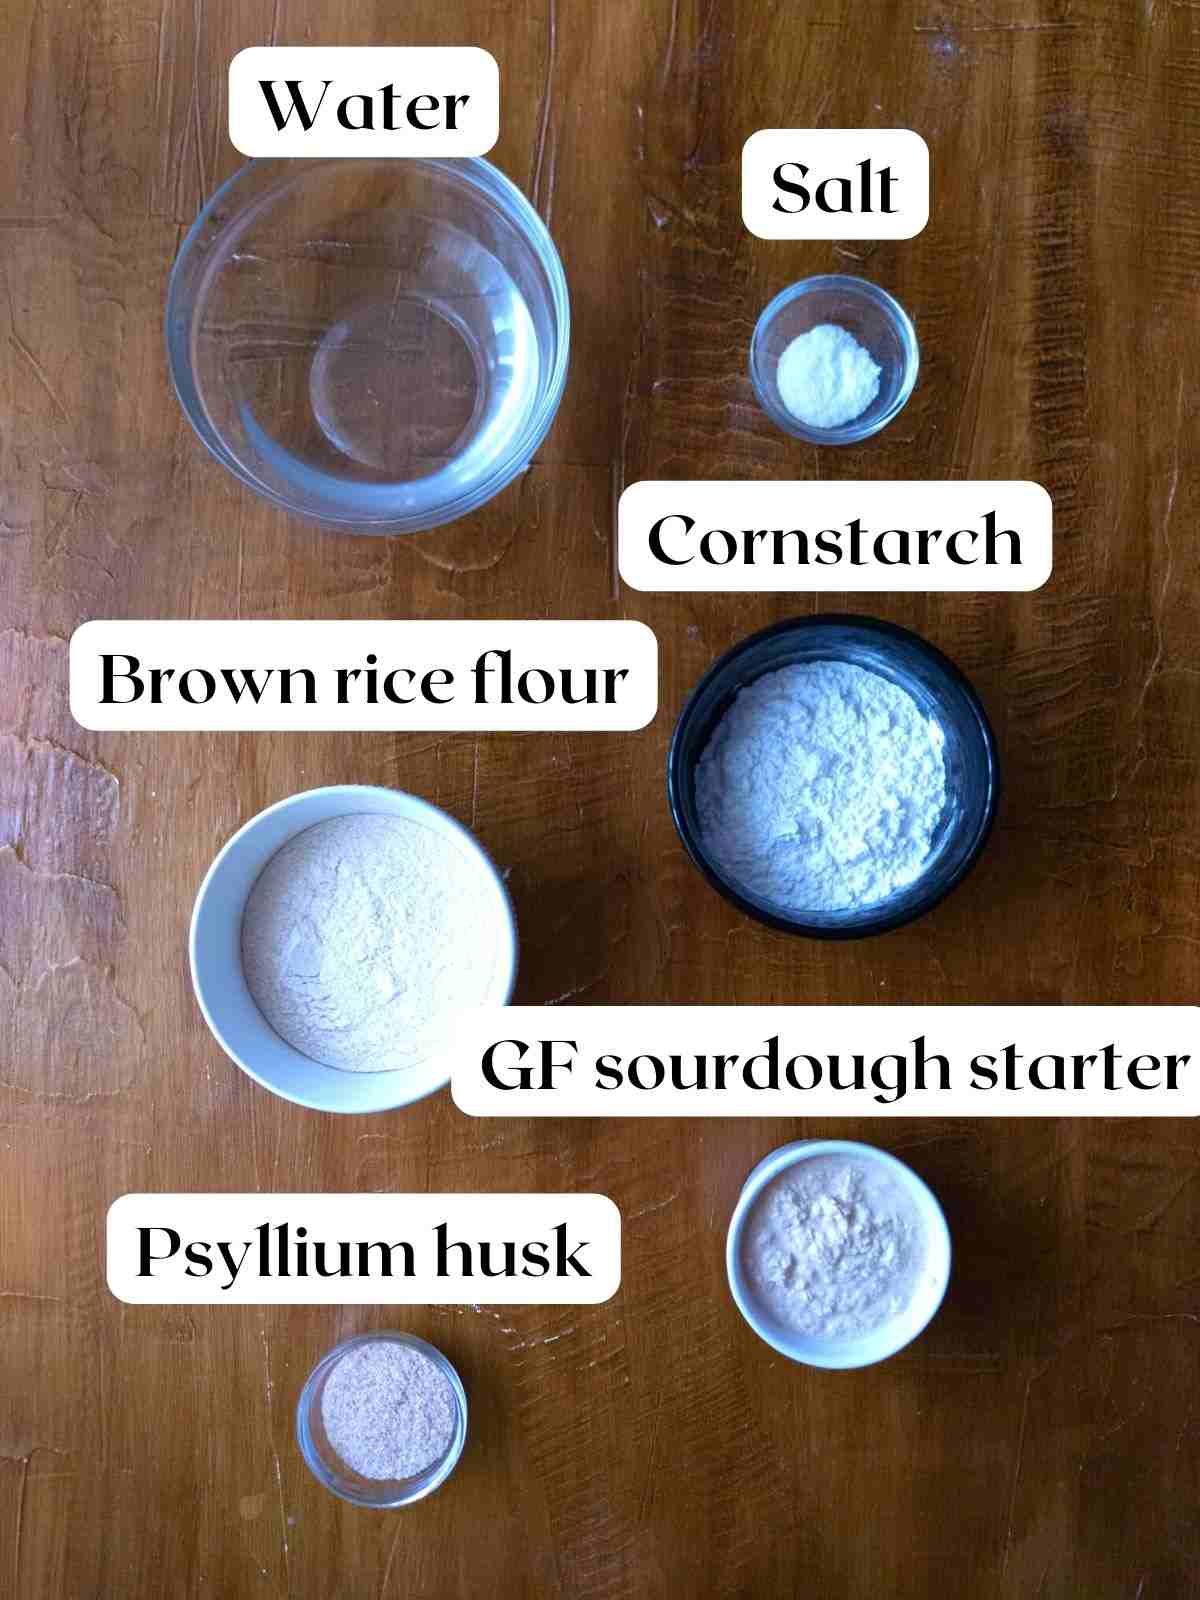
Water - use room temperature water to activate the sourdough starter well.
Salt - sea salt has a good nutritional profile.
Flour - you can also use a pre-made blend if you have to but the flavor won't be the same.
Psyllium husk - you can either use whole husks or powder. There are two types of psyllium husk powder, one is finer than the other. If you are using fine powder you will need less of it than if you were using coarse grind. For details on what psyllium husk is and its types, go to my psyllium husk 101 breakdown.
Sourdough starter - you can use either a mature starter or starter discard. If you are going to use discard, make sure to add 7g of dry active/instant yeast or 20g of fresh yeast to the dough. The rising time will also be shortened!
Substitutions
Brown rice flour - you can use oat flour, white rice flour, sorghum flour, buckwheat flour, or other types if you need to. Keep in mind that some flours absorb liquids better than others, so you might need to adjust the amount based on the texture.
Cornstarch - I am using cornstarch to make this pizza nightshade free (potato free) but you can use potato starch, tapioca starch, or arrowroot starch instead.
Psyllium husk - I do not recommend substituting psyllium husk. If you substitute psyllium husk, your crust will be less stable and more crumbly. Psyllium husk is by far the best binding agent for gluten-free sourdough pizza! Xanthan gum, guar gum, or other options are just not good enough. Read this quick psyllium guide for more information!
Step-by-Step Instructions
Step 1 - Mix the dough
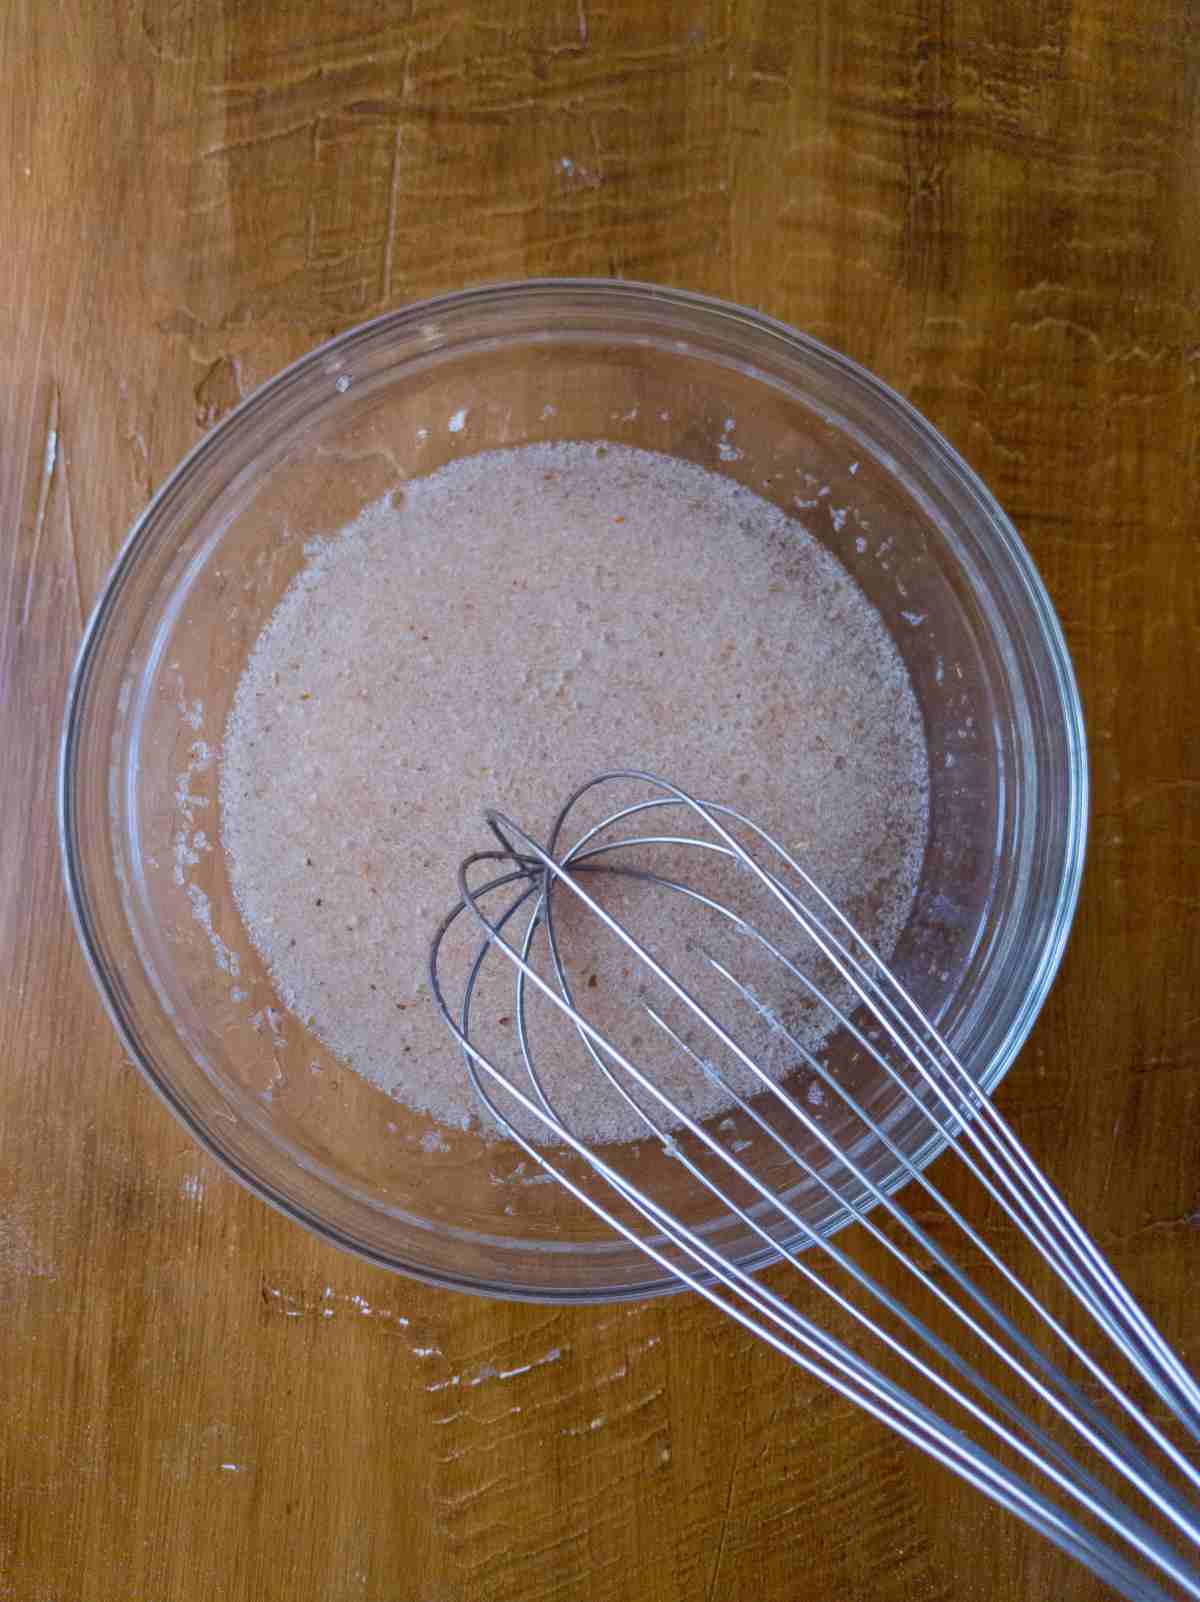
First, add psyllium husk to the room-temperature water, whisk to combine, and set aside for 5 minutes. Psyllium husk will absorb the liquids and form a gel.
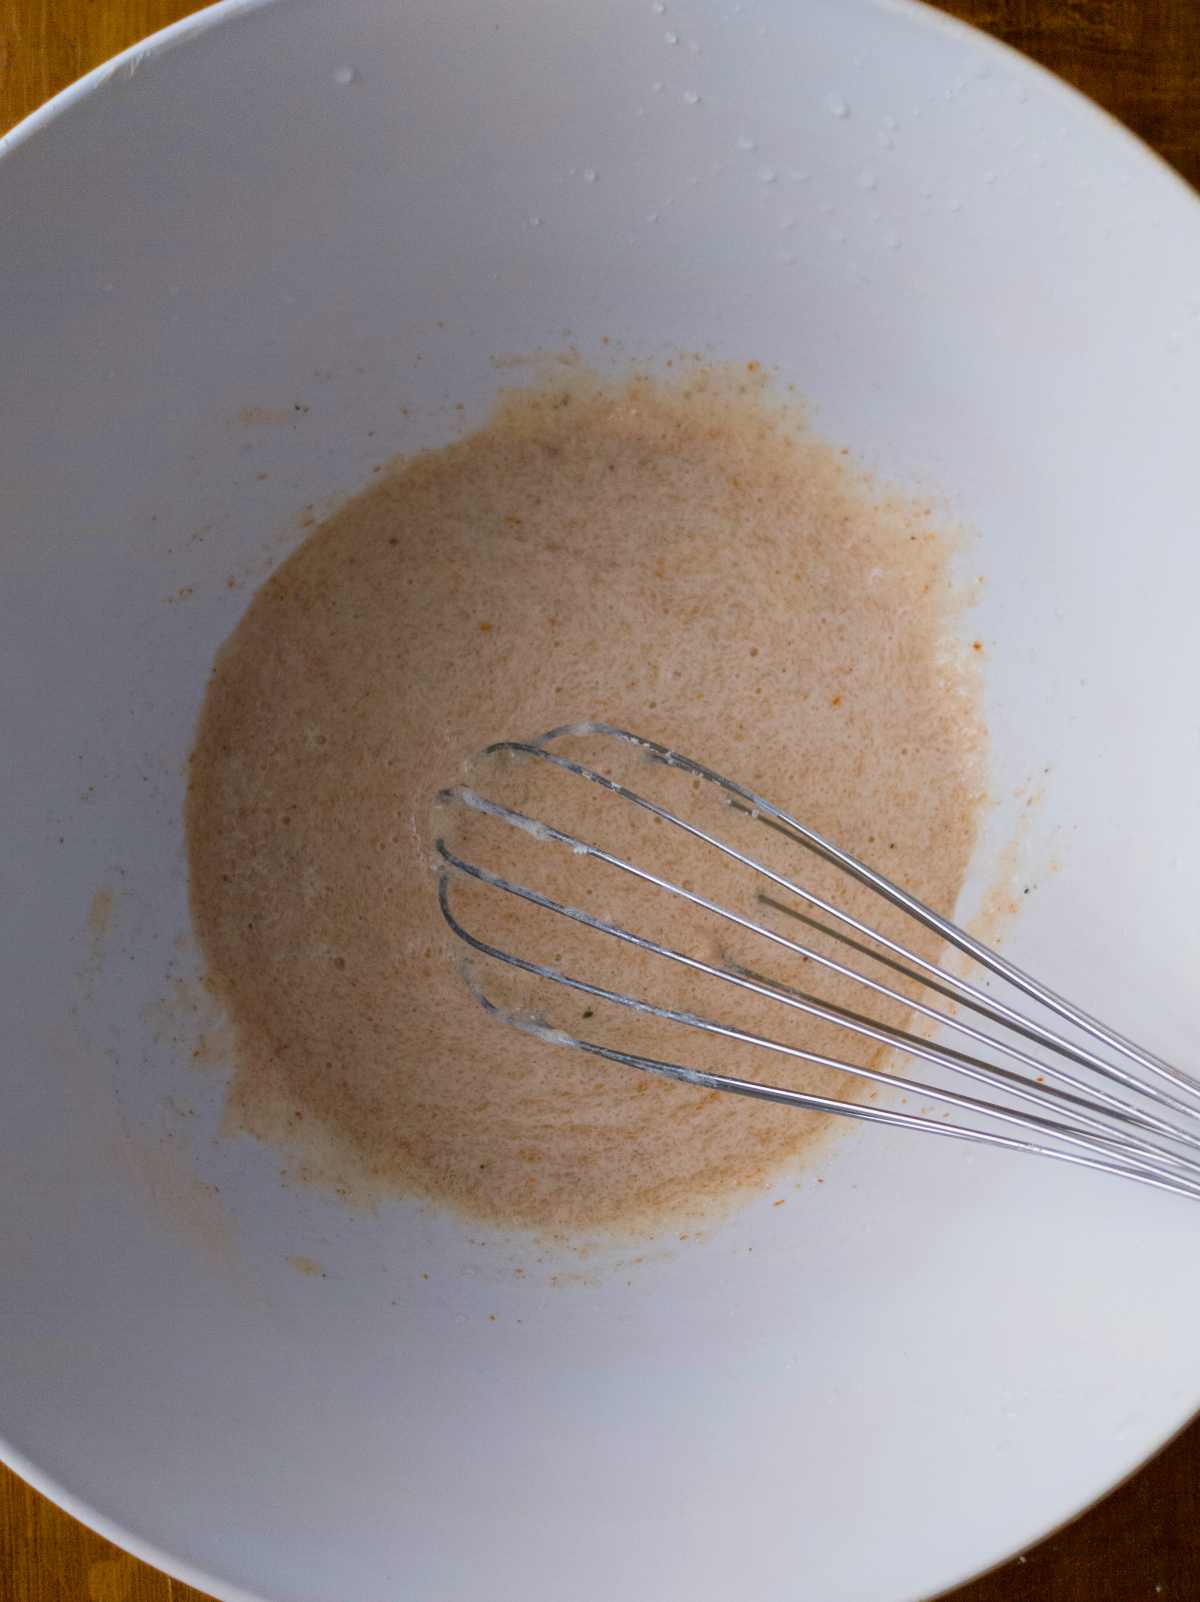
After five minutes, add the sourdough starter (fed or unfed) to a mixing bowl and pour psyllium husk gel into it. Mix to combine.
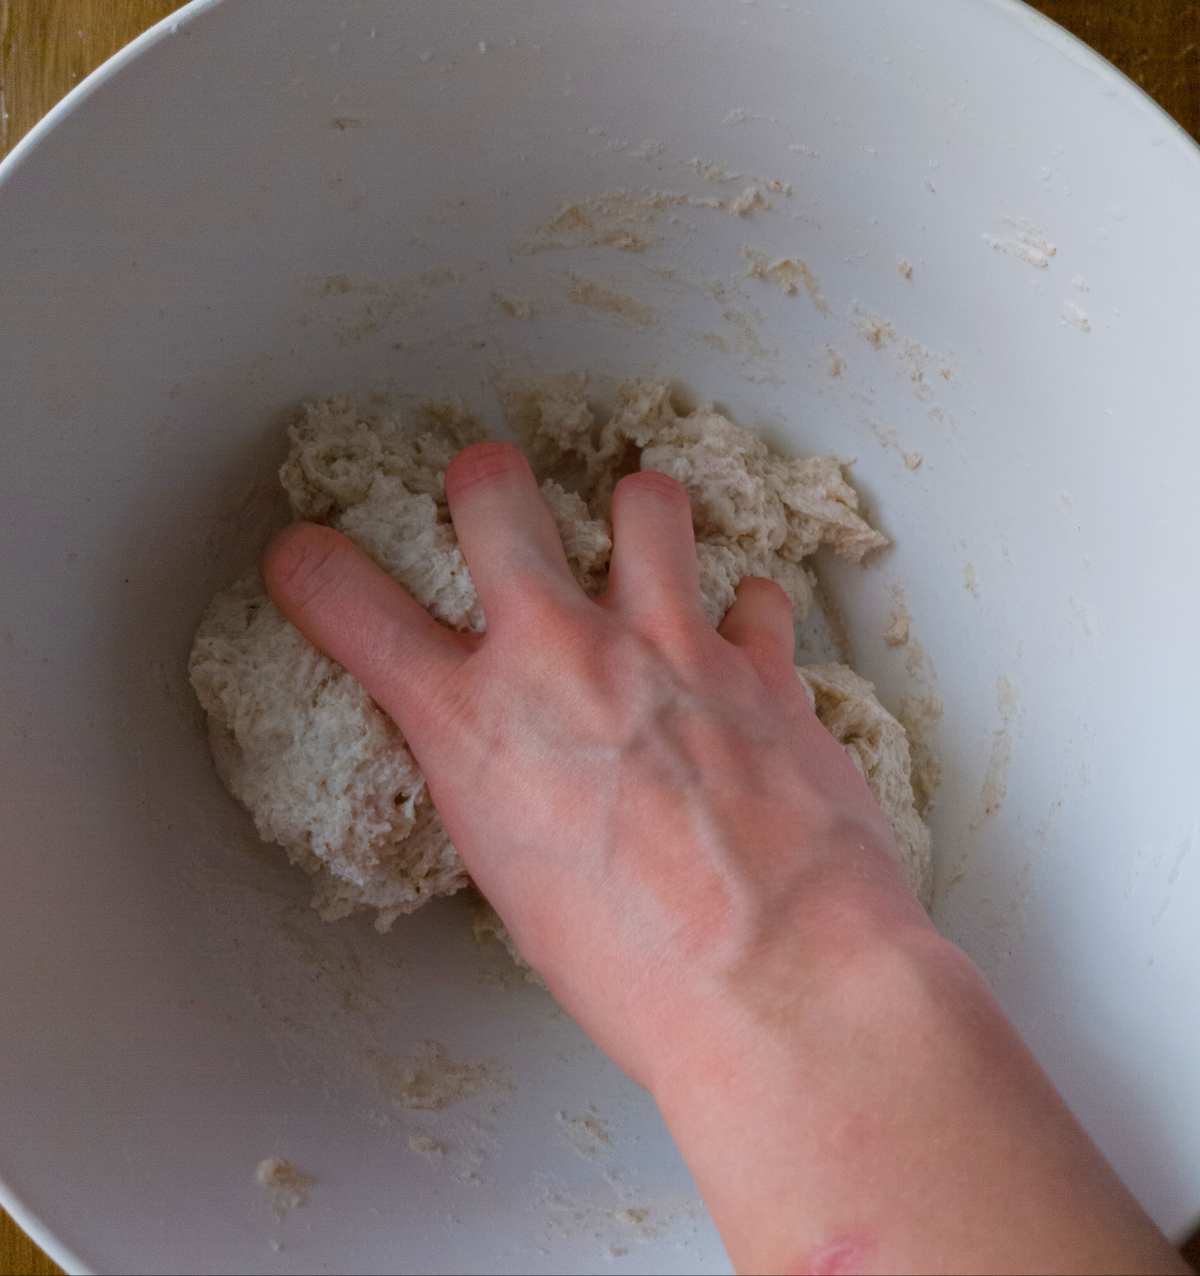
Add all the dry ingredients to the mixing bowl and mix with your hands.
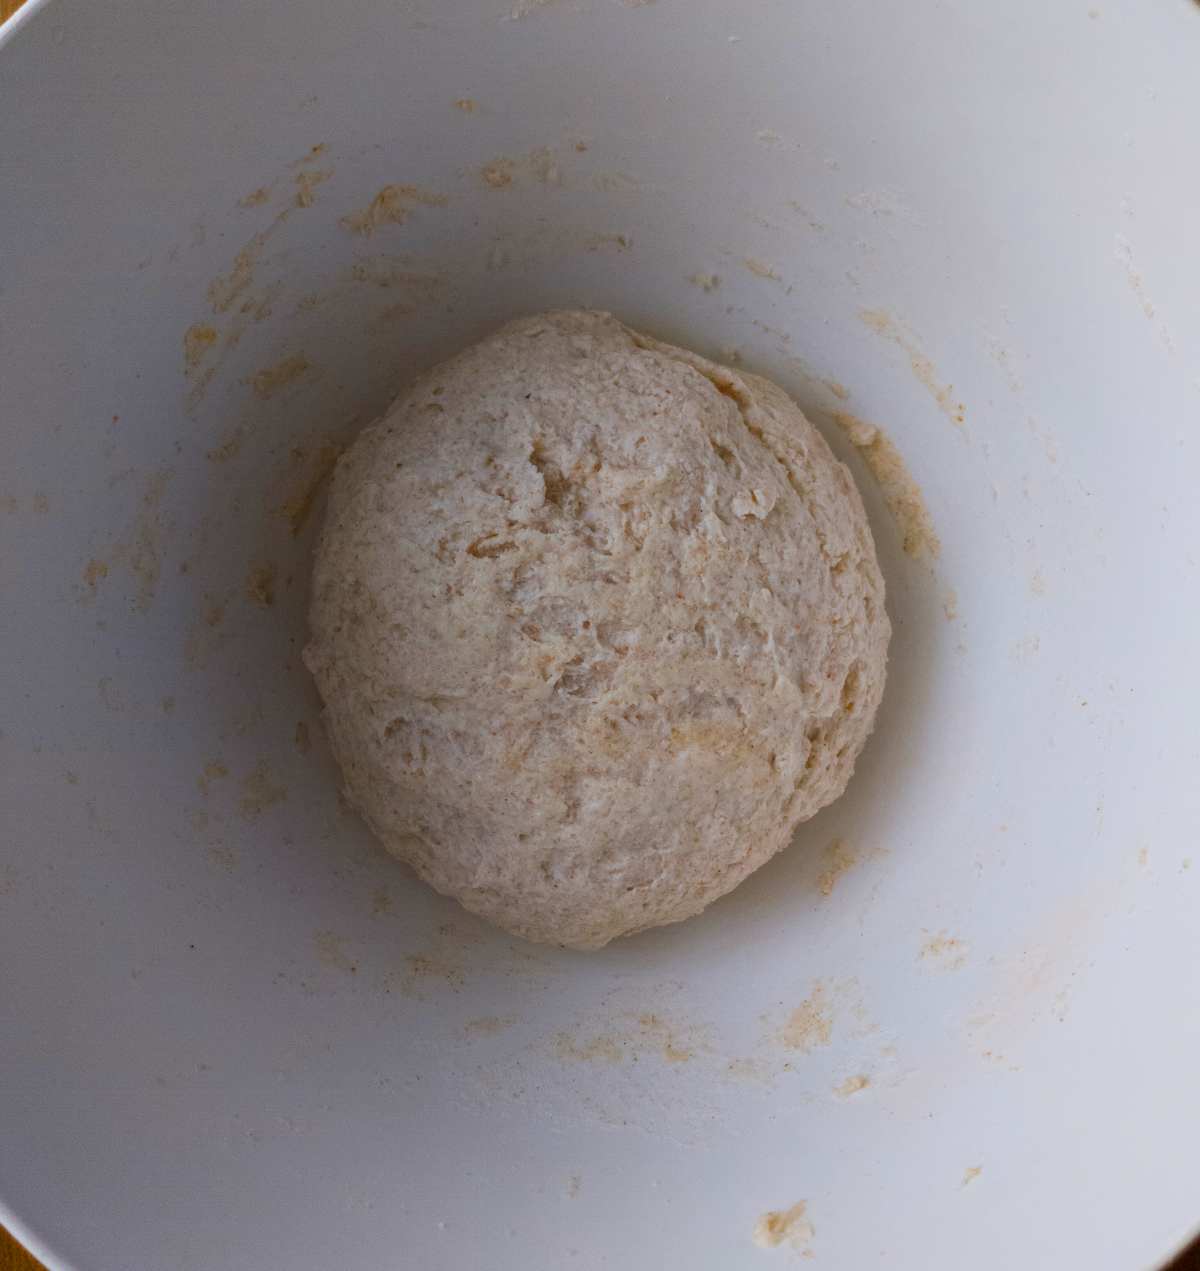
Cover with a kitchen towel or plastic wrap and leave the dough to ferment and rise for 3-6 hours at room temperature or longer in the refrigerator (anywhere from overnight up to 2 days).
Step 2 - Shape and par-bake
Preheat the oven to 400F/200C together with the baking tray you are using. I like to use my cast iron skillet to bake pizza crust! You can use a pizza stone or a simple baking sheet.
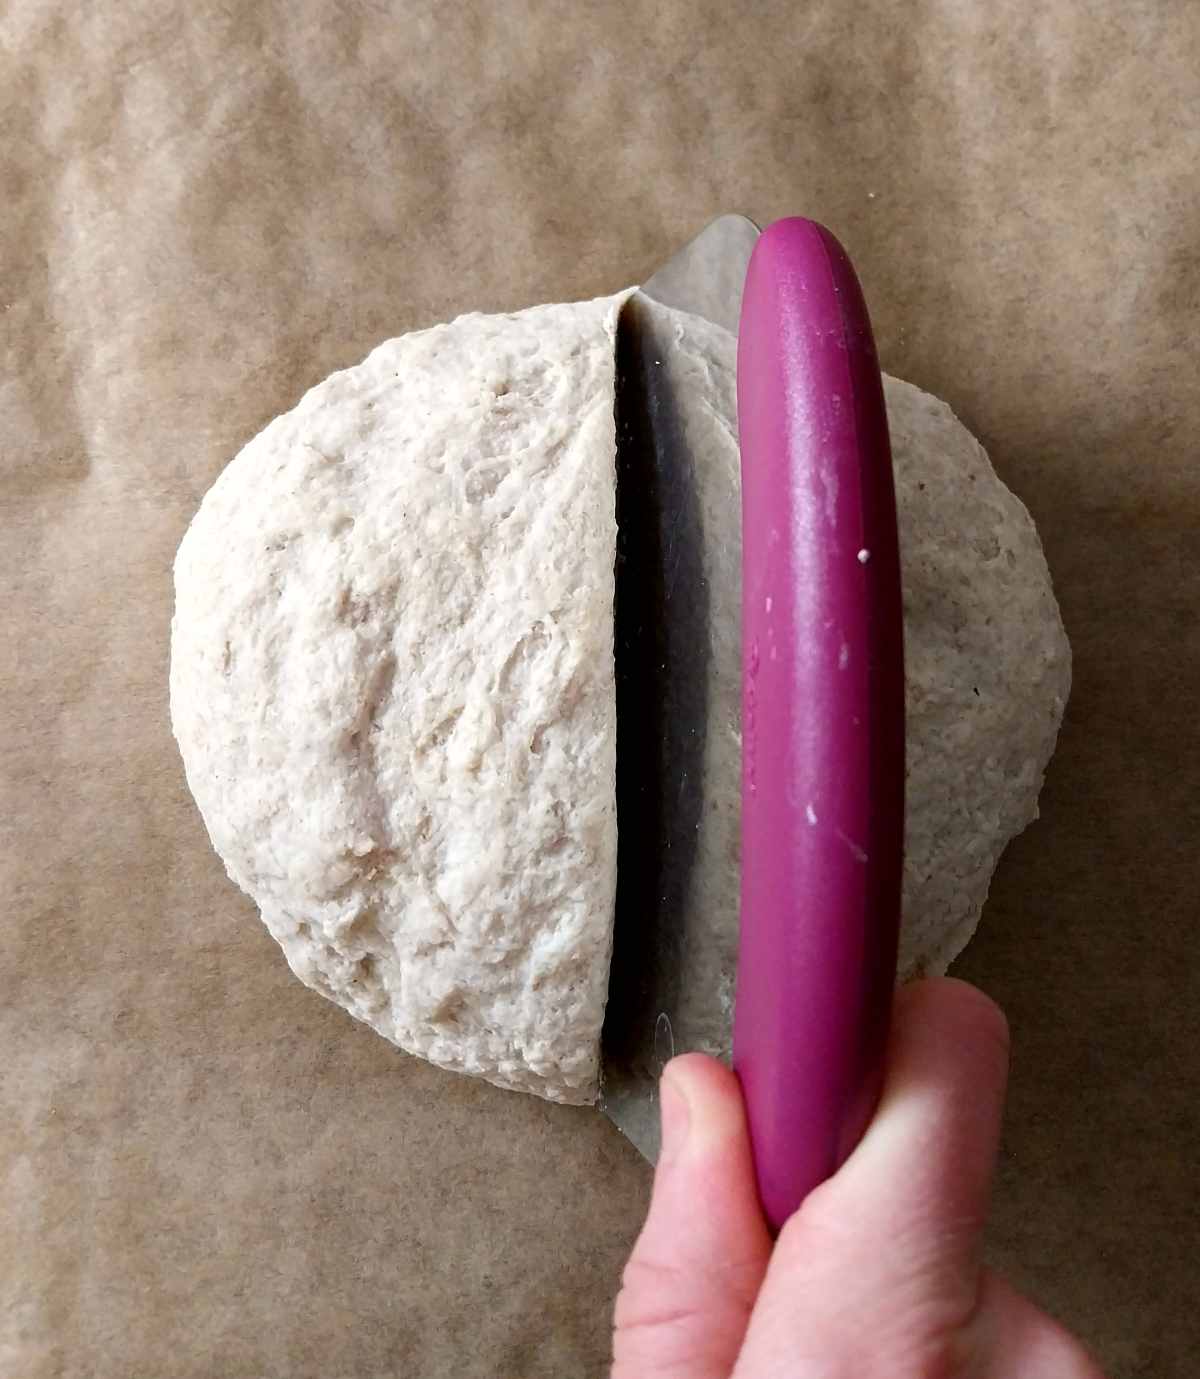
Then, transfer the dough onto a piece of parchment paper and divide it into two parts if making two medium-size pizzas or use the whole dough for a large pizza.
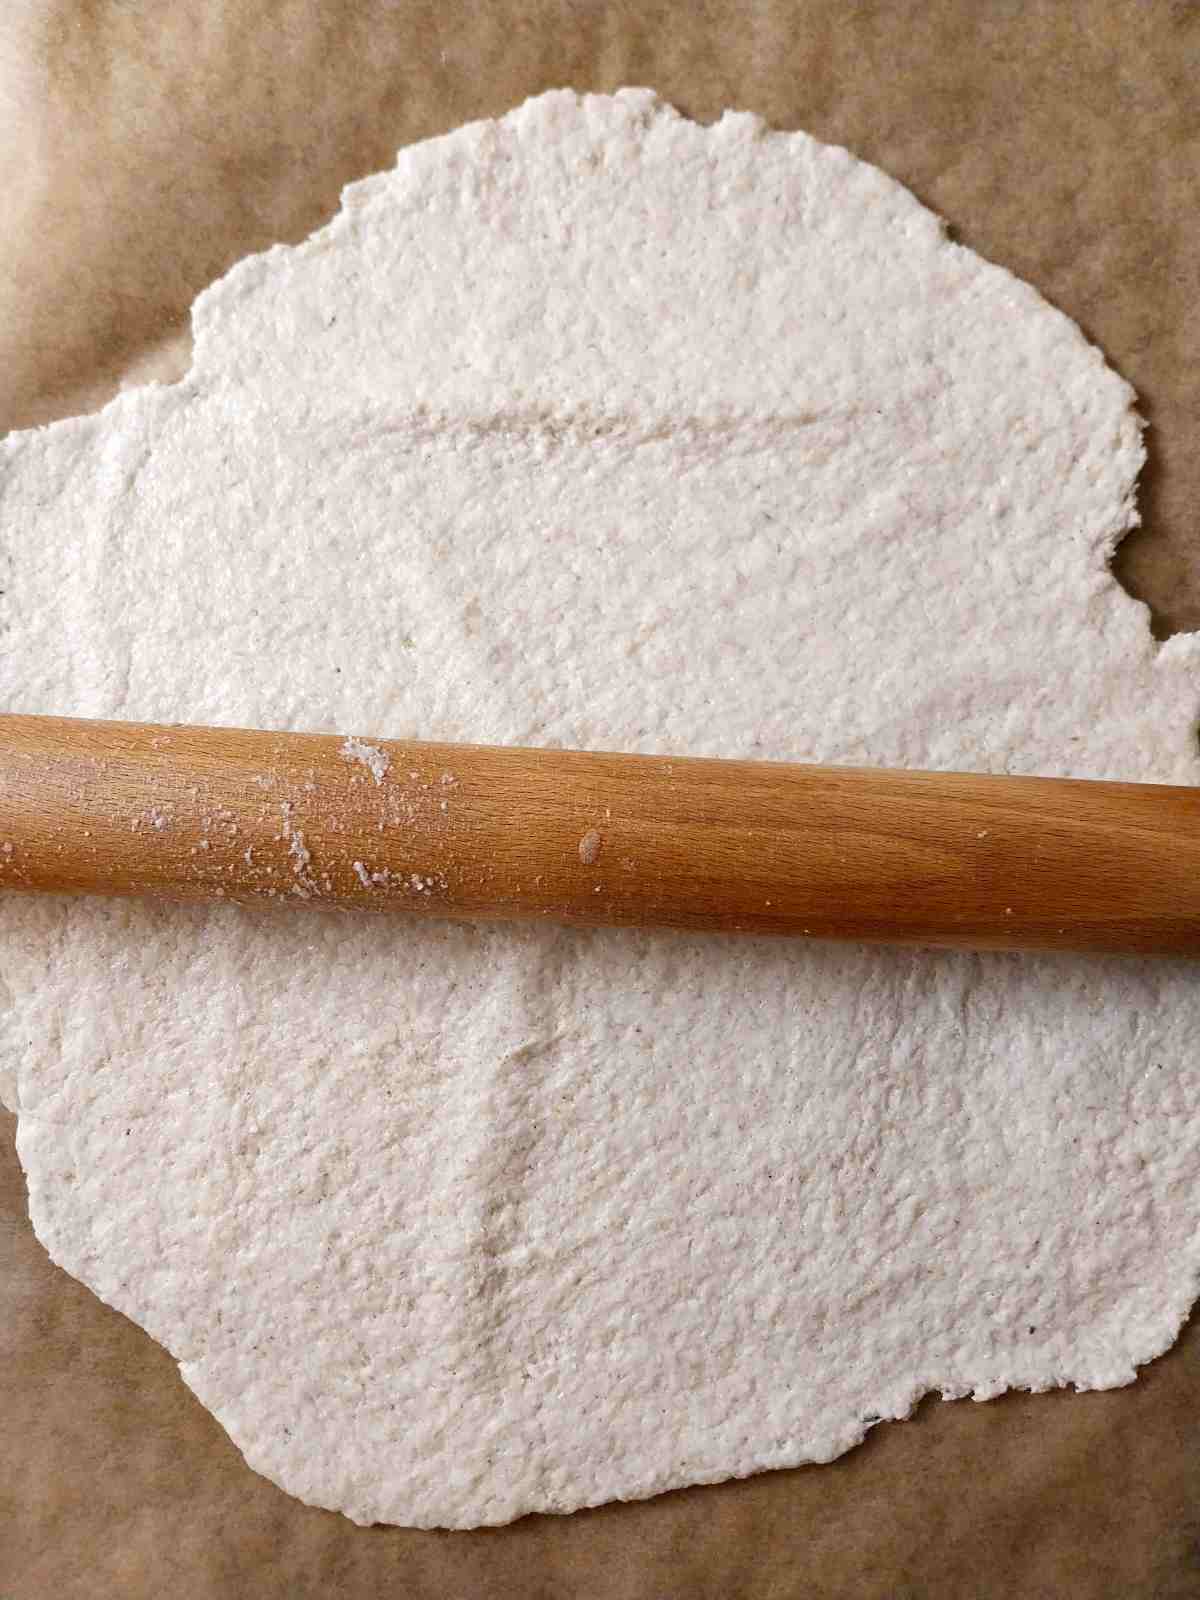
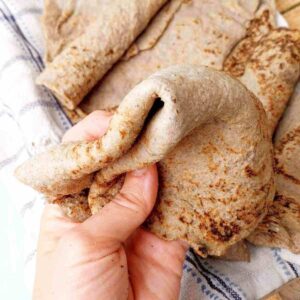
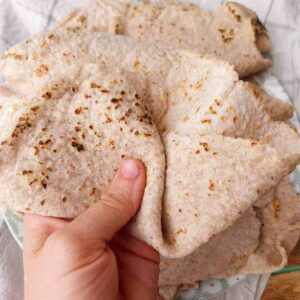
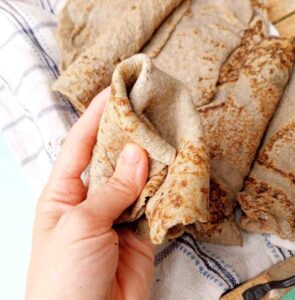
Pour a little bit of oil onto the dough to prevent sticking. Now, roll the dough out or shape it with your hands. For a thinner pizza roll the dough out thin, for a fluffier thicker crust roll the dough less.
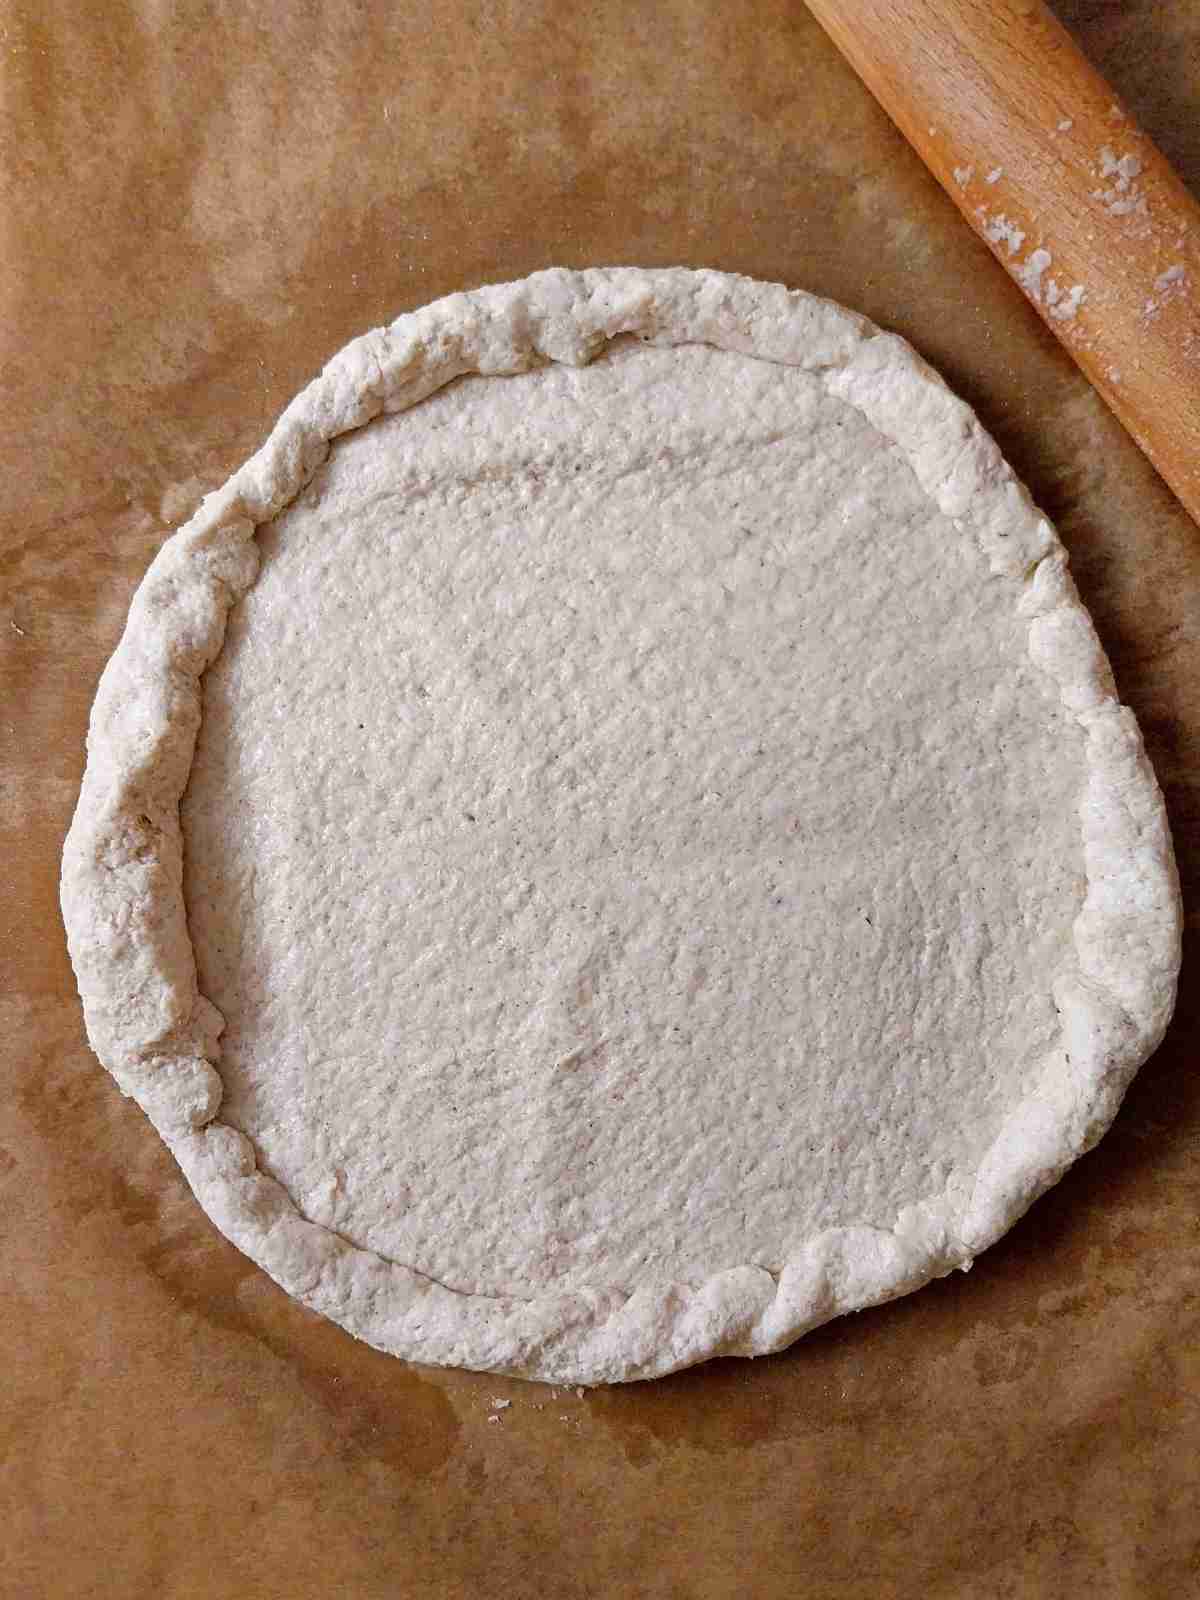
Then, form the borders of the pizza and create a nice round shape.
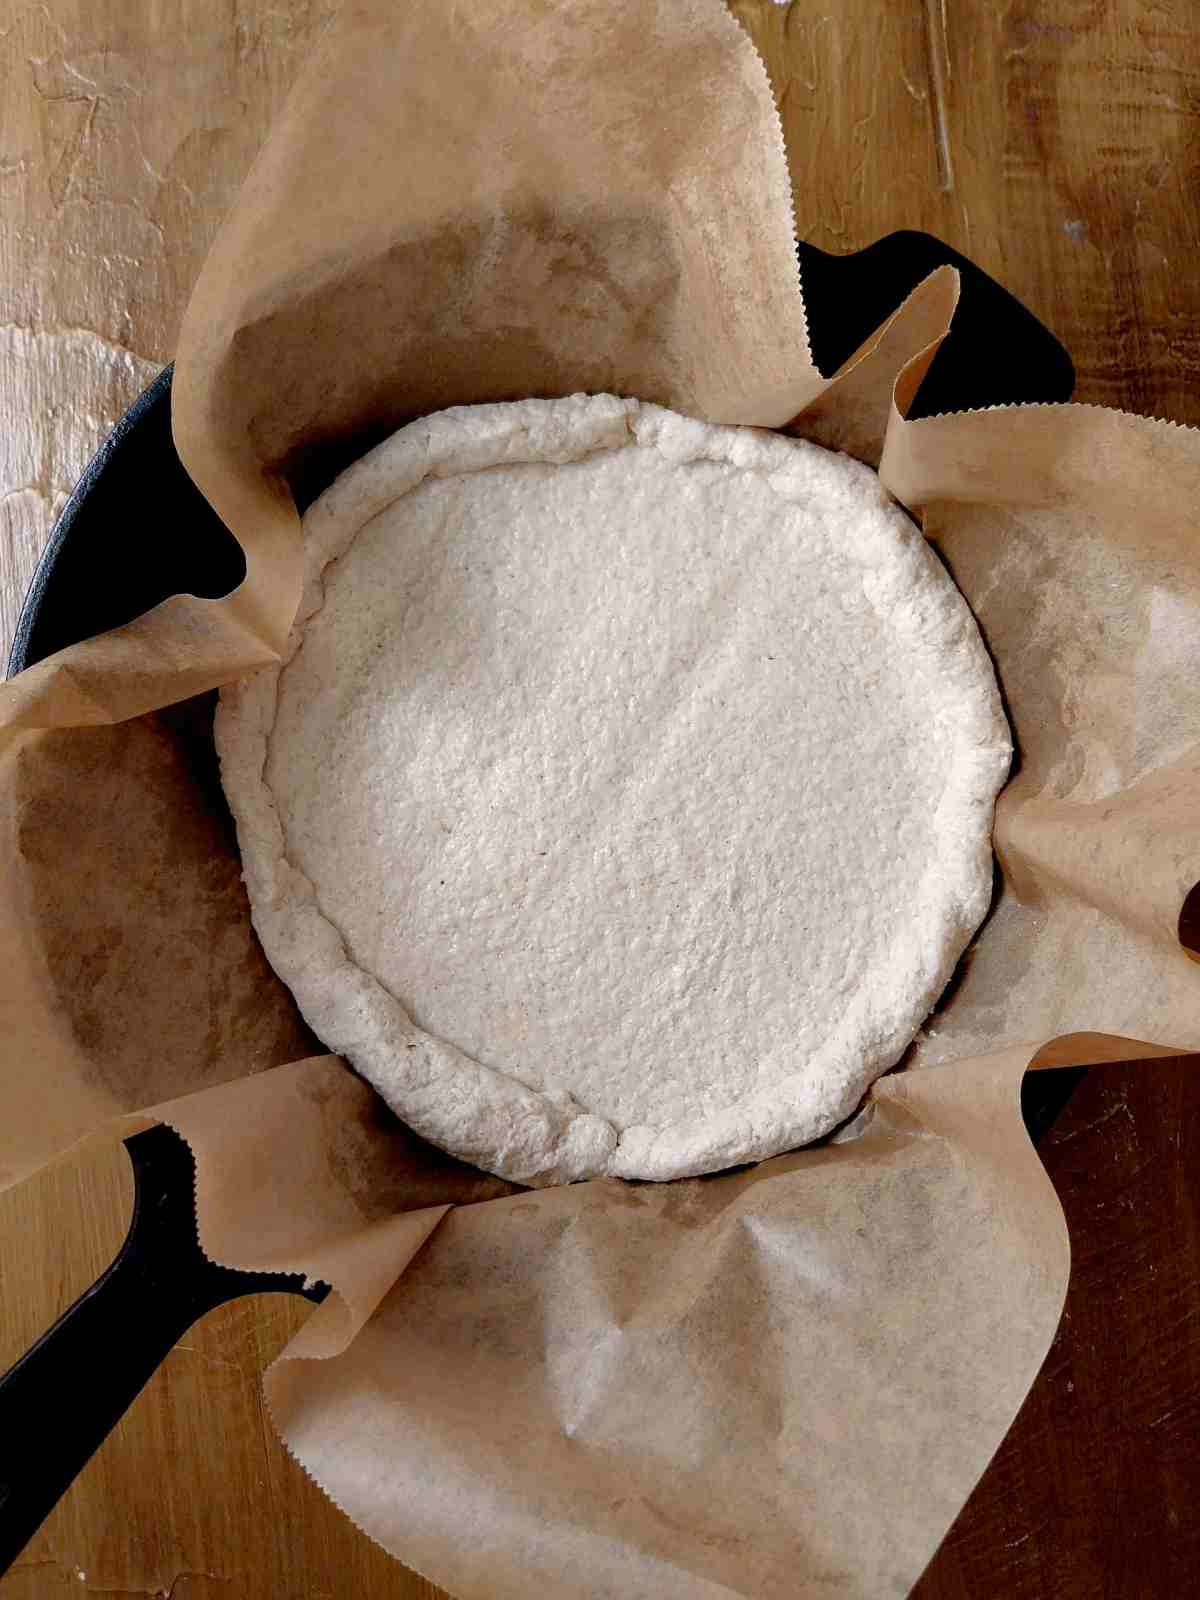
Transfer the dough together with the parchment paper onto the baking tray (in my case, it is a cast-iron skillet) and bake the crust without toppings for 15 minutes (20 minutes for a crunchy crust). This step is called par-baking meaning you pre-bake the dough before the toppings go on it.
Step 3 - Add toppings and bake again
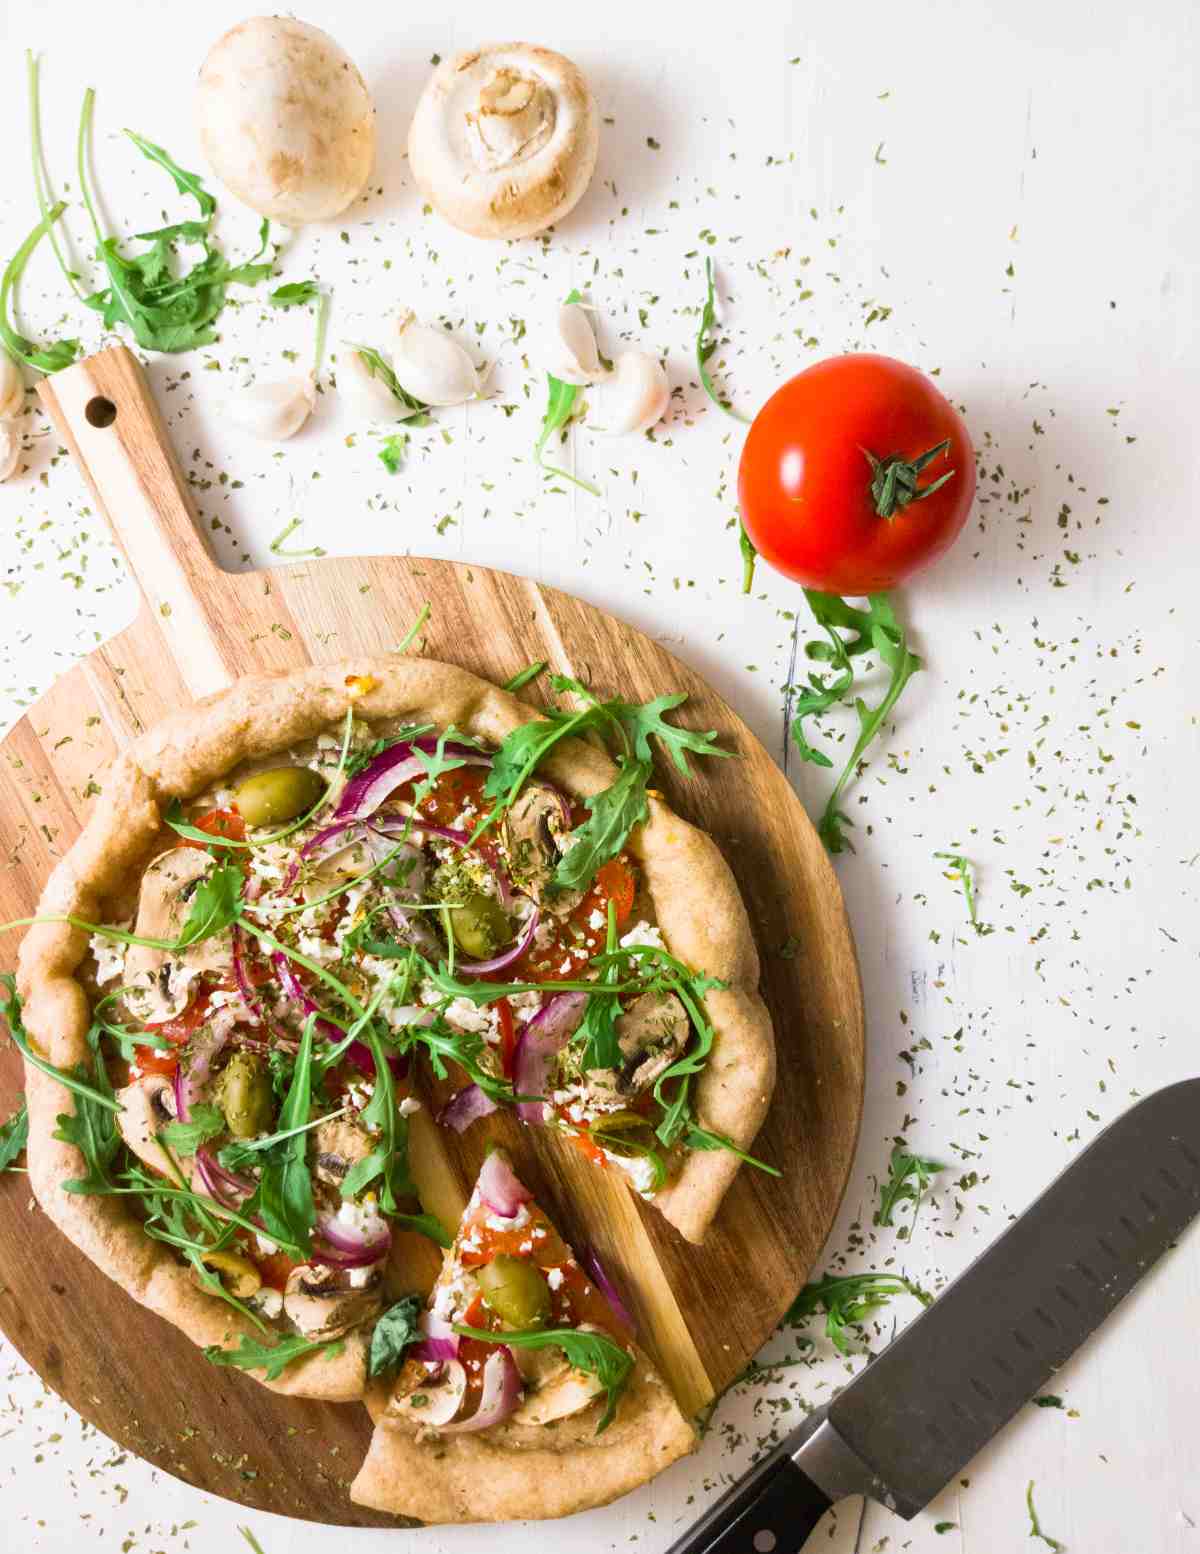
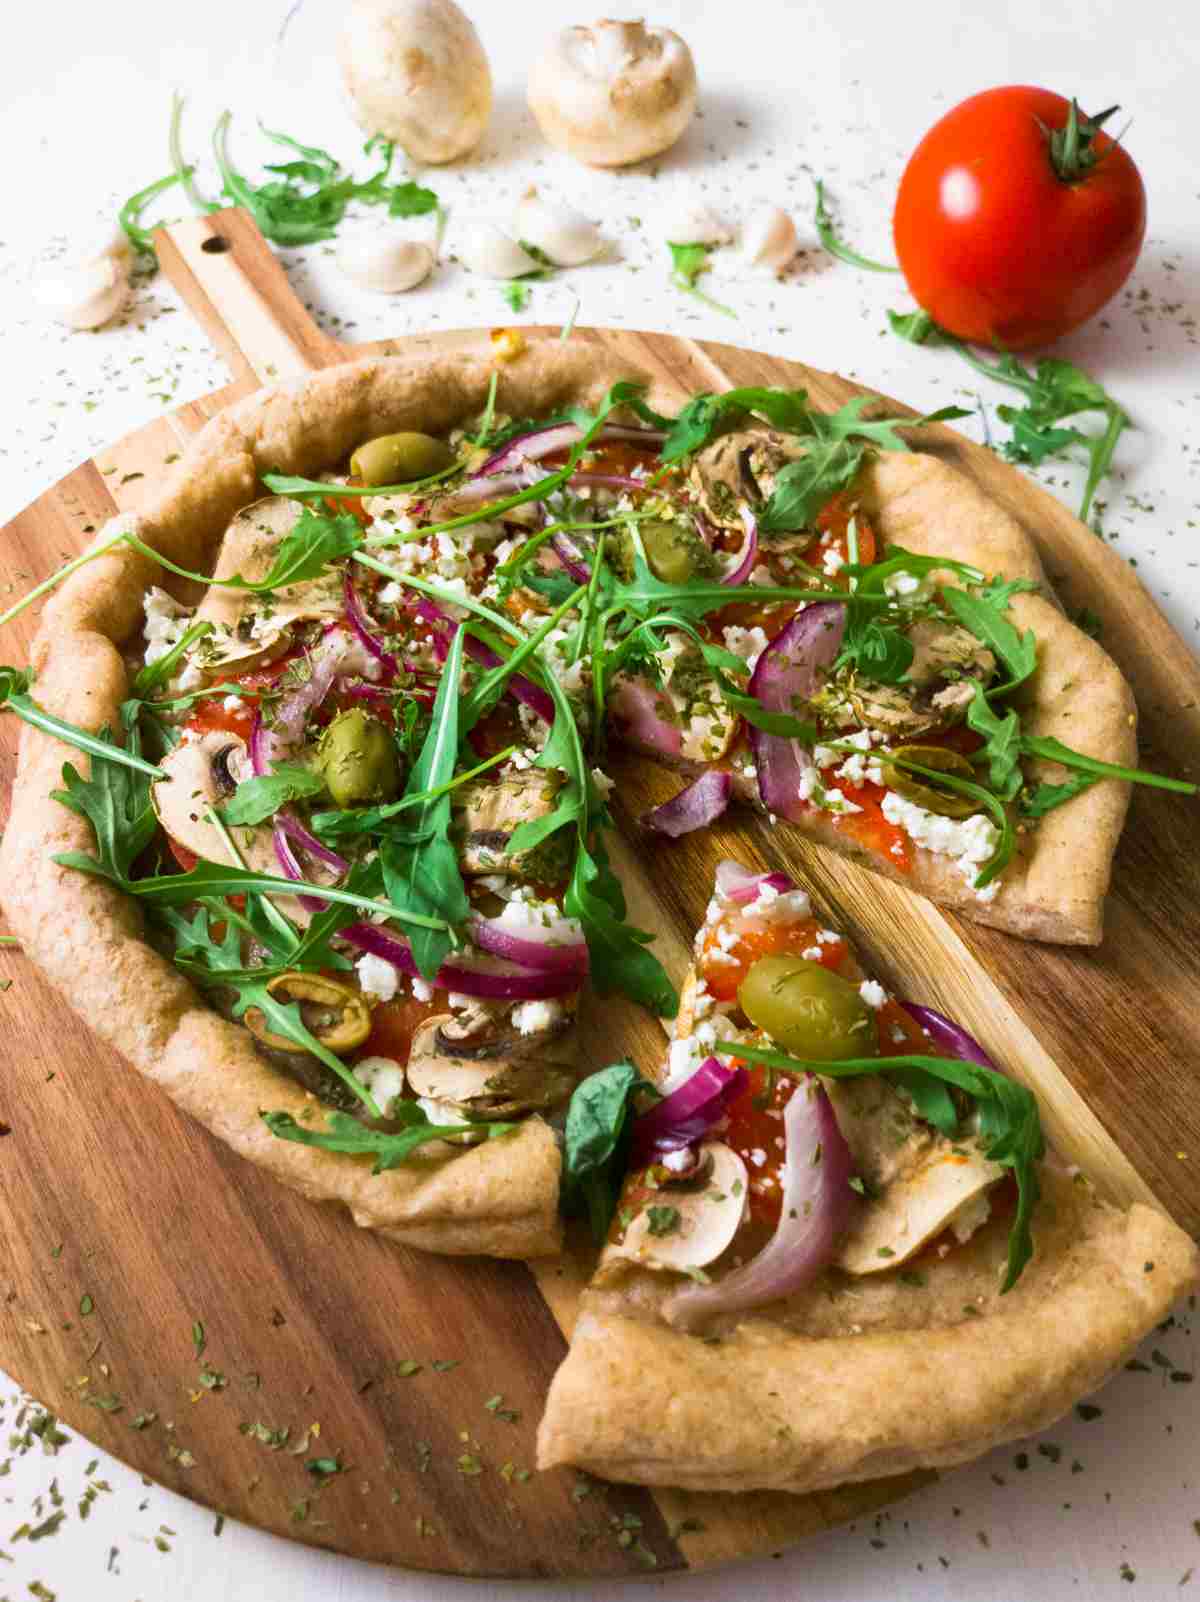
Then, add the toppings of choice and return to the oven for another 10 minutes. When ready, slice the pizza and enjoy! Top with fresh greens for extra flavor.
Favorite Pizza Sauces & Toppings
- Basic tomato pizza sauce with mushrooms, tomatoes, fresh basil, and cheddar.
- Olive oil & minced garlic base with olives, feta cheese, red onion, mushrooms, and arugula.
- Tomato pizza base with bolognese sauce.
Proofing Explained
In sourdough bread, there are two stages of bread fermentation - the bulk rise and proofing. With sourdough pizza crust, we only do one stage which includes both in one. Proofing is the fermentation & rising process of GF pizza dough before baking.
For a more sour pizza you will need to proof your dough in the refrigerator for 12-16 hours, where for a less sour crust it will only need 3-6 hours in room temperature.
You can even leave the dough in the refrigerator for up to 2 days if you need to make the recipe ahead or if you want to make a few pizzas at different times during the weekend.
Expert Tips
- Weigh your ingredients. I myself was hesitant to use grams in place of cups, but once I learned how to, I started preferring a digital scale to cups! It is so much easier and time-saving. I still use cups for liquids, oats, sugar, and some other things but GF flour has to be weighed for recipes to turn out well!
- You can use either a mature starter at its peak activity or starter discard. If you use starter discard, make sure to add 7g of instant/dry active yeast or 20g of fresh yeast. The rising time will also be shorter.
- You can use a pre-made gluten-free flour blend instead of the flours listed in the recipe, just keep in mind that the dough might behave differently and have a different flavor. Use 240g of GF flour for the recipe. I have a great homemade gluten-free flour blend you can try.
- Keep a bottle with filtered room-temperature water on the kitchen counter to use in sourdough recipes. I know how inconvenient it can be to not have room-temperature water when you need it!
FAQ
Yes, wrap the dough in plastic wrap and freeze it for up to 3 months. You can freeze the dough before or after fermentation, although it is better to freeze it after. If you freeze your dough before fermentation, you will not get as much rise after thawing as bacteria will be weak.
Yes! Split the dough into as many parts as you need to make small-sized individual pizzas.
You can make my no-yeast cassava flour pizza instead as this recipe is specifically designed to work with a GF sourdough starter.
You need to par-bake the crust in order for it to bake all the way through. If you bake the dough with toppings it will be wet and gummy on the bottom.
Yes, you can. In that case, make sure to add 7g of instant/active dry yeast or 20g of fresh yeast and shorten the rising time.
More like this

Get my new gluten-free sourdough recipes eBook
The top 32 recipes of 2026!
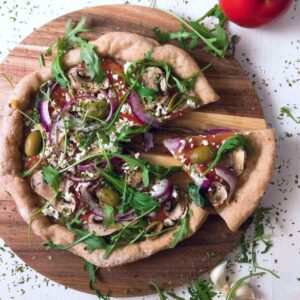
Gluten Free Sourdough Pizza Dough
Equipment
- 1 whisk
- baking tray cast iron skillet or stone are best
- kitchen towels
- Rolling Pin (optional)
Ingredients
- 15 g psyllium husk if using powder, use 12 grams. For more info on psyllium go to this psyllium husk guide
- 300 g water room-temperature
- 150 g gluten-free sourdough starter if using starter discard, add 4-7g of active dry/instant yeast or 15-20g of fresh yeast.
- 170 g brown rice flour oat, sorghum, and other flours can be used, too
- 70 g cornstarch potato, tapioca, arrowroot starches work, too
- 12 g salt
- oil for rolling the dough to prevent sticking
SAVE THIS RECIPE!💌
Instructions
- First, add psyllium husk to the room-temperature water, whisk to combine, and set aside for 5 minutes. Psyllium husk will absorb the liquids and form into a gel.
- After five minutes, add the sourdough starter to a mixing bowl and pour psyllium husk gel into it. Mix to combine. If you are using starter discard, add 4-7g of active dry/instant yeast or 20g of fresh yeast.
- Add all the dry ingredients to the mixing bowl and mix with your hands.
- Cover with a kitchen towel or plastic wrap and leave the dough to ferment and rise for 3-6 hours at room temperature or longer in the refrigerator (anywhere from overnight up to 2 days). If you are using starter discard and yeast, leave the dough to rise for 1 hour at room temp.
- Preheat the oven to 400F/200C together with the baking tray you are using. I like to use my cast iron skillet to bake pizza crust! You can use a pizza stone or a simple baking sheet.
- Then, transfer the dough onto a piece of parchment paper and divide it into two parts if making two medium-size pizzas or use the whole dough for a large pizza.
- Pour a little bit of oil onto the dough to prevent sticking. Now, roll the dough out or shape it with your hands. For a thinner pizza roll the dough out thin, for a fluffier thicker crust roll the dough less.
- Then, form the borders of the pizza and create a nice round shape.
- Transfer the dough together with the parchment paper onto the baking tray (in my case, it is a cast-iron skillet) and bake the crust without toppings for 15 minutes (20 minutes for a crunchy crust). This step is called par-baking meaning you pre-bake the dough before the toppings go on it.
- Then, add the toppings of choice and return to the oven for another 10 minutes. When ready, slice the pizza and enjoy! Top with fresh greens for extra flavor.

Lou says
This is a great recipe. I have made this 6 or 7 times now, and it just gets better. My sourdough lives in buckwheat flour so the pizza is dark and has a little buckwheat flavor. I use fresh starter and don't need to add yeast. Your precooking times are right on - I par bake 20 minutes (which I thought was long, but 400 is a lower heat). I just saw your buckwheat focaccia recipe...that is my next bake. Thanks for your recipes!
April says
I've been trying to find a good, reliable gluten-free pizza dough I can make at home... and this recipe IS THE RECIPE! Bonus points for being able to make it with gluten-free sourdough that I now dearly love. A bit better than store-bought GF pizza doughs (& cheaper!). Tastes wonderful, I def recommend keeping the dough in the fridge overnight & keeping the dough a bit thick to get a wonderful, perfect bready-pizza bite!
Natasha Levai says
Hi April!
Thank you for the review and I am really happy you liked the pizza crust!
April says
This was well worth it! After 6 months of trying other gluten-free recipes, I am so glad I tried this recipe! I knew after the banana bread that I HAD to try another recipe of Natasha’s. This recipe makes keeping a GF sourdough worth it and to-go orders / grocery store GF pizzas non-equivalent to the quality of pizza dough this recipe can make! I followed the recipe to the T, having to rest it overnight fermenting. (With a late date night and needing to defrost blocks of cheese.)
Bronwyn says
This is my go to pizza crust recipe now that I’ve started gluten-free sourdough baking! It’s also really good if you cut string cheese in half lengthwise roll it into the crust edge for stuffed crust! I’ve tried so many variations of flours or pre-mixed flour, depending what I have. All have been good.
Megan Repsher says
The best gf pizza crust by far!! I used discard and instant yeast. It was ready to par bake in 1 your and my family loved it!! A new staple in my house!! Thank you so much for sharing!
Christine says
Yesterday I used a day old sourdough discard that was still active and added yeast per the recipe and let it rise for 6 hours but probably could have baked it after 3 hours. I weighed the finished dough so that I could divide it evenly and par baked it. My only complaint is that it tastes salty. I suspect that is sourdough because I notice the same with the English Muffins. My husband likes it and that's what really matters because he doesn't have to be GF. Today I'll be adding the toppings. Fingers crossed.
S says
Like this recipe but due to allergies I cannot use the psyllium husk powder, and must use konjac powder. Have made your recipe twice with it and guessing I need to reduce the 300g of water since it is always a wet soupy dough. Thinking the absorption is much lower? Can you please help with how much to reduce it?
Natasha Levai says
This recipe cannot be made without psyllium husks, unfortunately! To make a recipe without it, you would need to find one that is designed without psyllium in mind.
Bridget VanGinkel says
I tried this recipe for the 1st time yesterday. I must say out of all the gluten-free pizza crusts I've tried, this is the best GF crust I ever had. I added in Italian seasonings and garlic powder into the crust. I divided up the crust into Small pizzas as we are a family of of four. When it was baking my husband walked into the kitchen and stated it smelled just like Papa Murphy's. unlike other gluten-free crust I've tried this did not give me any bloating issues or cramping. it was very easy on the digestive track. I plan on making a few batches of these this coming week to have in the freezer for when we are craving pizza. Thank you for the awesome recipe.
Adri says
Hi! If you freeze this dough, do I need to defrost it before proceeding to the baking bit?
Also, if I freeze it after par-baking, does it need defrosting first or can it proceed to the final baking step directly from the freezer?
Thanks so much in advance.
Natasha Levai says
Hi Adri, in both cases you can bake directly from frozen!
Sandy says
Just wondering can you make this recipe and freeze it as balls in the fridge or do you need to shape it like a pizza crust first.
Natasha Levai says
Hi Sandy! It would make your life easier to roll the pizza out first, because then all you need to do is bake the crust from frozen and add your toppings. If you freeze it as dough balls, then you will need to thaw it all the way until it is soft enough to be rolled out, then roll it out and bake. This will increase the total work time and isn't as efficient time-wise.
Barb says
Can you freeze this dough after you par bake it before adding the toppings?
Natasha Levai says
Hi Barb! Yes, you can!
Adri says
Would you bake it directly from the freezer (after putting the toppings) in this case and if so, would the baking time / temperature change?
Brilliant recipe, my family absolutely loves it 🥰
Lee says
I’ve just made this using brown rice flour and potato starch. I also used a pizza stone for the first time. Together, after not having a traditional pizza for 8 years, I felt like I’d ordered from Domino’s. There was an absence of the normal gluten free cardboard texture and I’m happier in life now that I can have pizza once again! I live with MS and you’ve made life that little bit better xxx
Katrina Farley says
Lee, I love your spirit! my hubby has had MS since 1992 and it is the little things in life that make his days not as bad as they could be. the day I gave him back bread that didn't make his symptoms worse was amazing. I hope you find lots more little things that keep you going!
Clarie says
I’m trying it right now. Can’t wait ! 😍 if I made it from discard can I put it into fridge overnight? I read it later in recipe that it takes just hour with the discard version but I don’t want to make it in middle of the night 😂🙏 thank you for info 🫶🏻
Natasha Levai says
Hi Clarie! 1 hour is if you are also using instant yeast next to the starter. But yes, you can put the dough in the fridge for the night!
Sali Peterson says
I made a half recipe. Absolutely delicious. Chewy, crispy.
Personal Sour Dough Gluten Free Pizza
1. 1.25 TBS psyllium husk powder
½ cup warm water
2 tsp Turbinado sugar
Whisk until gels in medium bowl
2. ½ cup sourdough discard
1 tsp dry active yeast
Whisk together
3. ½ cup + 2 TBS brown rice flour
¼ cup arrowroot flour
Salt
Whisk together
4. Add sourdough discard/yeast mix to psyllium gel. Combine well.
5. Add dry ingredients. Mix with hands
6. Dust board/marble with Arrowroot flour. Knead in ¼ cup arrowroot until smooth and elastic. 5 to 10 turns.
7. Dust parchment paper with arrowroot flour. Flatten dough into a disk. Sprinkle arrowroot. Flip upside down. Sprinkle with arrowroot. Roll out to size of cast iron pan. Place on plate. Trim parchment. Create pizza lip. Cover with towel. Let rise 1.5 to 2 hours.
8. Preheat skillet in 425° oven. BAKE crust 15 minutes.
9. Top pizza. BAKE 10 to 12 minutes until melted and crusty.
*Optional: broil 2-3 minutes.
Carla Jones-Harris says
Thanks for this.
Laura Bosch says
Thanks for this recipe! I made it as pizza with active starter and it was very good! Today I pressed the dough out into a rectangle, covered it with melted butter and herbs, folded it in half, and sliced it into 24 strips. Twisted each strip, stretching a little, and laid them closed together on parchment paper, then brushed with more melted butter and sprinkled with grated parmesan cheese. It rose for an hour, then onto a preheated pizza stone at 400 for 25 min! Super yummy.
Natasha Levai says
Wow! Sounds elaborate and delicious 😀
Yvonne says
The best (GF) pizza crusts I’ve ever made! An extra un-topped crust made good flatbread too. Thank you for sharing this recipe!
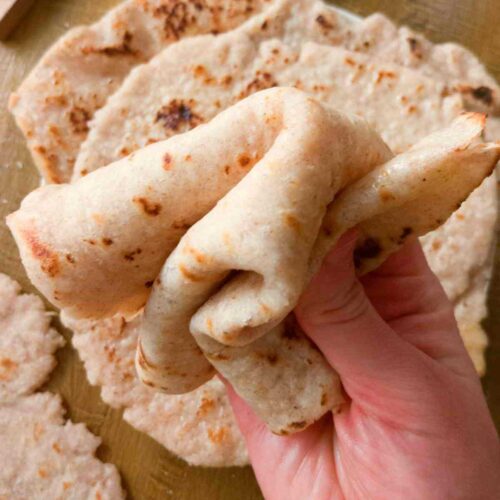
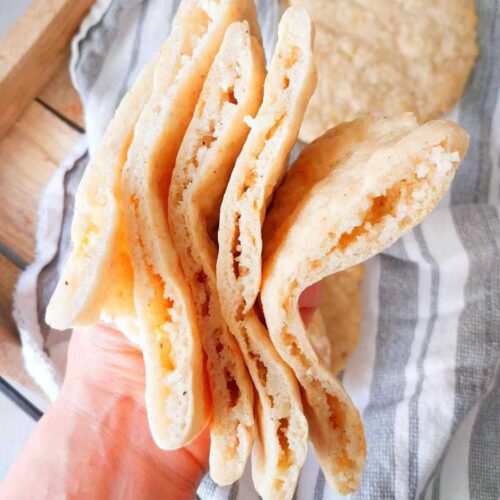
Natashashome says
Thank you so much for your feedback! For flatbreads, you can check out a specifically designed GF sourdough flatbread recipe! https://www.natashashome.com/gluten-free-sourdough-flatbread/
Maayke says
This pizza was so easy to make and it turned out great! Thank you for sharing your recipe.
Ramsha says
hi. can we use jowar flour?
Natasha Levai says
Hi Ramsha! Yes, you can use jowar flour in this recipe.