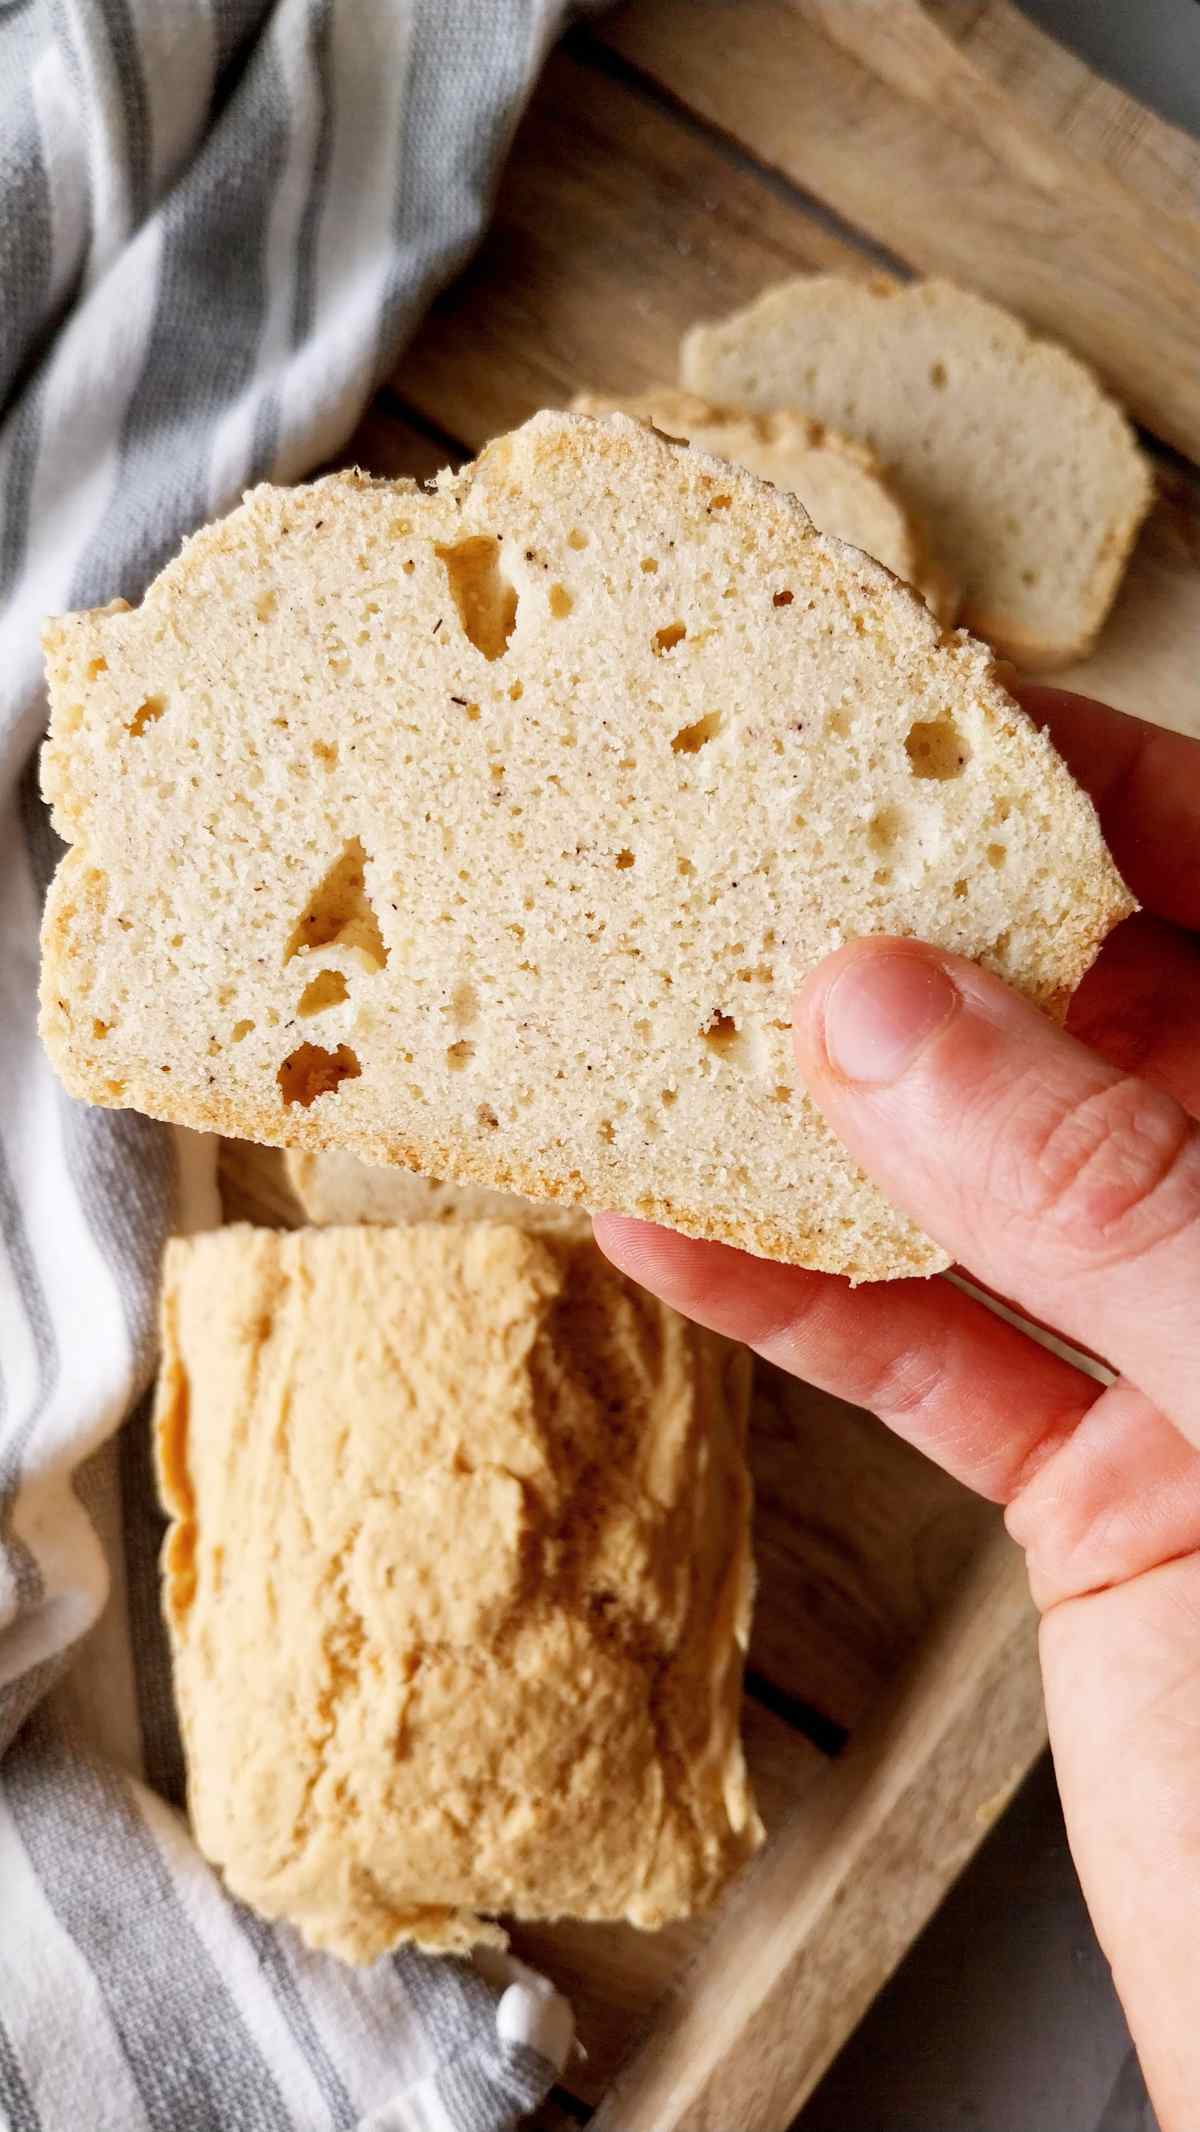
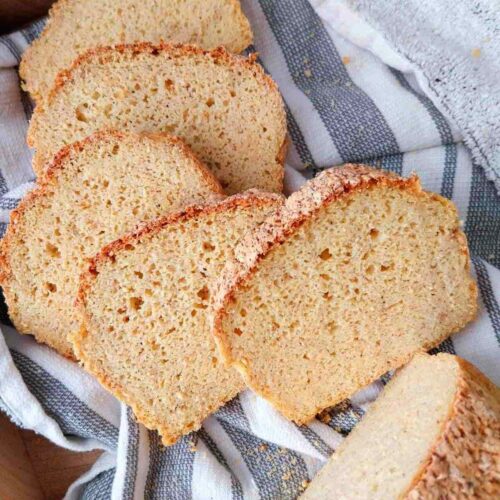
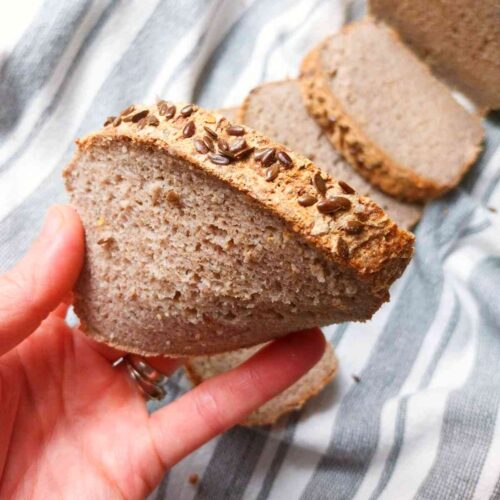
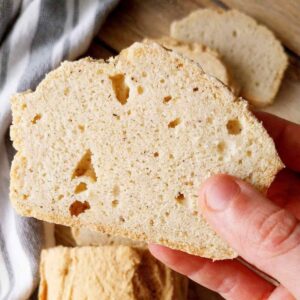
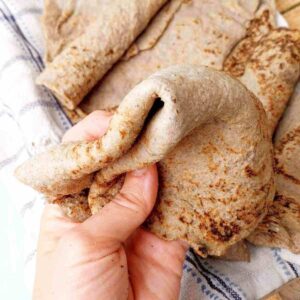
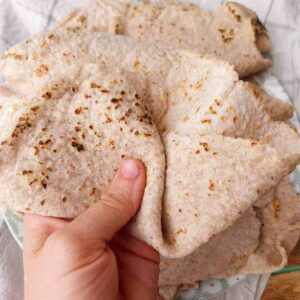
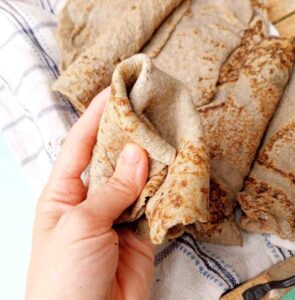
Who said it was impossible to make 100% rice bread without any starches or xanthan gum? This rice flour bread is soft, bendable, airy, and very light! The crust is not hard at all, the bread is very easy to slice. It is dairy-free, paleo, low-oxalate, nightshade-free, and low-salicylate as well!
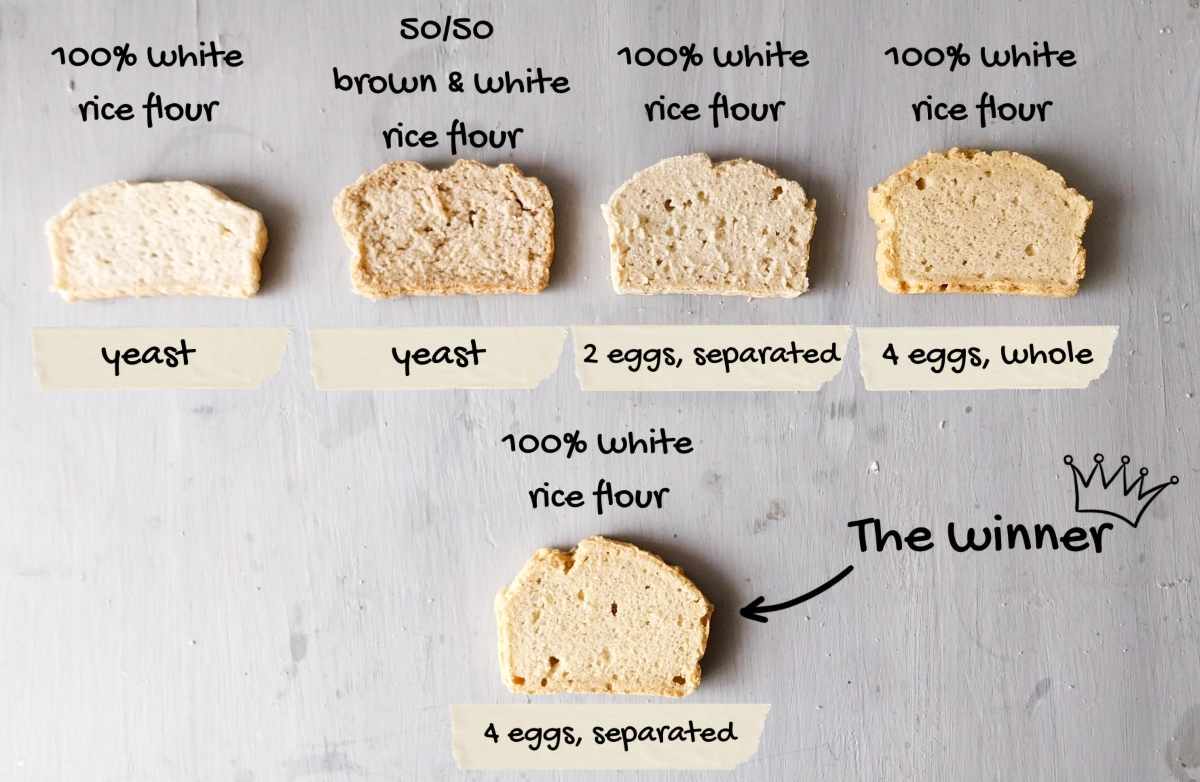
After many trials, I finally came up with the best rice flour bread. Yeast doesn't work well with rice flour, so to avoid dense texture and gumminess, we need the help of whipped egg whites and raising agents like baking soda, as we do in quick breads like gluten-free banana nut bread, or this gluten-free yeast-free loaf.
For another budget-friendly, simple gluten-free bread, see my new corn flour bread recipe!
Jump to:
🍚Ingredients for Rice Bread
- Rice flour - I used white rice flour, although you can swap part of it for brown rice flour for a nuttier flavor.
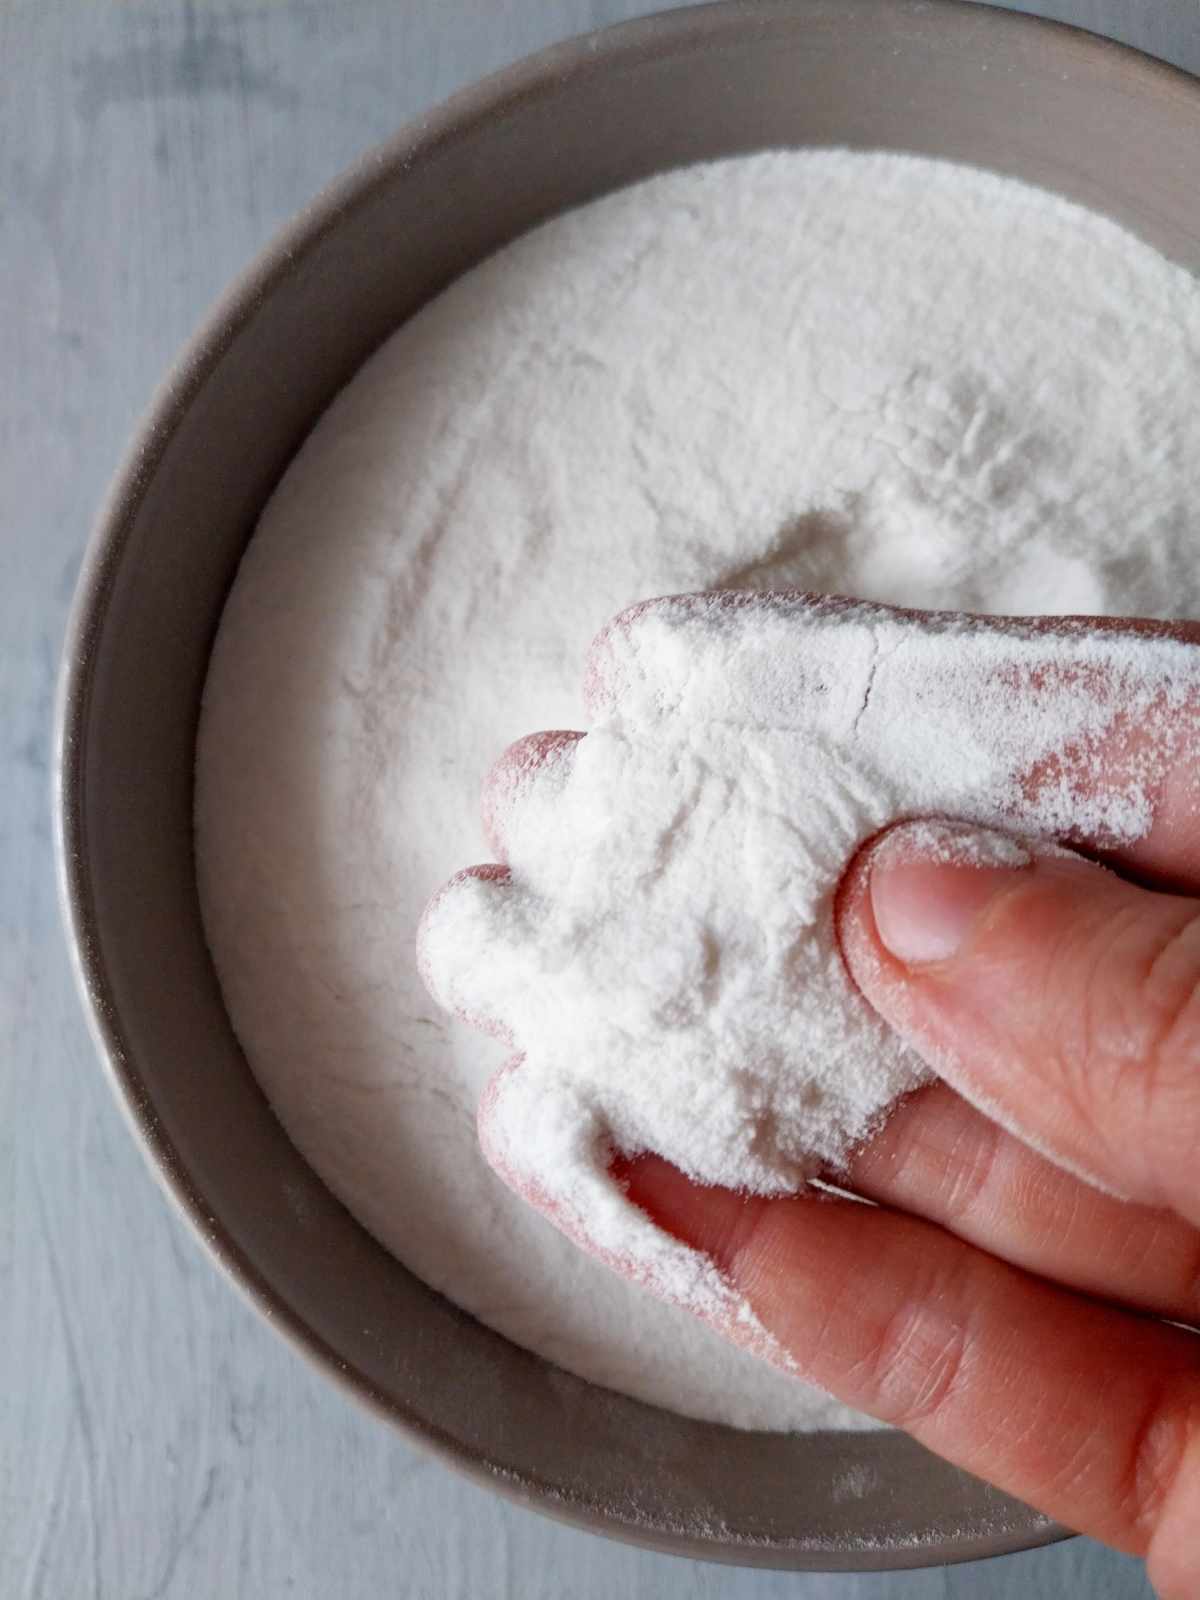
- Psyllium husk - I recommend using whole psyllium husk vs. powder. Psyllium powder needs longer hydration time and it might give your bread a purple tint! Plus, it often clumps in water.
- Eggs - eggs keep your bread fluffy, spongy, airy, and moist without making it gummy!
- Baking powder - use fresh baking powder and make sure it is gluten-free (if you have gluten intolerance). You can use baking soda in which case add 1 tablespoon of apple cider vinegar (soda needs acids to activate).
- Sea salt - for the best flavor and nutrition.
See the recipe card for quantities.
Substitutions
- Rice flour - you can use brown rice flour to make the bread whole-grain (might be harder to digest). If you are looking to reduce carbs, then I'd recommend you make this low-carb almond flour bread instead.
- Psyllium husk - you might be able to make bread with Konjac, although it will affect the texture and structure. Otherwise, I don't recommend substituting psyllium.
- Eggs - I don't recommend using any egg substitutes for this recipe as it relies on the eggs heavily (although whipped aquafaba might be an option). If you are looking to make vegan bread, I'd recommend you try a recipe that uses both flour and starches. You can make this psyllium bread, this chickpea boule, or my millet sandwich bread instead.
Variations
You can add flavor to this bread by tweaking a few things:
- Add mixed seeds like sunflower, pumpkin, sesame, or flaxseed.
- Incorporate sundried tomatoes or olives into the dough.
- Make it sweet by reducing salt, and adding more sugar, cinnamon, and dried fruit.
- Season the dough with basil, rosemary, dill, thyme, or Italian seasoning.
Can I make rice flour at home?
Yes, you can! There are two methods to homemade rice flour. One is with a high-speed blender (like Vitamix or Blendtec) and another one can be made with a regular blender or food processor.
A better option is to get Japanese short-grain rice instead of a long-grain type. If you can, try buying organic white rice because it tends to be lower in arsenic which is toxic in large amounts.
High-powered blender method:
- Place 1 cup of uncooked rice into the blending bowl and lock the lid securely.
- Start blending on high speed until the rice turns into fine flour.
- Store in an air-tight jar or bag for up to 1 year. You can freeze the flour to make it last longer.
Regular blender/food processor method:
- Soak the rice in water overnight.
- Drain the water and let the rice dry completely.
- Blend the rice in a blender or a food processor until it turns into fine flour.
- Store in a glass jar or an air-tight container.
Pro tip: make sure the rice is completely dry before blending unless you will use it right away.
How to Make Rice Bread
For detailed instructions, see the recipe card!
Step 1

Start preheating the oven to 350F/175C (don't use the fan setting).
Add psyllium husk and water to a medium-sized bowl and whisk vigorously to prevent lumps. Set aside.
Step 2
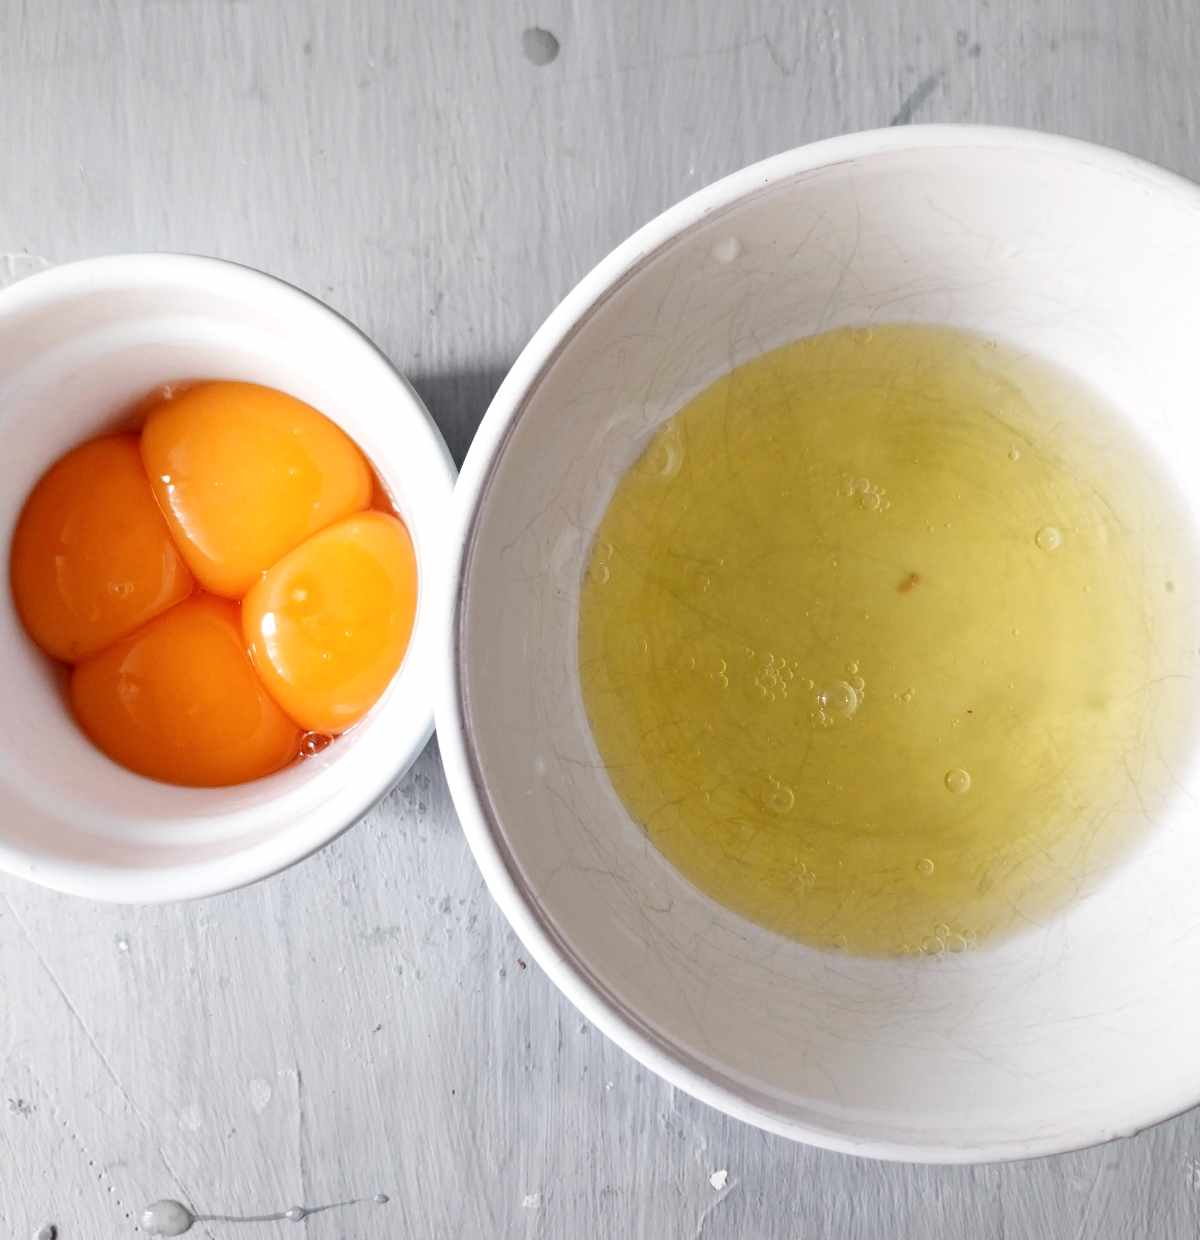
Separate the egg yolks and whites. You can simply use your hands and let the egg whites slip through your fingers into the bowl. Place the yolks in a separate bowl.
Make sure that none of the yolks get into the whites because the fat will inhibit egg whites from whipping into stiff peaks.
I recommend separating one egg at a time using a separate bowl and adding the whites one by one to the larger bowl because you never know when a yolk will break and contaminate the egg whites.
Step 3
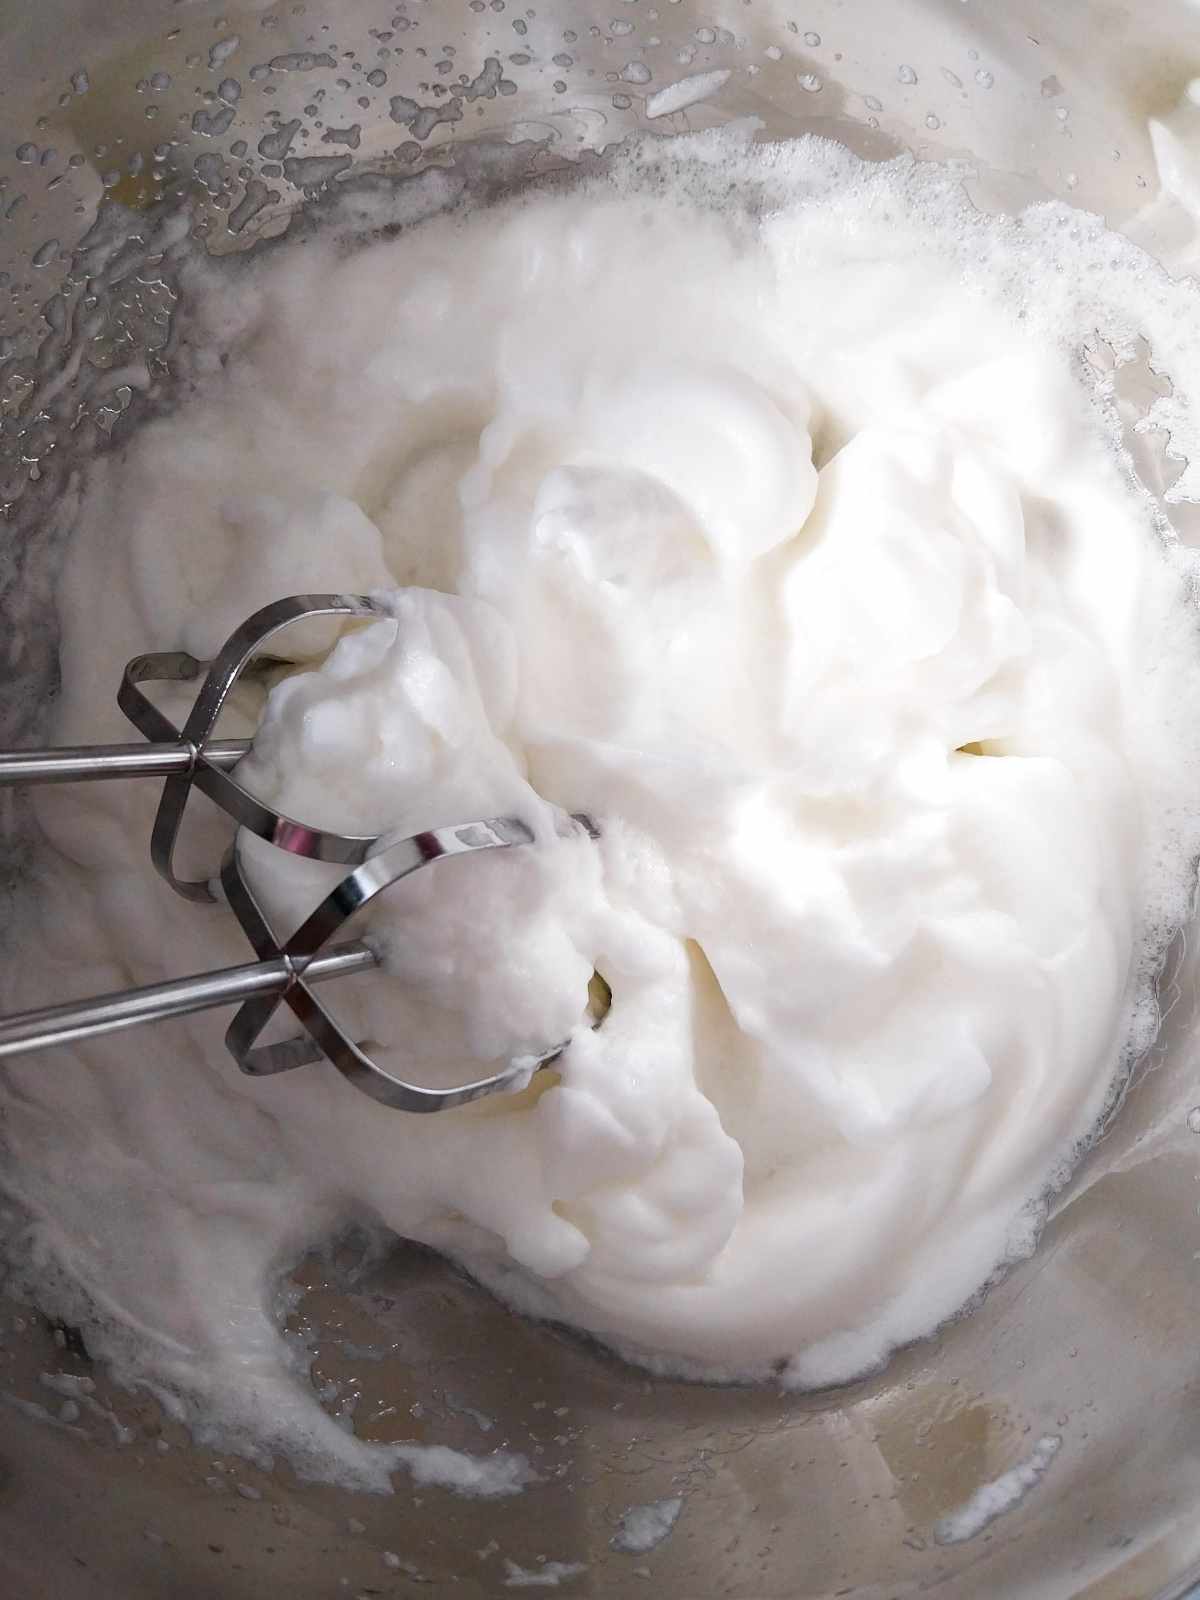
You will need an electric mixer for the next step. Beat the egg whites at high speed of your electric mixer until they form stiff peaks. It will take a couple of minutes.
Step 4
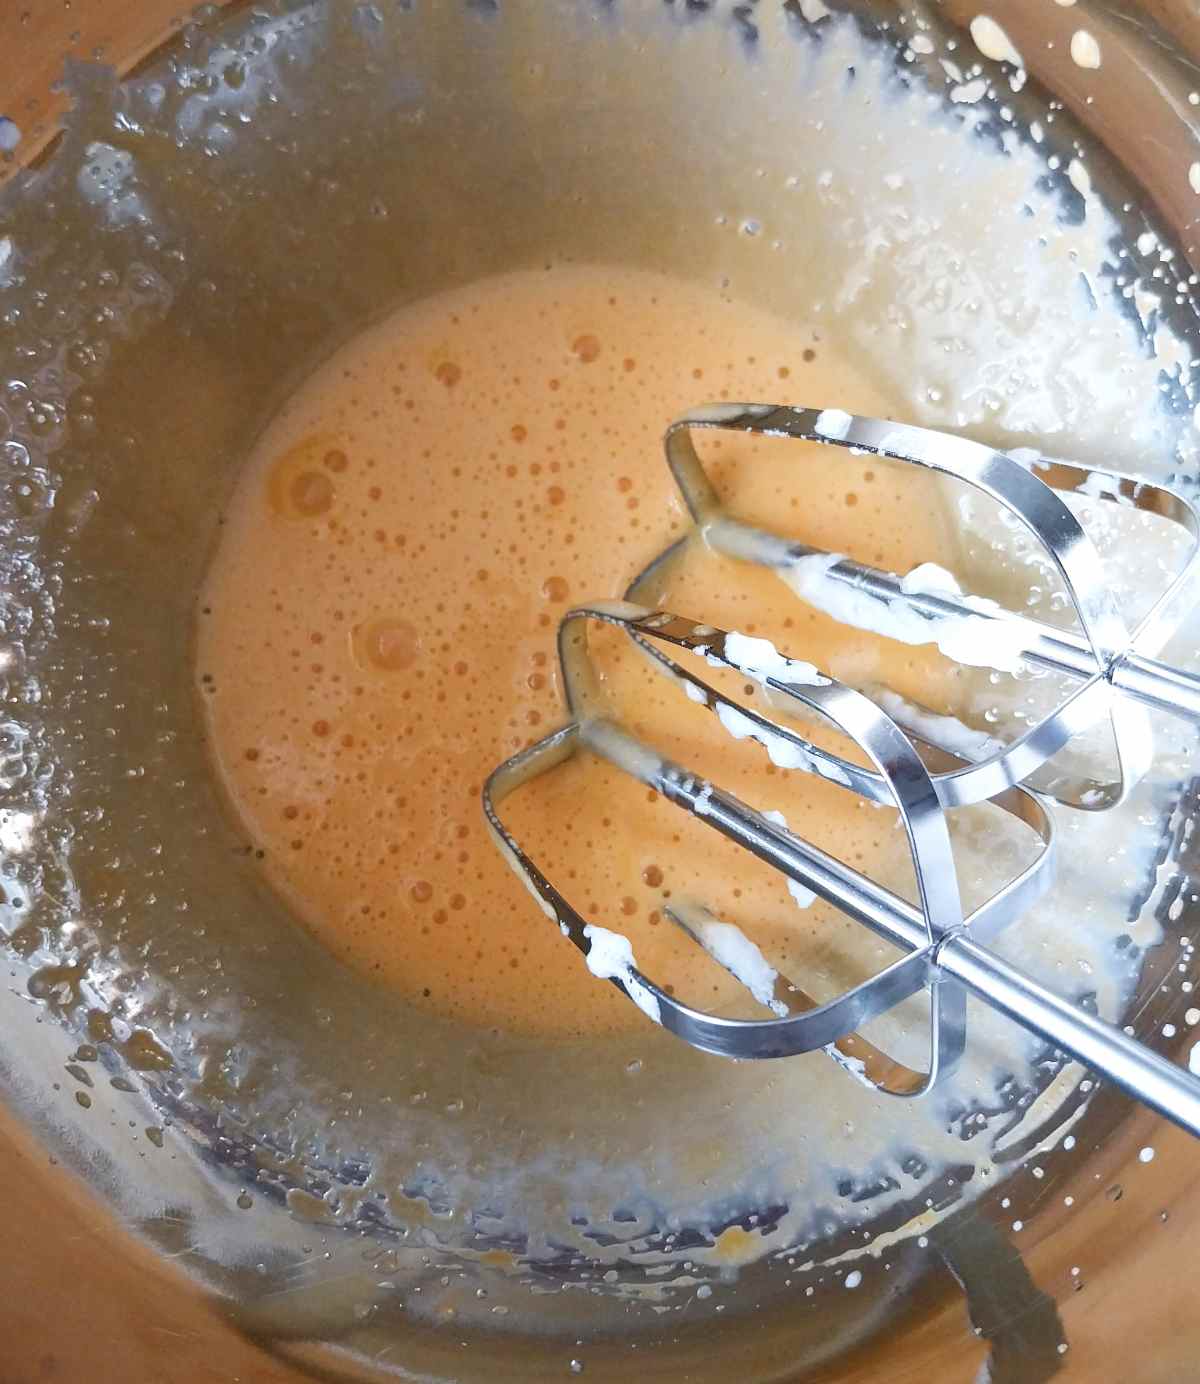
Then, beat the egg yolks until they look pale yellow. This should take a minute or so at high speed.
Step 5

Once egg yolks are ready, add psyllium gel to the mixing bowl with the yolks and mix with the electric mixer until evenly incorporated.
Step 6
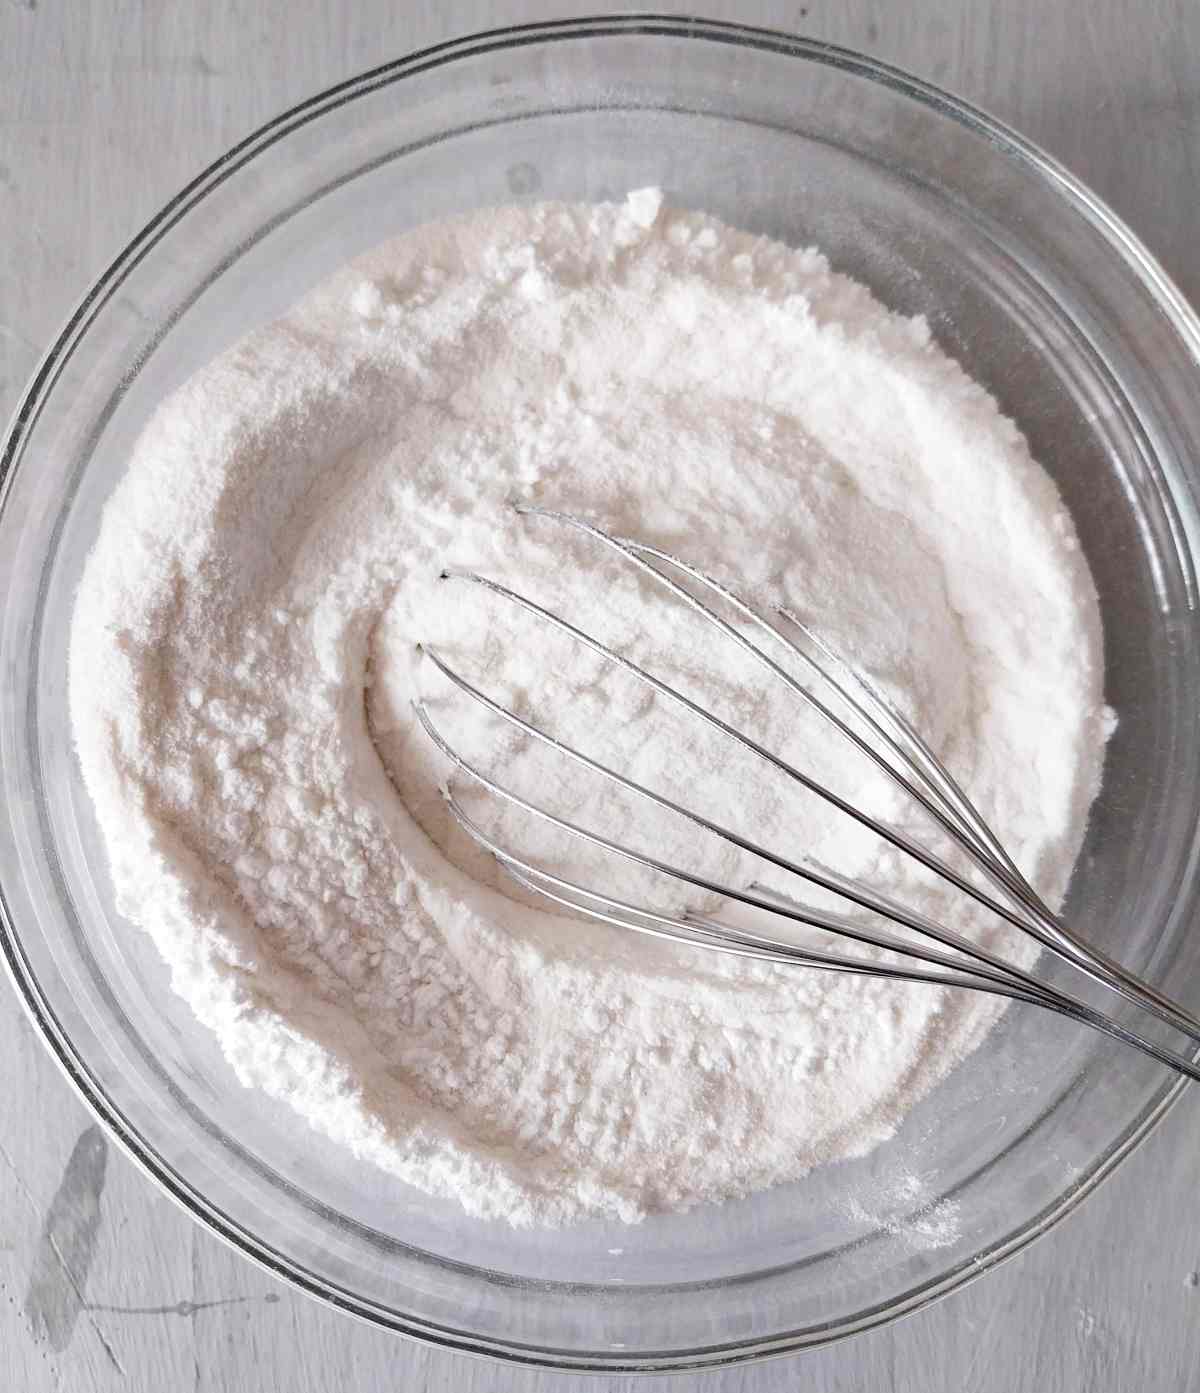
In a separate bowl combine all the dry ingredients and mix to incorporate.
Step 7

Add the dry ingredients to the egg yolk with psyllium. Beat until you see crumbly dough form.
Step 8

Add the egg whites to the rest of the ingredients and mix until it looks like a thick cake batter. Don't overmix!
Step 9
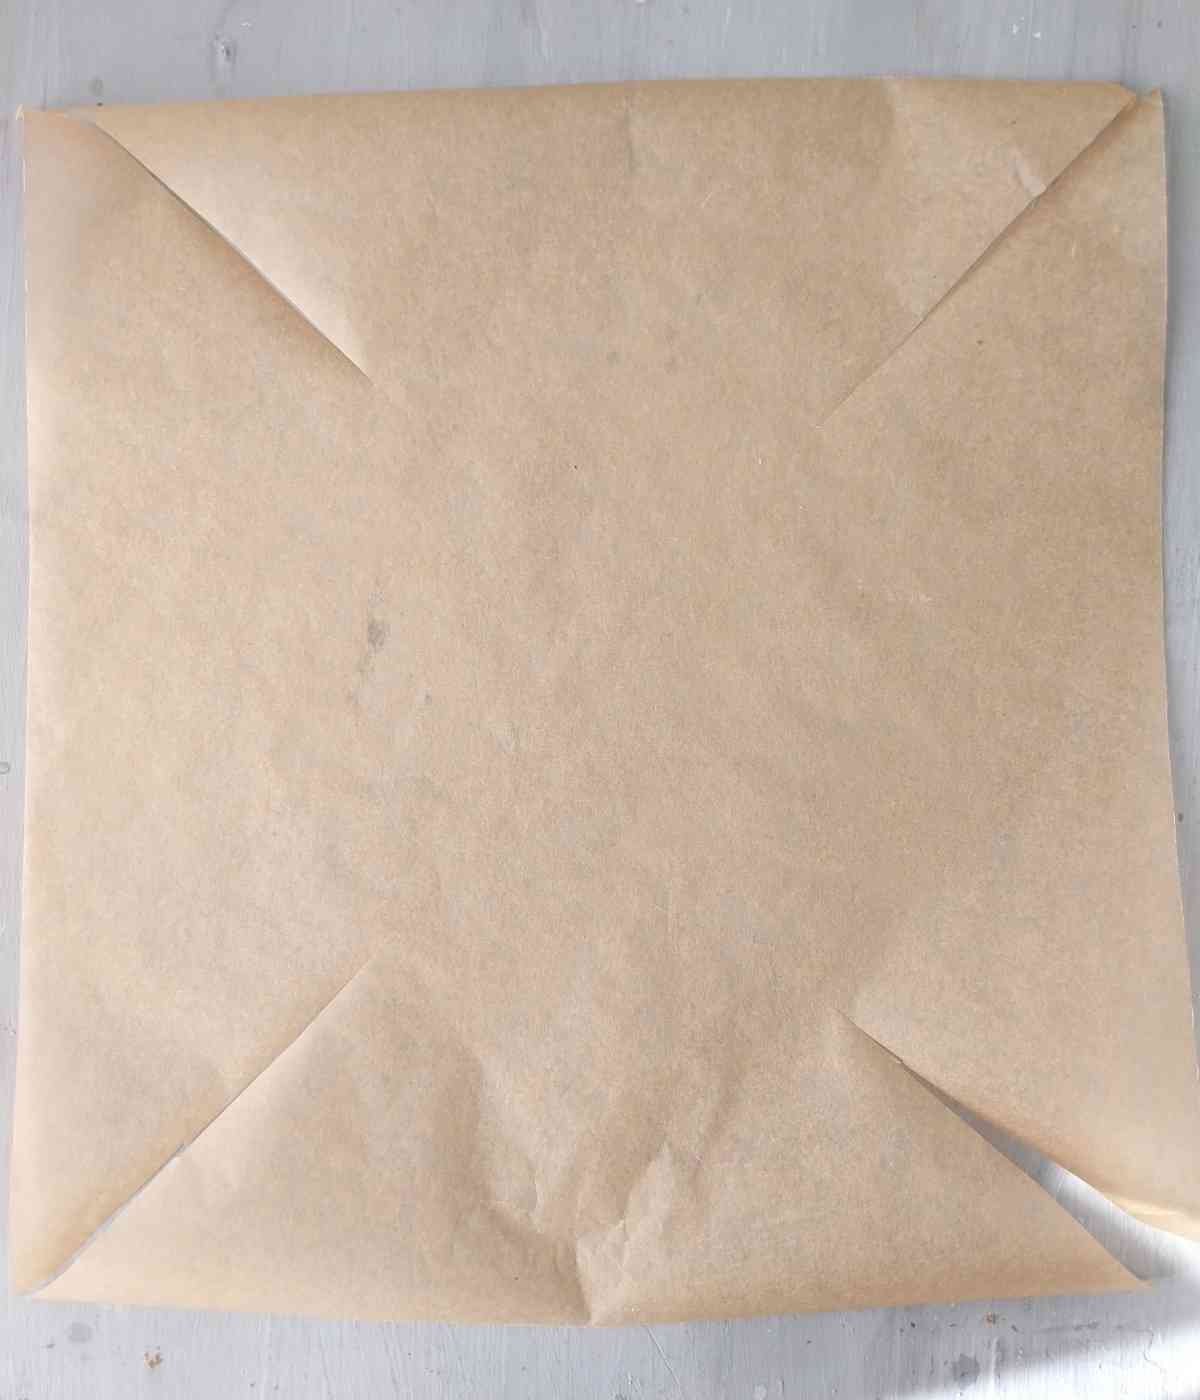
Now, line your baking loaf pan with parchment paper. You can do it however you prefer, but I find that if you make cuts from the corners of the parchment toward the center (about halfway), it makes it easier to line a bread pan with minimal wrinkles.
Step 10

I recommend using a smaller loaf pan (8x4"/20x10cm) to get a taller loaf but if you only have the standard 9x5"/22x12cm, you can use that as well.
I like using clothespins to hold the paper in place while I pour the bread dough into the loaf pan. Make sure to remove them before placing the pan into the oven!
Step 11
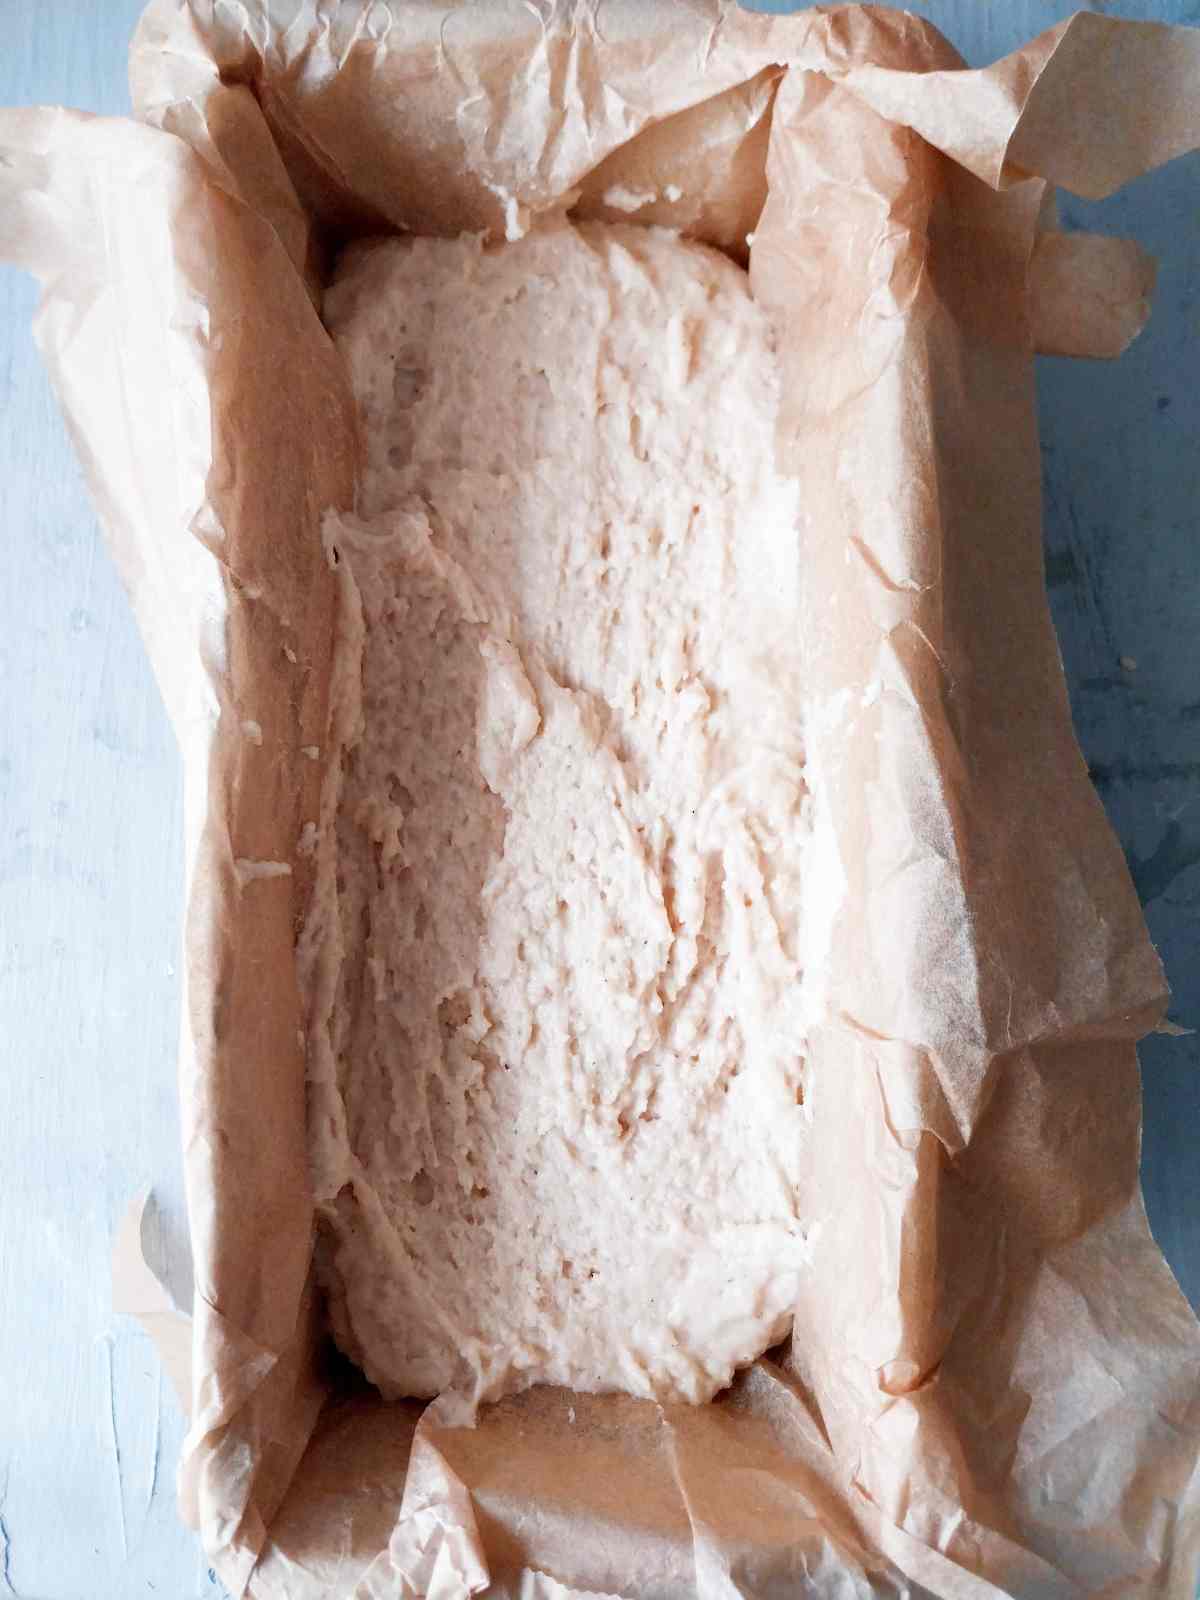
Smooth the batter using a silicone or an off-set spatula and bake the bread for 1 hour at 350F/175C. Take the bread out of the pan, remove the parchment paper, and transfer the loaf onto a wire rack.
Let the bread cool completely before cutting into it! Enjoy!
Pro tip: weigh your flour with a digital scale if possible, otherwise make sure to use a spoon & level method instead of packing the rice flour into the measuring cups.
💭Expert tips
- Remove the bread from the loaf pan immediately after taking it out of the oven to prevent a soggy bottom. Cool the bread on a wire rack to ensure airflow on all sides.
- Slice and freeze the bread in an air-tight container for up to 3 months to keep and fresh and moist. Microwave to defrost!
- Make sure to keep the egg whites clean. If any fat gets into it, it won't whip into stiff peaks! Use a clean bowl and whip the whites first, then go on to the yolks.
- Don't use a bread machine for this recipe; instead, check out these gluten-free recipes for bread machine.
Frequently Asked Questions
You can make bread with cooked rice or with ground uncooked rice (rice flour). This recipe shows how to make a loaf with finely ground white rice that's cooked during baking. See my brown rice sourdough for another version of this recipe!
The flavor is neutral, which makes it perfect for both sweet and savory sandwiches (think PBJ, BLT). The texture is more spongy, kind of like Victoria cake, but salty with no grittiness often found in gluten-free rice flour breads.
More Gluten-Free Bread Recipes You Will Love!
Looking for more inspiration and flavor? Here are more gluten-free bread recipes you can easily make!
Get my new
Gluten-Free Bread Recipes eBook
The top 26 recipes of 2026! Includes a bonus conversion chart for gluten-free flour.
Gluten-Free 100% Rice Bread (No Gum)
Equipment
- 1 electric mixer
- 1 bread pan
Ingredients
- 200 grams water
- 10 grams whole psyllium husk I don't recommend using powder
- 4 large eggs
- 330 grams white rice flour
- 2½ teaspoon baking powder
- 6 grams salt adjust to taste
SAVE THIS RECIPE!💌
Instructions
- Start preheating the oven to 350F/175C (don't use the fan setting).
- Add psyllium husk and water to a medium-sized bowl and whisk vigorously to prevent lumps. Set aside.
- Separate the egg yolks and whites. You can simply use your hands and let the egg whites slip through your fingers into the bowl. Place the yolks in a separate bowl. Make sure that none of the yolks get into the whites because fat will prevent egg whites from whipping into stiff peaks. I recommend separating one egg at a time using a separate bowl and adding the whites one by one to the larger bowl because you never know when a yolk will break and contaminate the egg whites.
- You will need an electric mixer for this step. Beat the egg whites on high speed until they form stiff peaks. It will take a couple of minutes.
- Then, beat the egg yolks until they look pale yellow. This should take a minute or so at high speed.
- Once egg yolks are ready, add psyllium gel to the mixing bowl with the yolks and mix with the electric mixer until evenly incorporated.
- In a separate bowl combine all the dry ingredients and mix to incorporate.
- Add the dry ingredients to the egg yolk with psyllium. Mix until you see crumbly dough.
- Add the egg whites to the rest of the ingredients and mix until it looks like a thick cake batter. Don't overmix!
- Now, line your baking loaf pan with parchment paper. You can do it however you prefer, but I found that if you make cuts from the corners of the parchment toward the center (about halfway), it makes it easier to line a bread pan with minimal wrinkles.
- I like using clothespins to hold the paper in place while I pour the bread dough into the loaf pan. Make sure to remove them before placing the pan into the oven!
- Smooth the batter using a silicone or an off-set spatula and bake the bread for 1 hour at 350F/175C. Take the bread out of the pan, remove the parchment paper, and transfer the loaf onto a wire rack. Let the bread cook completely before cutting into it! Enjoy!

Vicki says
For an egg-free version, add one cup of whole flaxseed, ground (or one and quarter cup ready ground flaxseed) instead of the eggs, then enough extra liquid to make a kneadable dough - not much is needed. It also works with half white, half brown rice flour, I used Dove's Farm. Definitely lower the oven temperature too. My first attempt was very dry and horribly eggy
Angel says
Turned out great! I had to keep my oven temp a bit lower and will turn lower still, next time as I have a brand new oven and cooks fast. Taste and texture was great. Holds up well, doesn't crumble.
Tania says
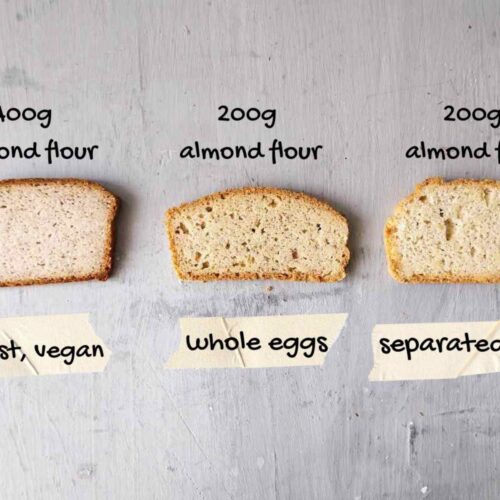
For the photo showing your bread experiments (at the very top), I am really curious to know what was the recipe for the 1st option where you used 100% white rice flour and yeast... Can you post the recipe? I'd like to experiment myself with tweaking the ingredients to see if I can get it to rise myself. Please and many thanks!
Natasha Levai says
Hi Tania! I used about 400g rice flour and 7g of instant yeast. Water is adjustable depending on the consistency!
Kat says
Hi wondering if you ever tried this using cooked rice instead of rice flour.
Natasha Levai says
Hi Kat! No, I haven't!
Rocio Otero de Young says
HOLA! Great recipe!
But is it possible to skip the psyllium husk (food sensibility), can I use potato starch instead? Thanks so much, in advance, for your answer.
Natasha Levai says
Hi Rocio! It has been quite a journey to develop this recipe and every single part of it is necessary to get the result you see in the pictures. I definitely don't recommend substituting psyllium husk with potato starch but you could try xanthan gum instead. You would need 1-2 tsp of it per bread.
Brice says
I'm going to attempt to make this without psyllium, only because I cannot tolerate any kind of binders such as psyllium, flax, or chia. I know you clearly state you do NOT recommend omitting the psyllium, BUT...if you were going to, would you still add water to the recipe? I'm assuming it will need liquid, so what kind of consistency should I be looking for when pouring into the pan?
Natasha Levai says
Hi Brice! If you want to make this without psyllium, I recommend you find a recipe that is designed without it because psyllium husk is the star ingredient in this recipe, without it all measurements would need to change and the end result would not be so good. It is just not possible to leave psyllium out, so I'd recommend you find another recipe! Sorry about that!
Natalia says
I want a white rice bread. I'm vegan and don't eat eggs. Do you have a suggestion for omitting this?
I saw the 100% brown rice vegan bread and also that white rice flour cannot be used in that recipe.
Help!!
Natasha Levai says
Hi Natalia! The reason white rice flour cannot be used in the brown rice bread recipe is because white rice flour doesn't rise with yeast. If you use white rice flour, your bread will most likely be very small and dense although you can give it a go and see if you like it! You can use 50% brown rice and 50% white rice, that would make it somewhat better.
The eggs help this bread with an airy texture, so an egg substitute wouldn't really work. Is there any other type of flour you can have other than white rice?
Jelena says
Can i use brown rice instead of white rice?
Natasha Levai says
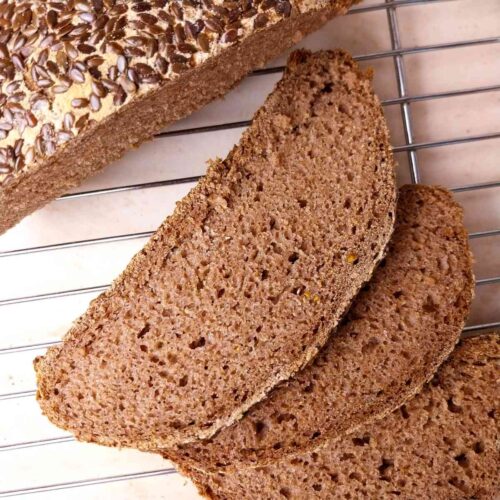
No, brown rice and white rice flours are different in the way they act in bread. I have a separate recipe for a brown rice bread here https://www.natashashome.com/brown-rice-bread/