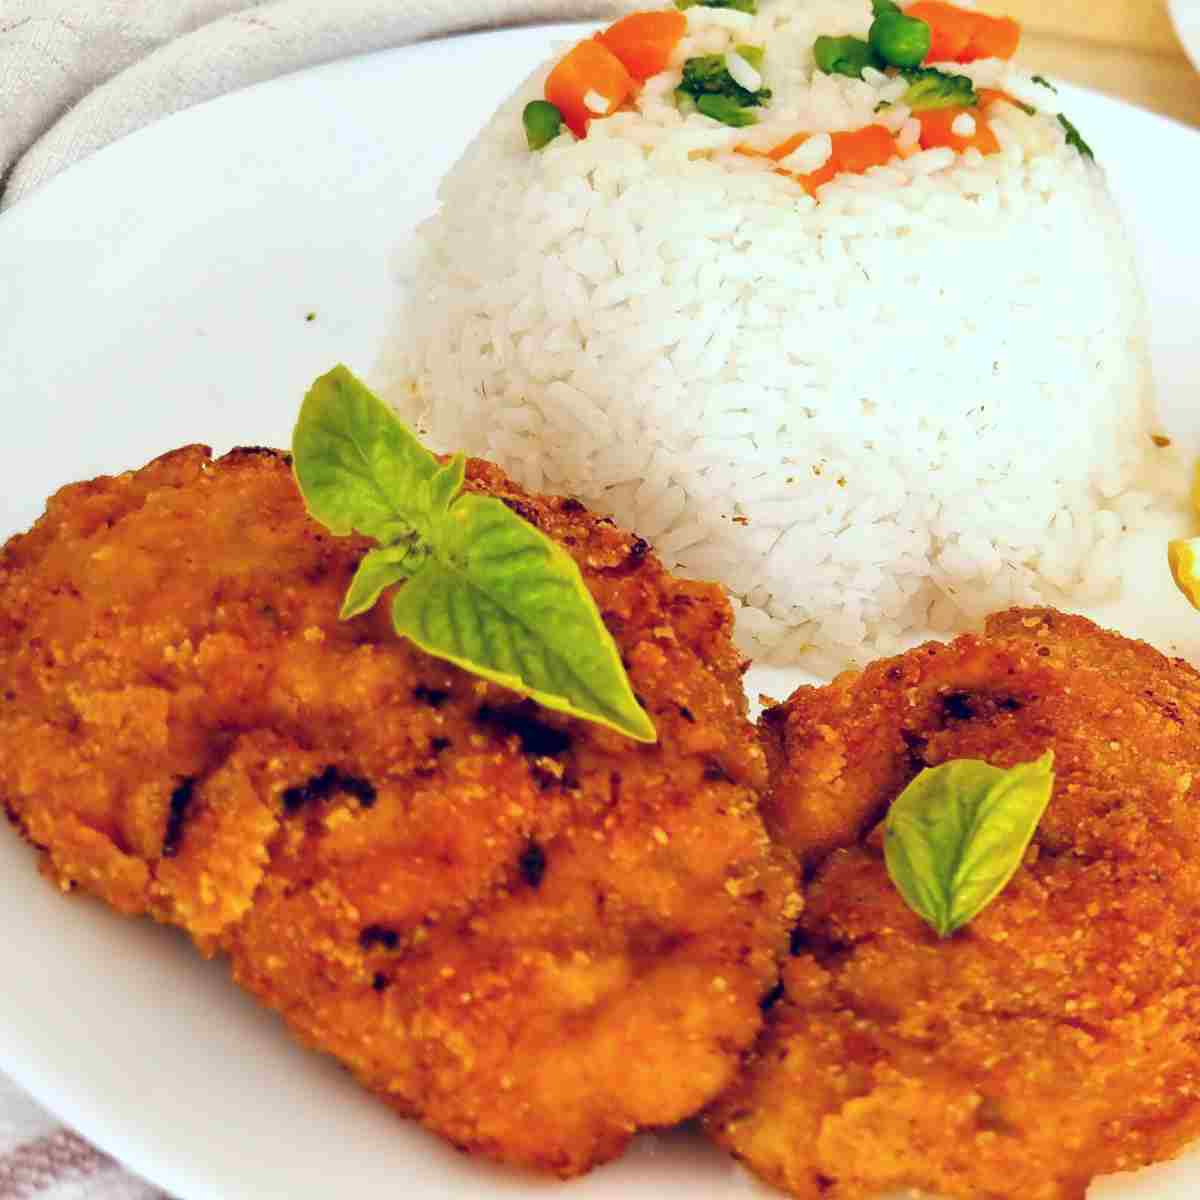
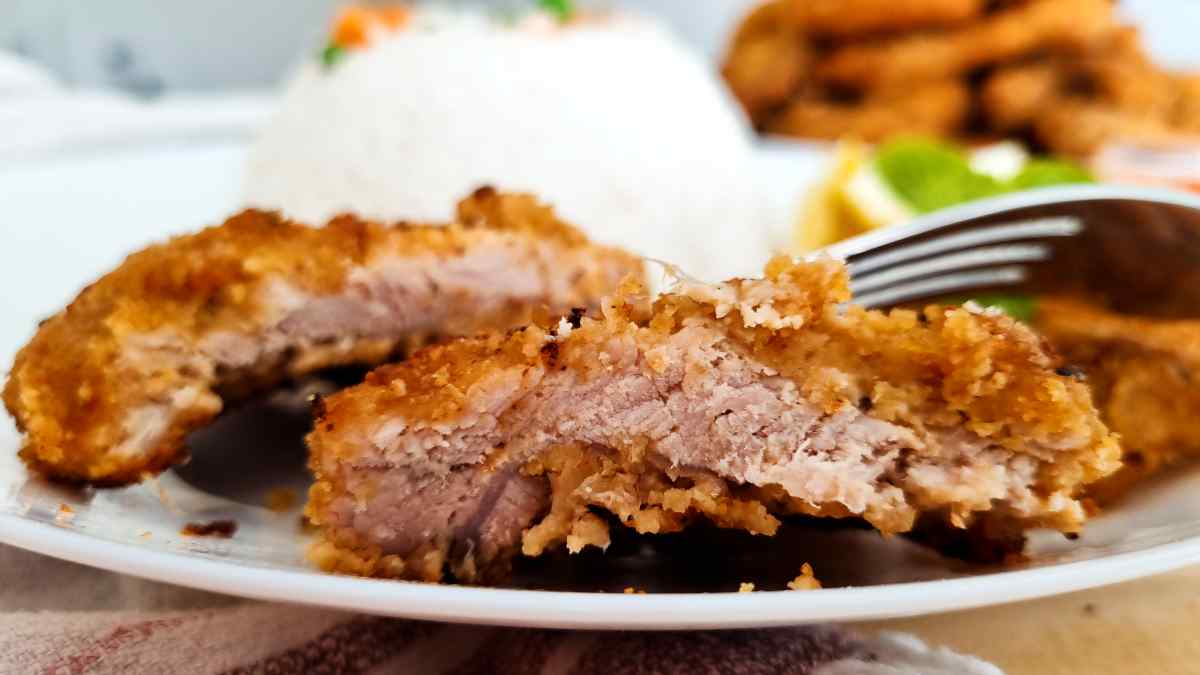
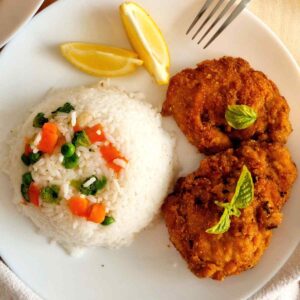
These delicious Gluten-Free Breaded Pork Chops are crispy and flavorful! Readers especially love this side of Cream Cheese Mashed Potatoes to go with the pork chops.
Jump to:
Why You Will Love This Recipe
- This recipe yields tender pork chops.
- Completely gluten and dairy free.
- You can bake these pork chops in the oven to make them healthier! They go great with savory rice recipes and mini aubergine pizzas!
- You can freeze these pork chops before frying and make them a part of your weekly meal prep.
What You Need for Gluten-Free Breaded Pork Chops
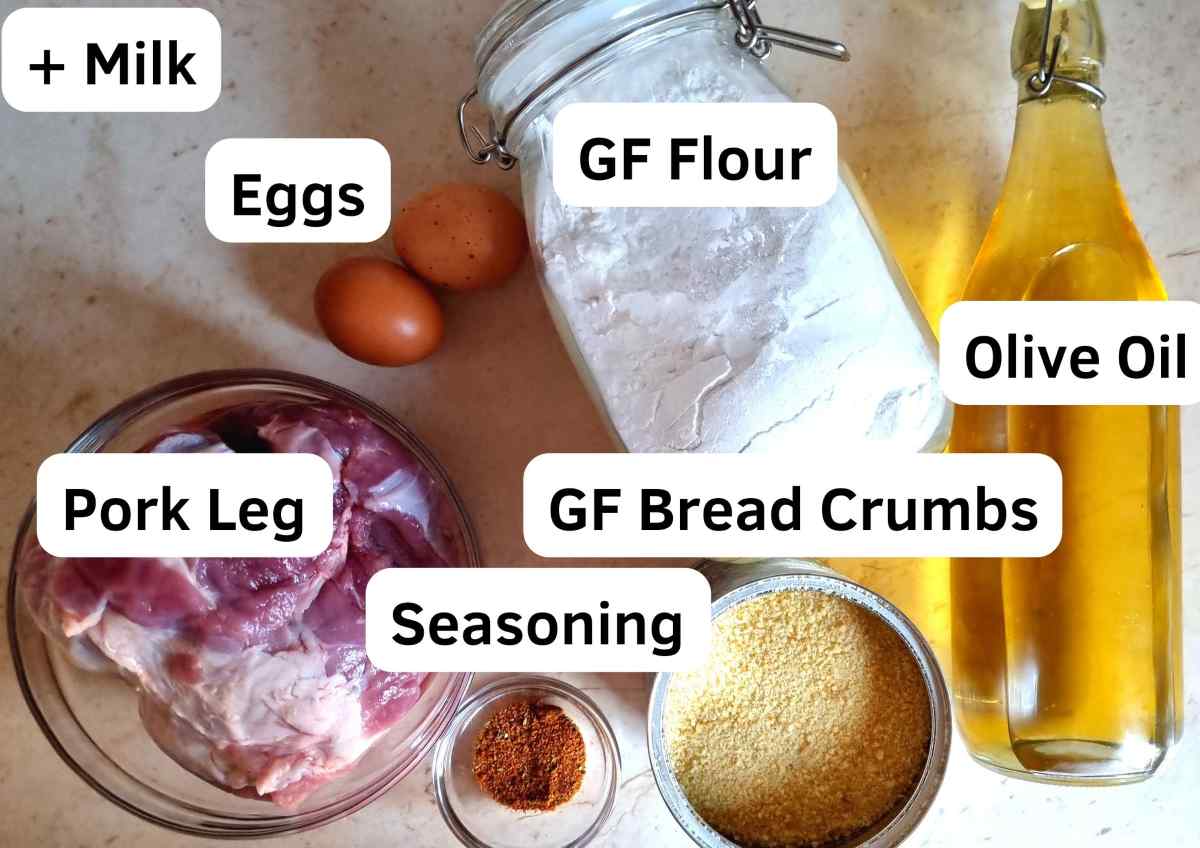
Flour - you can use any gluten-free blend, don't worry about a binding agent, and you don't need any gum in the flour for this recipe. You can also use this homemade rice-free gluten-free flour blend.
Bread crumbs - I used a food processor to make gluten-free bread crumbs out of my homemade bread. You can make low-carb pork chops out of low-carb gluten-free bread.
Pork - I used about 1.2 kg or 2.6 lbs of pork leg for this recipe. Make sure you buy a boneless cut!
Milk - use plant-based milk for dairy-free pork chops.
Pork chop seasoning - feel free to use any seasoning you like (like taco seasoning) but make sure it has a lot of salt. Otherwise, just follow my instructions for a homemade pork chop seasoning.
Substitutes
Pork - you can also use chicken slices.
Milk - you can also use sour cream or yogurt.
Flour - you can use almond flour to make it very low-carb!
Variations
Add parmesan cheese to the batter for more flavor. You can also add thyme, oregano, or other herbs to make the coating extra flavorful.
Bake these pork chops in the oven to make them healthier!
How to Make Gluten-Free Breaded Pork Chops
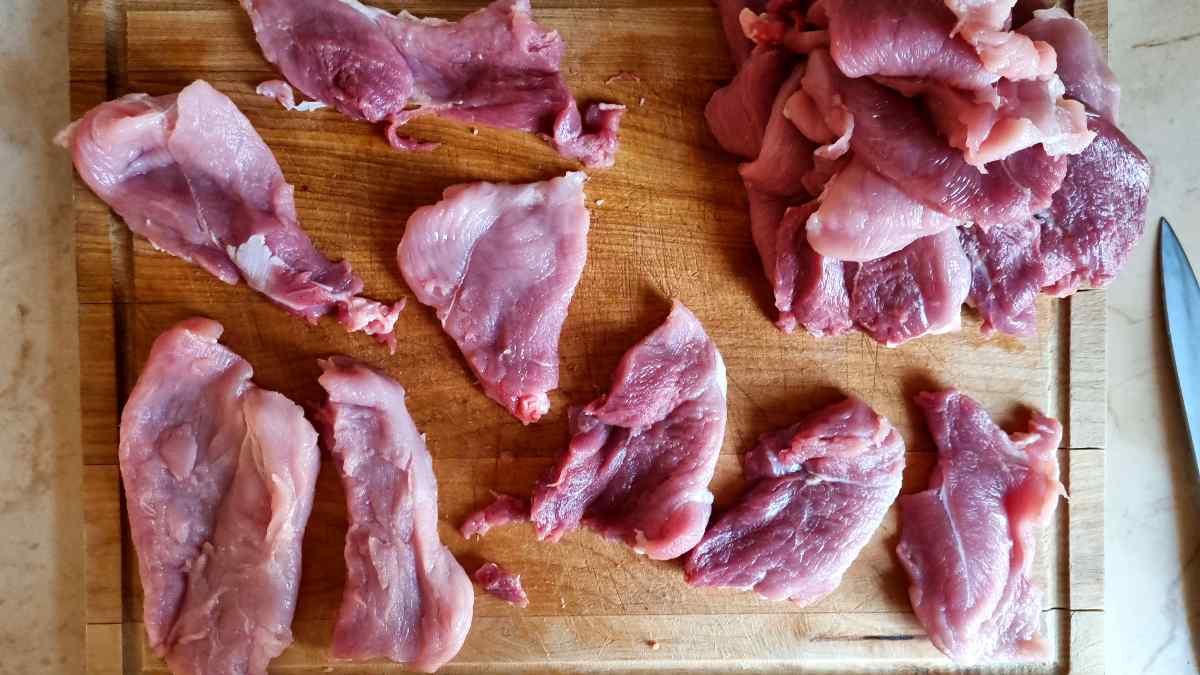
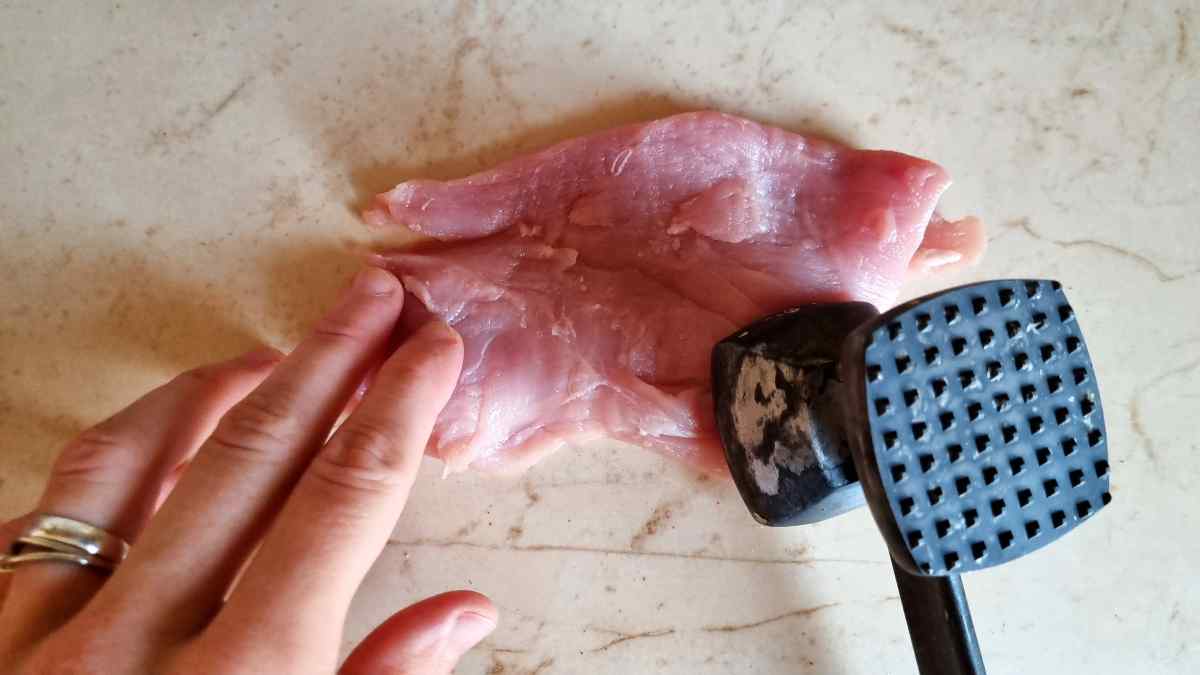
Step 1 - Cut and pound the meat
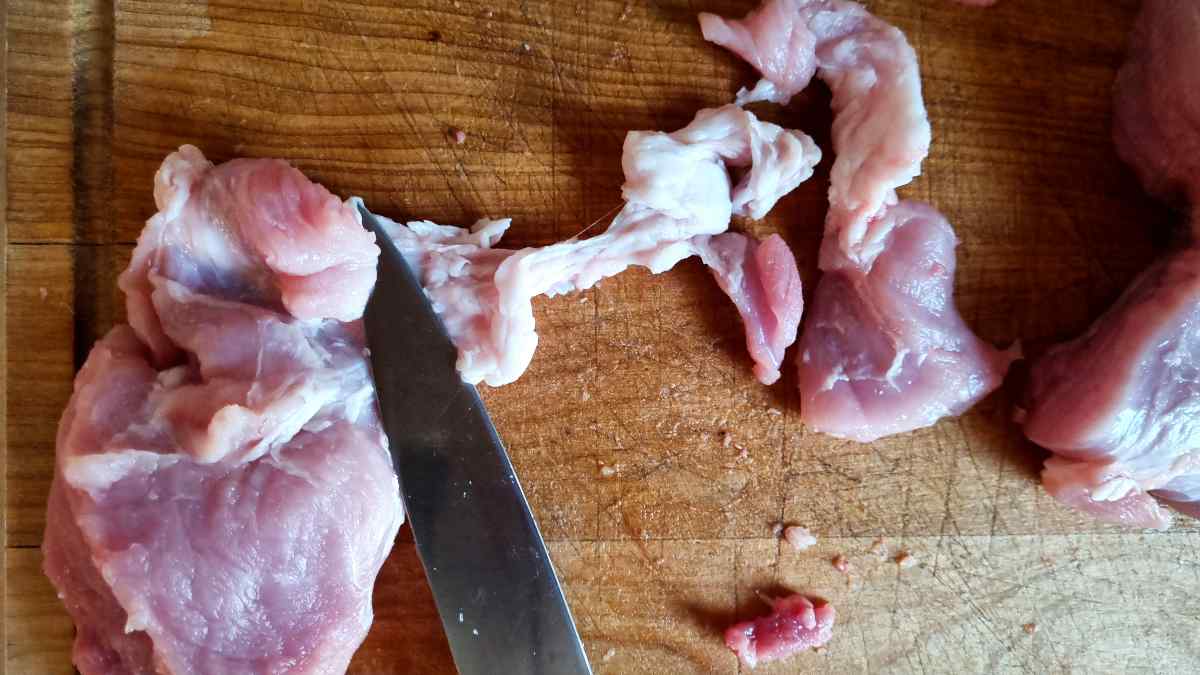
Slice the pork leg thinly. The slices will not be perfectly even and thin so you will need to pound them with a meat mallet. Make sure to cut out the white tissue from the meat slices (they are way to chewy if you leave them in).
TIP: if you don't have a meat mallet you can use a rolling pin to roll the meat out or just find something heavy that is suitable for pounding pork chops. You can be creative 🙂
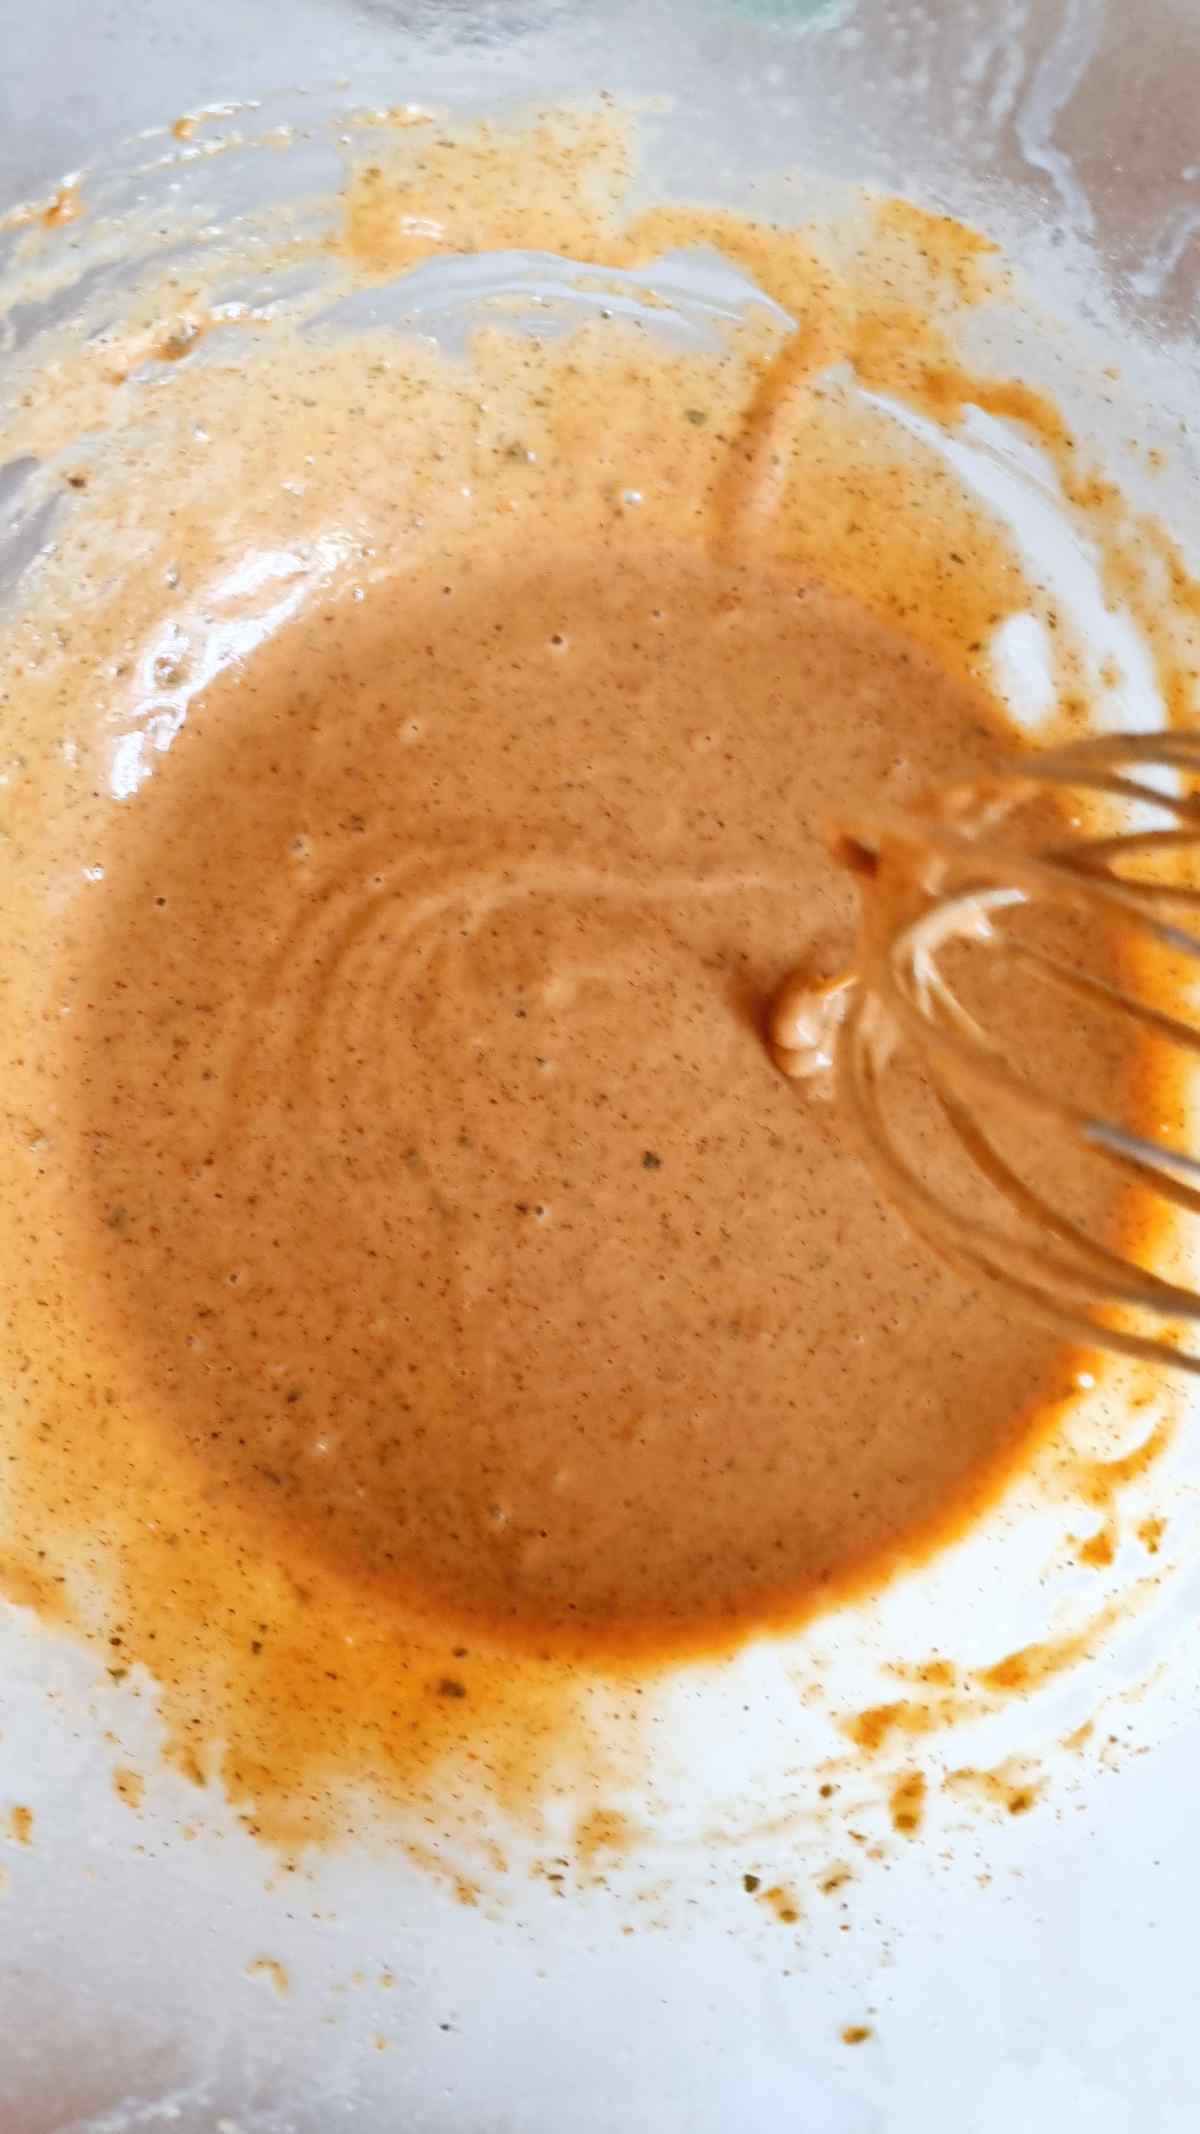
Step 2 - Prepare the batter
Whisk the eggs well, then add olive oil a drop at a time while vigorously whisking. Your goal is to allow the oil particles to break up and emulsify into the eggs. If you pour too much oil at once it won't emulsify and will separate from the eggs later.
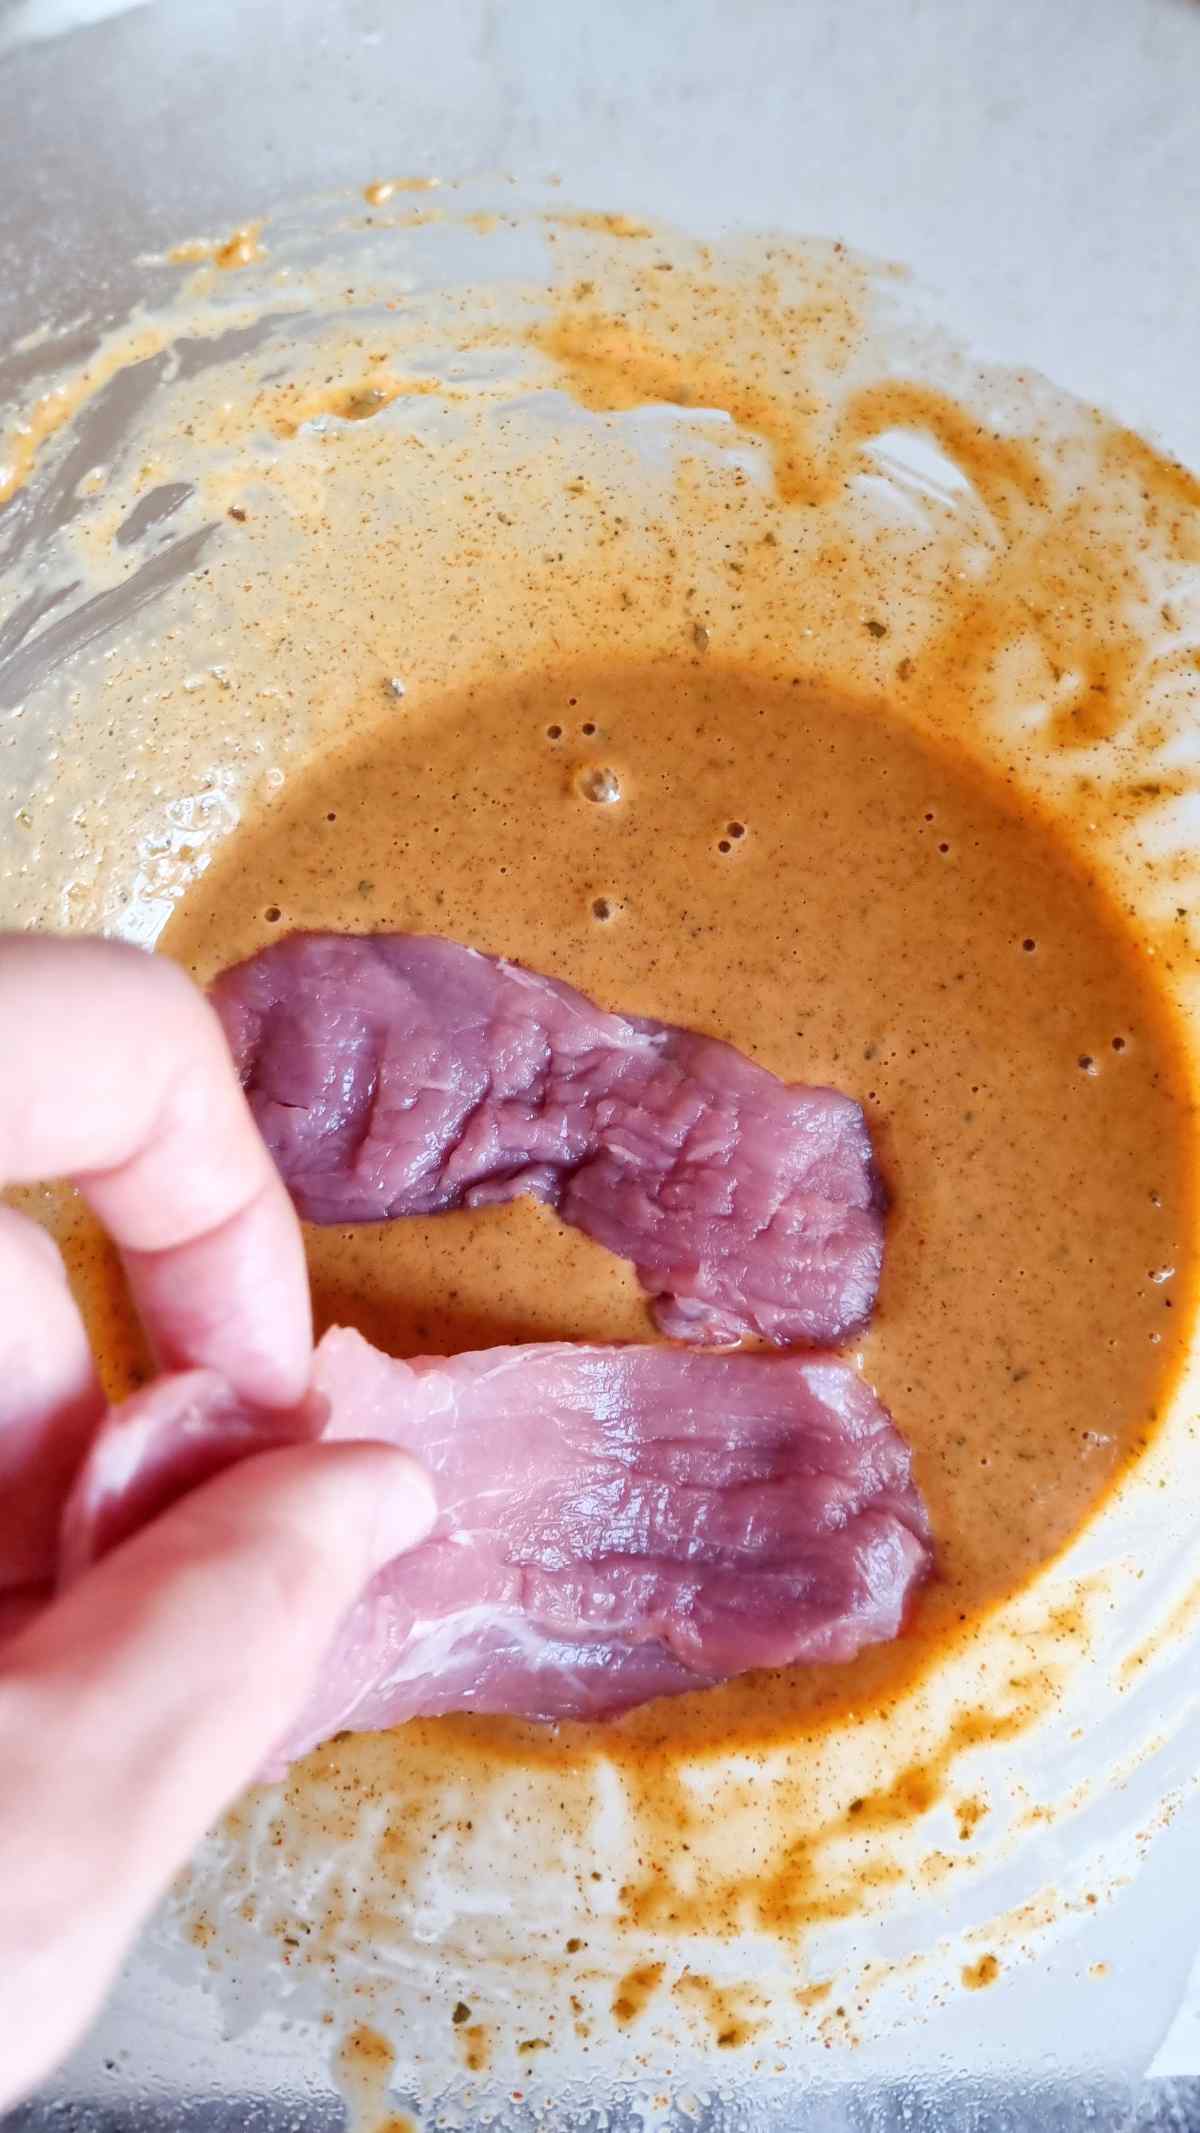
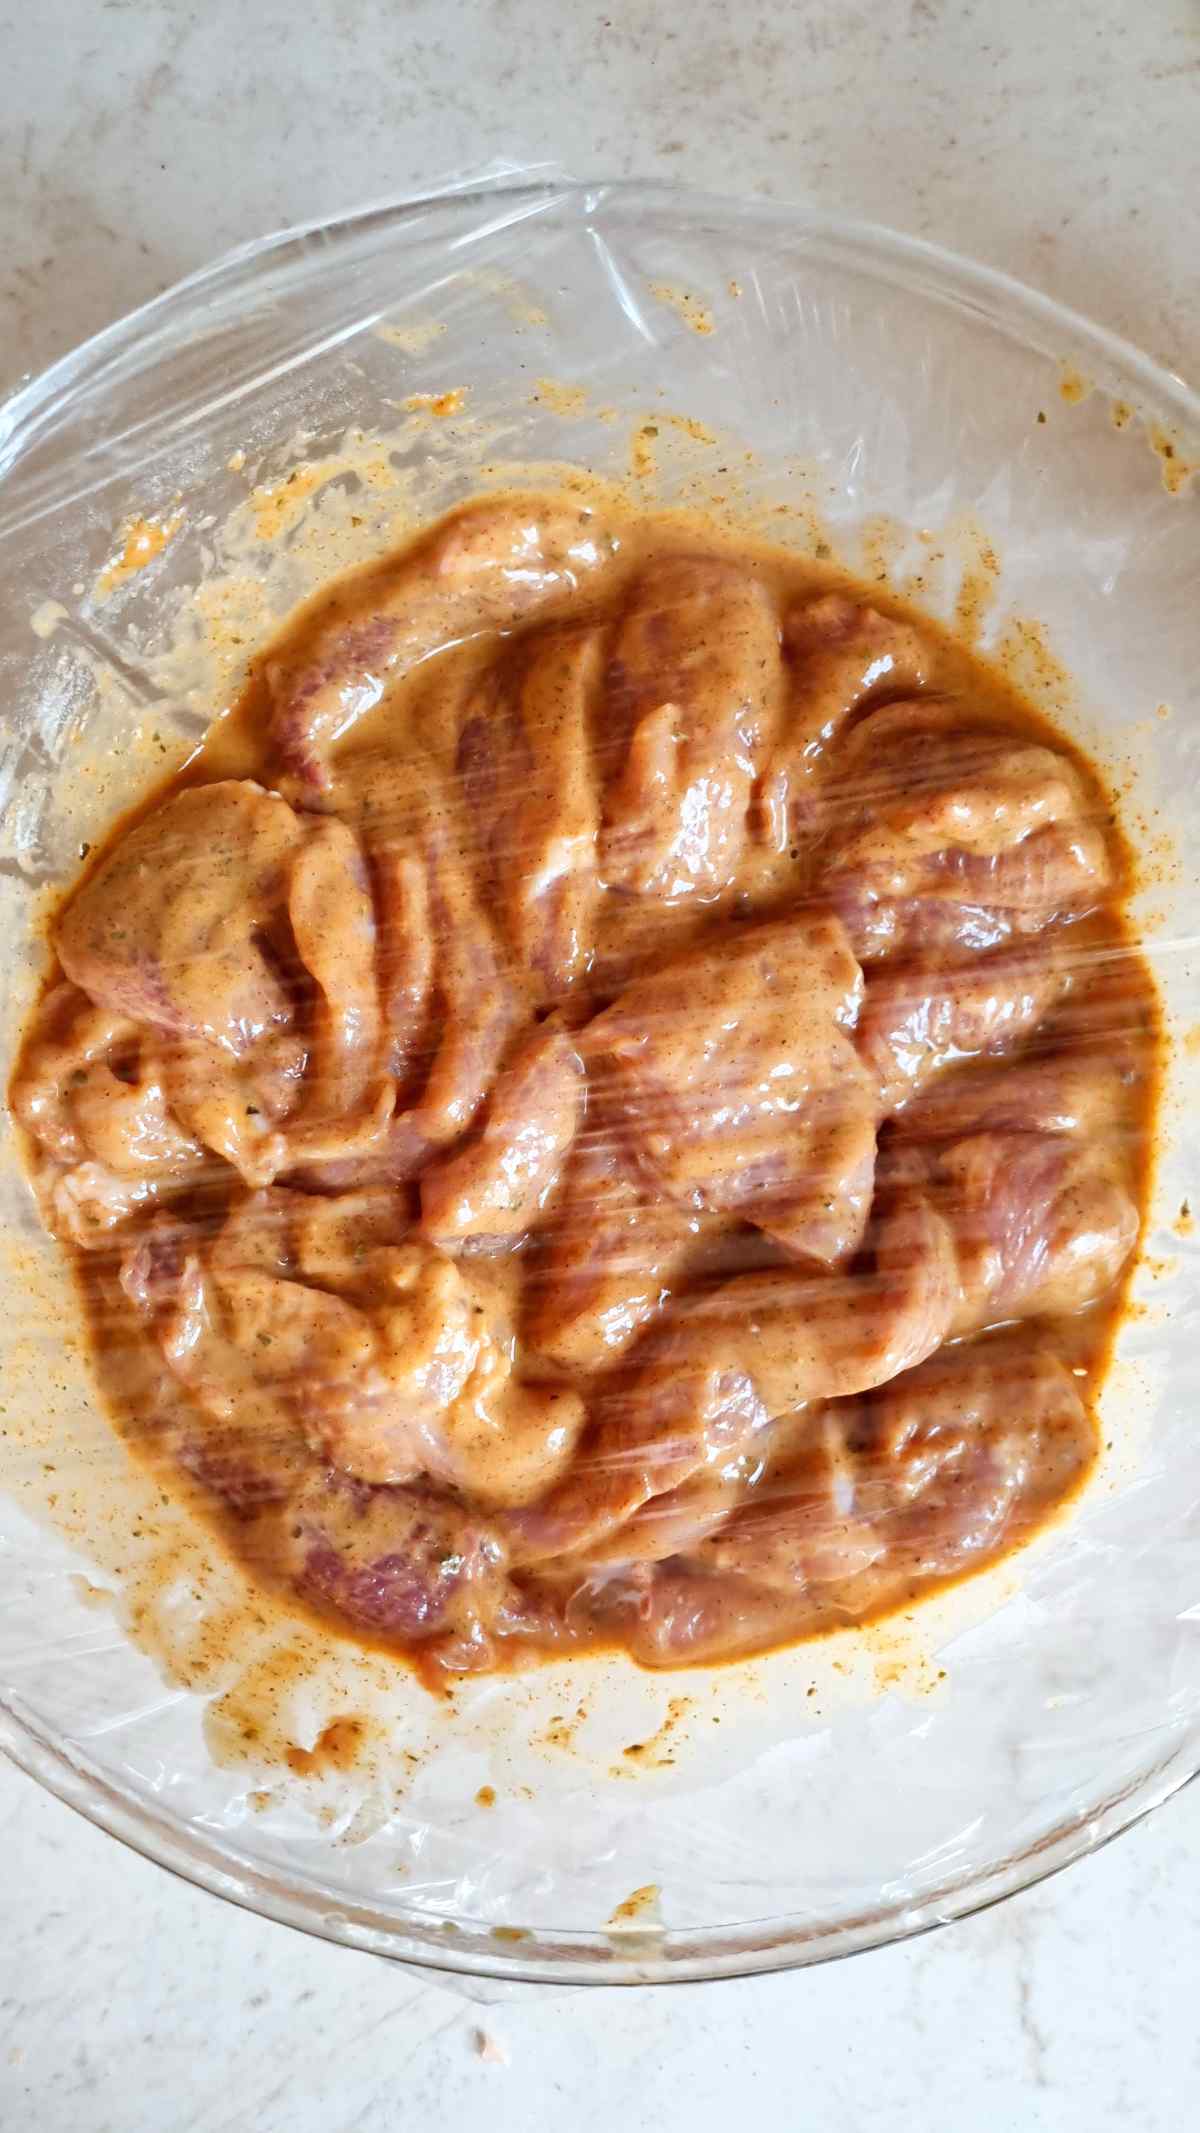
Add the seasoning and the flour. Pour a couple of tablespoon of milk into the batter until it becomes pourable. Then, place the pork slices one by one into the batter coating them well. Cover with plastic wrap and place in the refrigerator for 30-60 minutes.
Step 3 - Fry the meat
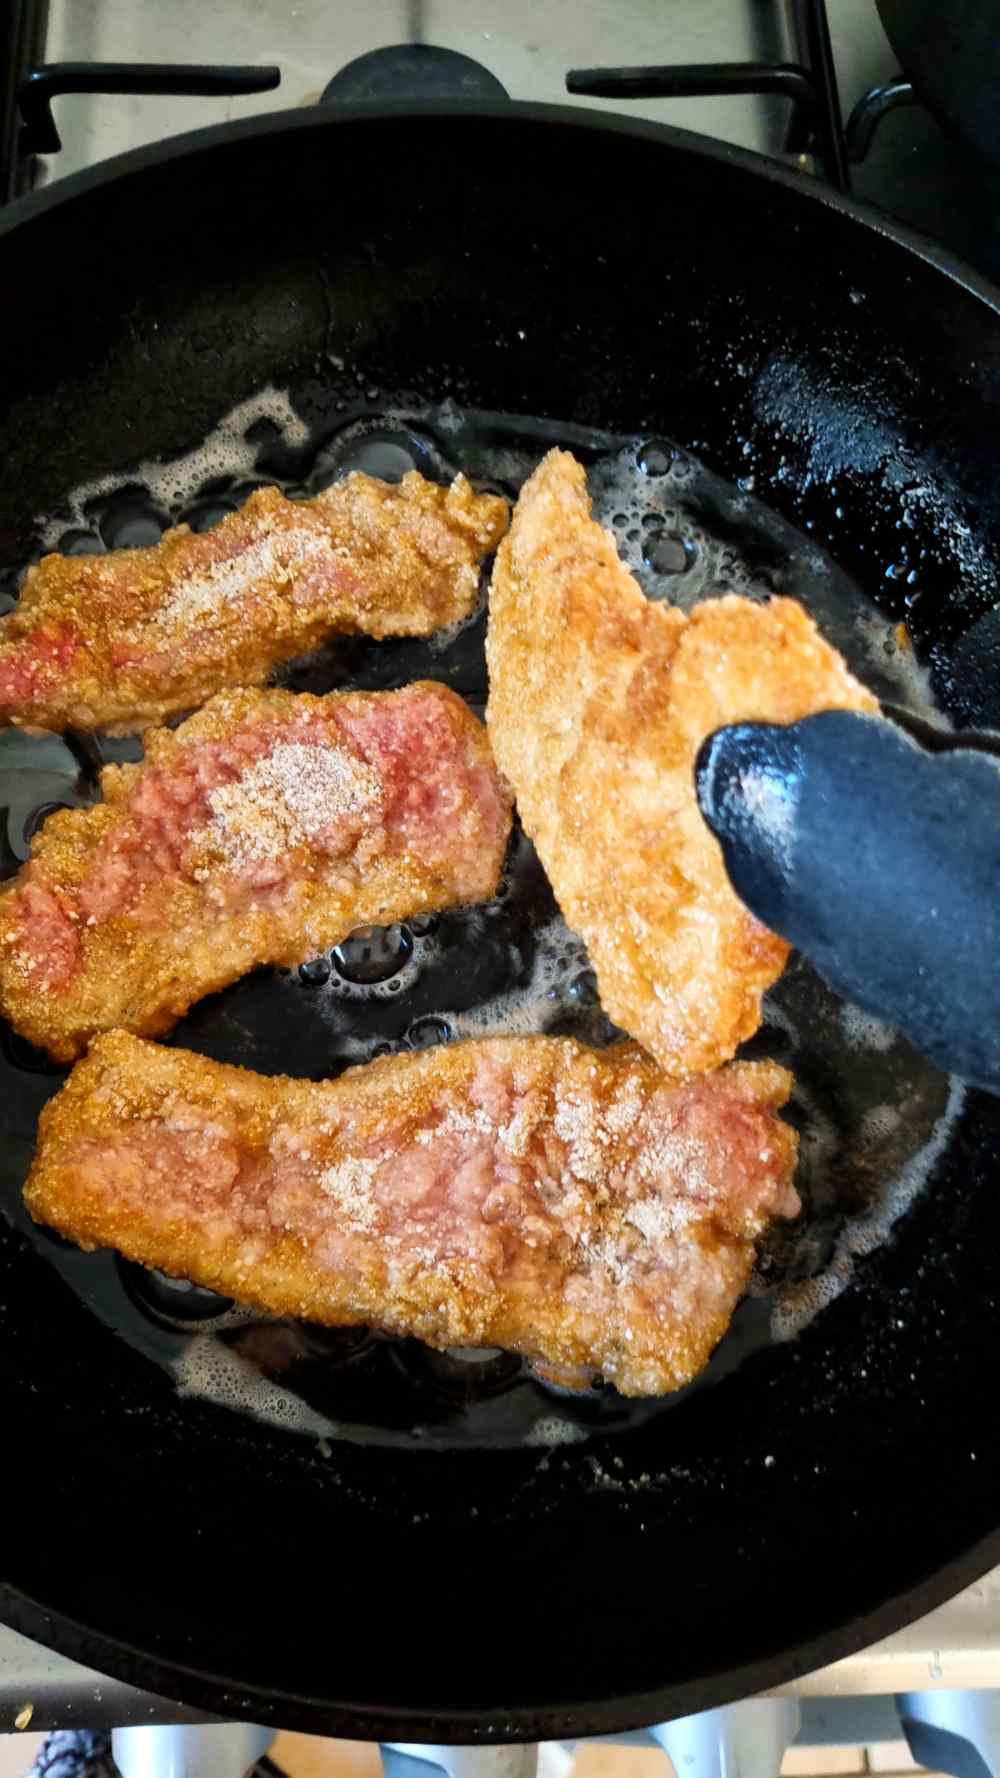
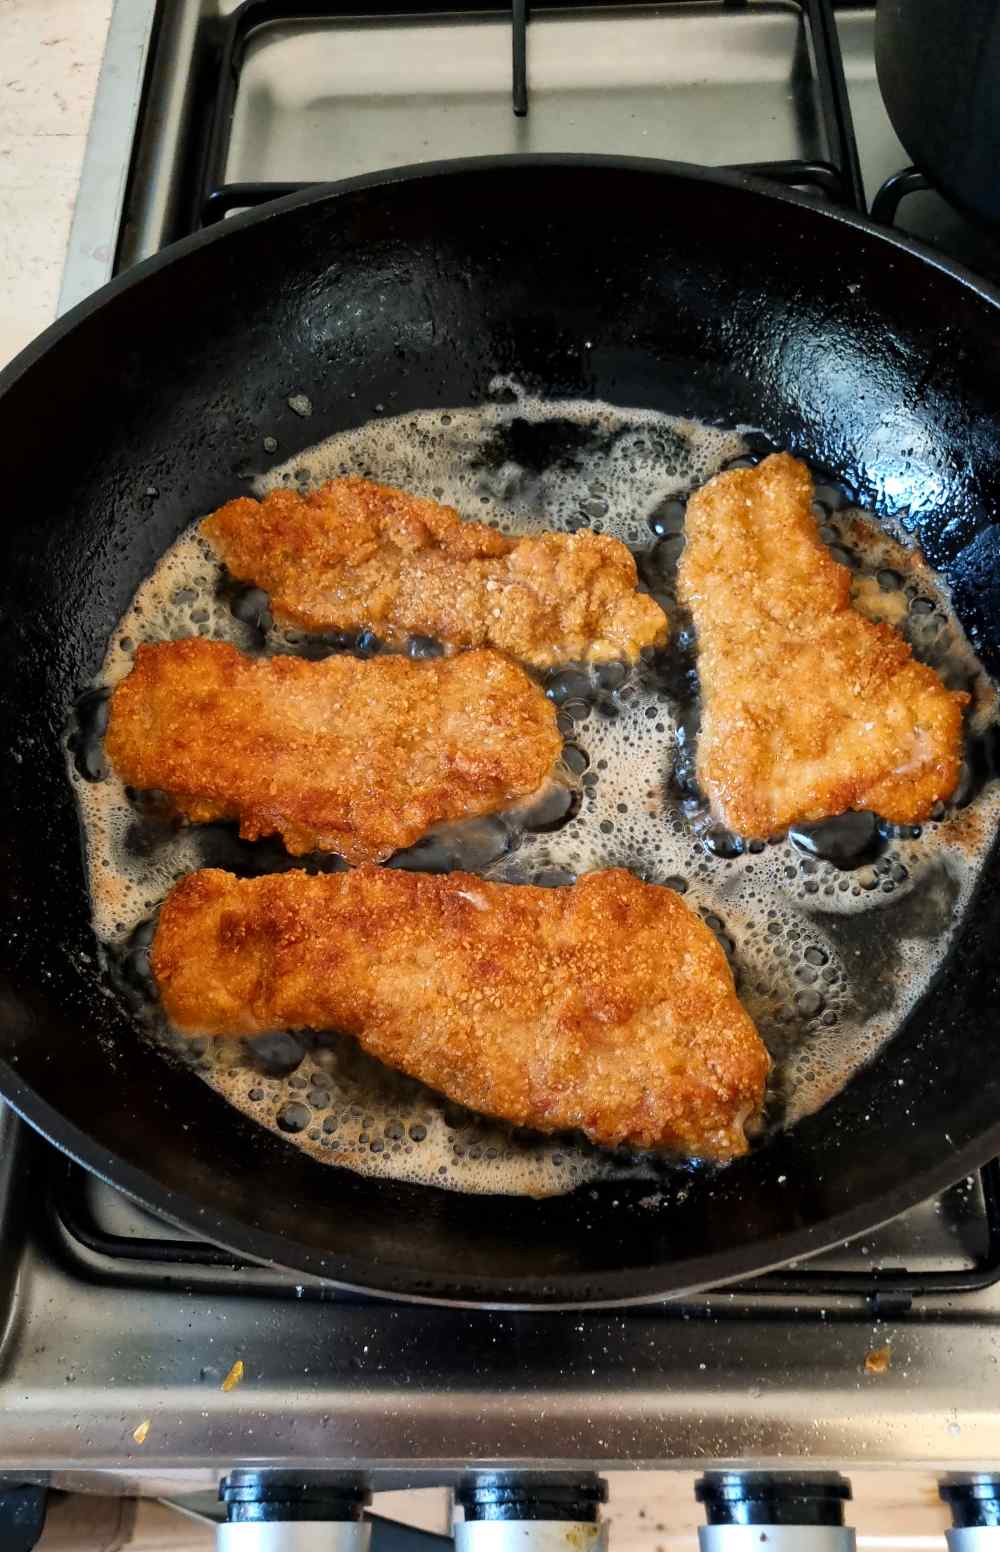
Preheat a large cast iron pan for 5-10 minutes on medium heat. Add frying oil to the pan (I used sunflower oil) until it comes up to about ⅛ of an inch. You can adjust the oil levels if you would like less oil in your cutlets.
Pour gluten-free breadcrumbs into a wide plate and dip each piece of meat into the breadcrumbs. Make sure the cutlets are covered in crumbs completely, then place 3-4 slices in the pan.
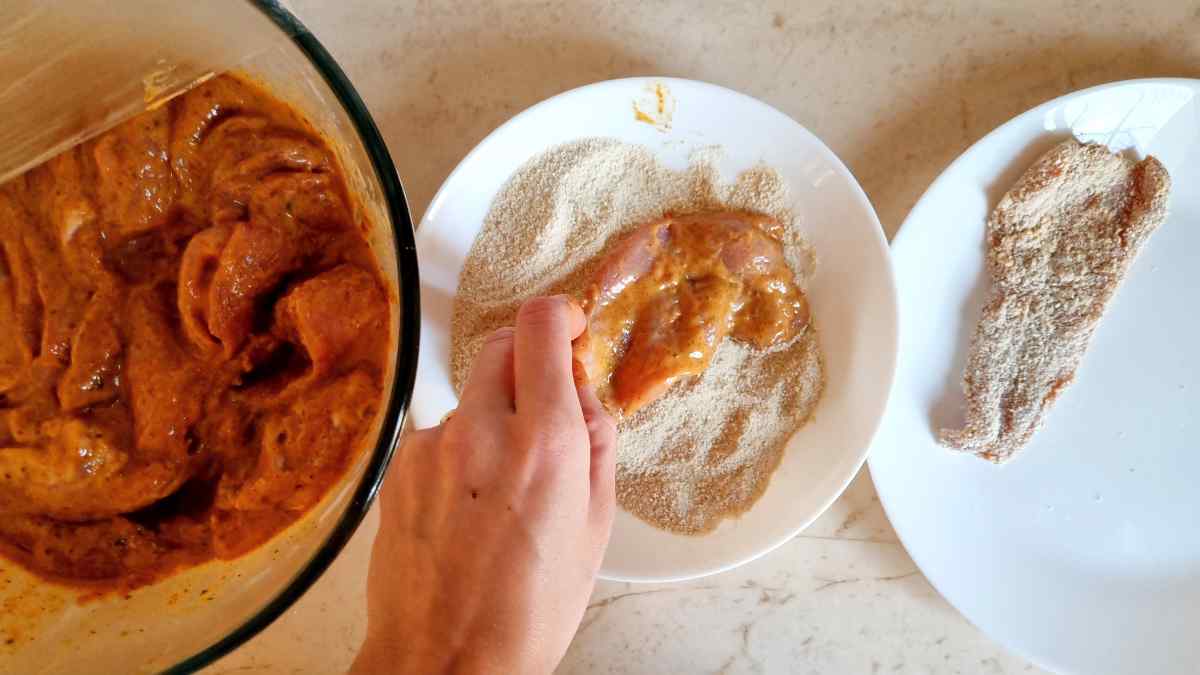
TIP: for more flavor, you can add salt, seasoning, or parmesan to the breadcrumbs.
Fry on medium heat for 3-4 minutes, then flip, fry for another 3-4 minutes, and transfer to a cooling rack. If you don't have a cooling rack line a plate with paper towels and place the cutlets onto that paper to let the oil be absorbed.

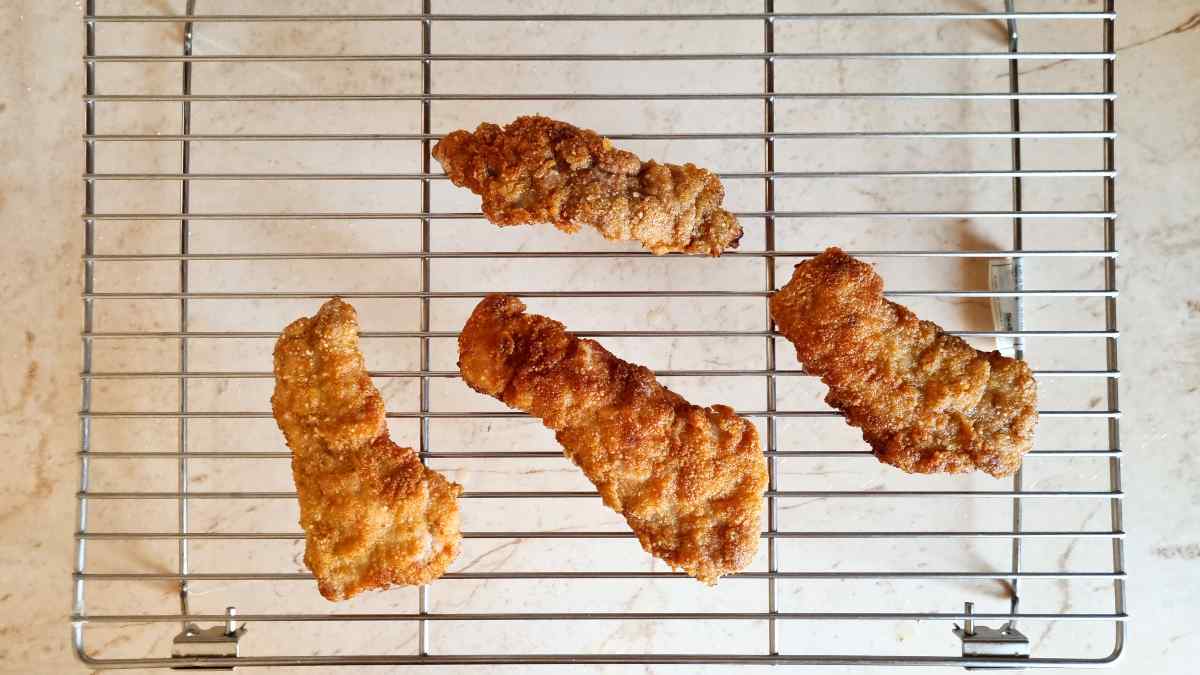
Repeat with the rest of the meat. Add oil as needed! Serve with mashed potatoes, rice, or with your favorite side.
Storage Tips
Store these pork chops in the refrigerator for 3-4 days or freeze them for up to 3-4 months! To defrost, place them in the microwave for a few minutes or into the oven at 350F/175C for 10-15 minutes or until ready. If you are freezing them raw, you will need to cook them according to the instructions once defrosted or cook longer if cooking straight from the freezer.
Expert Tips
- Make sure your knife is really sharp before slicing the meat. You will save yourself time by sharpening your knife first!
- After the first batch, cut one of the cutlets and see if it cooked through, then, adjust the time accordingly for the next batch. I generally don't watch the time anymore as I can tell the doneness of my pork cutlets by the browning. However, I always try the first batch, and if it is well done I fry the rest in the same way.
- Make sure you are using a lot of salt. The meat is not going to be seasoned from the inside so you need to make sure there is enough salt in the batter and breadcrumbs for the best results. You can also experiment with adding spices or Parmesan cheese to the breadcrumbs.
Recipe FAQs
Use beaten eggs to create a sticky surface that will keep the flour on the meat.
Use breadcrumbs for more texture! Skip the cornmeal-it tends to burn before the meat is fully cooked.
You can bake the meat in the oven by preheating it to 375F (170C) and baking for 20-30 minutes. In this case, I recommend using a thermometer as it will be really hard to tell when the meat is done just by the way it looks. The temperature of a cooked pork chop is 145F or 63C.
If you tried this Gluten-Free Breaded Pork Chops Recipe or any other recipe on my blog please leave a 🌟 star rating and let me know how it went in the 📝 comments below. Thanks for visiting!
Crispy Gluten-Free Breaded Pork Chops
Equipment
- 1 meat mallet (or be creative and use some other heavy opject)
- 1 cast iron pan (optional, but cast iron works better)
- 1 cooling rack (you can also use paper towels to absorb the oil)
Ingredients
- 1.2 kg (2.6 lbs) of boneless pork leg
- 2 eggs
- 2 tablespoon olive oil
- 2 tablespoon pork chop seasoning, you can use taco seasoning
- 72 grams (½ cup) gluten free flour
- 2 tablespoon milk use plant-based for dairy-free option
- gluten free bread crumbs use as many as you need to coat all slices, depends on their size.
- oil for frying I used sunflower oil
SAVE THIS RECIPE!💌
Instructions
- Slice the pork leg thinly. The slices will not be perfectly even, and thin so you must pound them with a meat mallet. Make sure to cut out the white tissue from the mea slices (they are way to chewy if you leave them in).
- Whisk the eggs well, then add olive oil a drop at a time while vigorously whisking. Your goal is to allow the oil particles to break up and emulsify into the eggs. If you pour too much oil at once it won't emulsify and will separate from the eggs later.
- Add the seasoning and the flour. Pour a couple of tablespoon of milk into the batter until it becomes pourable. Then, place the pork slices one by one into the batter coating them well. Cover with plastic wrap and place in the refrigerator for 30-60 minutes.
- Preheat a large cast iron pan for 5-10 minutes on medium heat. Add frying oil to the pan (I used sunflower oil) until it comes up to about ⅛ of an inch. You can adjust the oil levels if you would like less oil in your cutlets.
- Pour gluten free breadcrumbs into a wide plate and dip each piece of meat into the breadcrumbs. Make sure the cutlets are covered in crumbs completely, then place 3-4 slices in the pan.
- Fry on medium heat for 3-4 minutes, then flip, fry for another 3-4 minutes, and transfer to a cooling rack. If you don't have a cooling rack line a plate with paper towels and place the cutlets onto that paper to let the oil be absorbed.
- Repeat with the rest of the meat. Add oil as needed! Serve with mashed potatoes, rice, or with your favorite side.

Hannah says
Thank you for sharing this recipe. I was looking for something like this in a gluten-free version!