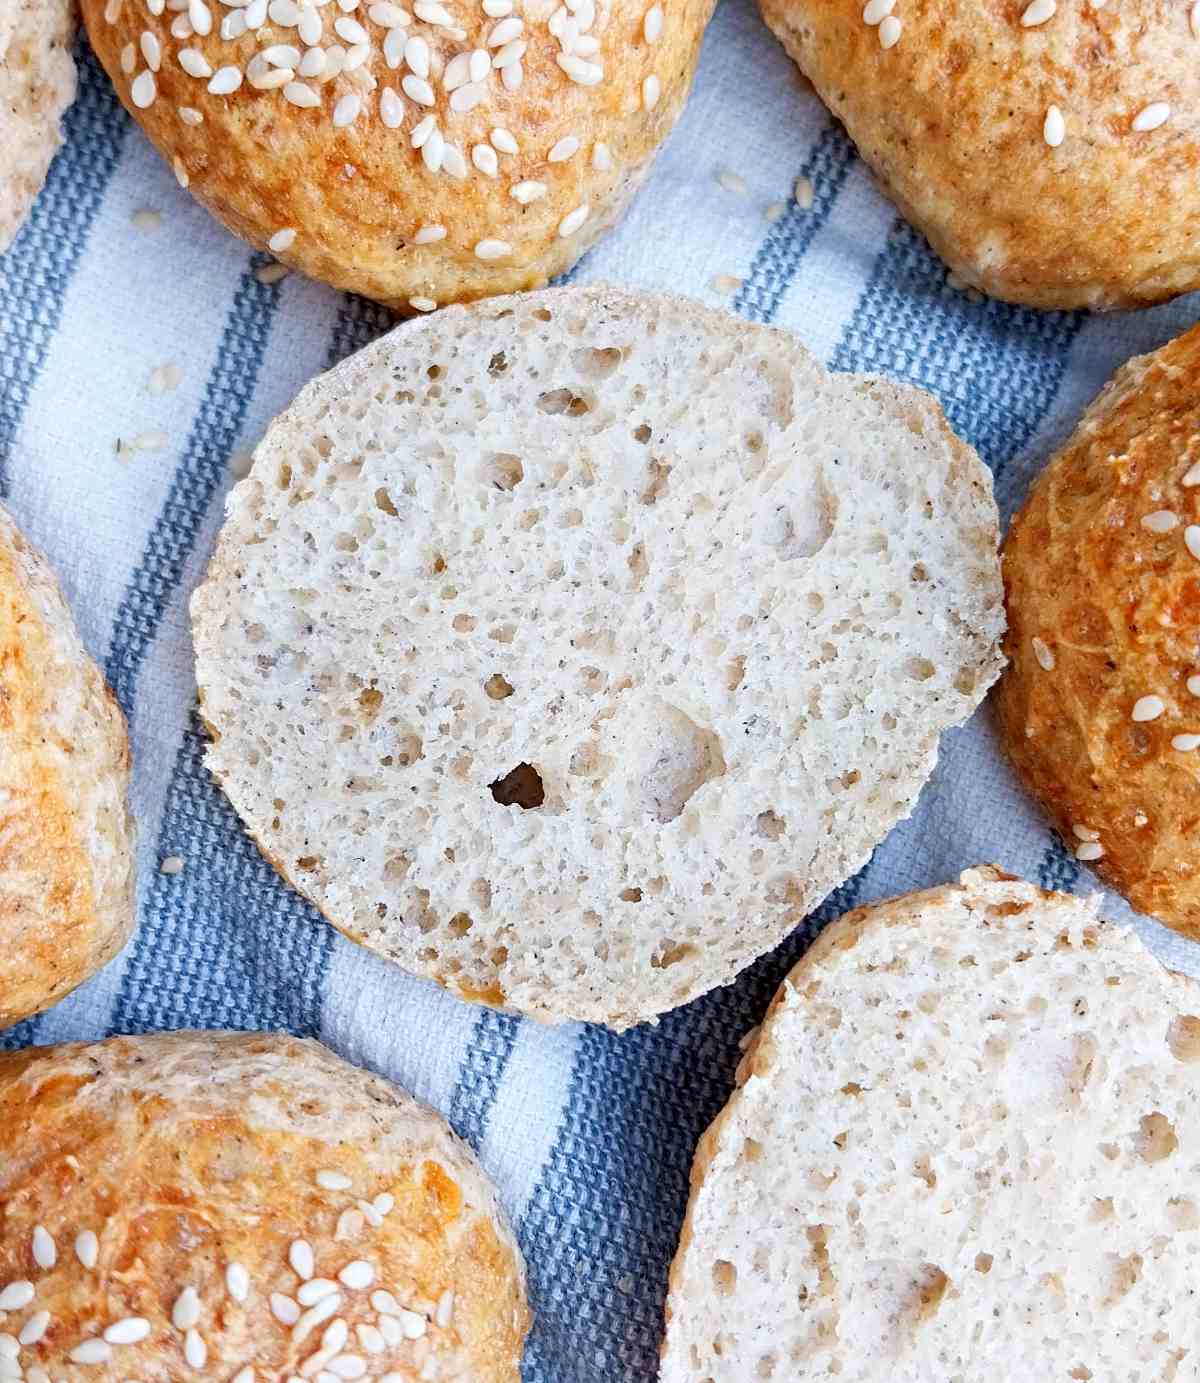
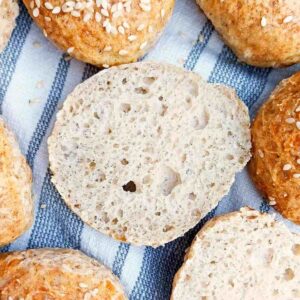
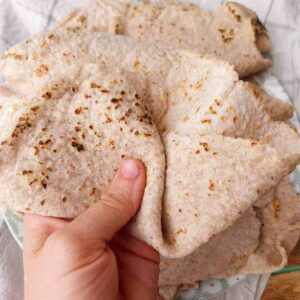
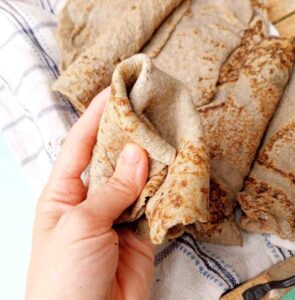
Here you will find the best plushy soft Gluten-Free Slider Buns to make for an upcoming Memorial Day party! These are a variation of my soft-crusted gluten-free Dutch oven bread that readers absolutely love.

These gluten-free slider buns are a perfect gluten-free tailgate food idea, and a great treat for Memorial Day! They are so soft and flavorful, your guests won't guess these are gluten-free.
This recipe was in part inspired by my gluten-free sourdough hamburger buns and can be eaten together with these gluten-free breaded pork chops.
Jump to:
Why You Will Love This Recipe
- The softest gluten-free buns you will ever have!
- Ready within a couple hours, just like my buckwheat bread rolls.
- The buns have a soft top (unlike many other GF recipes) just like my soft & fluffy gluten-free sourdough.
Ingredients for Gluten-Free Sliders

Ingredient notes:
- Psyllium husk - I recommend using whole husks for the best results, although powder can be used, too, if that's all you have. See my psyllium husk guide for details!
- Oil - You can use sunflower, coconut, avocado, olive, or any other neutral seed or vegetable oil.
- Instant yeast - I don't recommend active dry yeast because you need to activate it before use.
See the recipe card for quantities.
Substitutions
Eggs - use 2 flax eggs (mix 10g of flaxseed powder or 2 tablespoon of flaxseed meal with 110g of water, whisk, and set aside for 10 minutes to let it thicken) for vegan slider buns.
Milk - use plant-based milk for dairy-free slider buns.
Xanthan gum - you can use guar gum instead.
Psyllium husk - this ingredient can't be substituted.
Sorghum flour - you can use brown rice or buckwheat flour instead.
Tapioca starch - use arrowroot starch instead.
Potato starch - cornstarch is a good substitute.
How to Make Gluten-Free Slider Buns

Step 1. Add water and psyllium husk to a medium-sized bowl and whisk well to incorporate.
Set the bowl aside to let the psyllium gel form (about 2 min).

Step 2. In a large mixing bowl, combine all of the dry ingredients, including sugar, and whisk thoroughly to incorporate.

Step 3. Add the wet and dry ingredients together and mix using an electric mixer fitted with dough hooks. Mix on medium-high speed for at least 5 minutes to ensure a smoother, more cohesive dough. About halfway through, scrape down the sides and bottom of the bowl with a silicone spatula to make sure all flour is incorporated.
You can mix using a sturdy wooden spoon or even your hands if necessary, though this may result in less smooth tops.
Note: The dough will be fairly sticky - that's normal! Resist the urge to add extra flour to the dough.

Step 4. Dust the working surface with gluten-free flour and turn the dough onto it. Shape the dough into a ball, dusting it as you go to prevent sticking.
Divide the dough ball into 16 parts using a bench scraper as you would for scones (see picture). You can use a scale or simply eyeball the parts for this step.

Step 5. Slightly wet or oil your hands before shaping the buns to prevent sticking. Shape each dough part into a small, tight ball and place them onto a baking sheet lined with parchment paper or a baking mat.
Cover the buns and let them proof at room temperature for about 1-1.5 hours. The buns will puff up but won't double in size.
To speed up the process, place the buns uncovered into the oven at 120°F/50°C (not higher).

Step 6. Once the buns are done rising, take them out of the oven (if that's where they were) and start preheating it to 350°F/175°C. In the meantime, prepare the egg wash by whisking an egg in a small bowl.
Gently brush the buns with an egg wash and top with sesame seeds. For the vegan version, use oil instead of the egg.
Once the oven is ready, bake the buns for 30 minutes, then carefully remove them from the oven and let them sit on the baking sheet for 10 minutes, then you can transfer them to a cooling rack. Enjoy!
Expert tips
- Don't open the oven during baking to prevent the buns from collapsing.
- Make sure the buns are spaced out and aren't touching to ensure a thorough bake-through, like you would with these gluten-free sourdough hot cross buns.
- Mix the dough for 5-10 minutes for extra smooth tops like in these gluten-free sourdough dinner rolls.
- Keep the buns at room temperature for up to 3 days or freeze for up to 3 months. Defrost in the microwave, oven, or thaw at room temperature.
Gluten-Free Slider Recipes to Try:
Common Questions
A burger bun is for a full-size meat patty, so it is much larger than a slider bun. Slider buns are best for mini-patties to build mini-burgers as finger foods to entertain guests, for example.
Psyllium husk gives gluten-free bread its moisture and chewiness. Adding xanthan gum along with it enhances the wheat-like texture, while eggs, oil, and milk contribute to a soft crust and richer flavor.
More Gluten-Free Recipes You Will Love!


Gluten-Free Slider Buns
Ingredients
Psyllium Gel
- 20 grams whole psyllium husks whole psyllium husks
- 260 grams water warm or room temperature
Dry Ingredients
- 130 grams tapioca starch or arrowroot starch
- 100 grams potato starch or cornstarch
- 170 grams sorghum flour or brown rice flour
- 15 grams sugar add more for sweeter buns
- 7 grams instant yeast if using active dry yeast, activate it with some of the water or milk from the recipe
- 7 grams xanthan gum or guar gum
- 8 grams baking powder don't use baking soda
- 12 grams sea salt
Wet Ingredients
- 100 grams milk use plant-based for dairy-free
- 2 medium-large eggs or use flax eggs
- 30 grams any neutral oil I used sunflower oil
SAVE THIS RECIPE!💌
Instructions
- Add water and psyllium husk to a medium-sized bowl and whisk well to incorporate.Set the bowl aside to let the psyllium gel form (about 2 min).20 grams whole psyllium husks, 260 grams water
- In a large mixing bowl, combine all of the dry ingredients, including sugar, and whisk thoroughly to incorporate.130 grams tapioca starch, 100 grams potato starch, 170 grams sorghum flour, 15 grams sugar, 7 grams instant yeast, 7 grams xanthan gum, 8 grams baking powder, 12 grams sea salt
- Add the wet and dry ingredients together and mix using an electric mixer fitted with dough hooks. Mix on medium-high speed for at least 5 minutes to ensure a smoother, more cohesive dough. About halfway through, scrape down the sides and bottom of the bowl with a silicone spatula to make sure all flour is incorporated.100 grams milk, 2 medium-large eggs, 30 grams any neutral oil
- You can mix using a sturdy wooden spoon or even your hands if necessary, though this may result in less smooth tops.Note: The dough will be fairly sticky - that's normal! Resist the urge to add extra flour to the dough.
- Dust the working surface with gluten-free flour and turn the dough onto it. Shape the dough into a ball, dusting it as you go to prevent sticking.
- Divide the dough ball into 16 parts using a bench scraper as you would for scones (see picture). You can use a scale or simply eyeball the parts for this step.
- Slightly wet or oil your hands before shaping the buns to prevent sticking. Shape each dough part into a small, tight ball and place them onto a baking sheet lined with parchment paper or a baking mat.
- Cover the buns and let them proof at room temperature for about 1-1.5 hours. The buns will puff up but won't double in size. To speed up the process, place the buns uncovered into the oven at 120°F/50°C (not higher).
- Once the buns are done rising, take them out of the oven (if that's where they were) and start preheating it to 350°F/175°C. In the meantime, prepare the egg wash by whisking an egg in a small bowl.Gently brush the buns with an egg wash and top with sesame seeds. For the vegan version, use oil instead of the egg.
- Once the oven is ready, bake the buns for 30 minutes, then carefully remove them from the oven and let them sit on the baking sheet for 10 minutes, then you can transfer them to a cooling rack. Enjoy!
Notes
- Don't open the oven during baking to prevent the buns from collapsing.
- Make sure the buns are spaced out and aren't touching to ensure a thorough bake-through, like you would with these gluten-free sourdough hot cross buns.
- Mix the dough for 5-10 minutes for extra smooth tops like in these gluten-free sourdough dinner rolls.
- Keep the buns at room temperature for up to 3 days or freeze for up to 3 months. Defrost in the microwave, oven, or thaw at room temperature.

Sherry Ewy says
Natasha, I love your recipes! You are helping me make wonderful bread for my family❤️. Do you have a list of what flours can be subbed out for each other? I think buckwheat would be good , maybe? Or would teff work?
Natasha Levai says
Hi Sherry! You can use buckwheat or teff, the one thing to keep an eye on is the hydration. Some flour types absorb more liquids than others, so you will need to adjust the amount of water accordingly. I can't tell how much water you will need exactly, but generally, millet will absorb a lot, brown rice and sorghum flour absorb about the same amount of water as their weight (or a bit more), buckwheat and white rice might need less water.
Sonu says
Hi
wondering if anyone has tried this recipe eggless (with flax egg) ?
Will replacing eggs with flax egg work? Pls help
Natasha Levai says
These are perfectly soft and have no once of gumminess. Perfect for gluten-free sliders!