In this post, you will learn about all the ways you can make your starter stronger! While you grow your starter, check out this sourdough cinnamon babka recipe to make later.
Jump to:
What is a sourdough starter?
Sourdough starter is only a different type of yeast but is natural and bread made with it has great health benefits!
Ultimately, a sourdough starter is flour and water mixed together and left for a time on its own. The bacteria and yeast that are naturally present in the flour feed on the sugars that are released when water breaks the starches down. As the yeast and bacteria consume the sugars, we get the bubbly rise of our sourdough which will eventually raise your loaf when baking.
Methods For Activating a Starter
The most common method involves regular feeding and discarding of the starter mixture. You gradually strengthen your bacteria and create a culture that will leaven your bread and give it a sour flavor.
Another way of making an easy sourdough starter is with yeast water. For that you need to make the yeast water (which takes 4 days), then you can add it to flour and water and have a ready-to-bake sourdough starter within 12 hours. However, the yeast water needs to be remade every couple of months.
This post contains affiliate links, which means that if you purchase the products recommended in this post, I make a small commission at no cost to you. You will not be charged extra for purchasing through the links. To read my full disclosure click here.
Best Four For Strengthening a Starter
To strengthen a weak starter try feeding it whole wheat flour or rye flour for a week. Whole wheat tends to give a better rise and once the starter is strong enough, you can use 50% all-purpose flour and 50% whole wheat or rye flour. To give an extra boost to your starter, add 1 teaspoon of honey. You don't have to add honey every single time, but it does help at the beginning.
Best Water For a Stronger Starter
Water could be the reason why your starter is not rising well. Generally, if you can drink tap water in your area, it should be good for the starter as well. If the water has chlorine, use bottled water instead, as chlorine can kill certain types of bacteria.
How To Make A Strong Starter
DAY 1
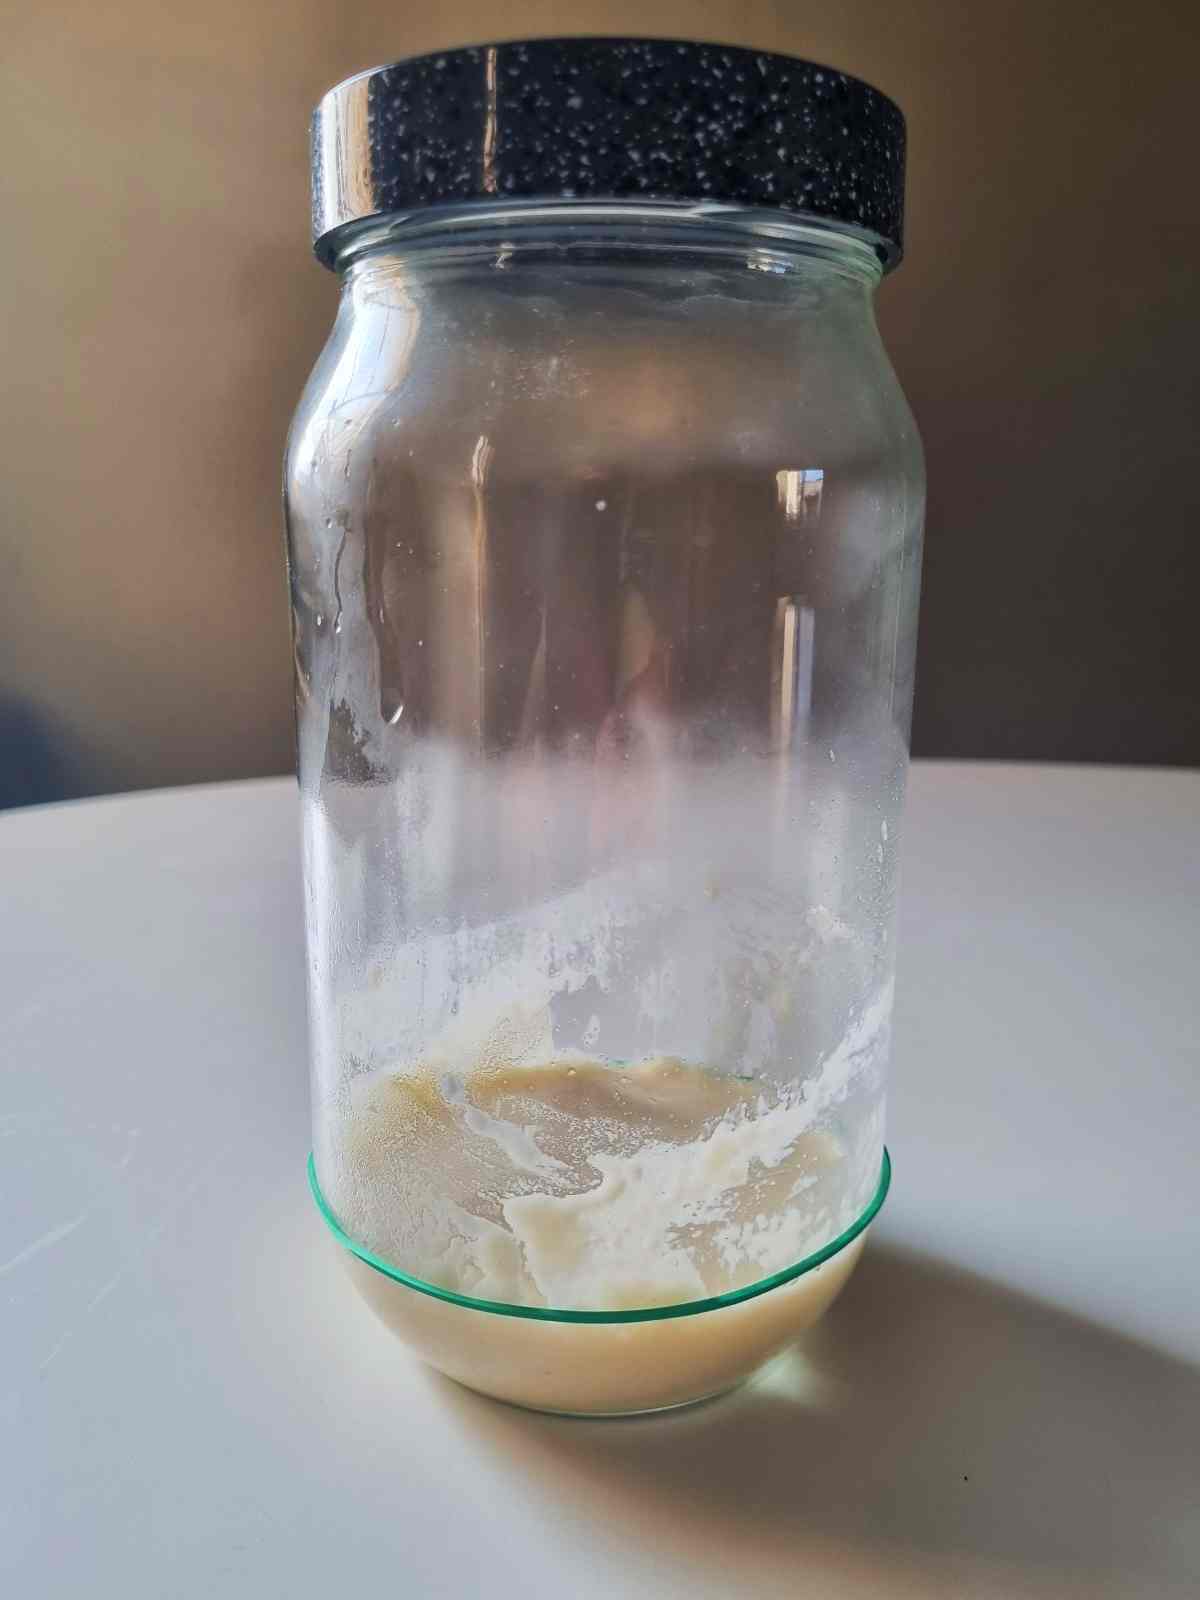
STEP 1 - Mix 50g water and 50g flour of your choice (or ¼ cup water and ½ cup flour) with a chopstick or any other tool you have (I use a spoon or a knife). Stir the mixture until you don’t see any dry flour bits left.
STEP 2 - Place the rubber band on the glass jar at the top level of your mixture.
STEP 3 - Place the lid on the top loosely (or use cheesecloth). This will allow for slight air circulation and prevent bugs from entering.
STEP 4 - Place the jar in a place with about 70F or 21C (a +2 or -2 degree difference is totally fine!) If the air is colder it is alright, it just might take a bit more time for the sourdough to rise.
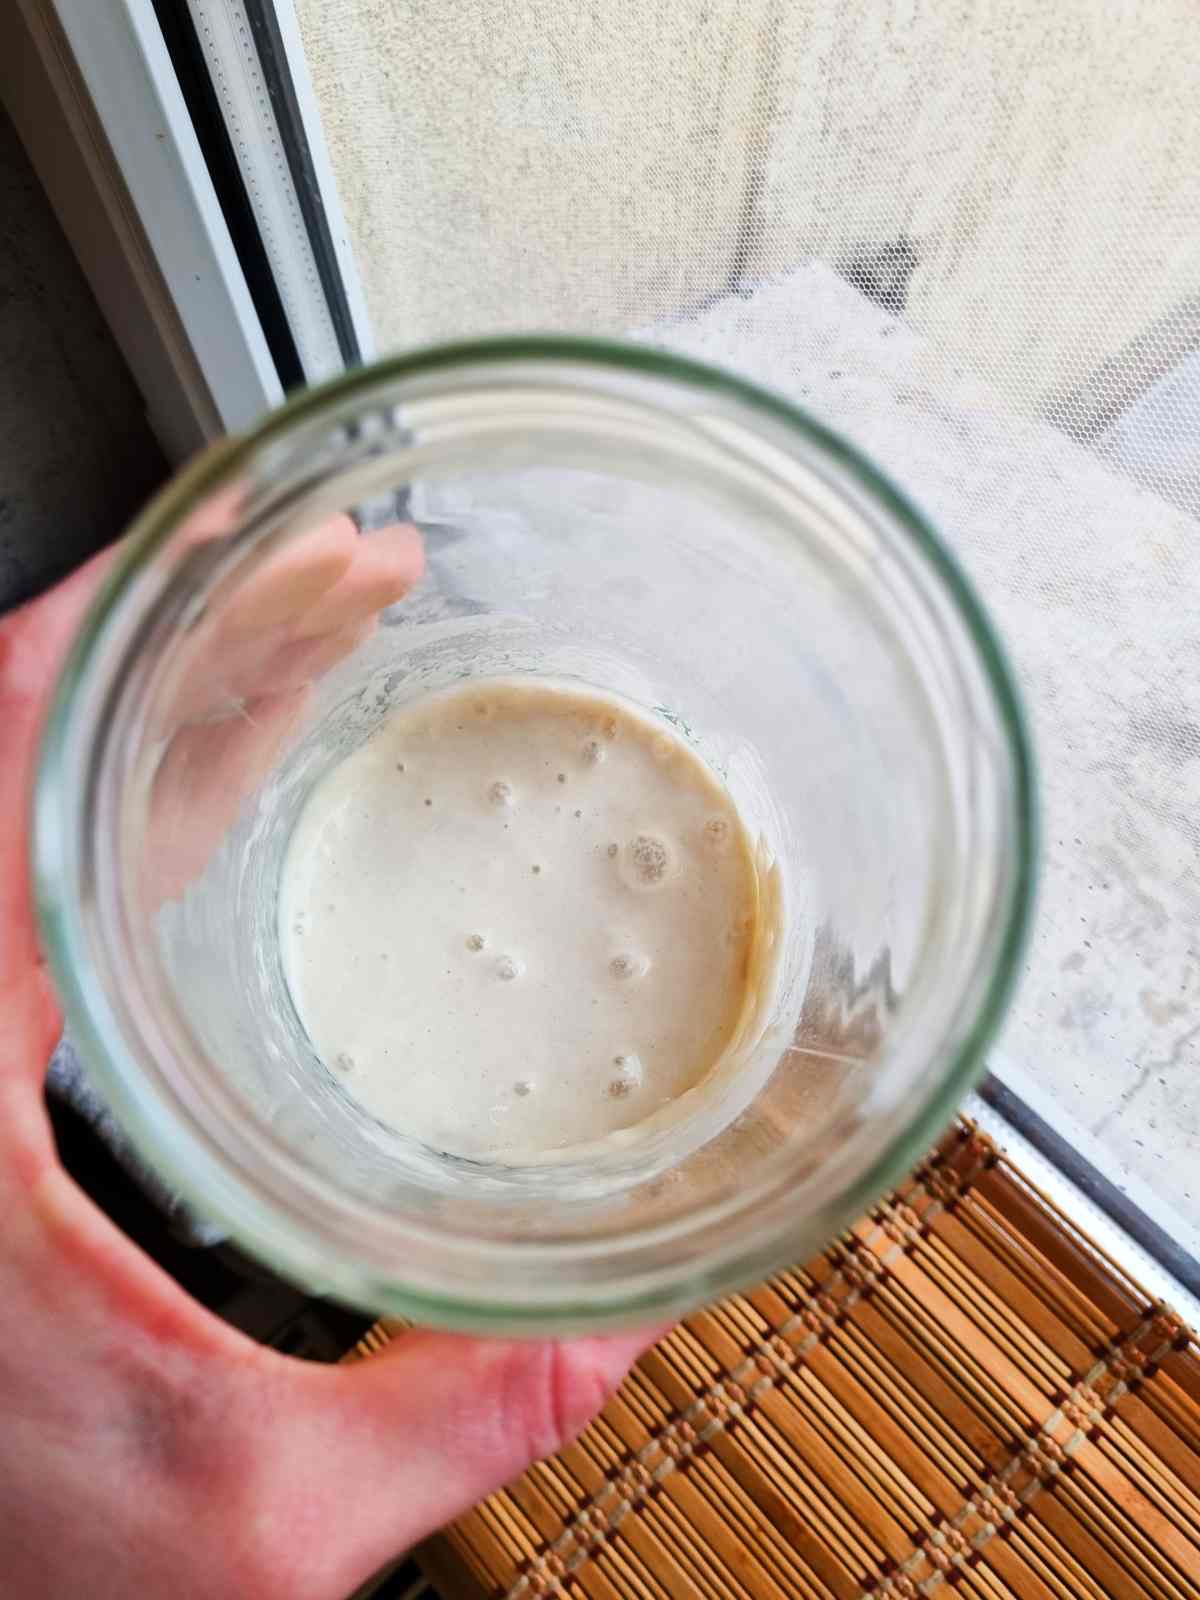
STEP 5 - Leave for 24 hours. After that, you might start seeing the first bubbles coming up to the surface!
DAY 2
STEP 1 - No bubbles yet? Don’t get discouraged! They will come. Patience is your friend. Get 50gof flour and 50g of water(½ cup flour, ¼ cup water) and add to the jar. No need for discarding any dough at this point! The bacteria is still weak and learning how to grow your farm for you.
STEP 2 - Mix well until no lumps are seen.
STEP 3 - Place the lid and rubber band on the jar. Then put the jar back with a preferred temperature of around 70F or 21C.
DAY 3
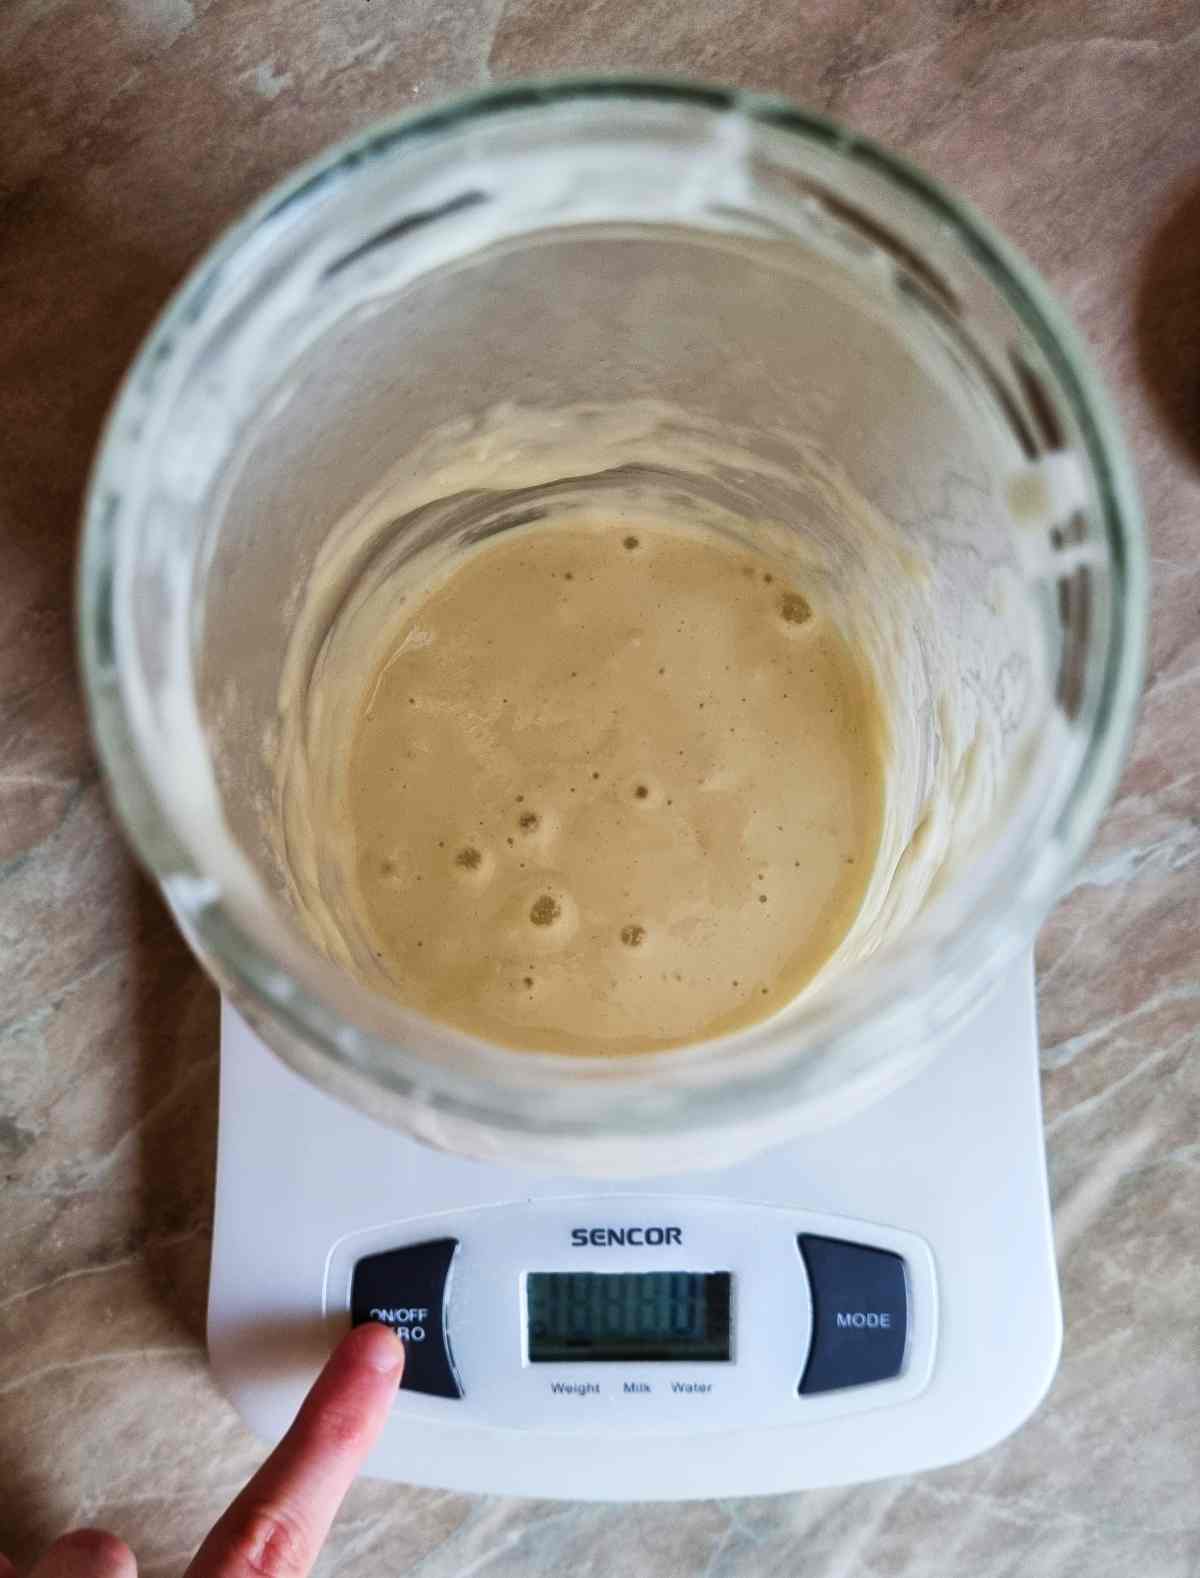
STEP 1 - See those bubbles? Yay! Today you will discard half of your sourdough and add an additional 50g of flour and 50g of water (½ and ¼ cup).
STEP 2 - Don’t throw away the discard, rather check out my sourdough discard recipes and make something delicious with it today!
DAY 4
STEP 1 - Feed your sourdough twice today, but do not discard anything (you can discard it if you need extra space in the jar).
DAYS 5 & 6
STEP 1 - Discard half of your sourdough in the morning and feed with the usual 50g/50g mixture.
STEP 2 - Repeat in the evening! By now your dough should be bubbling up and rising, you might notice a sour smell as well – that is totally normal at this stage!
DAY 7
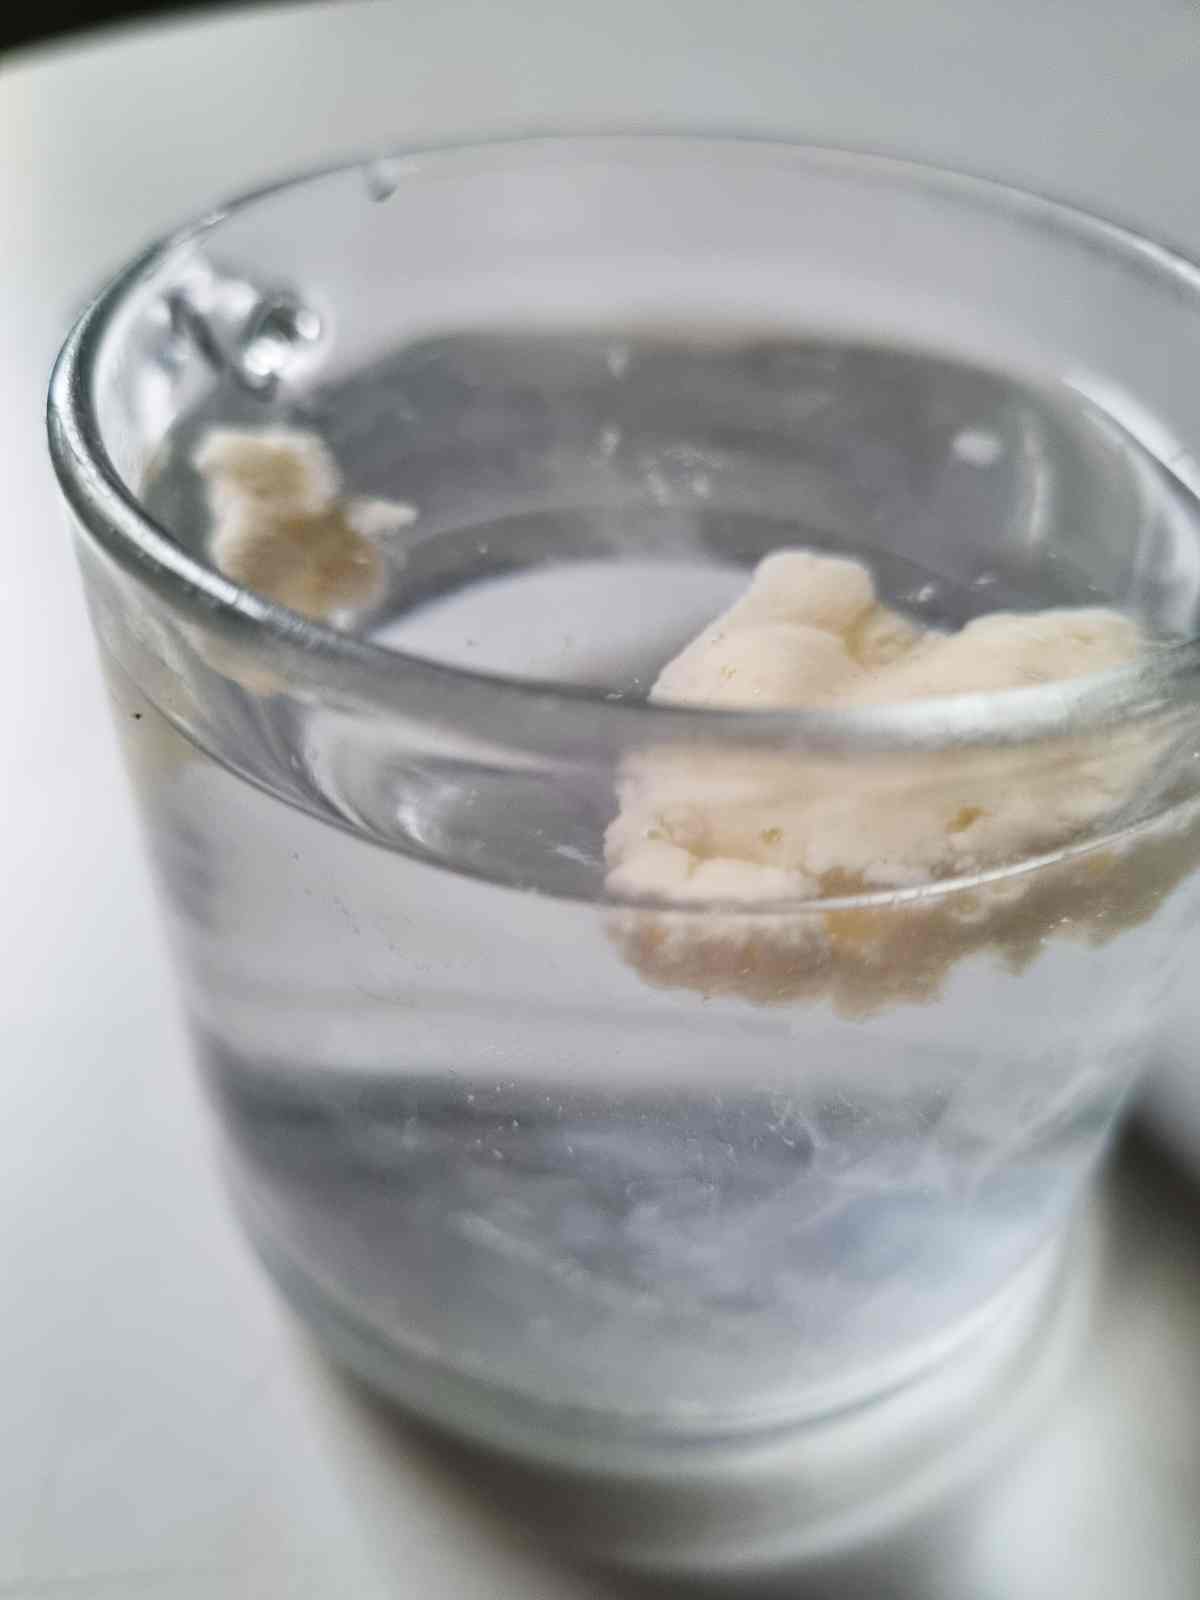
STEP 1 - Now that your sourdough is a week old, it can be used for bread making. To check whether it is ready, you can do a float test: feed your sourdough, then take a spoonful after 4 to 6 hours and see whether or not the starter will float. If it does – you are ready to embark on the baking adventure, but if not, continue growing your starter for some more days.
STEP 2 - Continue feeding and discarding the starter twice a day whether or not you decide to make bread with it.
DAY 8 and on
Keep feeding and discarding the starter twice a day for another week to make sure it is strong enough. Then you can store your starter in the fridge! Just feed your sourdough starter and place it in the fridge for a week until the next feeding. Keep it alive with weekly feedings and you will have a strong starter at hand any time you need it!
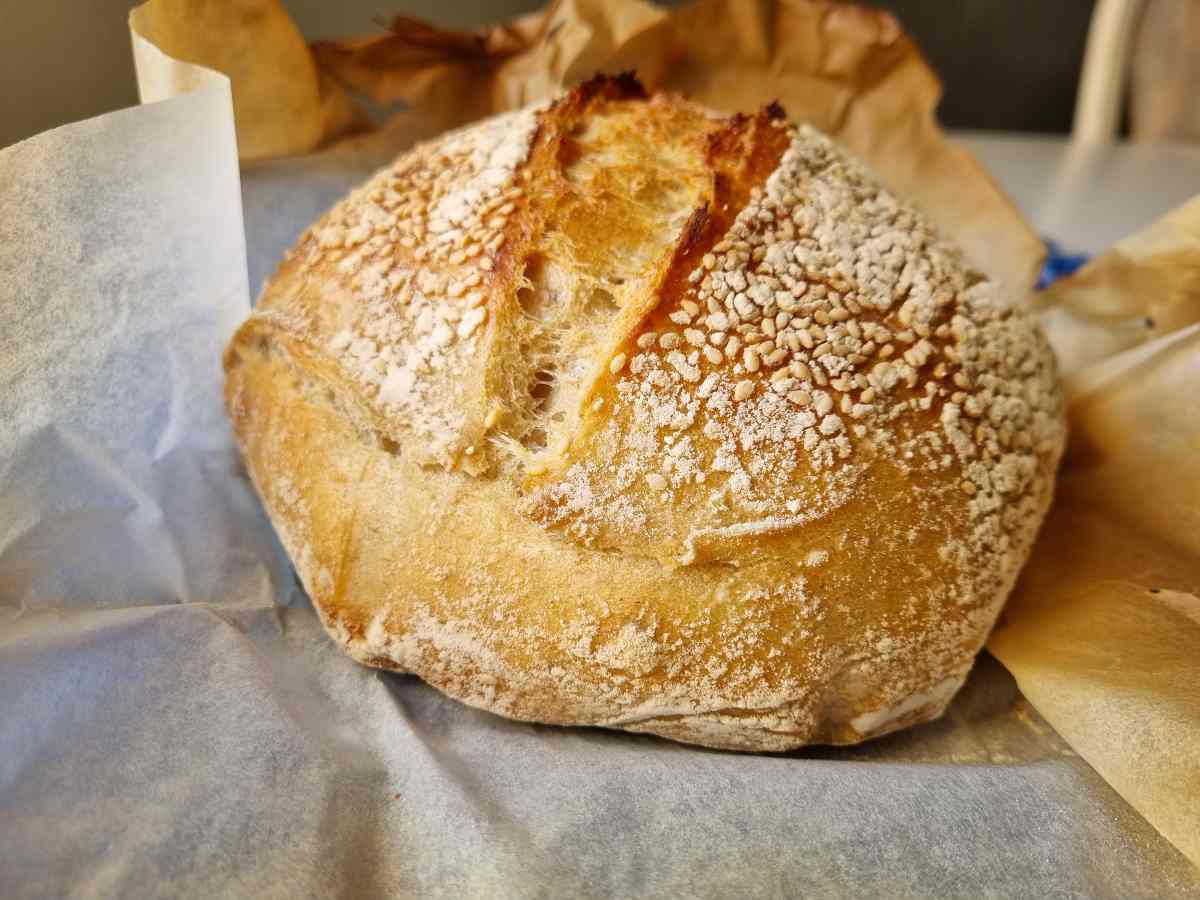
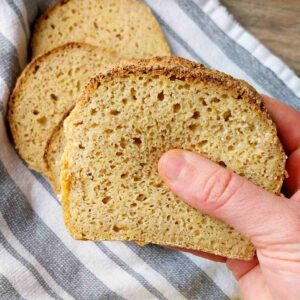
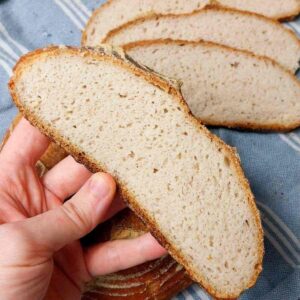
This is the bread I made with my 1.5-week-old sourdough starter:
Going forward
From now on you can follow the 1:1:1 principle. Any time you feed your starter, use equal parts starter, water, and flour. In our recipe, it would mean 50g starter, 50g water, and 50g flour.
Storing your sourdough starter
If you are not planning to use your starter in the next few days, you can put it into the fridge right after a feeding and keep it alive by refreshing it once a week. Once you are ready to bake, take it out of the fridge and feed it twice a day for two days and your starter should be ready for baking!
Another way to store your starter is by drying it. You can dry all or a part of your starter and revive it anytime you need it. In dry form, you can store it for an indefinite time. To learn how to dry your sourdough starter, check out this drying guide.
When to use the starter in bread?
Your starter is best when it rises to its full capacity. As you can see below, a starter has adjustment, growth, stability, and death periods. In the first stage, your bacteria are adapting to the environment, then it starts multiplying. At a certain point, it stays in the same spot before the bacteria start dying.

The reason you want to use your starter at its peak point is that that is when there is the biggest amount of bacteria present, they are adjusted to the environment, and ready to grow further.
If you use your starter when it already started to go down, then it will take more time to grow bacteria again. That can also make your bread sourer as a result.
If after a week or two of growing your starter it still doesn’t double in size (for me it is harder to get gluten free starter to double in size), then you will need to continue refreshing the mixture until it does. You can try refreshing twice within 12 hours to help the bacteria get stronger!
The temperature of your house can slow down or speed up the process.
Tips for Success
- If your starter is taking a lot of time to start rising, add a teaspoon of sugar or honey to help speed up the process.
- For best results use warm (but not hot) water when feeding.
- You might notice a quick rise in your starter within the first day or two. Do not hurry to use it for baking! It is normal for the starter to rise quickly and then slow down. Wait a week and then you can give baking a try!
- If you are making gluten free starter, keep in mind that it will need more water than the regular one. Make sure your starter looks like a thick paste and add more water if needed. Intuition is your friend here!
- After taking the sourdough starter out of the fridge feed it twice a day for a couple of days before baking bread.
Frequently asked questions
Why is there liquid in my sourdough starter?
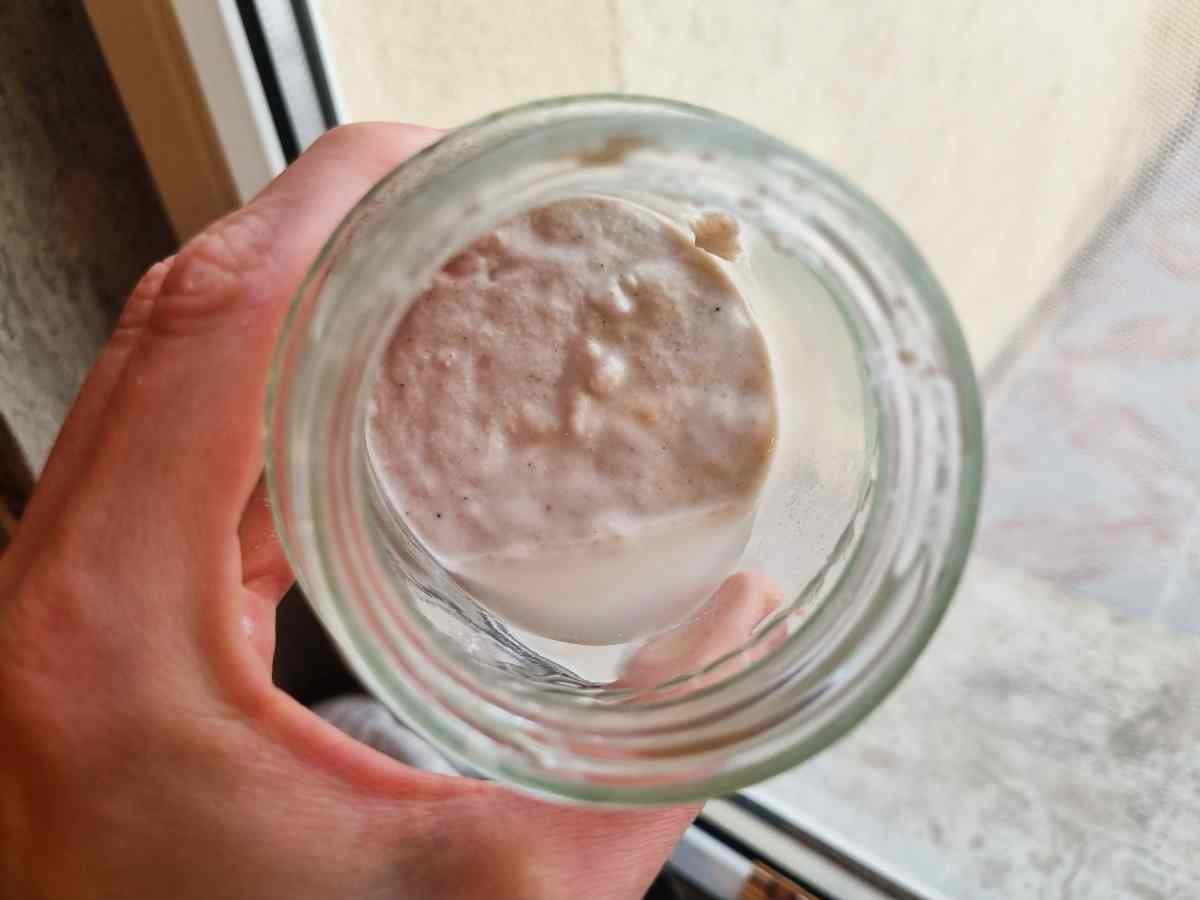
Hooch is the liquid that shows up on the top of your starter if you haven’t fed it for too long. It is usually a sign that bacteria is hungry and needs feeding. However, make sure the liquid is not black and doesn’t have a mold-like appearance.
What if there is mold in my sourdough starter?
If you notice mold, it is a sign that something got into it and it needs to be thrown in the trash. I know, I know! It is a bummer to throw away something you worked so hard on. But you definitely don’t want any mold in your food. Next time make sure you use clean utensils and protect the starter from any kind of contamination.
Why does my sourdough starter smell bad?
If your starter smells like alcohol, it might mean the bacteria is hungry. Just try feeding your sourdough more regularly and it should get better!
If you notice a vinegar-like smell – it is totally normal! Your starter might have a variety of different smells, most of which are probably unpleasant, but they are a part of the fermentation process.
However, if your starter smells like cheese or rotten meat, then, unfortunately, you need to throw it away and start over!
Can I feed my sourdough starter a different flour?
Yes, you can switch between flours, but give the starter time to get used to new food. You want to feed it the same flour for at least two days before baking. It goes for both regular and gluten free starters.
How much sourdough starter should I use for bread baking?
There are plenty of recipes out there varying from 10% to 25% of sourdough starter in a loaf, I would say your best bet is 15%, which if you are using 1kg (8 cups) of flour would be 150g (1 cup) of starter.
My starter was good early on but now nothing is happening. Should I start over?
Remember, the first couple of days might result in a quick rise and a lot of activity, but that activity is going to slow down later on. It is totally normal to see little to no bubbles in your starter during the first few days. Continue the process and eventually, you will get there! Remember that the temperature is also important. If it is cold in your house, your starter will take longer to develop.
Do I have to discard my sourdough starter?
Yes. If you don’t discard it, you will end up with way too much sourdough starter. You need to provide enough food for the bacteria to grow, and if you don’t discard you will have excessive amounts of bacteria to feed.
But you don’t have to throw away the discard! Who likes wasting food? I have lots of must-try gluten-free sourdough starter discard recipes for sourdough lovers! Try these sourdough discard chocolate chip cookies or these pumpkin muffins! But the quickest and easiest way to use up the discard is to simply fry it!
How do I know when my sourdough starter is ready for baking?
With a regular starter there is a float test – take a spoonful of the starter 4 to 6 hours after feeding and drop it into a glass of water. If the starter floats – it is ready!
Generally, it takes one to two weeks to grow a strong starter.
Can I freeze my sourdough starter?
Apparently, you can! Turns out that freezing doesn’t kill off bacteria entirely, it leaves the most part alive, ready for the next use. However, it is not recommended to freeze it for longer than two weeks. After two weeks you can still use your starter for the flavor but you might want to use other types of yeast to help your bread rise. To freeze your sourdough starter just put it into a zip-lock bag or into cubes freezing containers.
📖 Recipe
Strong Sourdough Starter Recipe
Equipment
- Kitchen scale
- Medium size jar
- Stirring utensil
- Rubber band
- Cloth (if not using a lid)
Ingredients
- 2 lbs flour
- 2 lbs water
- 1 teaspoon sugar (or honey)
Instructions
Day 1
- Place the jar on the scale and press the start button.
- Add 50 grams flour and 50 grams water. You can adjust the measurements if you accidentally added too much of the either ingredient.
- Stir until there are no lumps.
- Place the lid loosely on the jar, and place the rubber band on the highest level of the mixture.
- Leave for 24 hours.
Day 2
- Add 50 grams of flour and 50 grams of water to the mixture.
- Stir until there are no lumps.
- Leave for another 24 hours.
Day 3
- Discard about a half of your starter.
- Add 50 grams of water and 50 grams of flour to the jar.
- Stir until there are no lumps and leave for another 24 hours.
Day 4
- Feed your starter with the regular 50g/50g water and flour, but do not discard anything.
- Feed your starter twice today - once in the morning and once in the evening. Do not discard.
Days 5&6
- Discard about a half of the starter in the morning.
- Feed your starter with the regular 50g/50g water and flour.
- Repeat the discarding and feeding process in the evening.
Day 7
- Do the regular discarding and feeding twice a day.
- About 4 hours after feeding perform a float test - place a little bit of the starter into a cup with water. If the starter floats then it is ready for bread making.
Day 8 and on
- Continue discarding and feeding process twice a day from now on. You can store your starter in the fridge, in that case you only need to feed it once a week.
Notes
- If your starter is taking a lot of time to start rising, add a teaspoon of sugar or honey to help speed up the process.
- For best results use warm (but not hot) water when feeding.
- You might notice a quick rise in your starter within the first day or two. Do not hurry to use it for baking! It is normal for the starter to rise quickly and then slow down. Wait a week and then you can give baking a try!
- After taking the sourdough starter out of the fridge feed it twice a day for a couple of days before baking bread.


Lynne
Thank you for your detailed recipe and explanation!
Natashashome
You are so welcome!
NanaBecca
I was THRILLED to find a gluten free sourdough starter, and great recipes for the discards!! (I hate t waste anything.)
Thanks a million!
Becca
Agnes Chan
Thank you for your sharing! Since the temperature here is now 28-34 degree C in Summer, shall I wait until Autumn which is around 20 to 25 degree C to try to do it.
Natashashome
You should be able to grow a starter even in hot weather! You might need to refresh your starter more often though, as the yeast will be more active in warmer environment.
Kelley Goodall
Wow! I grew up as a granddaughter to bakers. However, I never learned how to bake sourdough bread which is my favorite to eat. And now I am having to switch to Non- gluten free products.
So this is a huge new endeavor! Grateful for all your information And the detail in which you have presented it. I look forward to experimenting with different flours and sweeteners as I am also T2D. Here we goooo! Kelley
Natashashome
Thank you for sharing your story! It is hard to adjust to a new lifestyle but once you get a hang of it you will come to realize that gluten free stuff can be really good! I sometimes prefer gluten free bread to regular even though I can eat both. Keep going!