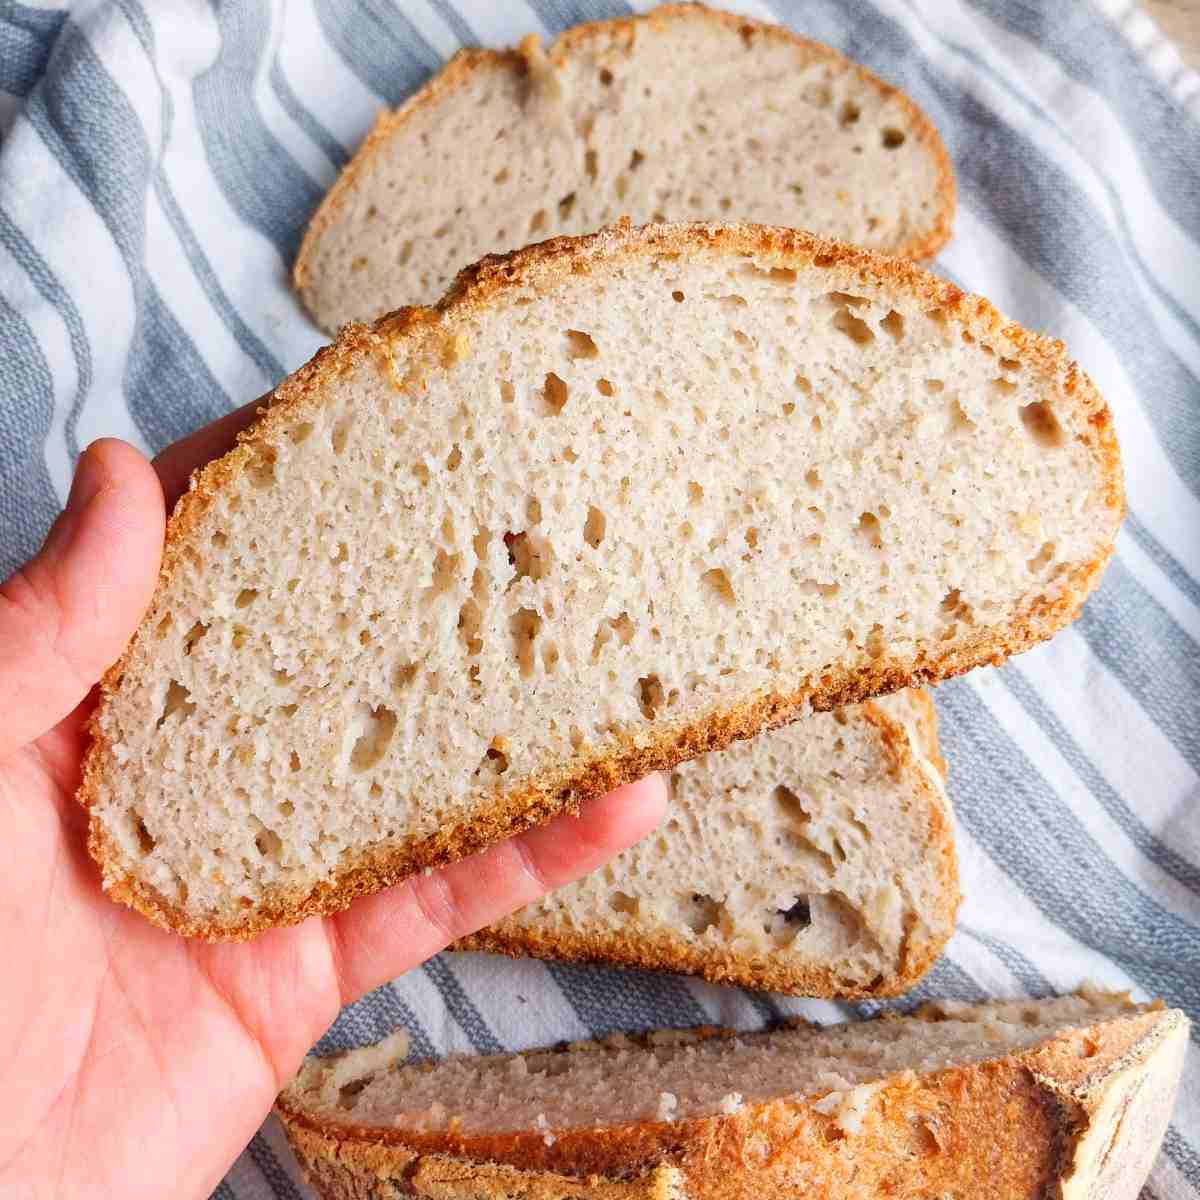
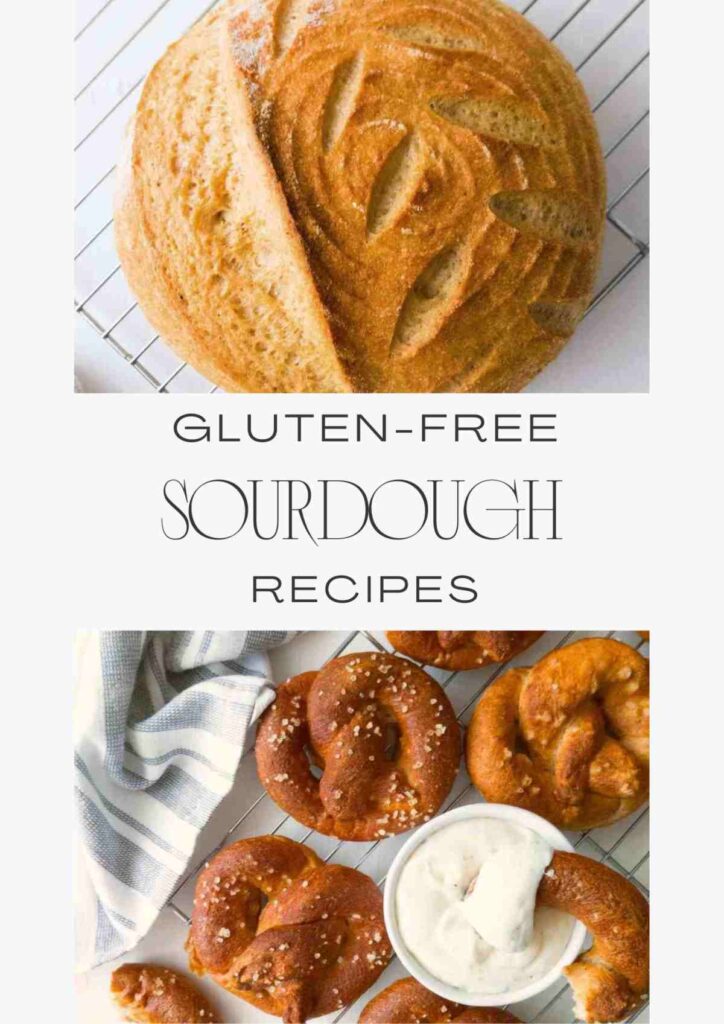
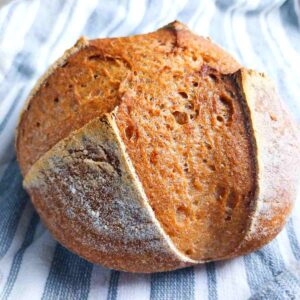
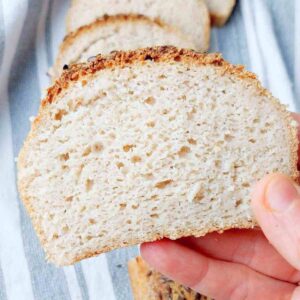
This vegan gluten-free sourdough bread is soft, fluffy, nutritious, and perfectly crusty! Once you master the skill, you will never go back to the store-bought gluten-free bread.

Jump to:
- Sourdough vs. Commercial Yeast
- Gluten-Free Starter
- Psyllium Husk
- Sourdough Terminology Explained
- 🍽 Tools You Might Need
- The Best Flour for GF Sourdough
- A note on flour types
- 🥘 Ingredients
- 📖 Substitutes
- 🔪 Step-by-step instructions
- Troubleshooting
- Frequently Asked Questions
- More Gluten-Free Sourdough Recipes to Try
- Get my GF sourdough recipes eBook
- Gluten Free Vegan Sourdough Bread
- 💬 Community
Sourdough vs. Commercial Yeast
Sourdough bread uses naturally grown yeast with wild bacteria that is naturally found in the air around us and in water and flour used to make a starter.
Commercial yeast is a single strain of bacteria created in a lab to speed up the fermentation process.
While commercial yeast is easier to use, sourdough will provide a unique flavor, more nutrients, and an authentic experience of artisan bread baking.
New to gluten-free sourdough? Watch my 16-minute video tutorial for beginners!
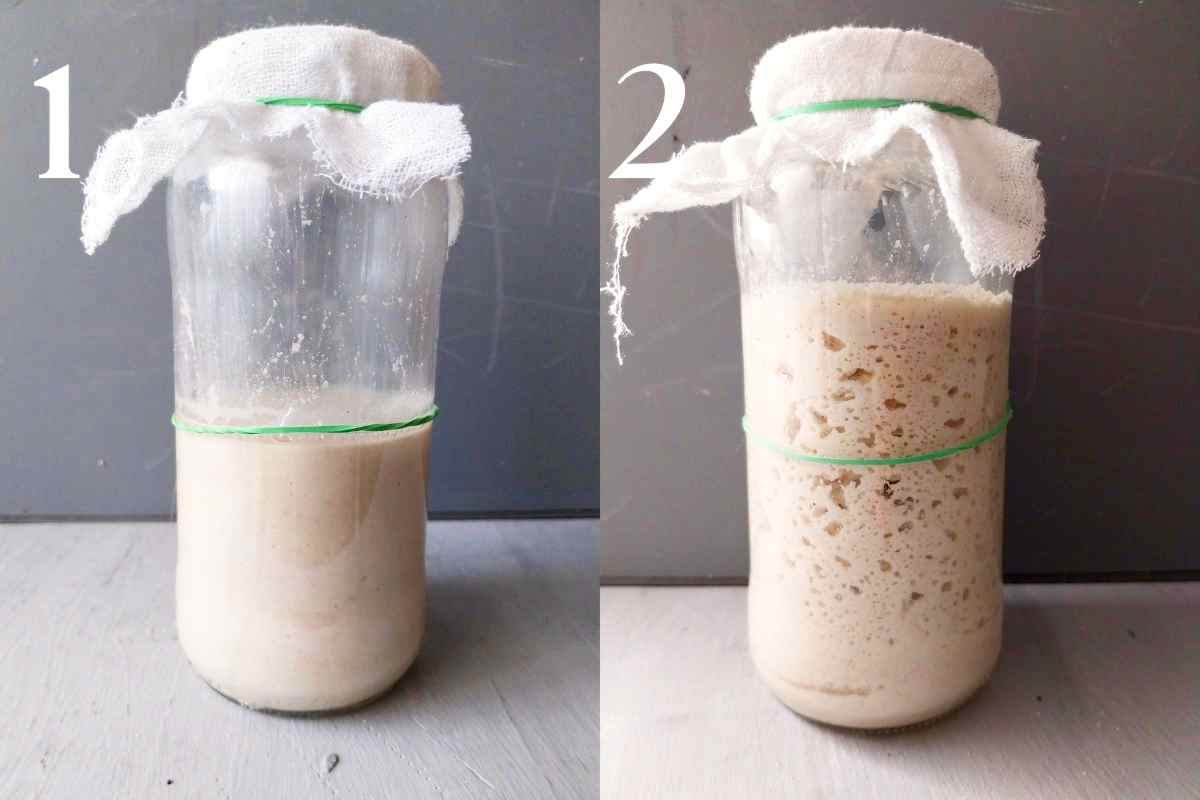
Gluten-Free Starter
You will need an active starter for this recipe, if you don't have a starter yet, make sure to read my minimal waste starter guide.
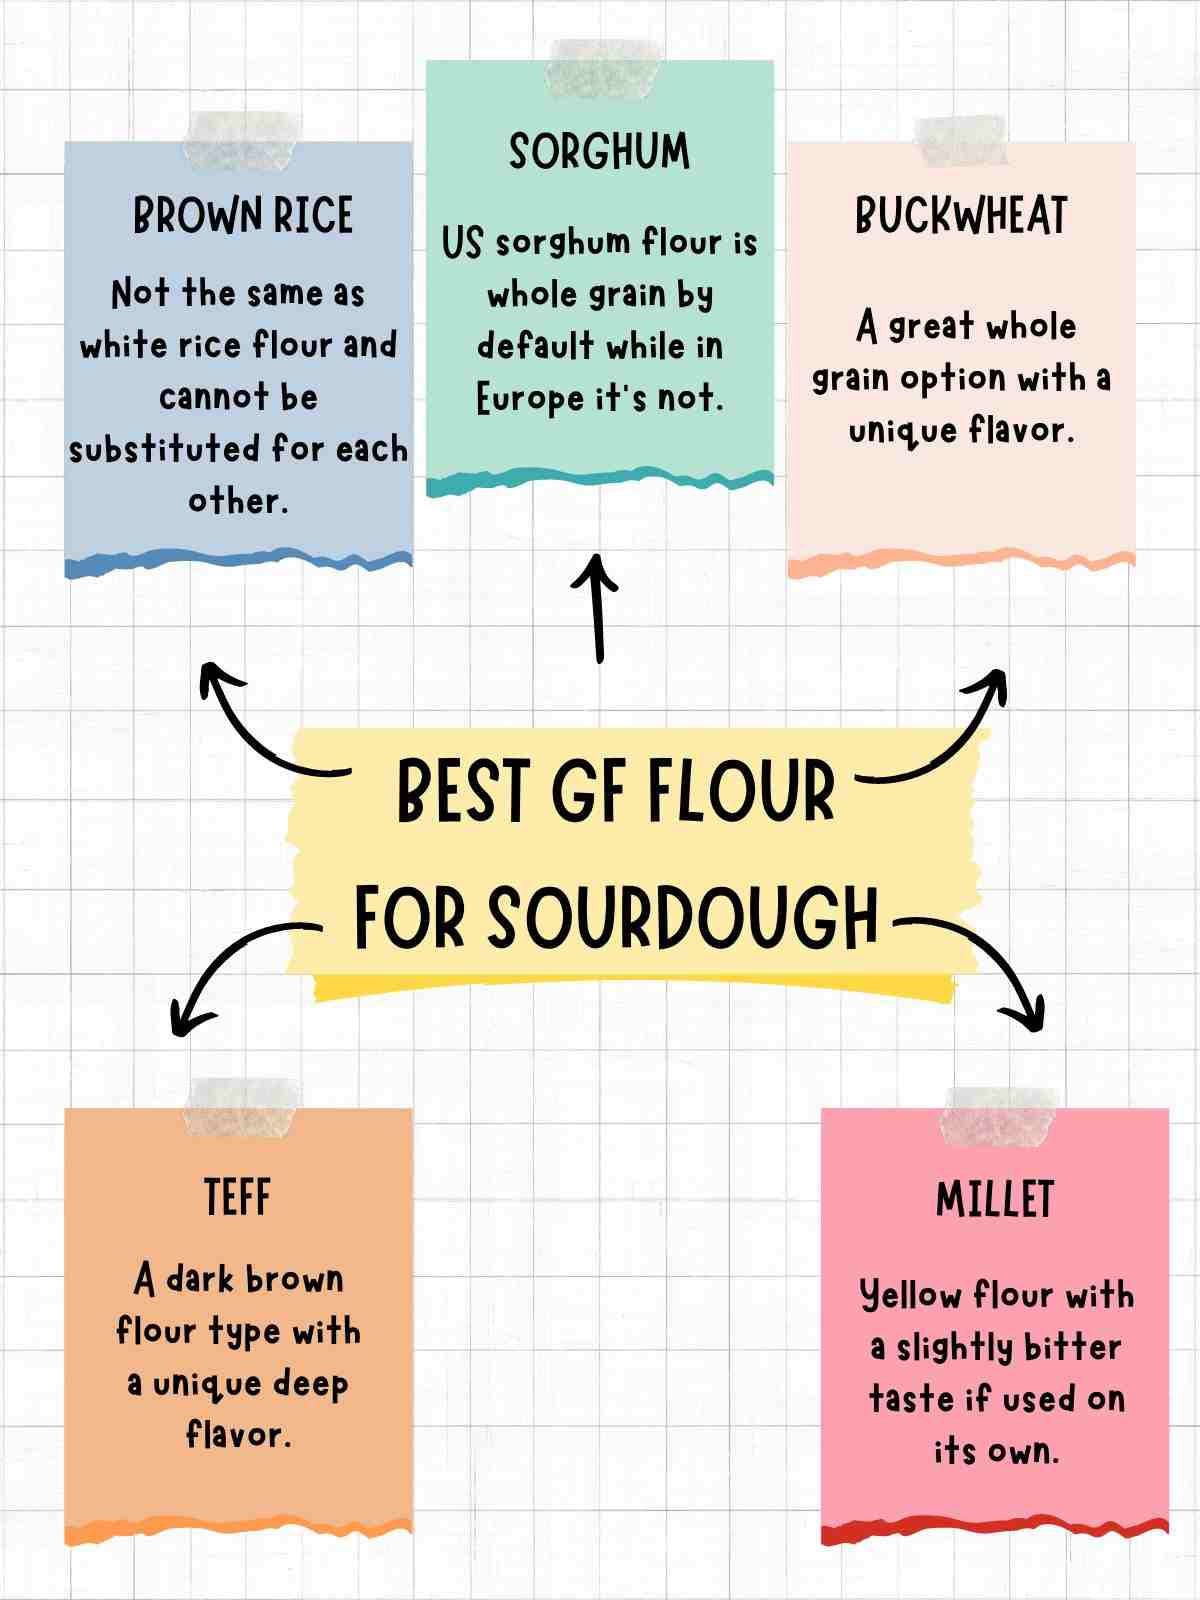
You can use any starter you have, I personally find sorghum flour starter and brown rice starter work best, but you can experiment with other types (like millet) as well.
Psyllium Husk
While some recipes use xanthan gum, I prefer using psyllium husk as a binder in gluten-free sourdough bread. I wrote more on this wonderful ingredient in my psyllium 101 article!
If you can't have psyllium, you might be able to use Konjac instead, although it makes the dough more crumbly, less shapable, and less stable.
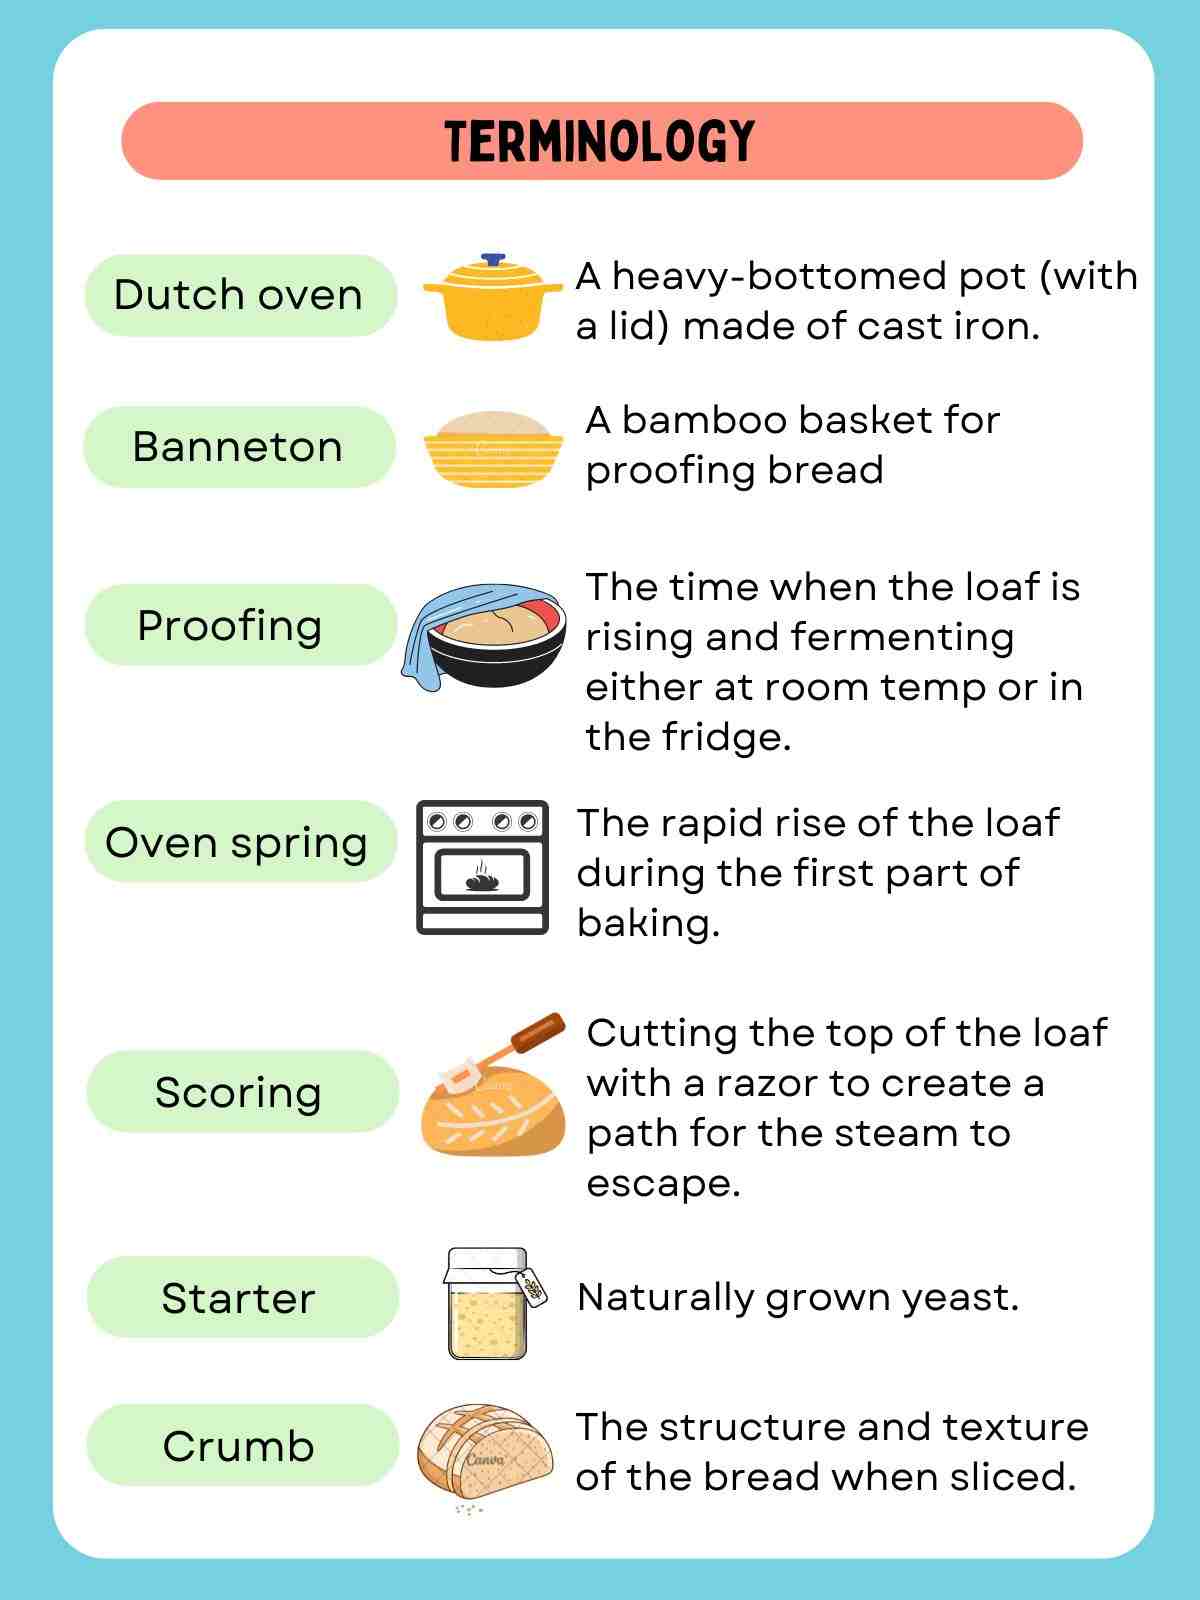
Sourdough Terminology Explained
🍽 Tools You Might Need
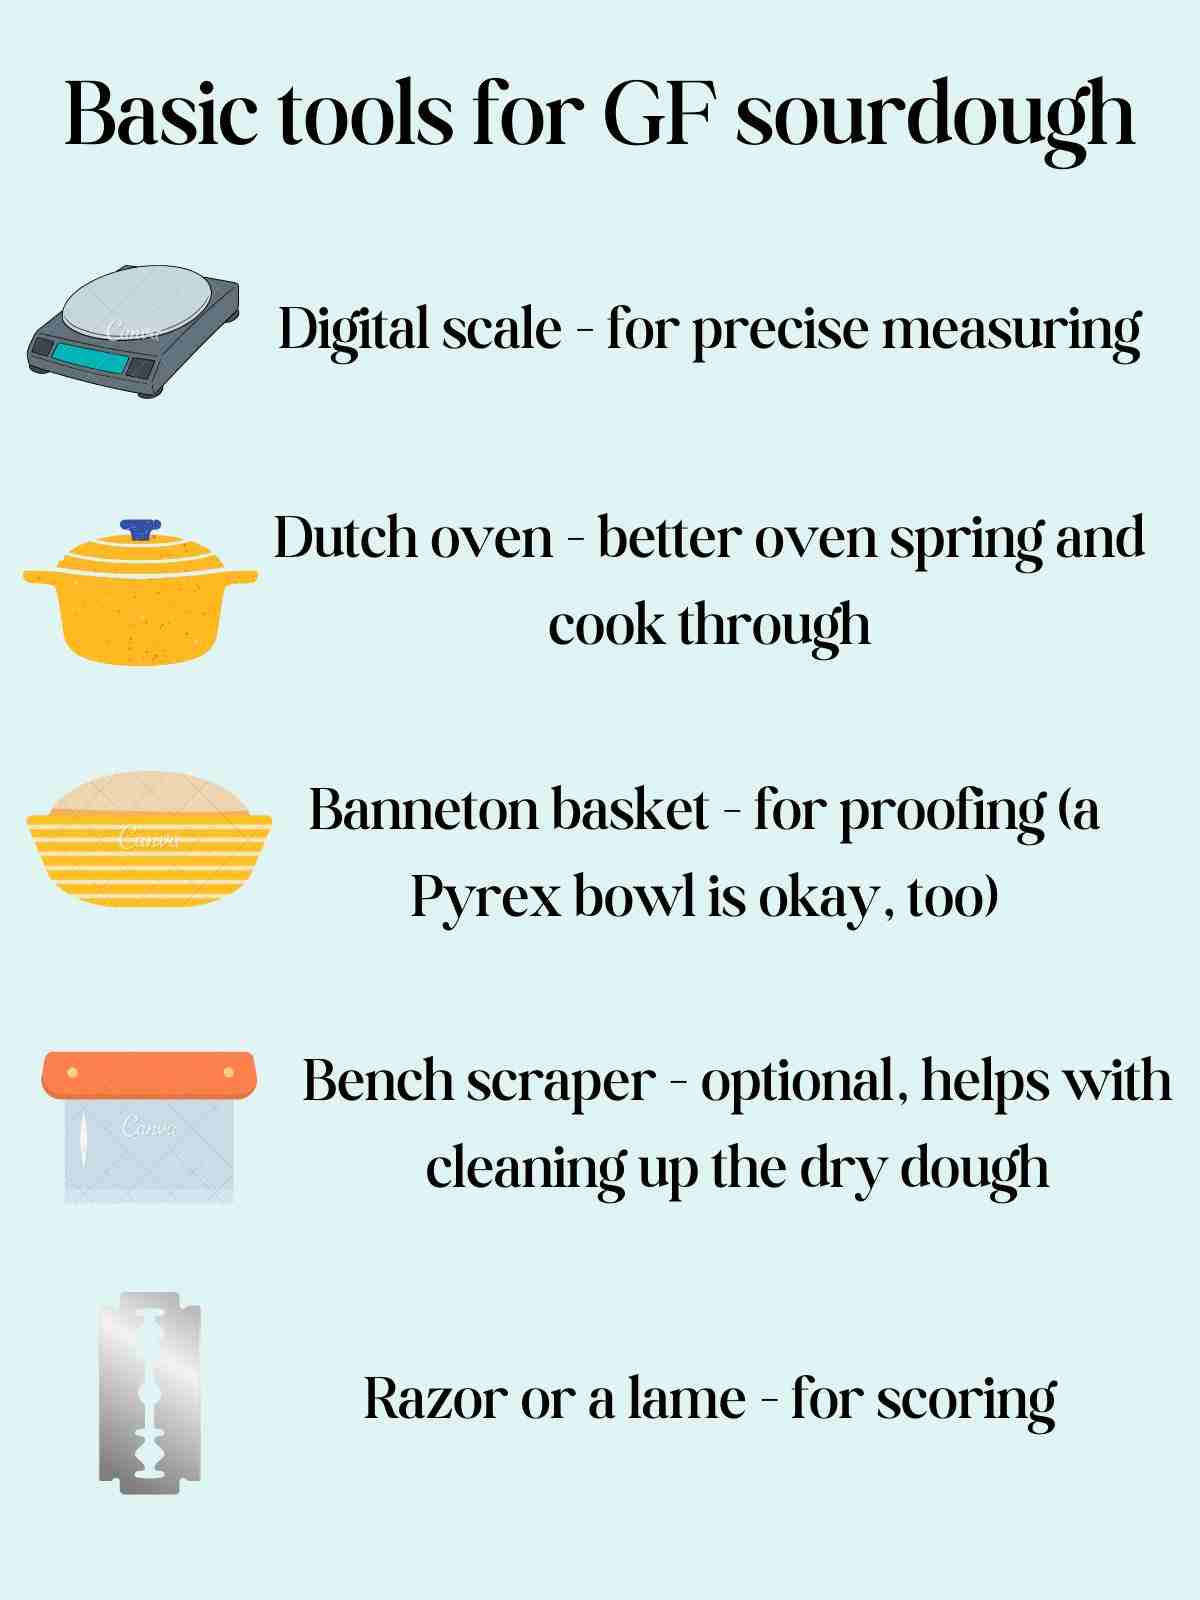
- A Dutch oven. You can also use a cast iron pan/baking sheet with a dish filled with water at the bottom to create extra steam during baking.
- A digital kitchen scale. I don't provide the cup measurements because it is so important for gluten-free sourdough to be measured by weight and not by volume!
- A banneton basket allows for a pretty pattern and better breathing of the dough. You can use a mixing bowl lined with a kitchen towel instead if you need to!
- A bench scraper. This tool is amazing when it comes to cleaning up the doughy mess off of the kitchen counter!
The Best Flour for GF Sourdough
Almond and coconut flours are not the best for making sourdough bread because of their low carb content. You can, however, add some starter to my almond bread recipe if you need a keto sourdough recipe!
A note on flour types
It is important to add starches like potato, corn, tapioca, or arrowroot to the dough for a fluffier crumb. If you can't have starches, check out my 100% millet, 100% sorghum, and 100% brown rice flour sourdough recipes.
🥘 Ingredients
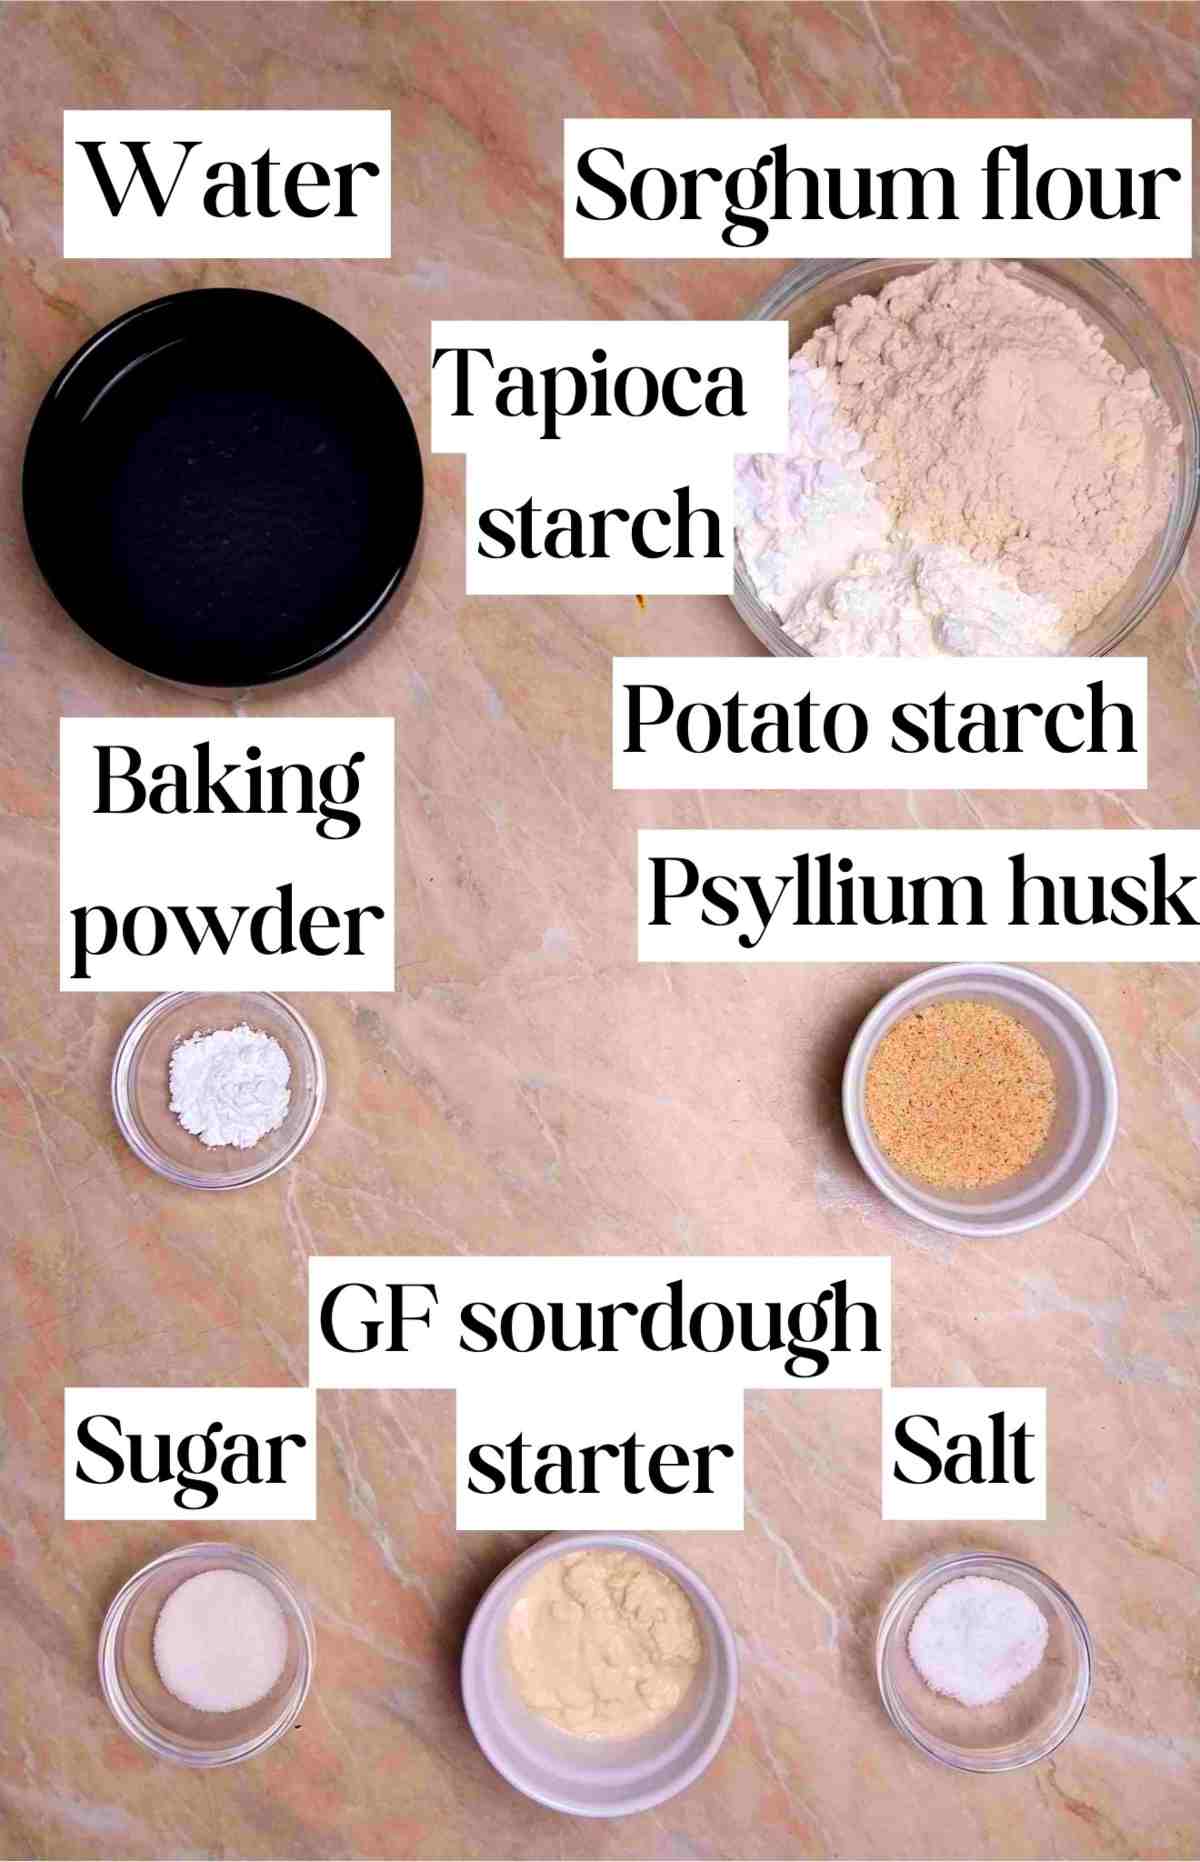
Gluten-free sourdough starter - use a mature starter that is at its peak activity, meaning when it is at its highest point of rising. Check out my gluten-free sourdough starter recipe if you don't have one!
Psyllium husk - you can use whole husks or powder. I prefer baking with whole husks as they are very easy to handle. But if you only have powder, then try avoiding very fine powder and opting for the coarser variety instead. For more information refer to my article about psyllium husk in baking.
Water - use room temperature water for the best results. I use tap water with no problems but if your tap water has chlorine in it, you will need to use filtered or bottled water.
Sorghum flour - European brands tend to be lighter than the US ones. You can use either sorghum flour, the results will be the same!
Starches - tapioca starch adds softness and chewiness to the texture while potato starch adds lightness to the loaf.
Baking powder - optional, but it helps raise the loaf and get more air in the bread.
Sugar - it is used for bacteria to feed on.
📖 Substitutes
Flour - feel free to experiment with other flour types keeping in mind that some of them might need more water than others!
Psyllium husk - I don't recommend substituting psyllium husk. You can use psyllium powder instead but keep in mind it might clump and/or turn your bread purple.
Sugar - use the same amount of maple syrup or honey in place of sugar.
🔪 Step-by-step instructions
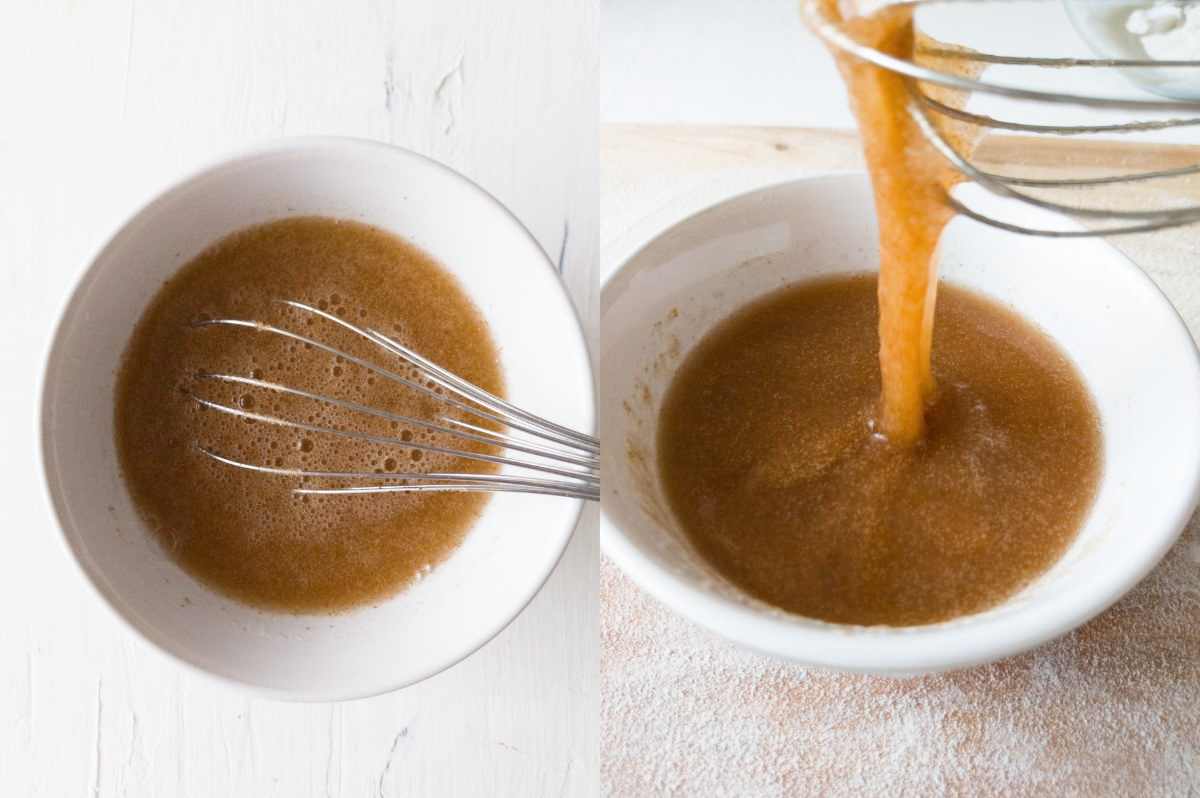
Step 1
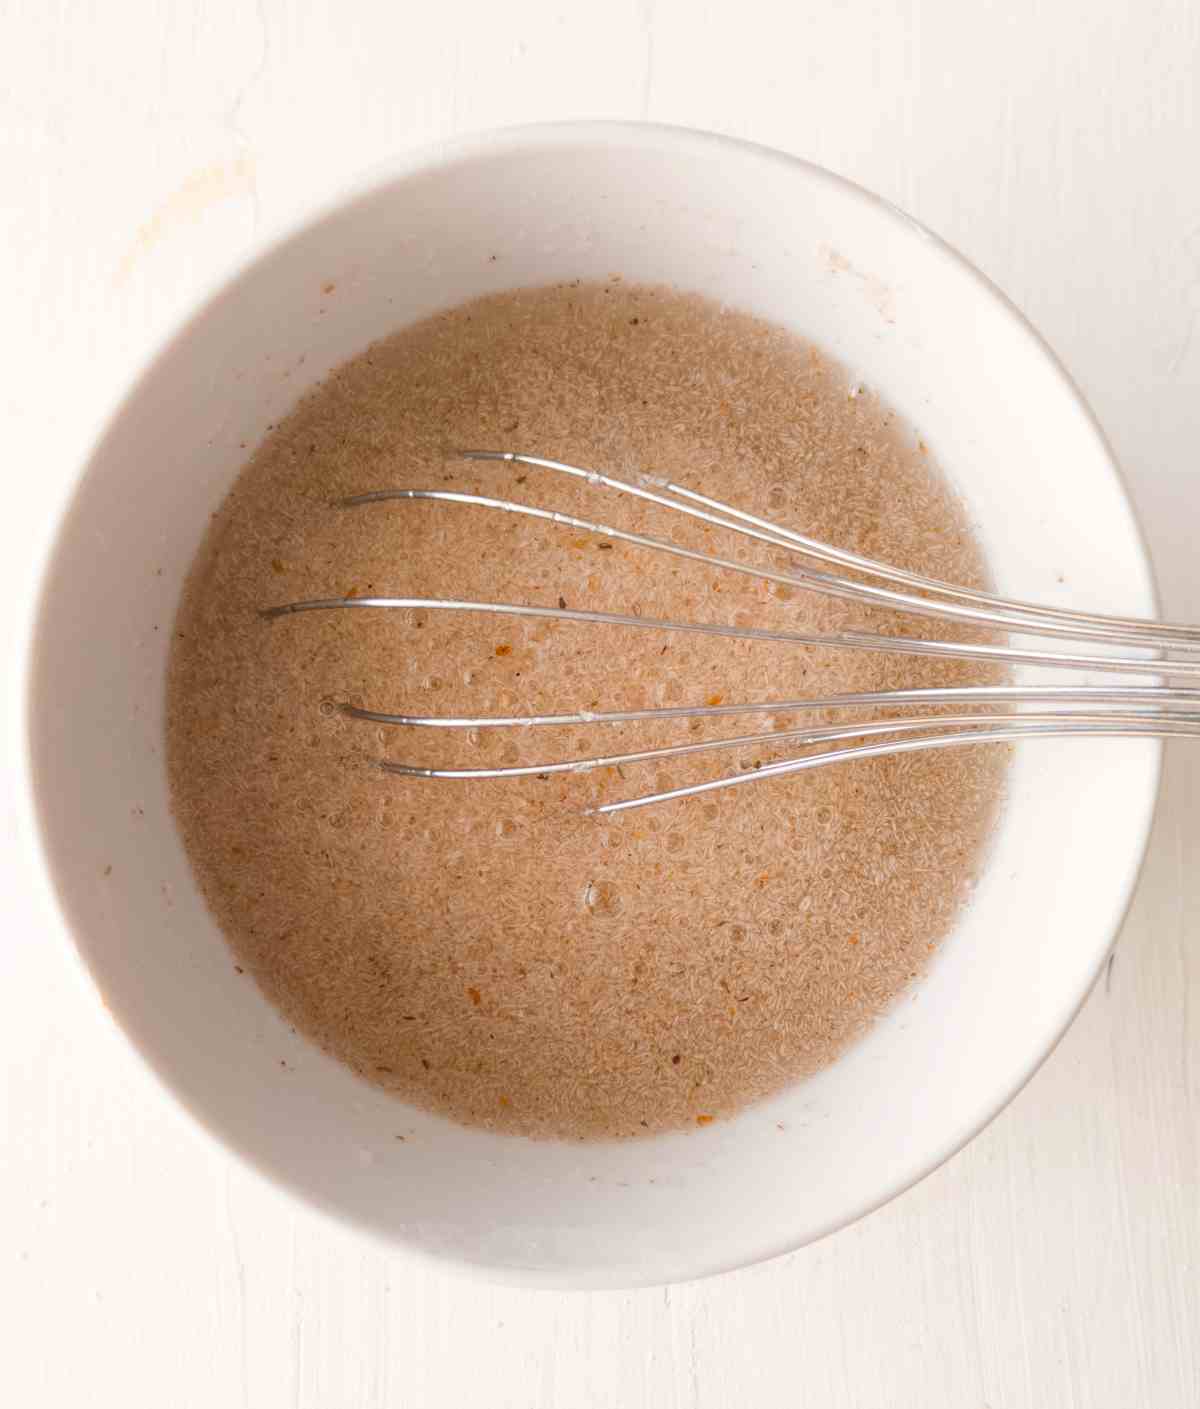
Combine psyllium husk, sugar, and room temperature/warm water in a medium-sized bowl, whisk to incorporate, and set aside.
Step 2
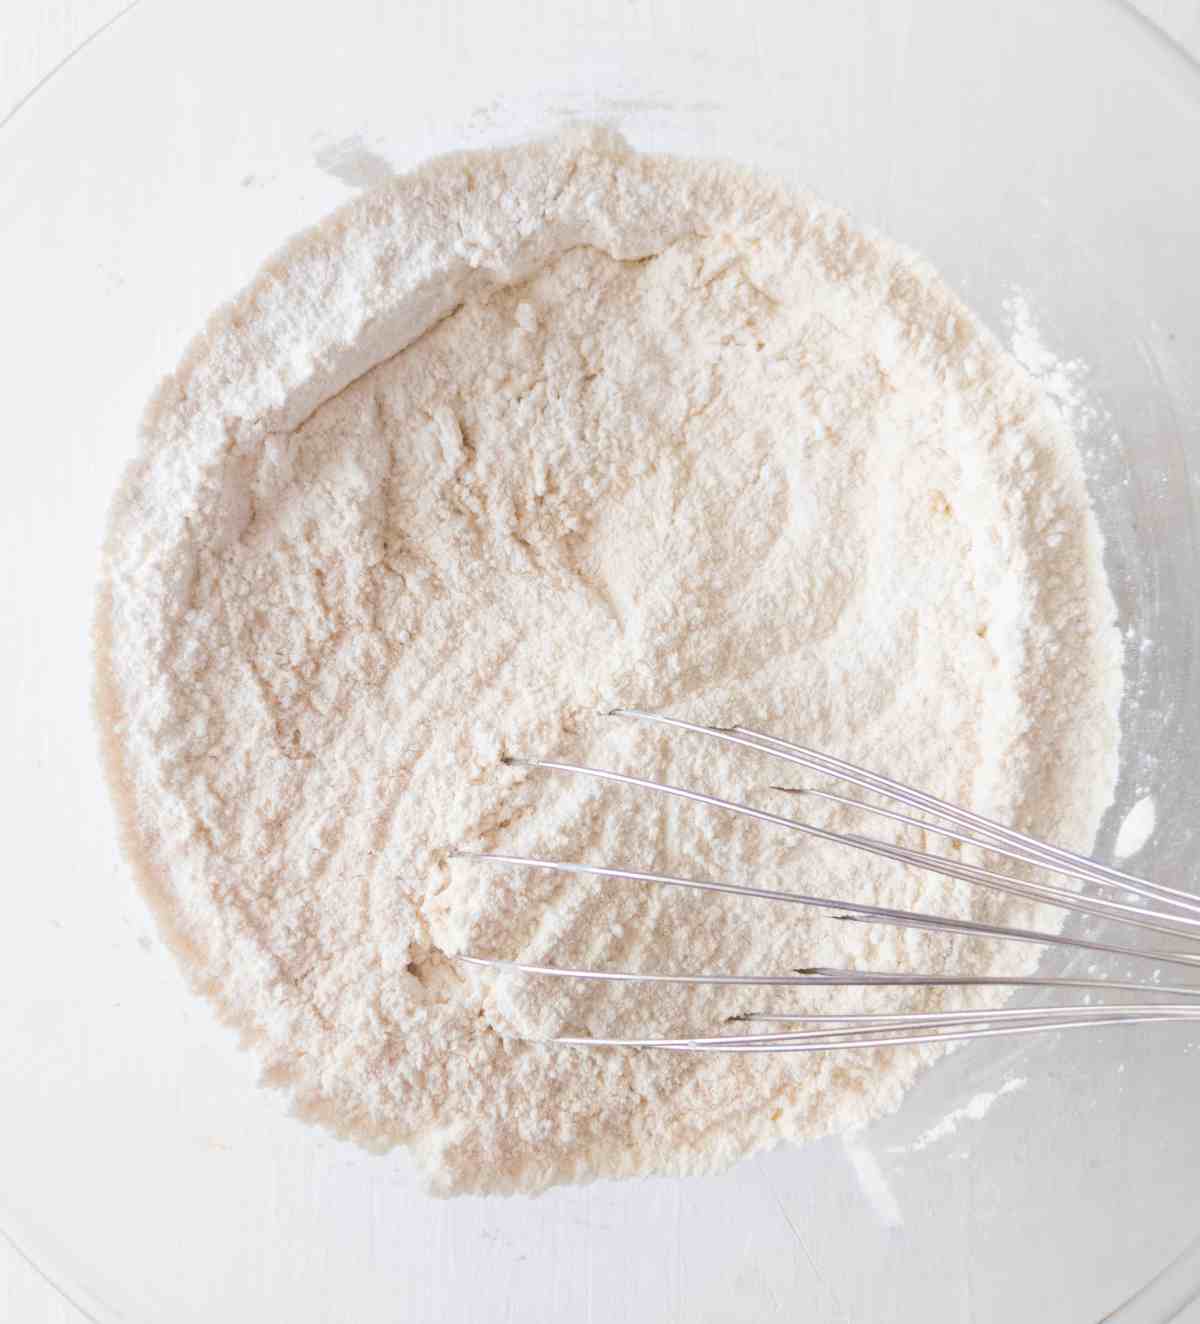
In a large mixing bowl combine all the dry ingredients (sorghum flour, starches, baking powder, and salt) and whisk to incorporate.
Step 3
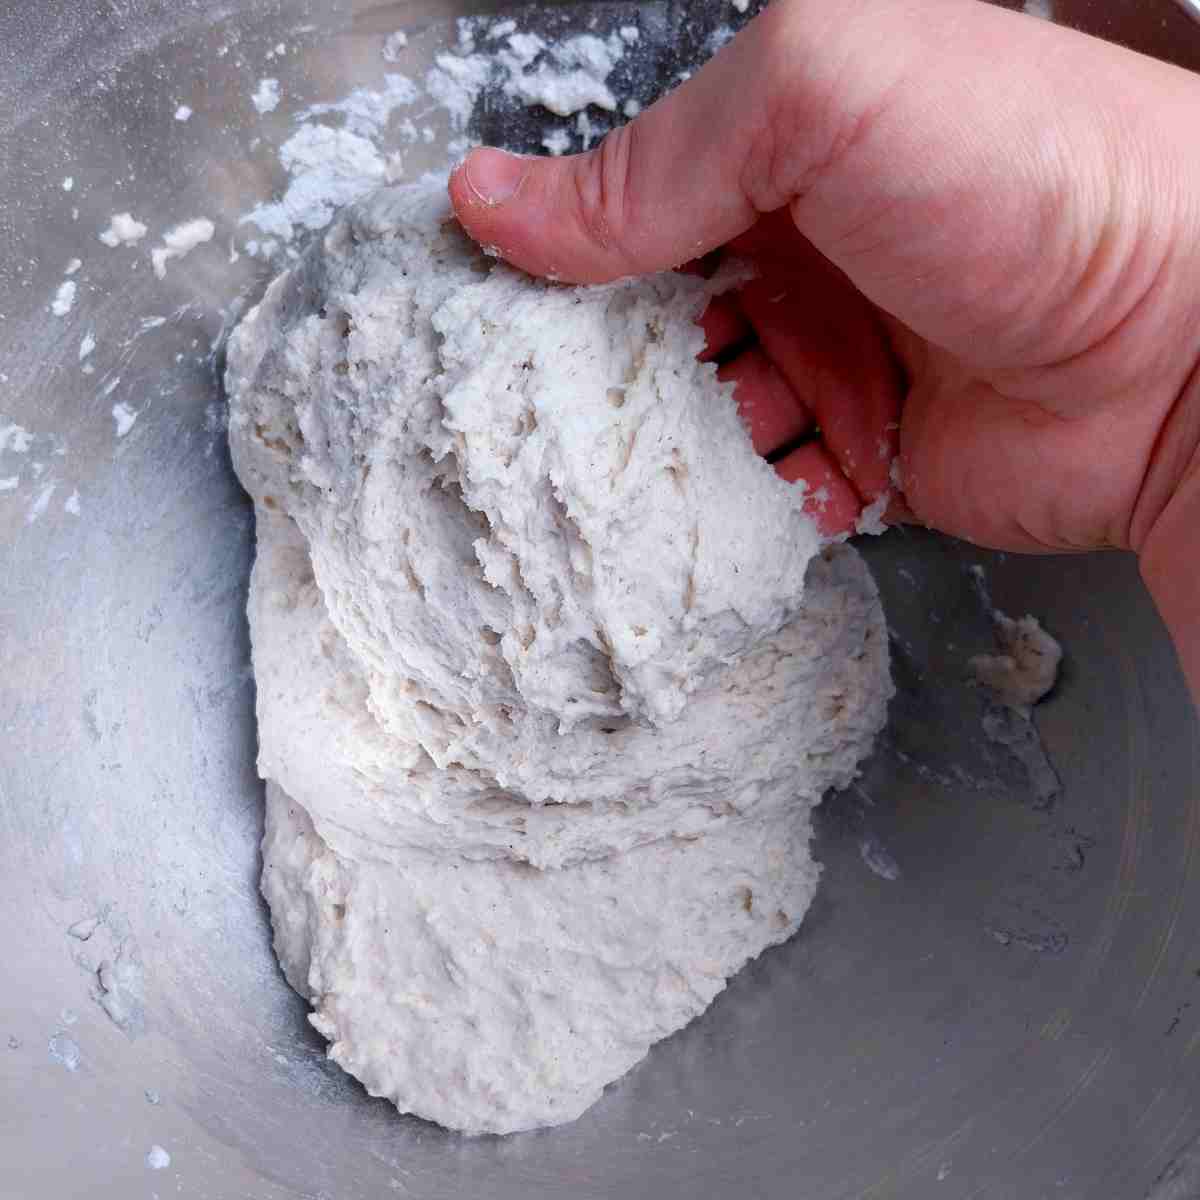
Once psyllium forms a gel, add it to the bowl with the dry ingredients.
Add mature gluten-free sourdough starter to the bowl and mix the dough thoroughly.
I like to use an electric mixer for this step but you can also do it by hand if you prefer.
Step 4
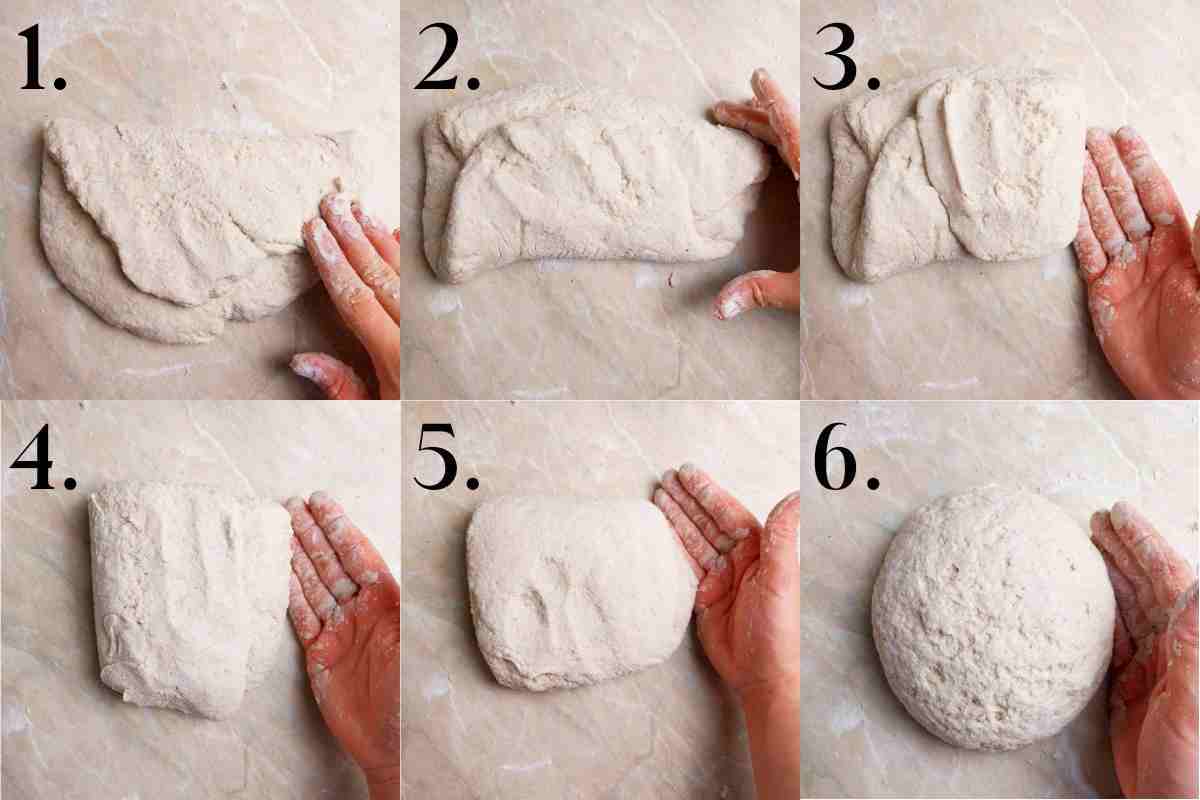
Once the dough is well incorporated, turn it over onto a lightly floured working surface and flatten it into a disc.
Fold each side of the disc onto its middle, flip the dough, and shape it into a ball (refer to the pictures for visual instructions).
Step 5

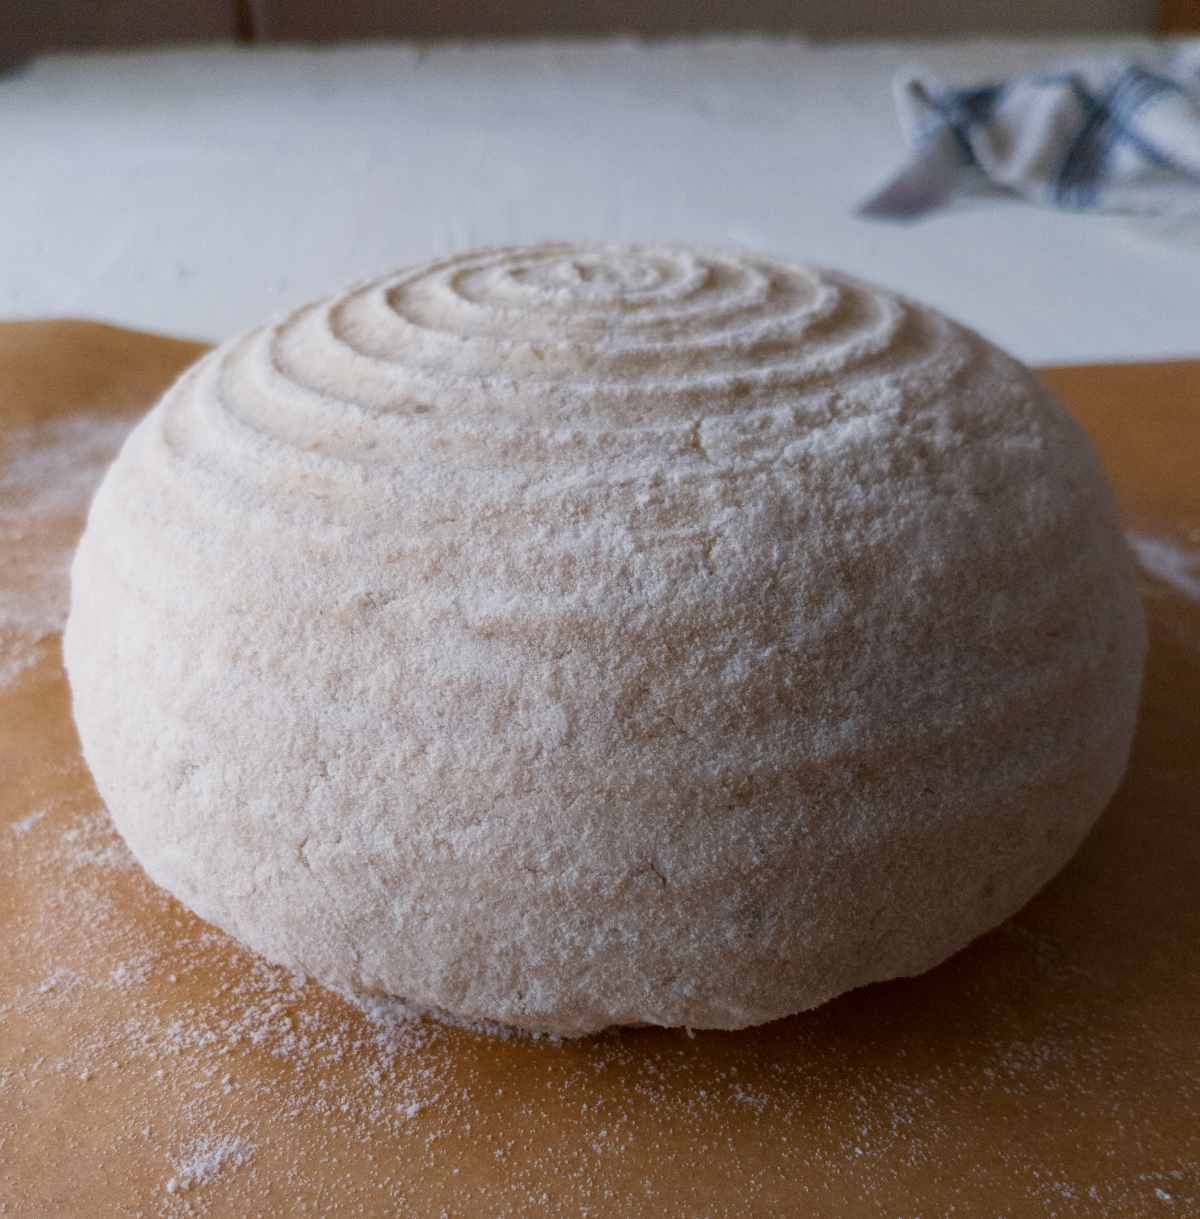
Flour the proofing basket or bowl lined with a kitchen towel and place the dough in it. Press the dough into the basket to create a flat top.
Cover the basket with a kitchen towel and leave to rise at room temperature for about 5 hours or in the refrigerator overnight (12-18 hours).
The dough should puff up during rising but it won't double in size. Don't worry if the dough doesn't rise a whole lot, it will do most of its job in the oven.
Step 6
Once the dough has been proofed, gently turn it over onto the working surface.
Carefully shape the dough into a tighter ball by turning the dough around and tucking its sides under itself.
Don't push the dough too hard to avoid losing the air bubbles formed during fermentation.
Step 7

Score the dough with a razor, a lame, or a sharp knife (be creative and make a nice pattern!). Scoring allows for a better oven spring.
Transfer the dough onto a piece of parchment paper and gently lower it into the cold Dutch oven.
Place the Dutch oven with the bread into the oven and start preheating it to 450F/230C. Once the oven is heated, bake for 40 minutes with the lid on.
Then, take the lid off, turn the temperature down to 350F/175C, and bake for another 30 minutes.
Transfer the bread onto a cooling rack and wait until it is no longer warm to the touch to slice it. Enjoy!
Troubleshooting
Gumminess - if your bread is gummy it might be due to underproofing/overproofing or not baking long enough. If you used other flour types than indicated in the recipe, you might need to adjust the water amount next time.
Too dense - if the bread doesn't have any bubbles and seems way too dense it could be due to a starter that isn't active enough or the cold proofing temperature.
A large hole in between the top crust and the crumb - this is a sign of overproofing the dough. Bake the dough sooner next time!
Frequently Asked Questions
Yes! Gluten-free starters won't always double and depending on the consistency, it might rise very little. You can still use it in bread as long as it is at least 2 weeks old!
You can give it a try but your bread might turn out gummier/drier depending on the contents of that flour blend.
I don't recommend making gluten-free sourdough in a bread machine due to its proofing timing and specific baking needs. Instead, check out these gluten-free bread machine recipes for ideas!
More Gluten-Free Sourdough Recipes to Try


Get my GF sourdough recipes eBook
The top 16 recipes of 2024!
Gluten Free Vegan Sourdough Bread
Ingredients
Wet ingredients
- 20 grams (3 tbsp) psyllium husk, whole husks, if using coarse powder use 20 grams, fine powder - 17g. For more details check my psyllium husk 101 article
- 410 grams (1⅔ cups) water, room-temperature
- 15 grams (1tbsp + 1tsp) sugar/maple syrup, helps the sourdough bacteria
- 70 grams (¼ cup) active sourdough starter
Dry ingredients
- 85 grams (¾ cup) tapioca starch or arrowroot starch
- 95 grams (½cup + 1tbsp) potato starch or 95g (¾ cup) cornstarch
- 180 grams (1⅓ cups) sorghum flour
- 12 grams (2 tsp) salt
- 2 teaspoon baking powder, check the package to make sure it is gluten-free
SAVE THIS RECIPE!💌
Instructions
- Combine psyllium husk, sugar, and room temperature/warm water in a medium-sized bowl, whisk to incorporate, and set aside.
- In a large mixing bowl combine all the dry ingredients (sorghum flour, starches, baking powder, and salt) and whisk to incorporate.
- Once psyllium forms a gel, add it to the bowl with the dry ingredients.Add mature gluten-free sourdough starter to the bowl and mix the dough thoroughly.I like to use an electric mixer for this step but you can also do it by hand if you prefer.
- Once the dough is well incorporated, turn it over onto a lightly floured working surface and flatten it into a disc.Fold each side of the disc onto its middle, flip the dough, and shape it into a ball (refer to the pictures in the post for visual instructions).
- Flour the proofing basket or bowl lined with a kitchen towel and place the dough in it. Press the dough into the basket to create a flat top.Cover the basket with a kitchen towel and leave to rise at room temperature for about 5 hours or in the refrigerator overnight (12-18 hours).The dough should puff up during rising but it won't double in size. Don't worry if the dough doesn't rise a whole lot, it will do most of its job in the oven.
- Once the dough has been proofed, gently turn it over onto the working surface.Carefully shape the dough into a tighter ball by turning the dough around and tucking its sides under itself.Don't push the dough too hard to avoid losing the air bubbles formed during fermentation.
- Score the dough with a razor, a lame, or a sharp knife (be creative and make a nice pattern!). Scoring allows for a better oven spring.Transfer the dough onto a piece of parchment paper and gently lower it into the cold Dutch oven and put the lid on.Place the Dutch oven with the bread into the oven and start preheating it to 450F/230C. Once the oven is heated, simply bake for 40 minutes without opening the oven.Then, open the oven, take the lid off, and transfer the loaf onto the oven rack. Turn the temperature down to 350F/175C and bake for another 30 minutes.Transfer the bread onto a cooling rack and wait until it is no longer warm to the touch to slice it. Enjoy!*If the bottom of your bread tends to burn, place a baking sheet in the bottom of the oven once you take the bread out of the Dutch oven.


Susan Friar says
Why don't you want Xanthan Gum in this particular bread?
Natasha Levai says
Hi Susan! This bread was developed with a different formula in mind. I have another recipe that uses both for a better texture, but that one is not vegan!
Leah says
Natasha, When you cold proof overnight in the frig, do you leave it set out on the counter for 15-30mins before going to the frig and or do you upon removing from the frig leave it set out for 15-30 mins before going to the oven to bake? I've not had good luck just putting it straight into the frig. I've been baking the Soft and Fluffy recipe, but wanted to try this vegan one, since it has all the things that agree with me in it and I'm not crazy about always using eggs.
Jen Brittain says
Hi Natasha,
can I use milk instead of water? Not sure about how the psyllium would gel in milk, or can I use 205ml water to make the gel and then add 205g milk into the gel just before I combine the wet and dry ingredients?
Cez says
Hi,
Can I use rice flour for this recipe?
Can I open bake this bread? I don't have a Dutch oven. Thanks!
Natasha Levai says
You can use part white rice flour. If you use rice flour as the foundation for the bread, it won't turn out as well! You can open bake, just the crumb will be denser.
Samantha says
Hi! Is it just regular baking powder or double acting? Thanks!
Wednesday N Sorokin says
This has been my go-to bread ever since I found the recipe. Thank you! Now, I have a problem. My last loaf came out more holes than bread. I checked to be sure I was using the right amount of xantham gum, only to find that you don't have any in the recipe! I have changed the flour - I used about 1/3 Caputo Fioraglut, 2/3 mix of sorghum, teff, and buckwheat. Last time I used slightly more Caputo and 3 t. xanthan gum. Do you have any tips for me?
Maria says
Hi,
I am trying this recipe for the first time. I was so excited to get my sourdough starter going. It seems though after putting it in the fridge it stopped being active? Is it dead? Do I start over... that took a lot of sorghum and 14 days of dedication. I'm so sad! Am I supposed to let it sit and bring it to room temperature before using it? The last time I fed it was 2 days ago with 40 g of sorghum and 40 g of water. HELP!!! I was so ready to mix it all in.
Sonu says
There's no oil in this recipe? I have gone thru the comments & many comments day that the original recipe before you updated have better results so wondering which one to try?
the updated one or original?
what's the difference in the end loaf results in both recipes? can you pls help
Natasha Levai says
Hi Sonu! This recipe was changed a long time ago and while some people preffered the old version, the majority seems to like the newer one! You can add oil if you prefer. The new recipe is very similar to the old one, just it produces larger holes in bread and omits unnecessary ingredients!
Tammy Jarrart says
Can I use another flour to sub the sorghum flour?
Natasha Levai says
You can use brown rice flour instead!