
This Buckwheat Sourdough Bread is full of flavor and has a soft crumb and a delicious crust. I love baking gluten-free sourdough and this is one of my go-to recipes! Check out my gluten-free starter recipe here.
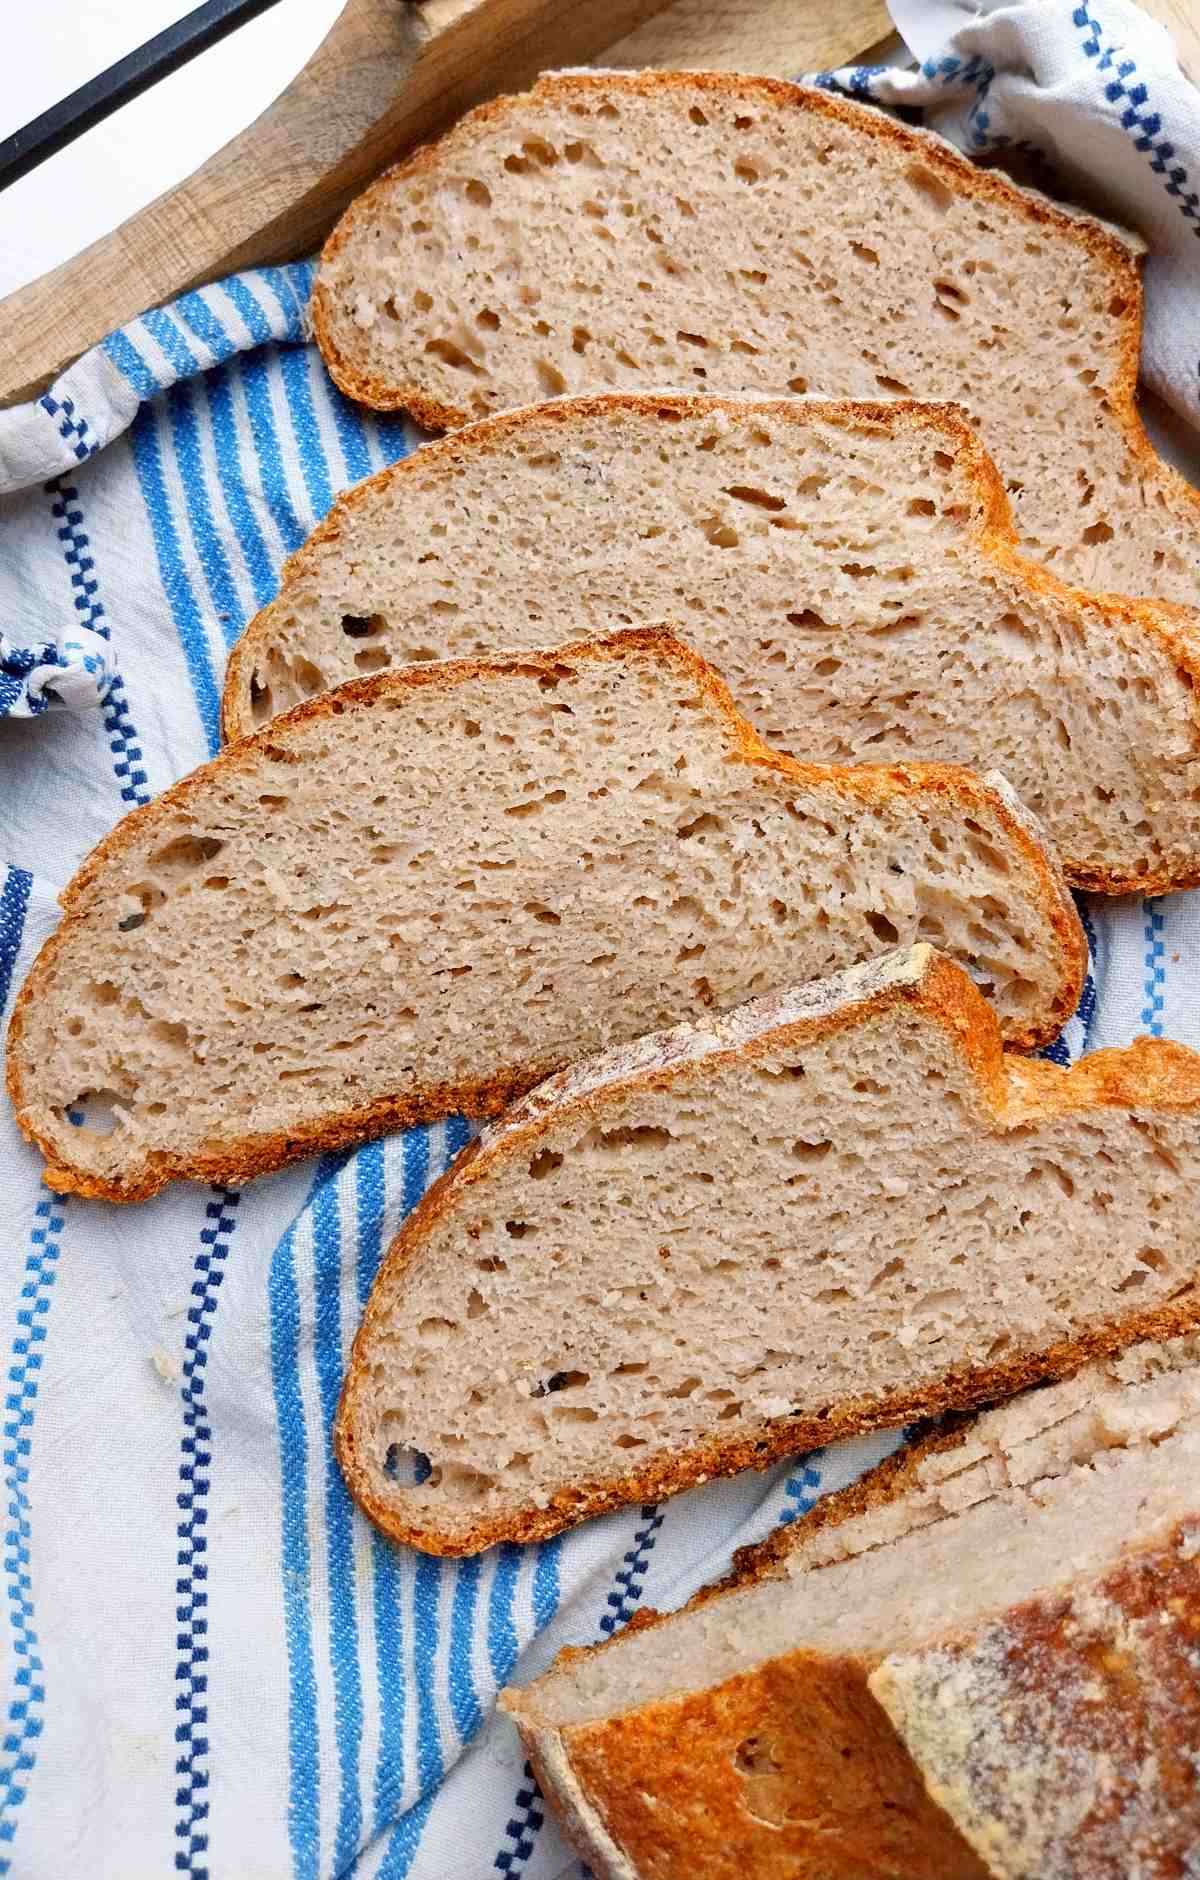
Since I discovered gluten-free sourdough I have been experimenting with recipes like vegan gluten-free sourdough, pure sorghum sourdough, millet sourdough, brown rice sourdough, and many others.
This buckwheat recipe has been in the works for a while and I am finally happy to share this recipe with a slight buckwheat flavor (not overwhelming like in 100% buckwheat bread), artisan crust, and a soft crumb!
Jump to:
Ingredients For Buckwheat Sourdough

- Gluten-free flour mix - the starches soften the crumb while buckwheat flour adds nutrition and a special flavor. I don't recommend using pre-made gluten-free flour for this recipe!
- Gluten-free sourdough starter - you can use any gluten-free starter (brown rice, sorghum, teff, buckwheat, etc.), only make sure it is active and has not been sitting in the fridge for a week prior to baking.
- Psyllium husk - I recommend whole husks vs. powder. If you choose powder, use 18g instead of 20g.
- Baking powder - not essential but helps open the crumb more. Don't swap for baking soda.
- Sugar - another optional ingredient. Sugar helps the yeast bacteria but bread will work great even without it.
See recipe card for quantities.
Substitutions
- Tapioca starch - use arrowroot starch instead.
- Potato starch - you can swap with cornstarch.
- Buckwheat flour - if you don't like buckwheat, try a vegan sourdough with sorghum flour.
- Psyllium husk - while there are some alternatives to psyllium, I have only been able to use Konjac as a substitute (about 6g per loaf). However, the texture and the rise are best with whole psyllium husks.
- Sugar - use honey or maple syrup instead.
- Baking powder - you can skip baking powder if you need to.

my favorite
Banneton baskets
I recommend getting a round 9-inch basket and an oval one for more variety!
How To Make Buckwheat Sourdough
Step 1
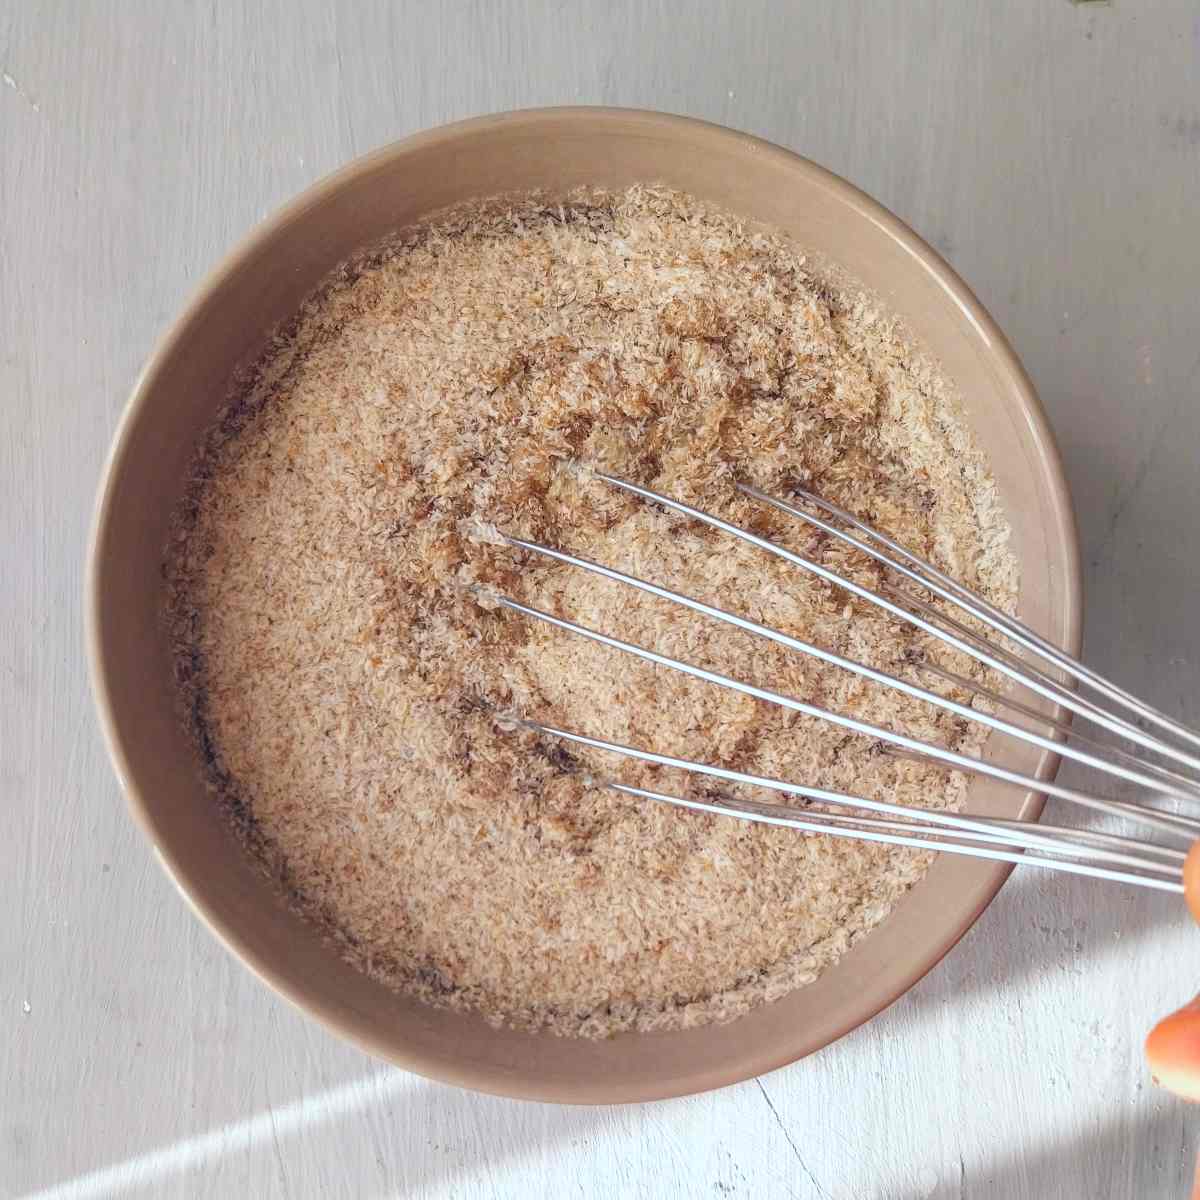
First, we will make psyllium gel. Combine psyllium husk and water in a medium-sized bowl and whisk to prevent clumping.
Add the sugar to the bowl and set it aside for a couple minutes.
Step 2

Combine the flour, starches, baking powder, and salt in a separate large mixing bowl and whisk to incorporate.
Step 3

Now, add the sourdough starter to the bowl with psyllium gel and stir to combine.
Step 4

Add the wet ingredients to the bowl with the dry ingredients and mix using an electric mixer with dough hooks or do it by hand.
Mix until the dough comes together and all ingredients seem to have incorporated evenly.
The dough will be sticky but workable.
Step 5

Turn the dough over onto a lightly floured working surface and flatten it out as you see in the picture.
Dust the dough with extra flour if it is sticking to your hands too much!
Fold each side of the dough onto itself as you see in the pictures, flip, and shape the dough into a ball.
Step 6

Place the dough upside down into the banneton basket or a mixing bowl lined with a kitchen towel if you don't use a banneton. Cover the bread with a tea towel to prevent it from drying out.
Leave the loaf to ferment for 5-7 hours at room temperature (21-24C/60-75F) or for 12-18 hours in the refrigerator.
Step 7

Once the bread is done proofing, transfer the loaf onto a piece of parchment paper (handle the dough carefully to avoid deflating it) and score in a pattern you like or as you see in the picture.
Lower the parchment with the bread into a cold Dutch oven, cover with the lid, and place the Dutch oven into a cold oven.
Start preheating the oven to 450F/230C and once it's preheated, start the timer for 40 minutes.
After 40 minutes, take the loaf out of the Dutch oven and transfer it to the oven rack. Lower the temperature to 350F/175C and bake uncovered for another 30 minutes.
Once the bread is done baking, transfer it to a cooling rack and let it sit until no longer warm to the touch. Slice and enjoy!
For bread machine check out these gluten-free bread machine recipes.
Tip!
Wrap the loaf into a kitchen towel 30 minutes into the cooling process to soften the crust. Alternatively, if the loaf is hard to cut, place it into the microwave for a minute and slice.
Storage
Store buckwheat sourdough at room temperature for 3-4 days or slice it and freeze for up to 3 months.
To defrost, simply place a few slices into the microwave for a couple minutes or toast them instead.
Troubleshooting & Tips
- The dough didn't rise - make sure the temperature where you placed the bread is warm and the sourdough starter is active. I don't recommend using white rice flour, coconut flour, almond flour, or potato flakes in a starter as those won't raise your loaf.
- The bread is too gummy - make sure to let your bread cool completely before slicing. If the dough is still tacky, toast the slices to dry out the crumb. Alternatively, you can leave the sliced bread at room temperature until it dries out on its own.
- The crust is too hard - wrap the loaf in a tea towel 30 minutes into the cooling process. This should soften the crumb! If the dough is cooled and it is too hard to slice, simply warm it up in a microwave for a couple of minutes.
- The bottom of the loaf is burnt - you can use a silicone liner for a Dutch oven to prevent burning.
Top tip
If you bake at a high altitude, the fermentation time will be shorter and you might need to add extra water to the dough. Your dough should be sticky, not dry!
FAQ
You can use sorghum but follow this sourdough bread recipe instead.
Overproofing.
More gluten-free sourdough recipes
You might also like these!


Get my new gluten-free sourdough recipes eBook
The top 32 recipes of 2026!

Vegan Buckwheat Sourdough Bread (Gluten-Free)
Ingredients
- 20 grams whole psyllium husks, use 18g if using powder.
- 400 grams water, room temperature or warm
- 10 grams sugar, optional. Honey/maple syrup can be used instead.
- 180 grams buckwheat flour
- 70 grams tapioca starch or arrowroot starch
- 80 grams potato starch or cornstarch
- 10-12 grams salt, adjust to taste
- 2 teaspoon baking powder, make sure it is gluten-free
- 70 grams active gluten-free sourdough starter
SAVE THIS RECIPE!💌
Instructions
- First, we will make psyllium gel. Combine psyllium husk and water in a medium-sized bowl and whisk to prevent clumping.Add the sugar to the bowl and set it aside for a couple minutes.
- Combine the flour, starches, baking powder, and salt in a separate large mixing bowl and whisk to incorporate.
- Now, add the sourdough starter to the bowl with psyllium gel and stir to combine.
- Add the wet ingredients to the bowl with the dry ingredients and mix using an electric mixer with dough hooks or do it by hand.Mix until the dough comes together and all ingredients seem to have incorporated evenly.The dough will be sticky but workable.
- Turn the dough over onto a lightly floured working surface and flatten it out as you see in the picture in the post.Dust the dough with extra flour if it is sticking to your hands too much!Fold each side of the dough onto itself as you see in the pictures, flip, and shape the dough into a ball.
- Place the dough upside down into the banneton basket or a mixing bowl lined with a kitchen towel if you don't use a banneton. Cover the bread with a tea towel to prevent it from drying out.Leave the loaf to ferment for 5-7 hours at room temperature (21-24C/60-75F) or for 12-18 hours in the refrigerator.
- Once the bread is done proofing, transfer the loaf onto a piece of parchment paper (handle the dough carefully to avoid deflating it) and score in a pattern you like or as you see in the picture.Lower the parchment with the bread into a cold Dutch oven, cover with the lid, and place the Dutch oven into a cold oven. Start preheating the oven to 450F/230C and once it's preheated, start the timer for 40 minutes. After 40 minutes, take the loaf out of the Dutch oven and transfer it to the oven rack. Lower the temperature to 350F/175C and bake uncovered for another 30 minutes. Once the bread is done baking, transfer it to a cooling rack and let it sit until no longer warm to the touch. Slice and enjoy!

Susan Minihane says
I've been experimenting with GF sourdough for the past 6 months. This recipe is the BEST that I've found. My only change is to make 1.5 x the recipe for my loaf pan, delete the baking powder, and add 1.5 teaspoons of instant yeast. While some may think using yeast is "cheating" in making sourdough from scratch, I don't because yeast is gluten-free and gives the bread an extra lift.
Lizzy Mac says
How come your recipe recommends putting your loaf in a cold Dutch oven in a cold oven? Curious because every other recipe I’ve ever seen for sourdough says you heat up the Dutch oven at 4:50 for 45 minutes before adding the loaf?
Natasha Levai says
Hi Lizzy! I like to do a cold start, I find that it works perfectly with gluten-free bread.
Ann says
Is the sugar/honey necessary? I read somewhere that starters don't really like sweeteners.
Also, my millet sourdough bread usually double, if not more, in size during proofing. My starter is made out organic short grain brown rice flour and water, equal amounts in grams. Is it OK to use it for this recipe? I would like to give this recipe a try.
Thank you.
Natasha Levai says
Hi Ann! If you want a millet sourdough bread, I have a recipe for it here: https://www.natashashome.com/millet-sourdough/
Gabrielle says
I give 5/5 for flavor, but mine was a little flat. What could have gone wrong?
Natasha Levai says
Hi Gabrielle! Gluten-free sourdough is not as big and round as regular wheat sourdough would be! If you want a loaf that comes closest to regular sourdough, check out this recipe instead: https://www.natashashome.com/easy-sourdough-starter/
Kimberley says
by how much should this recipe rise?
Natasha Levai says
Hi Kimberly! Gluten-free sourdough generally doesn't rise much during proofing. It does most of its rising in the oven, so as long as you proof according to the directions, you should be safe!
Maria says
This was my first gluten free sourdough recipe after years of perfecting regular sourdough. I was SO hesitant to try it out but it turned out great! I apparently used the darker buckwheat? So the bread resembled pumpernickel bread. The taste however was beautiful- and my friends loveddd it.