Gluten-free sourdough might seem intimidating and it was to me. There were times I wanted to give up on GF sourdough but I am glad I did not. Now I prefer baking GF sourdough to any other type of GF bread! You only need to make it right once and you will never go back. This brown rice flour sourdough starter is an easy way to start!
STOP making these 5 common GF sourdough mistakes!
Jump to:
- What is a Sourdough Starter?
- Is Sourdough Starter Naturally Gluten-Free?
- The Science Behind
- What Flour Is Best for a Gluten-Free Starter?
- Can I Feed My Starter A Combination of Flours?
- Should I Use Filtered Water?
- What Size Jar Should I Use?
- Should I Put a Lid on the Jar?
- Where Is the Ideal Place to Store the Starter?
- Step-by-Step Instructions
- FAQ & Troubleshooting
- How to Dry a Starter
- How to Freeze a Starter
- So, What Do I Do with the Discard?
- Get my GF sourdough recipes eBook
- 📖 Recipe
- Expert Tip
- 💬 Community
What is a Sourdough Starter?
Sourdough starter is a naturally grown yeast you can make at home by simply using flour and water! It takes a couple of weeks to grow a starter but once it is ready, you can keep using it forever.
You can make sourdough bread with your sourdough starter which will have a slightly sour flavor and a different nutritional build-up than the bread made with commercial yeast.
You can adjust how sour your bread gets by tweaking fermentation times, but we will talk about that later! For now, let's talk about the science behind the process.
New to gluten-free sourdough? Watch my 16-minute video tutorial for beginners!
Is Sourdough Starter Naturally Gluten-Free?
No, generally sourdough starter is not gluten-free if you are using all-purpose flour. However, if you use gluten-free flour, your starter will be gluten-free and you can make gluten-free sourdough bread with it (which is way easier than regular sourdough)!
The Science Behind
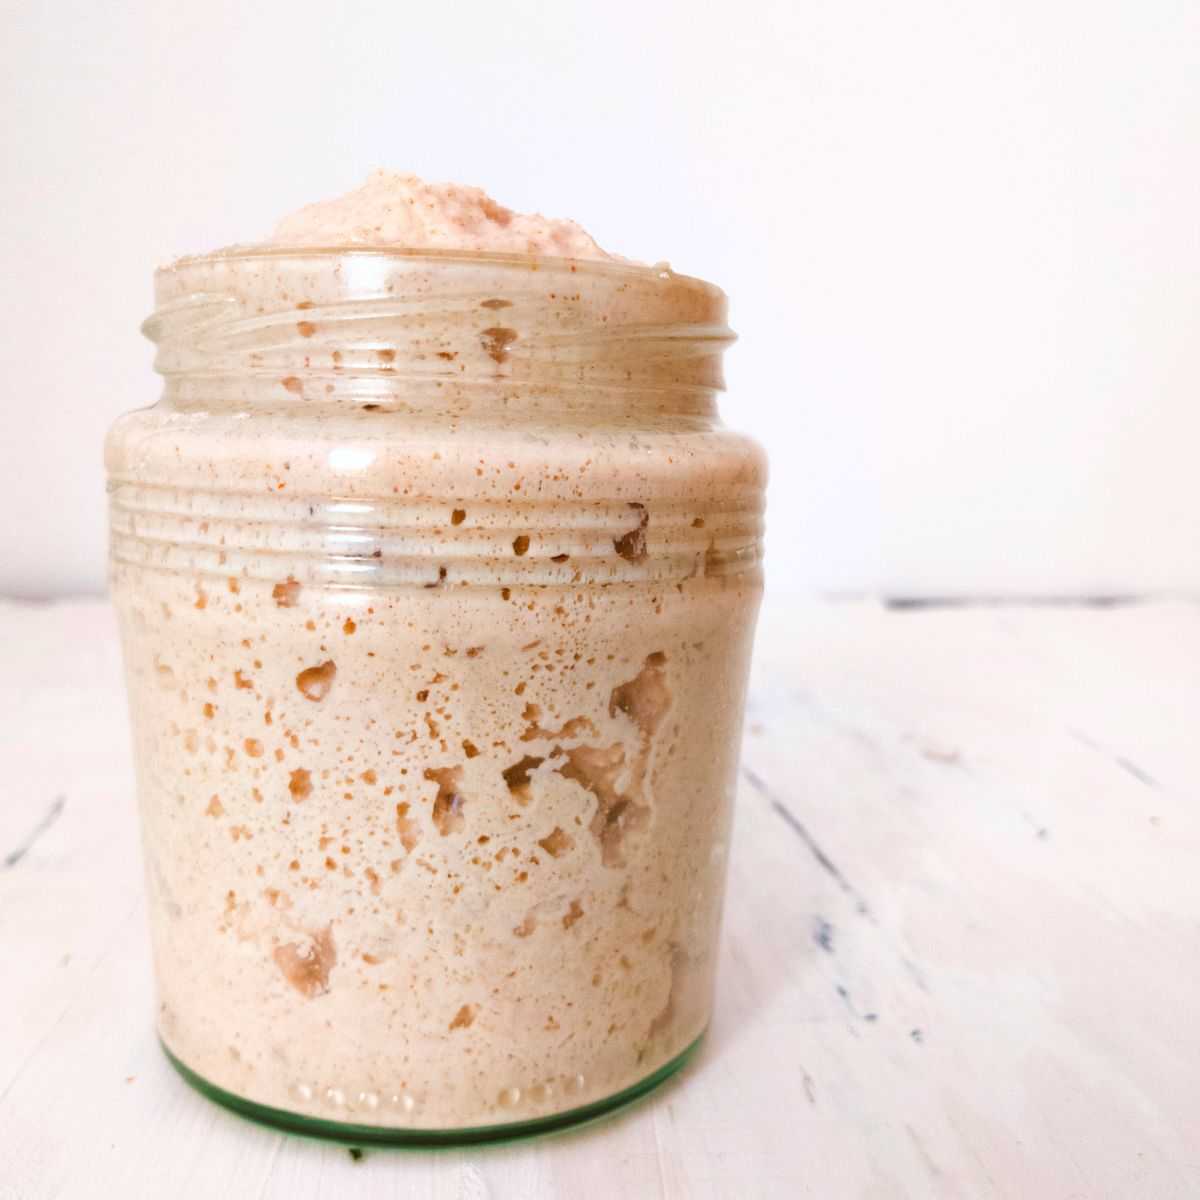
Creating a sourdough starter is pretty simple. You just mix equal parts of flour and water and let it sit at room temperature for a few days. During this time, the natural yeast and bacteria in the flour start to make themselves at home in the mixture. They eat up the sugars in the flour and create carbon dioxide gas and lactic acid through fermentation.
The yeast in the starter is responsible for making the dough rise. It produces carbon dioxide, which forms little bubbles in the dough and makes it rise. The friendly bacteria contribute to that distinct sour flavor that we love in sourdough bread. The longer you let your starter ferment and develop, the more delicious and complex your bread will be.
To keep your sourdough starter happy and active, you need to feed it regularly. This means removing some of the starter and adding fresh flour and water to give it the nutrients it needs.
This process helps maintain the right balance, prevents any strange flavors, and ensures that the yeast and bacteria have enough food to keep fermenting.
A well-maintained sourdough starter can stick with you for a long time and be used to make all sorts of yummy treats like bread, pancakes, waffles, and pizza dough. It's not just about the great taste either; sourdough bread made with a starter can be easier to digest and might even have some health benefits.
What Flour Is Best for a Gluten-Free Starter?
Sorghum flour, brown rice flour, and buckwheat flour are generally the best options for starting from scratch. I tried white rice flour, corn flour, sorghum flour, and brown rice flour, and in my experience, brown rice flour performed far better than any other type.
I read that some people find sorghum flour very good for starters, so I used it at first but did not see much activity. Then, I switched to brown rice flour with the same starter and it helped a lot. You can also explore chickpea flour, millet flour, and quinoa flour.
Can I Feed My Starter A Combination of Flours?
You can! It is best if you stick with flours that have the most nutrients for bacteria. The best flours are brown rice, sorghum, and buckwheat. You can also experiment with millet, chickpea, and quinoa!
Whatever combination you choose, stick with it until your starter is established. While it is okay to switch flour types between feedings, it is better to avoid switching too often,
So, if you feed your starter a combination of brown rice and sorghum, keep using that. If you want to switch to buckwheat let's say, you can do that, but avoid going back and forth between flour types every time you feed.
Should I Use Filtered Water?
If your tap water has chlorine in it, then you should use filtered water. We have very clean tap water here, so I always use tap water to feed my starter.
If you don't see any activity or bubbles in your starter after a few days of feeding, try using filtered water and see if that helps! The water should preferably be slightly warm, not too hot, and not too cold. Warm water will encourage the growth of good bacteria!
What Size Jar Should I Use?
Quart size jar is a good general size. However, you can use any glass jar you have at home that is not too small and not too big. It is best to have a couple of jars on hand because you will need to switch to a clean jar from time to time.
You don't need to switch jars every time you feed but once you see that dry starter is building up on jar walls, you know it is time to freshen it up!
Should I Put a Lid on the Jar?
It is best to cover your starter with a cheesecloth so that air can still get through. You can also use a lid but attach it loosely, don't screw it on.
Where Is the Ideal Place to Store the Starter?
Store your starter away from direct sunlight and away from other foods to prevent any sort of contamination that results in mold. It is best to find a warm spot to encourage growth.
A good place is inside a turned-off oven with the light turned on but if you don't want to always keep the light on, find a place that is not too cold in your house!
Step-by-Step Instructions
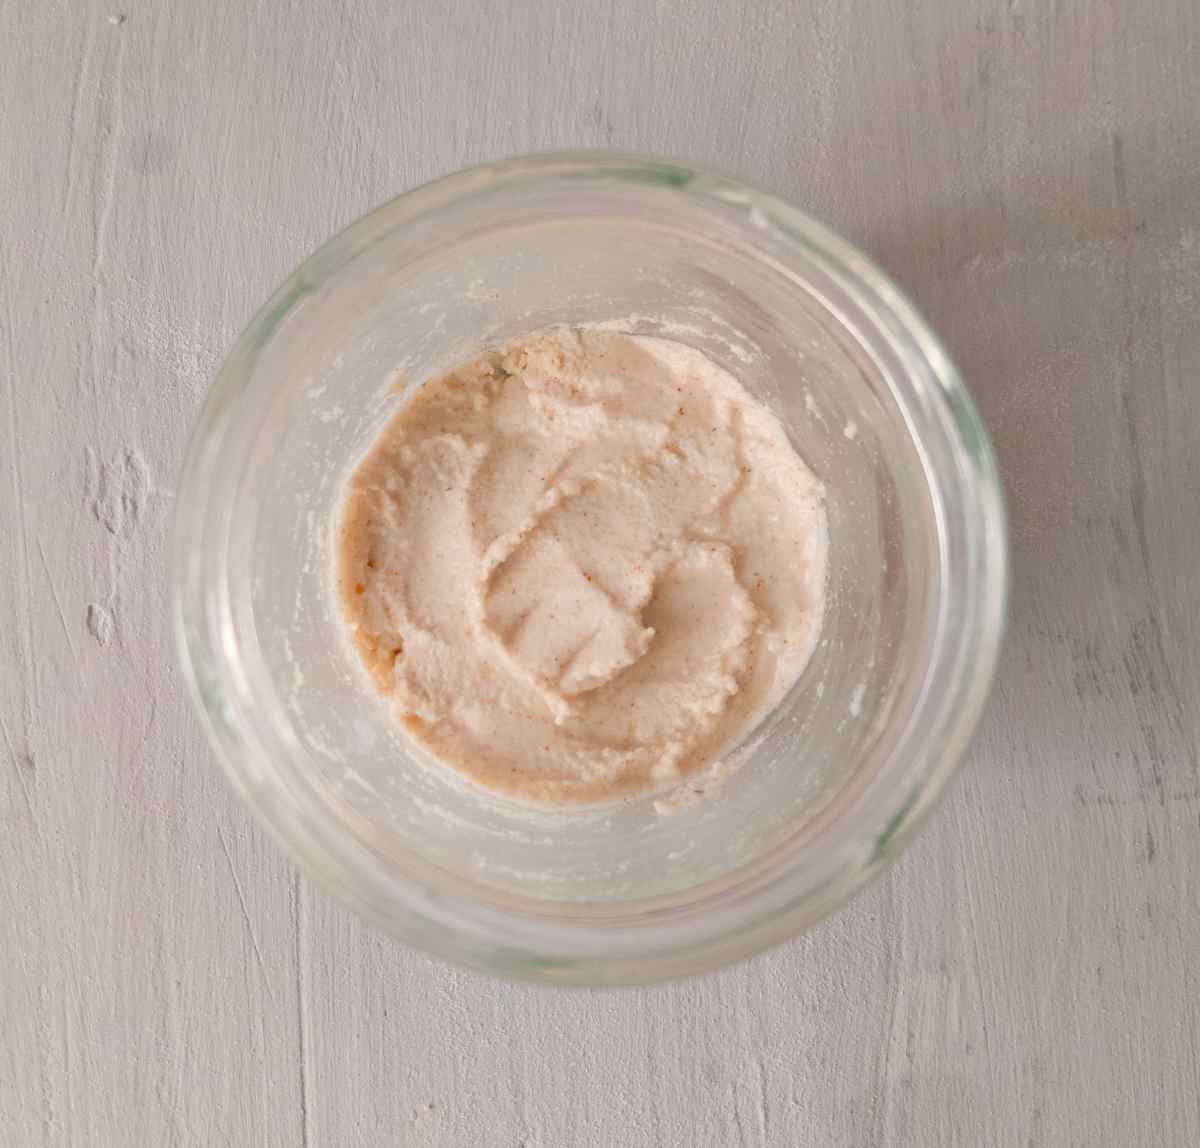
Day 1. Mix 20 grams of brown rice flour with 20 grams of water. We will start with very little flour and water to avoid excessive discard!
Stir the mixture with any kitchen utensil (stainless steel/wood are fine), scrape the sides of the jar, and cover the jar with a cheesecloth or a lid (loosely, the air still needs to come through).
It is important to scrape the sides of your jar to prevent it from building up on the walls and growing mold.
Find a place for your starter that is away from direct sunlight and separate from other food sources. Placing it near other foods can increase the risk of mold. Ideally, choose a warm spot in your house, but avoid placing it on a radiator or too close to a fireplace, as excessive heat can harm the bacteria.
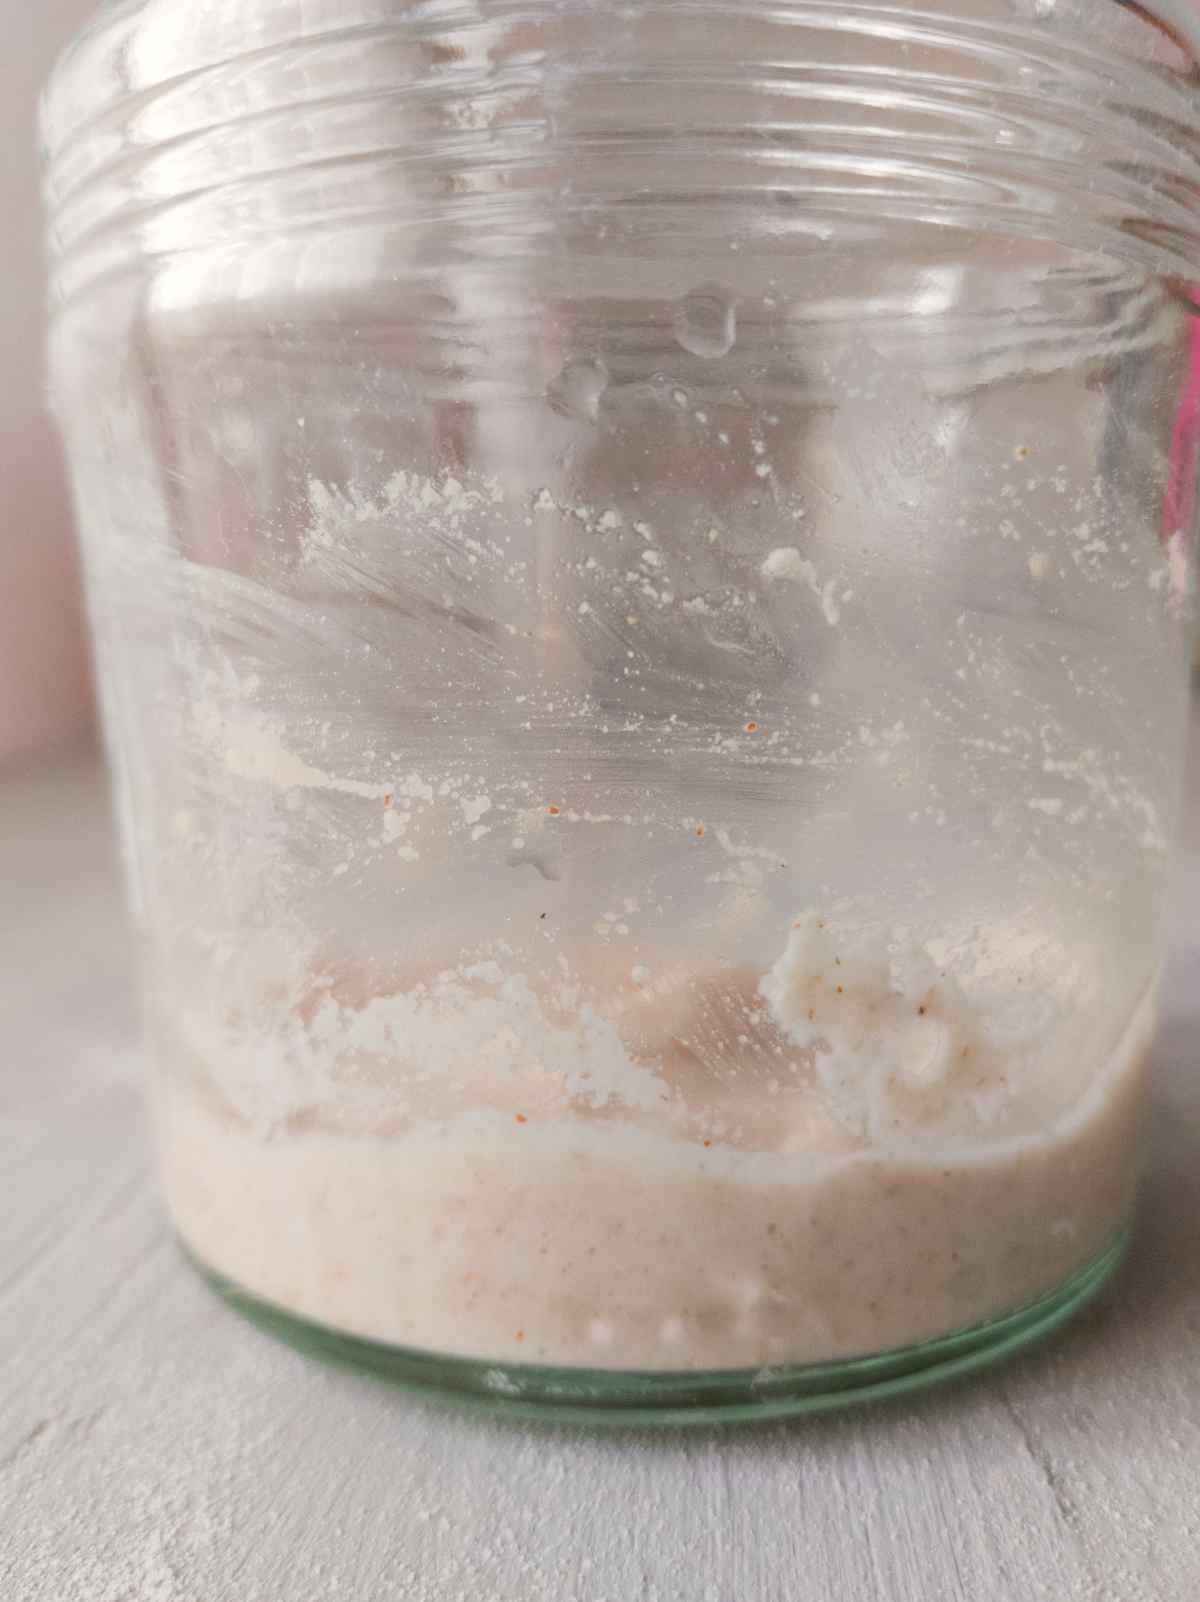
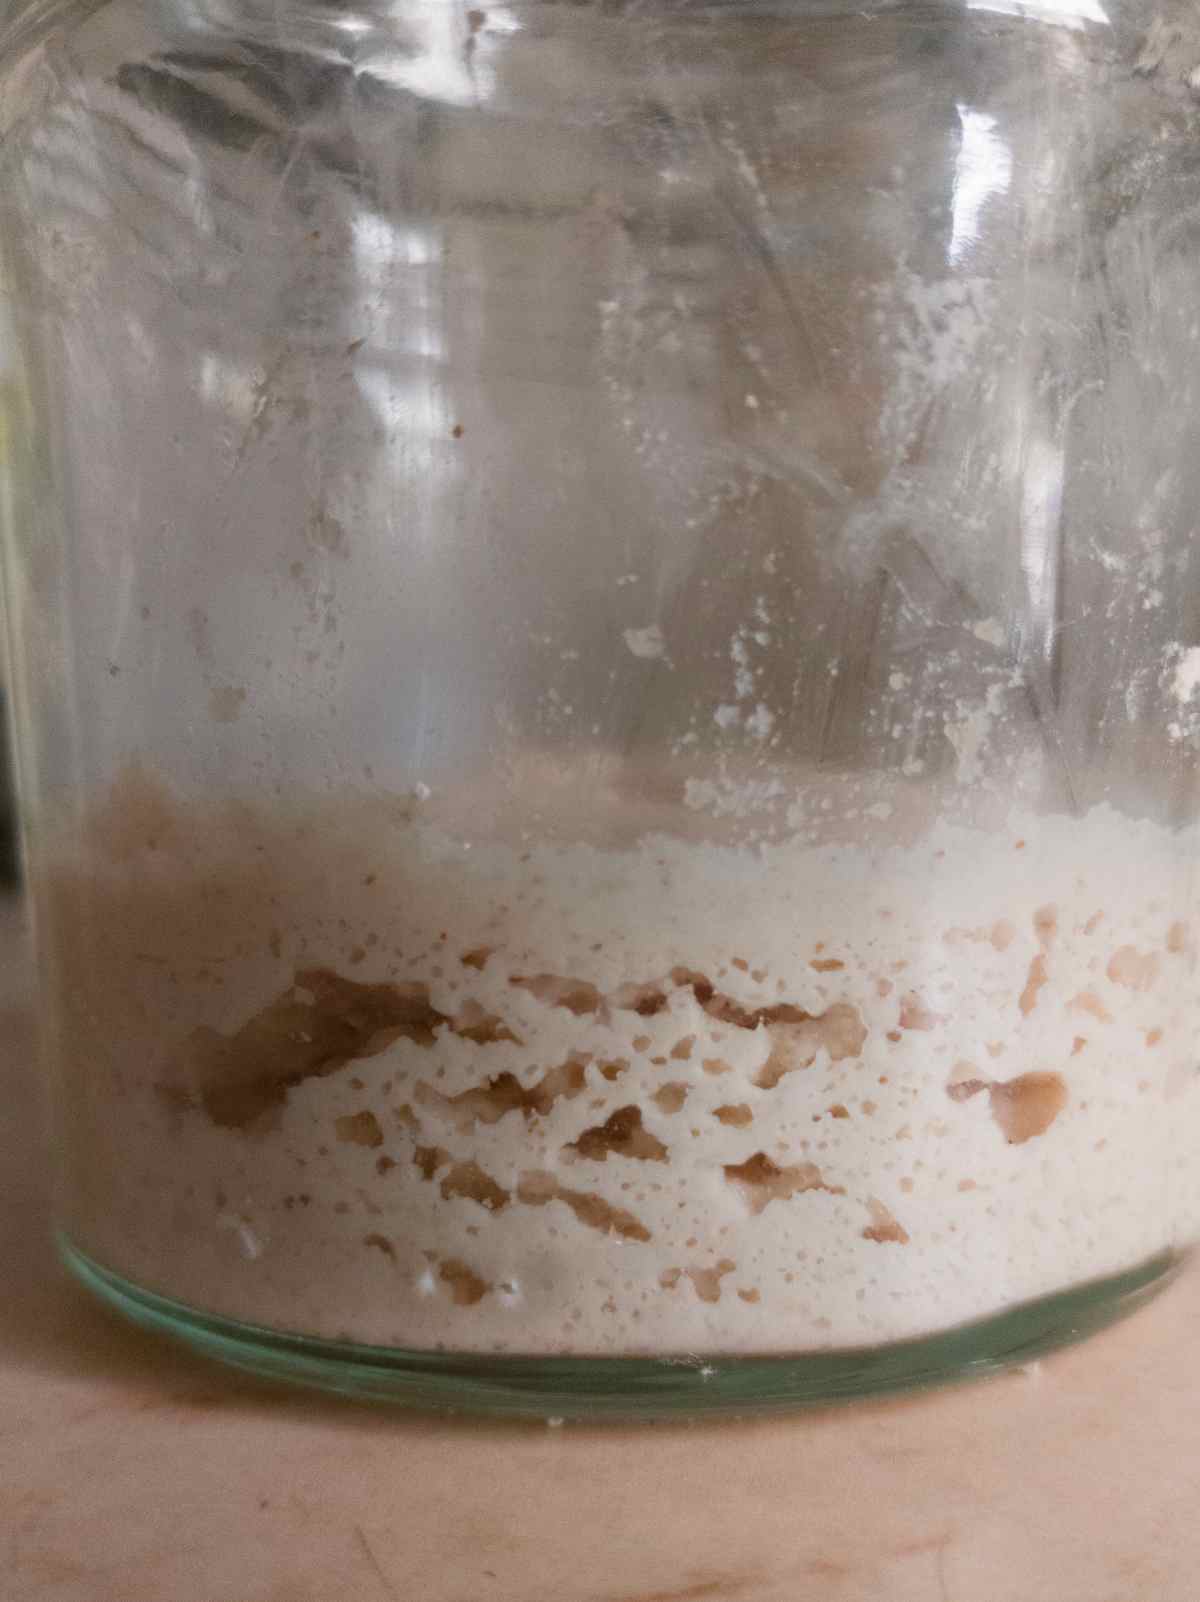
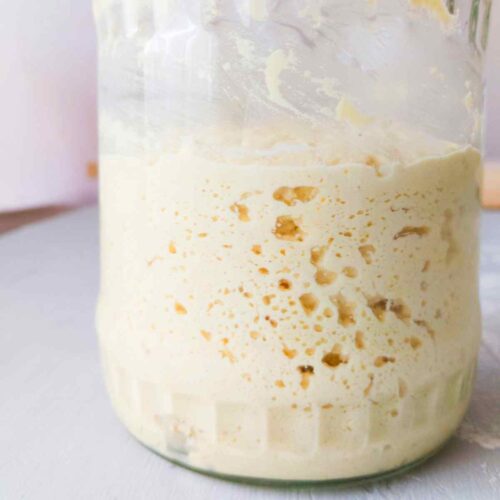
Day 2. Examine your starter for signs of activity. At this point, you should start seeing little bubbles at the bottom of the starter. If you don't see any bubbles, give the starter a stir and let it sit for another 24 hours to activate.
Once your starter is starting to bubble up a little bit, proceed to the next step. If after 48 hours you don't see any activity, proceed to the next step anyway and see if some discarding/feeding will help boost the process.
If after that you still don't see any bubbles, check out the troubleshooting section below!
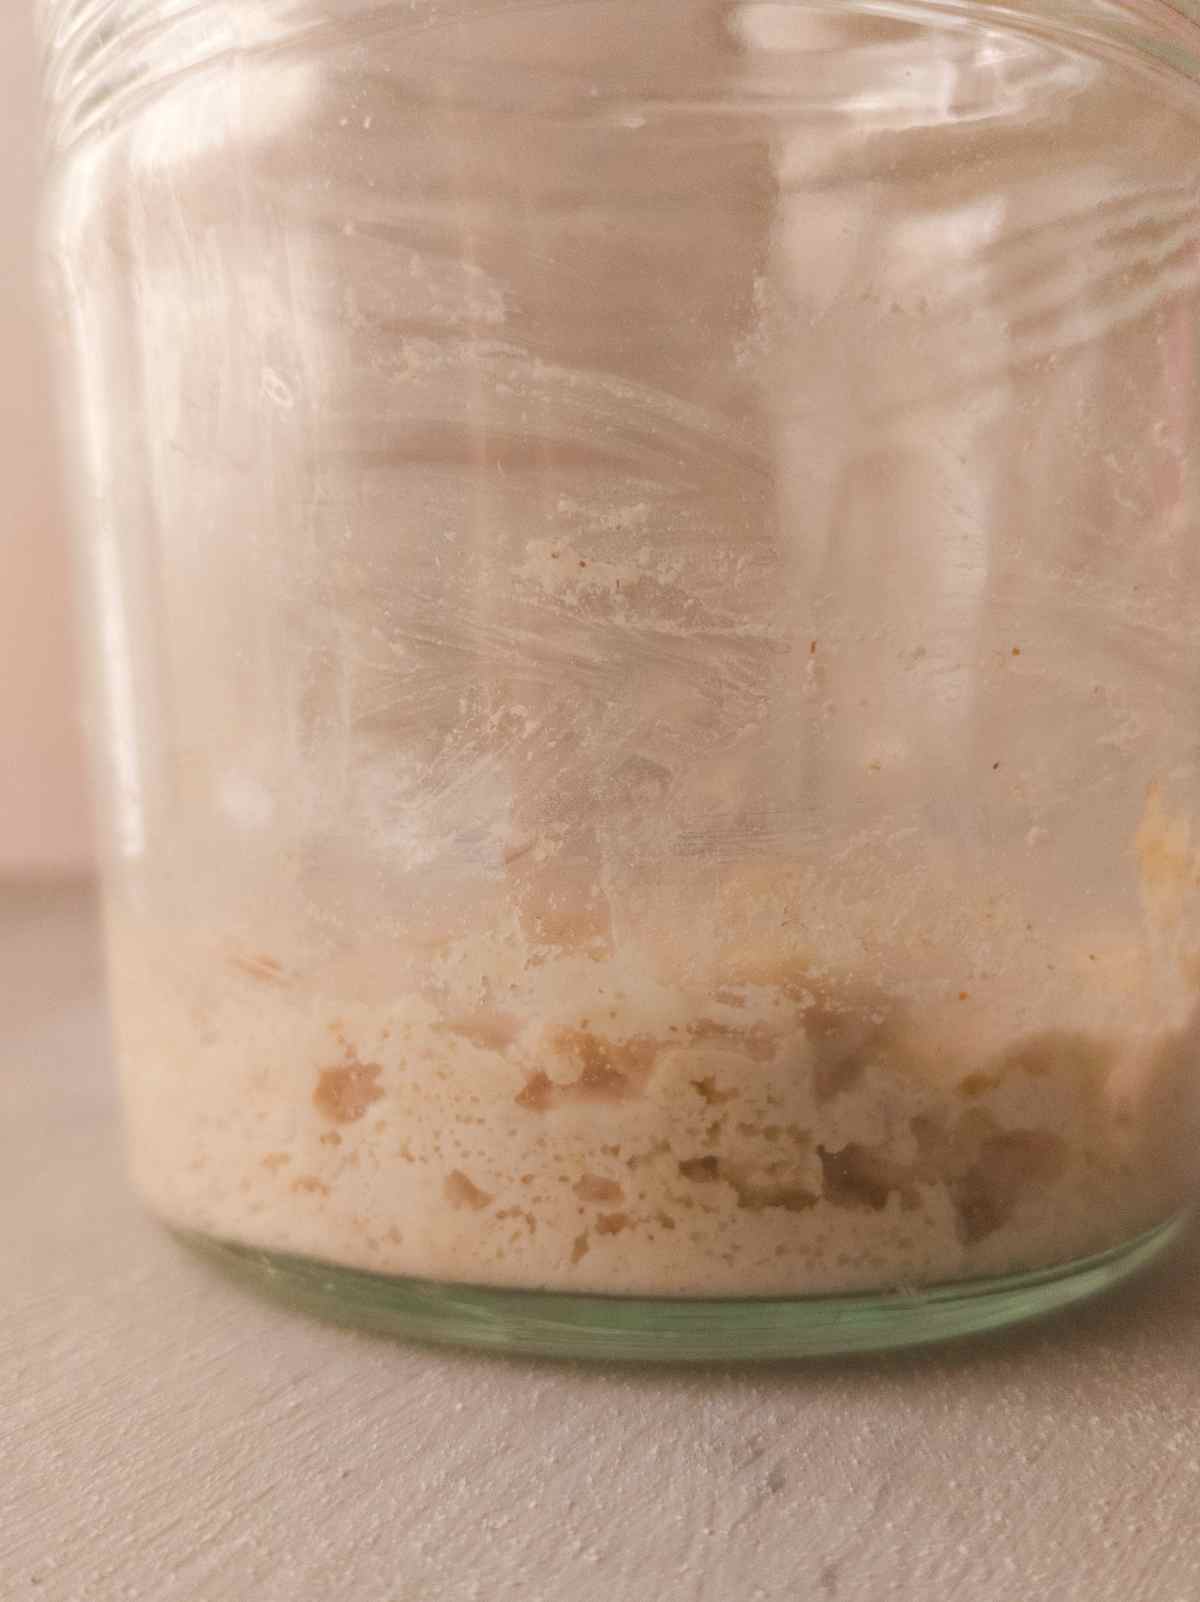
Day 3. Once you start seeing bubbles, it is time to start the feeding and discarding process! Discarding a portion of the starter is necessary to maintain a manageable amount and reduce waste.
Every time you feed the starter, you need to feed it at least at a 1:1:1 ratio, meaning if you have 50g of starter, you will need to feed it with 50g of flour and 50g of water. So, if you don't discard, you will end up having to increase the amount of water and flour with each feeding.
So, remove everything but 20g of the starter (you can use a fresh jar to track the amount) and add 20g of brown rice flour and 20g of water. If you are using buckwheat or sorghum flour, you might need to add less water to create a thick paste consistency.
Give the mixture a stir, scrape the sides, cover the jar with a cheesecloth or a lid (loosely), and let the starter sit for another 24 hours.
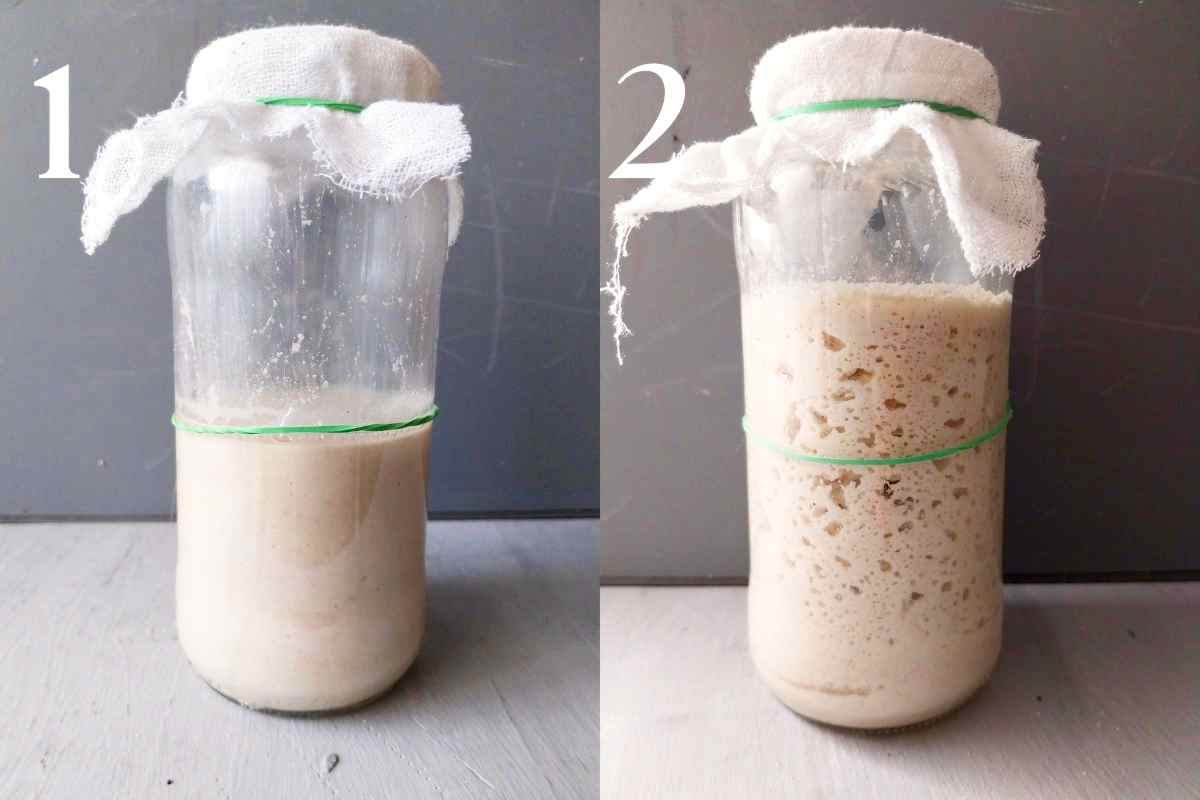
Days 4-14. At this point, we will start feeding and discarding our starter twice a day to build up its strength. At each feeding, discard everything but 20g of starter and add 20g of flour and 20g of water.
Don't use the discard for the first week as it has harmful bacteria that can make you sick! However, after the first week, you can collect discard in a separate jar and use it in gluten-free recipes that call for sourdough discard later.
Feed your starter every 12 hours for the best results. However, if you forgot to feed it at the 12-hour mark, don't worry, feed it whenever you can and continue the process! It is best to keep feeding and discarding twice a day for the first 2 weeks.
After that, you can keep your starter in the refrigerator when you aren't baking with it. If you keep it in the fridge, make sure to feed and discard it at least once a week to keep the starter healthy and active.
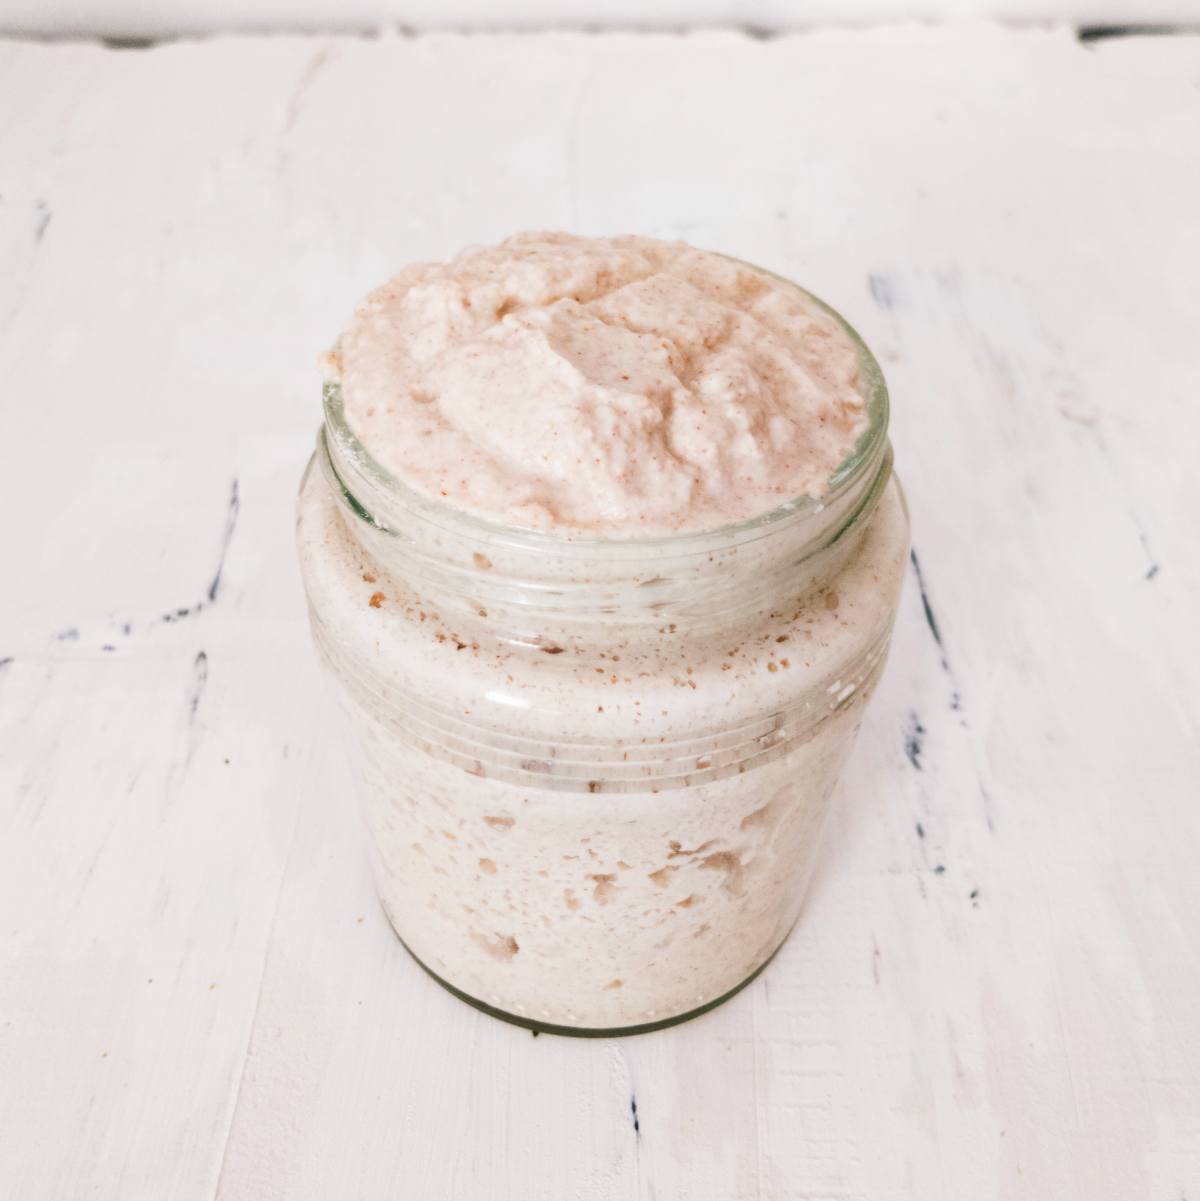
After about 10-14 days of consistent daily feedings, you can try baking your first gluten-free sourdough loaf! To do that, you will need to grow the amount of your starter. Now you have about 60-70g of starter and you will need at least 150g in order to make bread and have some extra left to maintain the starter.
To achieve that, skip the discarding step during the next feeding and instead, feed the starter with 100g of flour and 100g of water It will take a little bit longer for bacteria to work through its food this time! Then, once it reaches its peak activity (when it is at its highest point), you can use it in a bread recipe!
Note: if you are keeping your starter in the fridge, instead of using a cold starter in bread, it is best to take it out of the refrigerator and feed/discard it at least twice at 12-hour intervals before baking bread.
FAQ & Troubleshooting
Do I Have to Discard Every Time I Feed?
The short answer is yes. The reason we discard is to avoid extra waste. When you feed your starter, you need to feed it 1:1:1, meaning 1 part starter:1 part flour:1 part water. For example, if you have 50g of starter, then you need to feed it 50g of flour and 50f of water.
If you don't discard, you will end up having to feed your starter 200g or even 300g of flour at once which is an unnecessary waste.
My Starter Stinks!
It is totally normal for a starter to smell bad. Bad meaning like nail polish, vinegar, alcohol, sweaty socks (lol), and many other unpleasant things. Don't worry about the smell! Your starter is most likely doing just fine. The only time you need to be concerned is if you see mold. Otherwise, keep on going!
How Do I Know My Starter Is Ready to Be Used in Bread?
If your starter is at least 10 days old and bubbles up consistently after feedings, it is time to bake! Don't use a starter that is younger than 10 days.
It might show great activity but it is not strong enough yet to raise a whole loaf! Note, that your starter doesn't need to double in size to be fit for bread baking! Gluten-free starters rarely double in size although it is possible to achieve. If your starter is happy and bubbly, you are good to go!
I Only Have a Little Bit of Starter But the Recipe Calls for 100g
You need to grow your starter from 60g to 200-300g. To do that, simply skip the discarding step the next time you feed it and add 100g of flour and 100g of water.
Let the starter work through it and use it in bread! After that, you will keep your starter at a larger amount to keep using it in bread and other gluten-free sourdough recipes!
When Is the Best Time to Use a Starter?
It is always best to use a starter at its peak activity, meaning when it is at its highest point of rising. You can also use your starter after it fell with no problem but if you are looking to improve your bread and get more air bubbles, I would recommend using it at its peak activity stage.
My Starter Is Not Doubling!
Your starter doesn't have to double! Gluten-free starters can double but they normally don't unless you feed them 2-3 times a day and meet all their other needs (warmth, protection, etc.).
You can make great bread without your starter doubling! However, you can add 1 teaspoon of honey/maple syrup to the starter if you want to give it a boost.
I Can't See Any Activity In My Starter
Are you using tap water? If your tap water has chlorine in it, it will impede bacteria's growth. Try using warm filtered or bottled water. Another reason could be the ratio of water to flour. If your starter is runny then you probably are using too much water.
Some flour types need less water than others, so try reducing the amount of water and see what happens! Finally, make sure you are using a type of flour that has enough nutrition for bacteria to grow, Some good options are sorghum flour, brown rice, chickpea, buckwheat, and millet.
Water Layer On Top of the Starter
This water layer is called hooch. If you noticed the water hours after you fed the starter, then it is most likely a sign of hunger which means you need to feed your starter again.
Sometimes, the water will show up right after you feed the starter, in that case, it is nothing to worry about, it will get absorbed eventually!
How Do I Know If My Starter Has Gone Bad?
Mold! If you see mold, then it is time to say goodbye to your starter and get a new one. This can happen all of a sudden without any obvious warning signs.
To avoid having to go through the whole process again, dry some of your starter ahead of time to use in case you need it.
To dry your starter, simply spread a layer of it on a piece of parchment paper and let it dry for 24 hours. Then, store it in an air-tight container away from direct sunlight and extreme temperatures. Refresh once a year!
In most of the other situations, your starter has not gone bad just yet!
Can I Save Some Starter If It Has Mold?
No! Some sources out there will tell you it is ok to scoop the mold and keep on going but I am not 100% sure it is safe!
So, I recommend you to walk away from a moldy starter and get yourself a new one. It can be discouraging when your starter goes bad, I know the feeling! But trust me, you are better off safe than sorry.
My Starter Looks Pink
If your starter has a pink top layer, it could be due to using buckwheat flour. If you are not using buckwheat and still have pink top layer, reach out to us in our Facebook group and we will brainstorm together!
How To Maintain a Starter In the Fridge
You need to discard and feed your starter before placing it into the refrigerator. Then, take it out and discard/feed it weekly if you aren't baking with it.
Once you are ready to bake bread, take the starter out of the fridge and feed it at least twice with 12 hours in between the feedings before using it in bread recipes!
I Forgot to Feed My Starter
It is okay if you forgot to feed your starter as long as it hasn't grown mold. Just continue discarding and feeding until it gets its strength back!
How to Dry a Starter
To dry a sourdough starter, simply spread it onto a piece of parchment paper and let it dry for 24 hours. O
nce the starter is dehydrated, place it into an air-tight container or a jar and keep it at room temperature and away from direct sunlight. Don't expose it to extreme temperatures and refresh once a year (make a new batch).
To rehydrate a dried starter, place it into a jar with warm water, and once the dried starter dissolves, feed it with flour until it reaches the thick paste consistency.
Proceed with discarding/feeding as you would with a regular starter! It might take a few days before you start seeing any activity.
How to Freeze a Starter
You can also freeze your starter for later in case your current one dies for whatever reason! Freezing is the second best option after drying because it is harder to revive a frozen starter than a dehydrated one.
To freeze your starter, simply place some of it into an air-tight container and freeze it. Refresh once a year!
To thaw, let it come to room temperature (don't use a microwave!) and proceed with the discarding and feeding process. It will take some days before you start seeing activity and bubbles!
So, What Do I Do with the Discard?
The discard can be used in cooking after about a week of growing your starter. In the beginning, there are harmful bacteria that can make you sick if you eat it, so it is recommended to throw away the discard from the first week's feedings.
After that, you can start using the discard in recipes. The simplest one is to simply fry your starter! Then, you can make 3-ingredient banana pancakes with them, fluffy sourdough pancakes, sourdough discard naan bread, and many other recipes.
You can find a full list in my gluten-free sourdough discard recipe collection!
- 100% Brown Rice Sourdough Bread (Gluten-Free)
- 100% Millet Sourdough Bread (Gluten-Free)
- Gluten-Free Sourdough Bread (Vegan)
- Buckwheat Sourdough Bread (Gluten-Free & Vegan)
- 100% Sorghum Sourdough Bread (Gluten-Free)
- Gluten-Free Sourdough Rolls
- Whole-Grain Millet Sourdough Starter
- Gluten-Free Sourdough Baguette (French Bread)

Get my GF sourdough recipes eBook
The top 16 recipes of 2024!
📖 Recipe
Low-Discard Gluten-Free Sourdough Starter
Equipment
- 1 digital scale (not necessary but beneficial)
- 1 glass jar
- 1 stirring tool (a spoon or a knife)
- 1 Rubber band (to keep track of how much your starter has risen)
Ingredients
- brown rice flour
- water
- 1 teaspoon honey/sugar/maple syrup optional
Instructions
Day 1
- Mix 20 grams of brown rice flour with 26-30 grams of water. We will start with very little flour and water to avoid excessive discard! Stir the mixture with any kitchen utensil (stainless steel/wood are fine), scrape the sides of the jar, and cover the jar with a cheesecloth or a lid (loosely, the air still needs to come through). It is important to scrape the sides of your jar to prevent it from building up on the walls and growing mold.
- Find a place for your starter that is away from direct sunlight and separate from other food sources. Placing it near other foods can increase the risk of mold. Ideally, choose a warm spot in your house, but avoid placing it on a radiator or too close to a fireplace, as excessive heat can harm the bacteria.
Day 2
- Examine your starter for signs of activity. At this point, you should start seeing little bubbles at the bottom of the starter. If you don’t see any bubbles, give the starter a stir and let it sit for another 24 hours to activate.
- Once your starter is starting to bubble up a little bit, proceed to the next step. If after 48 hours you don’t see any activity, proceed to the next step anyway and see if some discarding/feeding will help boost the process. If after that you still don’t see any bubbles, check out the troubleshooting section below!
Day 3
- Once you start seeing bubbles, it is time to start the feeding and discarding process! Discarding a portion of the starter is necessary to maintain a manageable amount and reduce waste. Every time you feed the starter, you need to feed it at least at a 1:1:1 ratio, meaning if you have 50g of starter, you will need to feed it with 50g of flour and 50g of water. So, if you don’t discard, you will end up having to increase the amount of water and flour with each feeding.
- So, remove everything but 20g of the starter and add 20g of brown rice flour and 26-30g of water. If you are using buckwheat or sorghum flour, you might need to add less water to create a thick paste consistency. Give the mixture a stir, scrape the sides, cover the jar with a cheesecloth or a lid (loosely), and let the starter sit for another 24 hours.
Days 4-14
- At this point, we will start feeding and discarding our starter twice a day to build up its strength. At each feeding, discard everything but 20g of the starter and add 20g of flour and 26-30g of water. Don’t use the discard for the first week as it has harmful bacteria that can make you sick! However, after the first week, you can collect discard in a separate jar and use it in gluten-free recipes that call for sourdough discard later.
- Feed your starter every 12 hours for the best results. However, if you forgot to feed it at the 12-hour mark, don’t worry, feed it whenever you can and continue the process! It is best to keep feeding and discarding twice a day for the first 2 weeks. After that, you can keep your starter in the refrigerator when you aren’t baking with it. If you keep it in the fridge, make sure to feed and discard it at least once a week to keep the starter healthy and active.
- After about 10-14 days of consistent daily feedings, you can try baking your first gluten-free sourdough loaf! To do that, you will need to grow the amount of your starter. Now you have about 60-70g of starter and you will need at least 150g in order to make bread and have some extra left to maintain the starter.
- To achieve that, skip the discarding step during the next feeding and instead, feed the starter with 100g of flour and 120g of water It will take a little bit longer for bacteria to work through its food this time! Then, once it reached its peak activity (when it is at its highest point), you can use it in a bread recipe!
- Note: if you are keeping your staretr in the fridge, instead of using a cold starter in bread, it is best to take it out of the refrigerator and feed/discard it at least twice at 12-hour intervals before baking bread.


Kas
what can you use instead of honey to make vegan?
Natashashome
You can add sugar or maple syrup!
Annette
Where do we keep the started while it is growing? In a cupboard? Or Fridge?
Natasha Levai
Hi Annette! As your starter is growing it is best to keep it at room temperature away from direct sunlight. So, a cupboard will be ok while the fridge would not be. Thank you for your question, I will add this info to the post!
Peri
what is the best size jar to use?
Natasha Levai
As you are just starting out, a smaller mason jar will do but once your starter is established and you are ready to bake with it, you will need a larger jar to fit enough starter. I use a glass bowl to fit my starter, plus a bowl allows you to scrape the sides easily! Scraping the sides of any excess starter prevents mold from forming. Also, feel free to check out this video overview of making a starter and baking bread https://www.natashashome.com/gluten-free-sourdough-tutorial/
CD
In your instructions, when you say feed, do you actually mean discard then feed or do you just mean feed in each step?
When discarding, how much do you discard in each step?
It's been a LONG time since I've used any type of starter. 🤷♀️
Natasha Levai
Thank you for your question! When I say feed I mean discard and feed. You discard about half of the starter every time you feed (you can eyeball it, no need to be super exact). If you discard about a half every time you feed, then add 20g of flour and 20g of water, you will keep your starter fed and happy while keeping the discard to a minimum. Hope this helps!
Cherry
Do we cover the jar from day 1?
Worried about dust getting in.
Natasha Levai
Yes! Cover the jar with a cheesecloth or loosely with a lid.
Courtney
How long will this last in the fridge if I'm not able to use it for a bit? I love sourdough recipes!
Deborah
Thank you so much for sharing this recipe. I will share this with my gluten-intolerant friends!
Pauline Jennings
This is great! Just what I needed 🤗
Janet
So I’ve started my starter and am on day 10. My starter is approximately 80 grams. I didn’t discard after first two days. So 20 grams water and 20 g flour for 2 days. Since then I’ve discarded 1/2 -approx 40 grams of starter and feed with 20 g flour and 20 g water daily. My starter will only be 80 g total. What is the best way to grow it to 300g to make a loaf? I don’t want to overload my starter!
Natasha Levai
You won't overload it if you add a lot at once! The starter will be very happily eating through all of the flour and water you provided until it is done. So, I would say, add 150g of flour and 150g of water right away, wait until the starter gets to its peak, and bake with it! This way you will have 80g left after baking to continue maintaining your starter.
Stacie
I tried making a 100% buckwheat starter “grain free” that worked ok for a bit and eventually molded. It never rose very well, I used it for pancakes and muffins. Would it work to start a brown rice starter with your directions and then begin to add buckwheat flour after a few days of bubbling activity? From heresay I’m hoping it might rise better with the added starches from rice. But I’d still like it to be less rice so I don’t overdo on the rice.
Natasha Levai
Hi Stacie! You can start with brown rice and switch over to buckwheat. Common reasons for a starter getting mold are being too close to food sources, touching the starter with unwashed hands, using unwashed utensils, not refreshing the jar once in a while at least, not scraping the sides of the jar, not feeding the starter regularly.
Remember, you starter should not be too runny, and in case of buckwheat I suspect that 1:1 ratio would make it too watery. Your starter should look like a thick paste, not a pancake batter. Hope this helps! Let me know if you have any more questions!
Victoria
I cannot believe what a struggle this was until I found your page, thank you thank you thank you!!
I used old jam jars covered loosely with a piece of paper towel and switched to a clean jar every other day.
First loaf with this starter will be in the oven tomorrow morning 🙂
Natasha Levai
Woo hoo! Good job!! Thank you for sharing!!
Ali
Would the process/success be similar with white rice flour? I appreciate the value of whole grains. It’s an allergy question. Thanks!!
Natasha Levai
Hi Ali! White rice flour doesn't have as much potential as brown rice flour, precisely because it isn't whole grain! However, you can try sorghum or buckwheat flour if you can tolerate them! They are way better than white rice flour. White rice will work to a degree but not as great as brown rice, sorghum, and buckwheat flours. Millet is another good choice!
Swagatika
How to do the DISCARD?
Thoroughly mix the starter and then remove half or remove from the top layer of the ongoing starter?
Natasha Levai
Mix the starter and remove half of the starter. Don't just take the top!
Jen
My 1:1 starter of 20g each is chunky and crumbly. Is that normal?
Natasha Levai
If you are using brown rice flour, you should add 25-30g of water because brown rice flour absorbs more liquids than some of the other gluten-free flours.
Cheyenne Vanhoozer
Hi Natasha! I’ve been baking with a brown rice sourdough starter for years now and was thrilled to find your recipes recently. They’re helping me expand my horizons with baking! Thanks for all the work you’ve put into them. One question: the blogs I originally got my starter recipe from called for a 1:1 ratio of flour to water, but it was measured in cups vs weight. Thus, my starter is much more like a thin pancake batter than a paste. I get fantastic results with my bread, but am curious if there’s a benefit to having a starter with a lower hydration? Have you found it benefits the yeasts? I’m just curious and wanting to learn more! Thanks!
Natasha Levai
Hi Cheyenne! Generally, the starter will show more activity if it is on the thicker side. But if you are getting great results with your current starter, you can keep it as is!
Mackenzie L Shelton
yesterday was day 14 for me. the starter is very liquidy this morning after putting 100 g of brown rice flour and 120 g of water yesterday. Can I stir it and add in more flour or just wait for it to continue to activate?
Natasha Levai
Hi Mackenzie! Yes, of course! Add as much flour as needed to create a thick paste consistency.
Elise
Thank you so much for sharing this great gluten free sourdough. It’s been an amazing adventure thus far. My starter is 30 days old. Is there any benefit to feeding honey at this stage? I’ve been storing my sourdough in the refrigerator. When it’s time to feed it, should I allow the fermentation to finish inside the refrigerator or leave it at room temperature?
E
Thank you for sharing this wonderful recipe. As a novice with sourdough, this has been a fun adventure. My starter is almost 4 weeks and I’ve had it in my refrigerator. At this stage in the process, is there a benefit to feeding honey? When feeding the starter should I let the fermentation happen at room temperature for the sake of maintenance or should I put it back in the refrigerator?
Natasha Levai
If you are not planning to bake with your starter in the next few days, then you can return it back to the fridge! Honey is an option to boost a starter for a little while. I generally never add honey unless my starter is not showing any activity at all!
Carolyn
I am on day 11 of my brown rice starter. I keep 20 grams and feed 20 grams flour and ~25g water twice a day. I am not seeing any rise and not really any bubbles. I was the 250ml jar every time and stir with a wooden spoon. My house is cool (17°C ) so I have tried in the oven with the light on, in the microwave with a cup of very hot water. Any other recommendations?
Natasha Levai
Hi Carolyn! I would recommend you feed only once a day until you start seeing activity. Overfeeding the starter might contribute to the lack of activity!