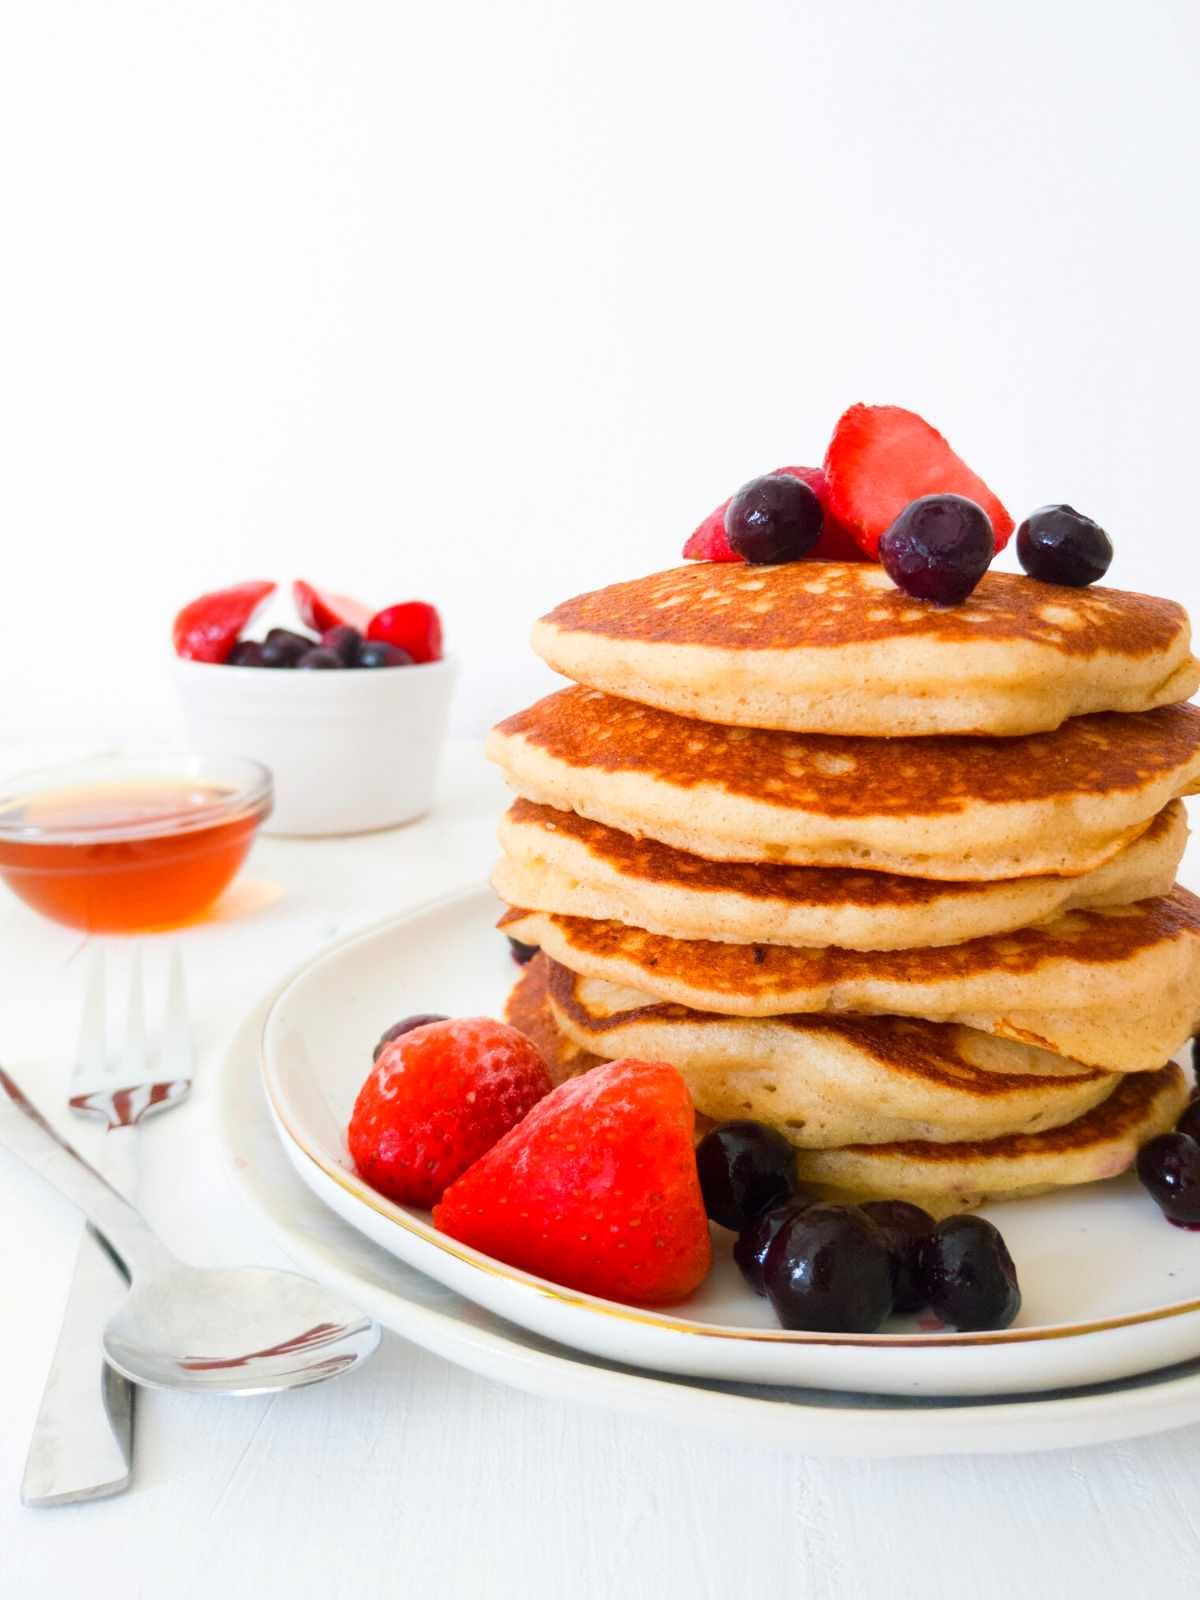
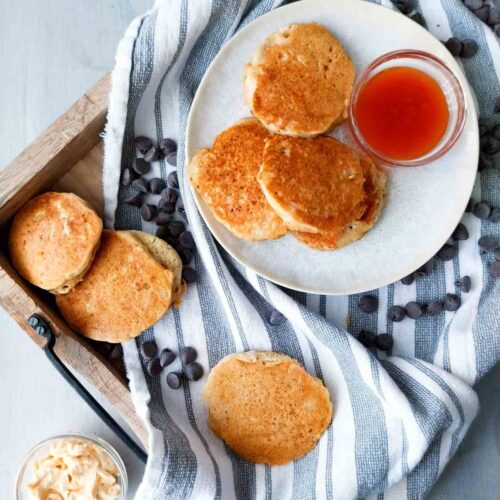
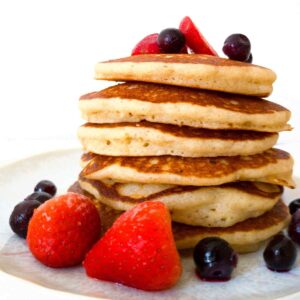
These gluten-free sourdough pancakes are my favorite GF pancakes (ok, maybe after these chocolate-stuffed ones!). They are soft, moist, flavorful, stable, and easy to make. If you don't have a GF sourdough starter, check out my regular GF American pancakes recipe instead.
Reader review
These pancakes are amazing! I highly recommend this recipe. I have to use egg replacers due to intolerances recipe still is wonderful! Thank you! It's such a treat to have a yummy pancake again after so long without!
- Anne
⭐⭐⭐⭐⭐
I'm always looking for more ways to use my starter discard and these fluffy pancakes are hands down one of the most efficient recipes!
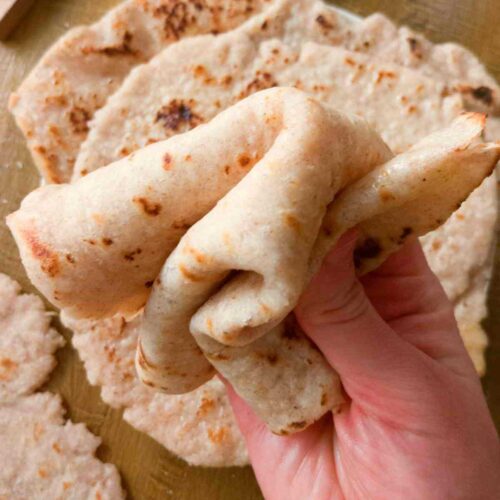
My second favorite recipe is these gluten-free sourdough French crepes. They call for about ½ cup starter making it a pleasant and easy way to clean out my starter storage! Dip them in some homemade sweetened condensed milk for an extra touch of sweetness.
Jump to:
Why You Will Love This Recipe
- Quick. No whipping egg whites, no overnight fermentation.
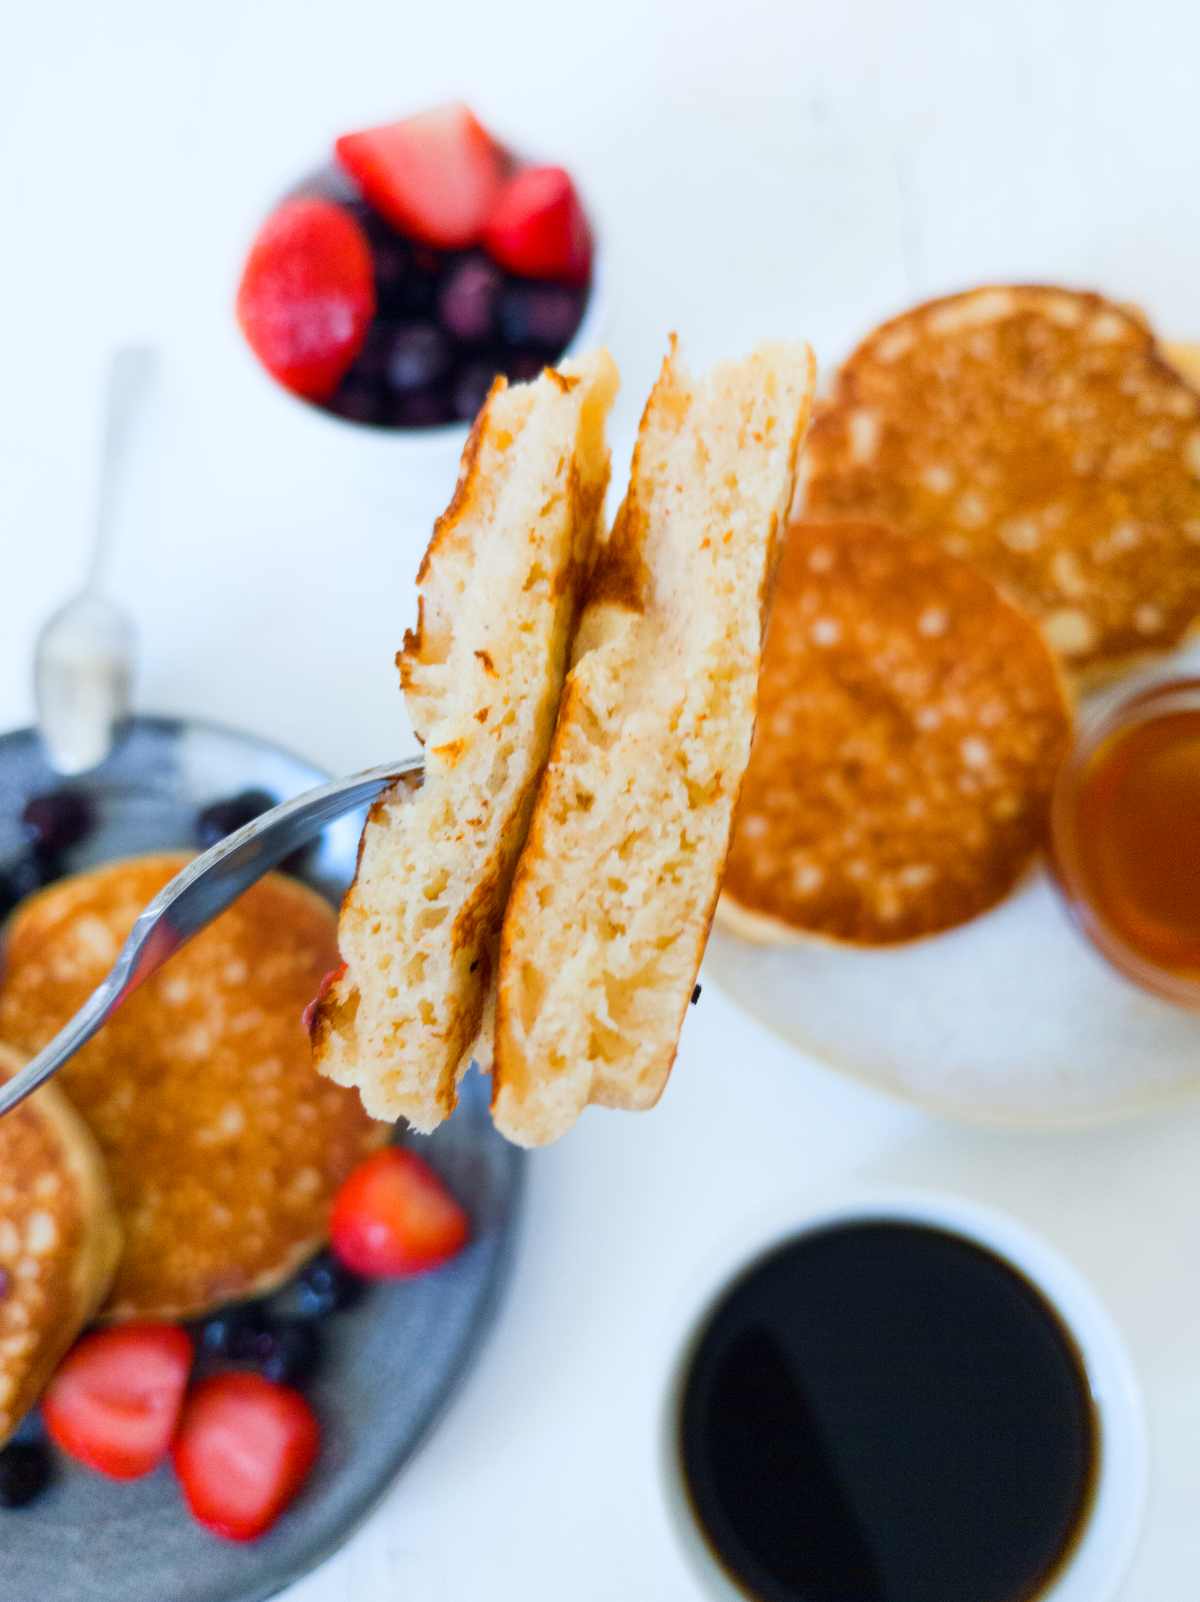
- Texture. Unlike many other pancakes I tried, these don't taste dry or bitter. Instead, they are moist, fluffy, and flavorful!
- Flavor. Gentle notes of sweetness are combined with the richness of oil and milk to create a depth of flavor!
New to gluten-free sourdough? Watch my 16-minute video tutorial for beginners!
Ingredients
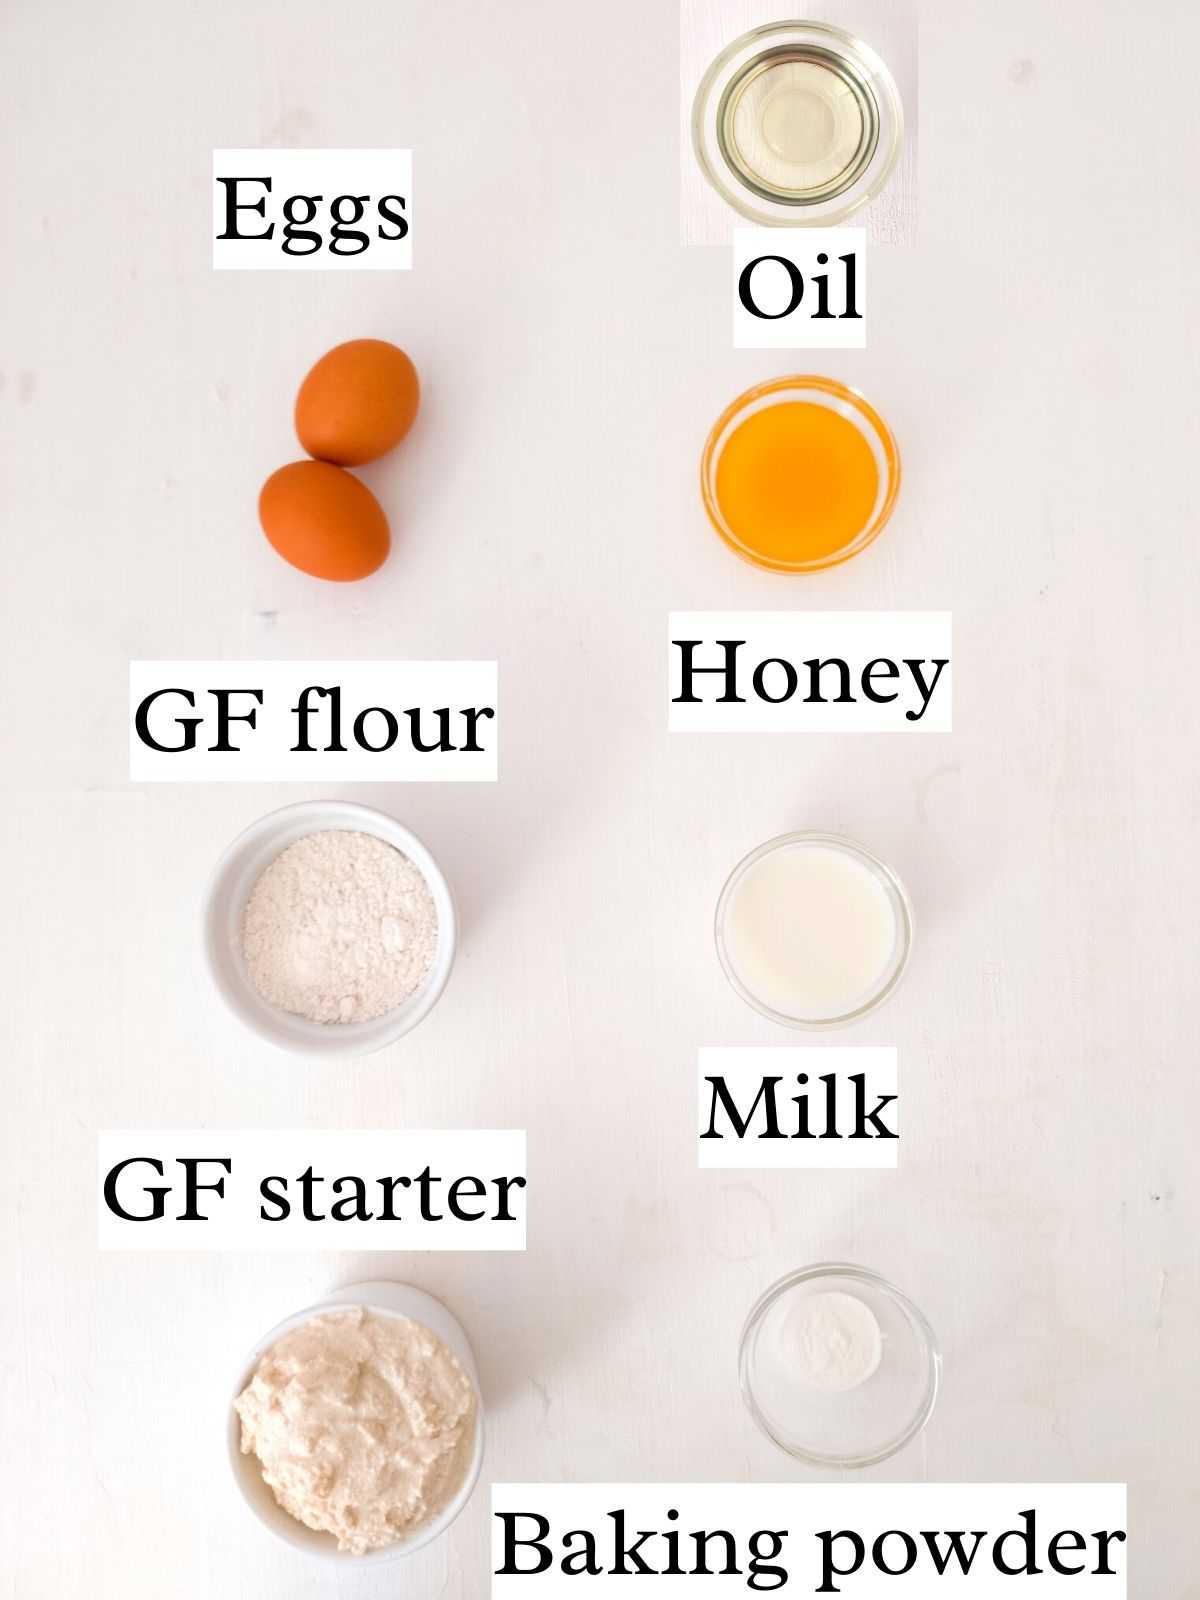
Eggs - make sure to use room-temperature eggs. To quickly bring them to room temp, place them in a bowl with hot water for 5 minutes!
Gluten-free flour - I used my homemade gluten-free nightshade-free flour mix but other blends should work well, too!
Oil - sunflower, coconut, avocado, or any other oil should work great! I used sunflower oil.
Baking powder - check the package to make sure it is gluten-free!
Sourdough starter discard - fed or unfed. I know many recipes state you should use a 100% hydration starter but for this recipe, you can use any starter you've got!
Substitutes
To make dairy-free pancakes use plant-based milk if necessary.
Honey - you can also use maple syrup or sugar.
Oil - you can use melted butter but the pancakes will not be as fluffy and light.
To make vegan GF sourdough pancakes use bananas in place of eggs (or you can try chia eggs), plant-based milk, and maple syrup in place of honey.
Step-by-Step Instructions
Step 1 - Mix the batter
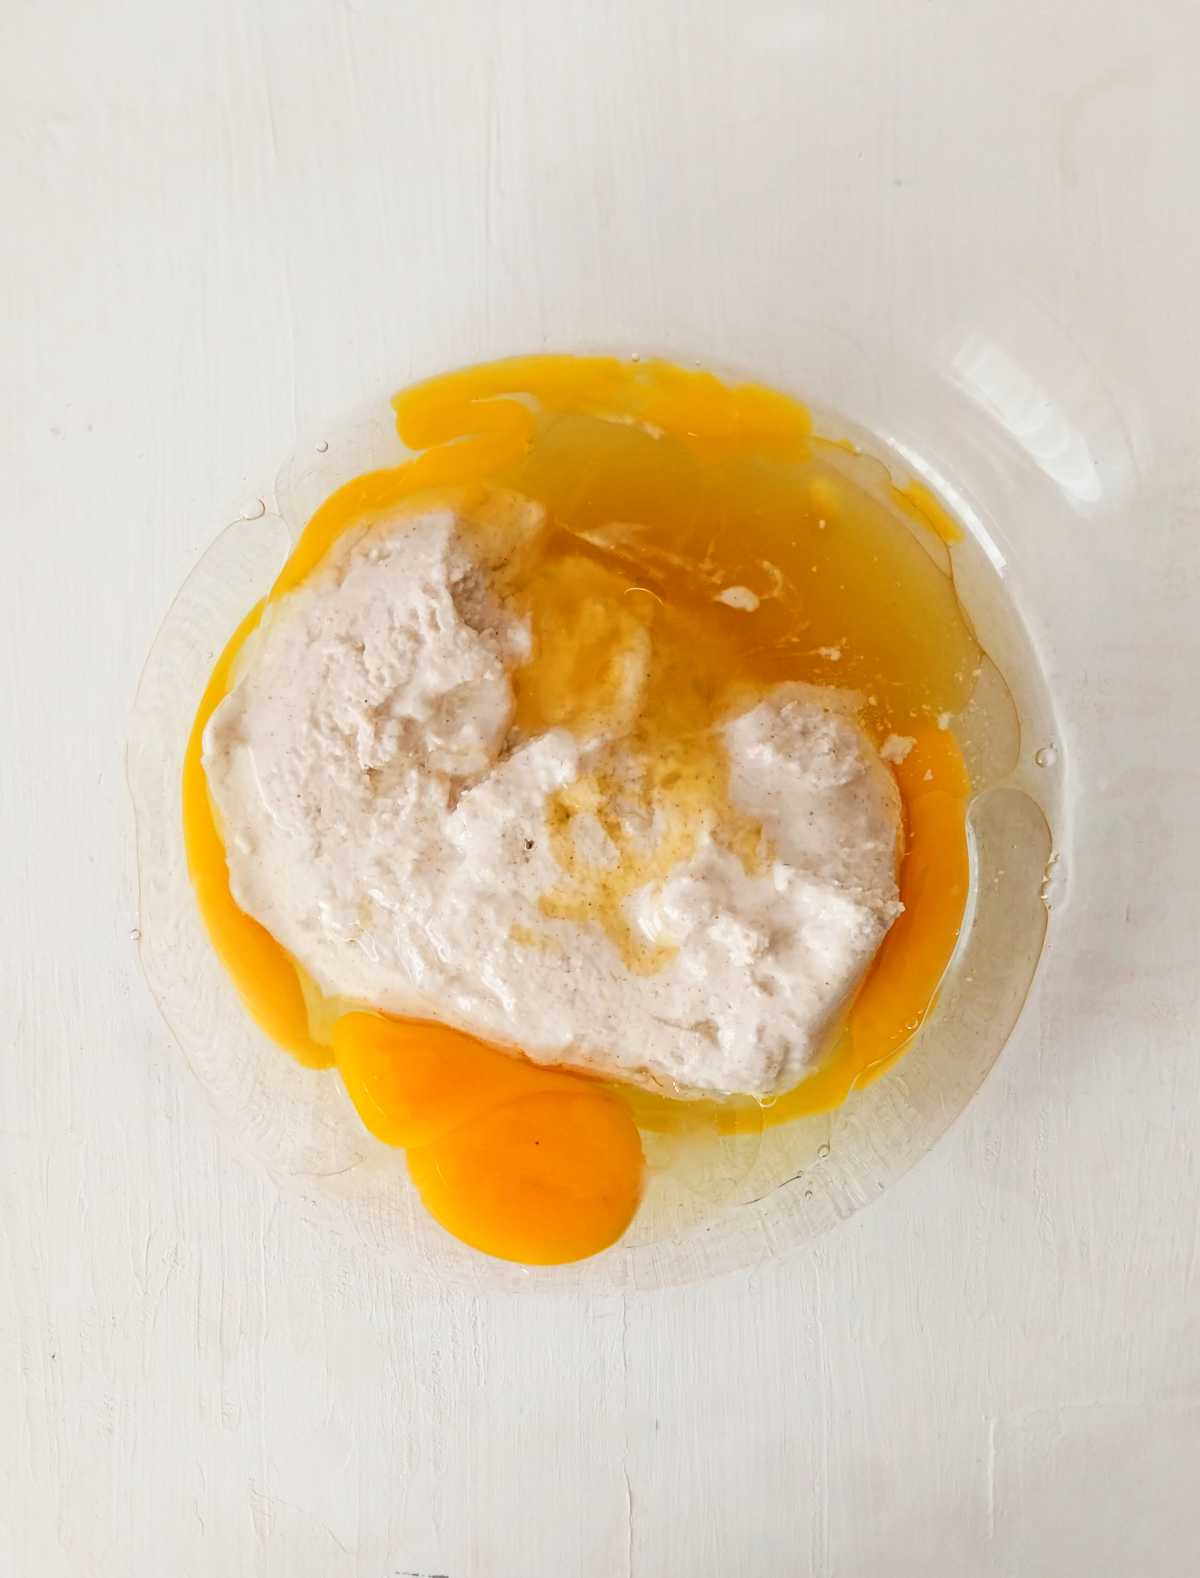
Add the sourdough starter, eggs, milk, oil, and honey to a large mixing bowl and whisk to combine.
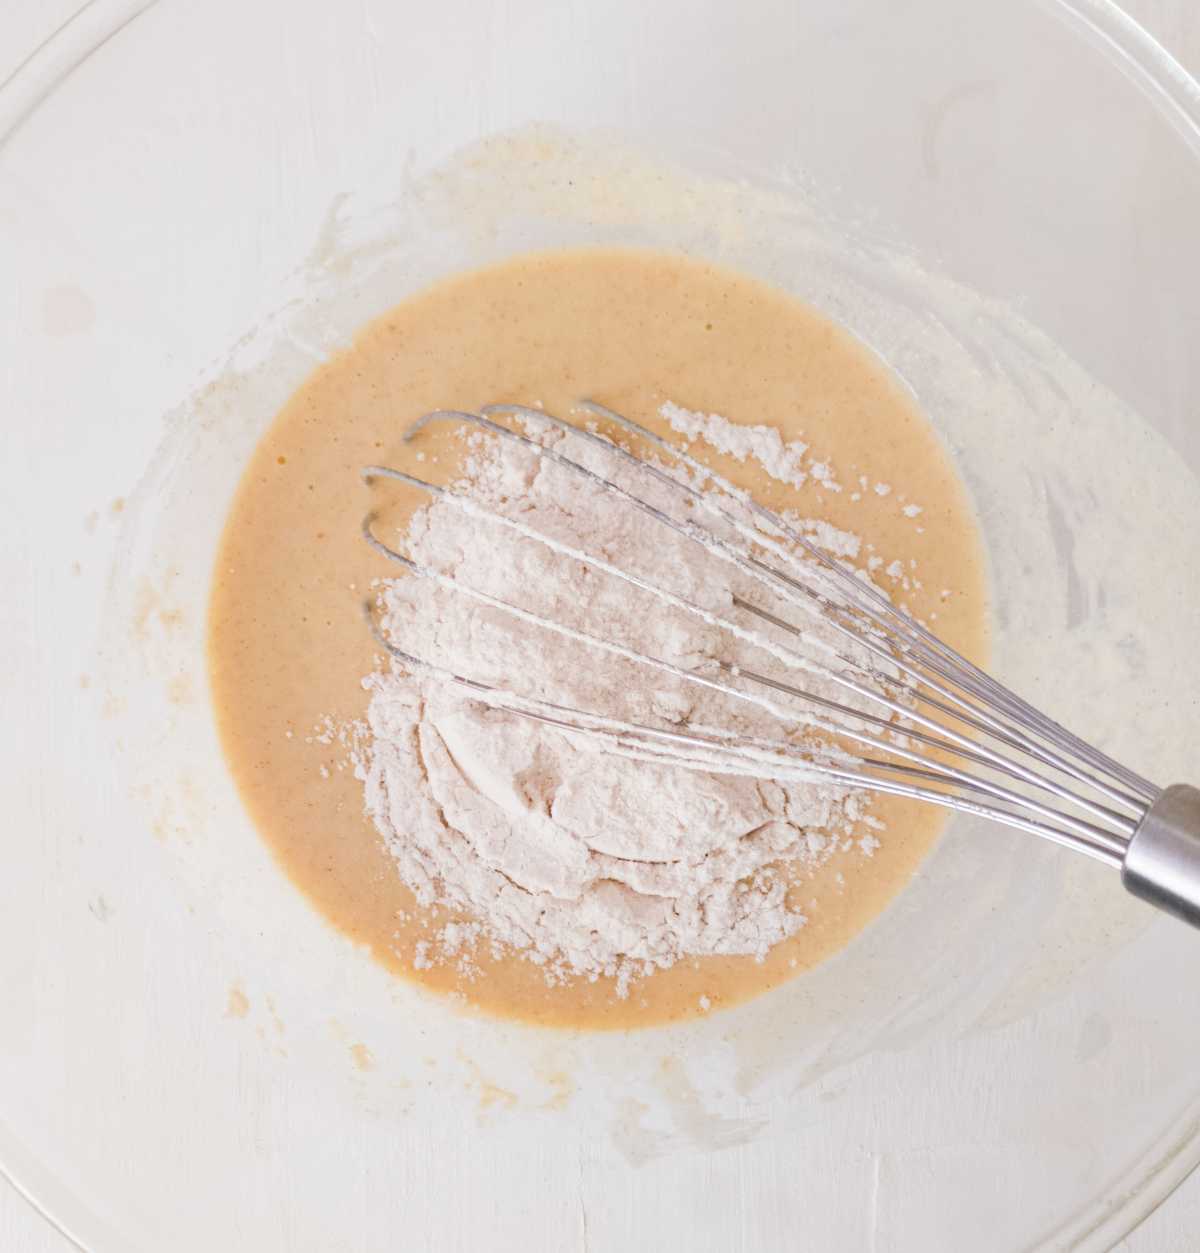
Then, add the dry ingredients (preferably mix those well prior to adding, especially if adding xanthan gum separately). Whisk to combine and leave to set for 5-10 minutes (GF flour needs time to absorb liquids well).
Step 2 - Bake
Heat the pan on the stove for a few minutes. I prefer using a cast iron pan as it fries the pancakes evenly unlike the regular non-stick pan. If using a cast iron pan, you only need to preheat it on a medium fire and then take the heat down all the way. For a non-stick pan you will have to adjust the heat as you go and judge by the appearance of the pancakes.
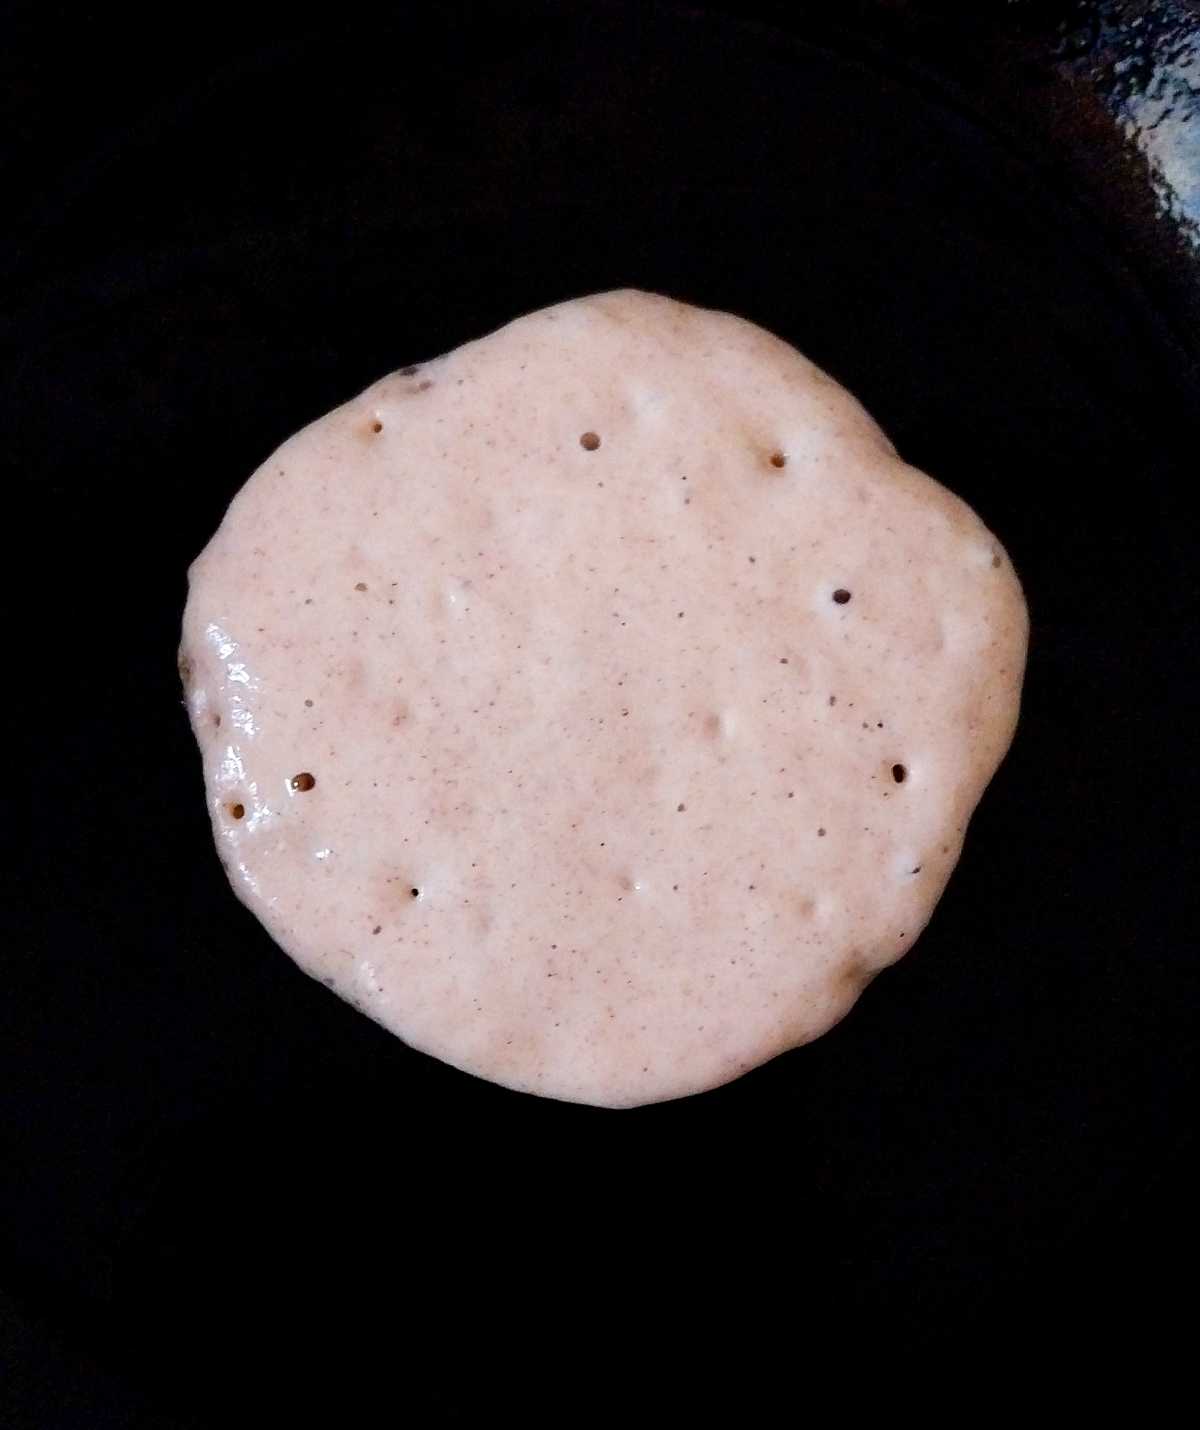
Use ¼ cup to scoop the pancakes onto the pan. Fry the pancakes for about 1 minute on one side (until bubbles start showing and the pancake is flippable).
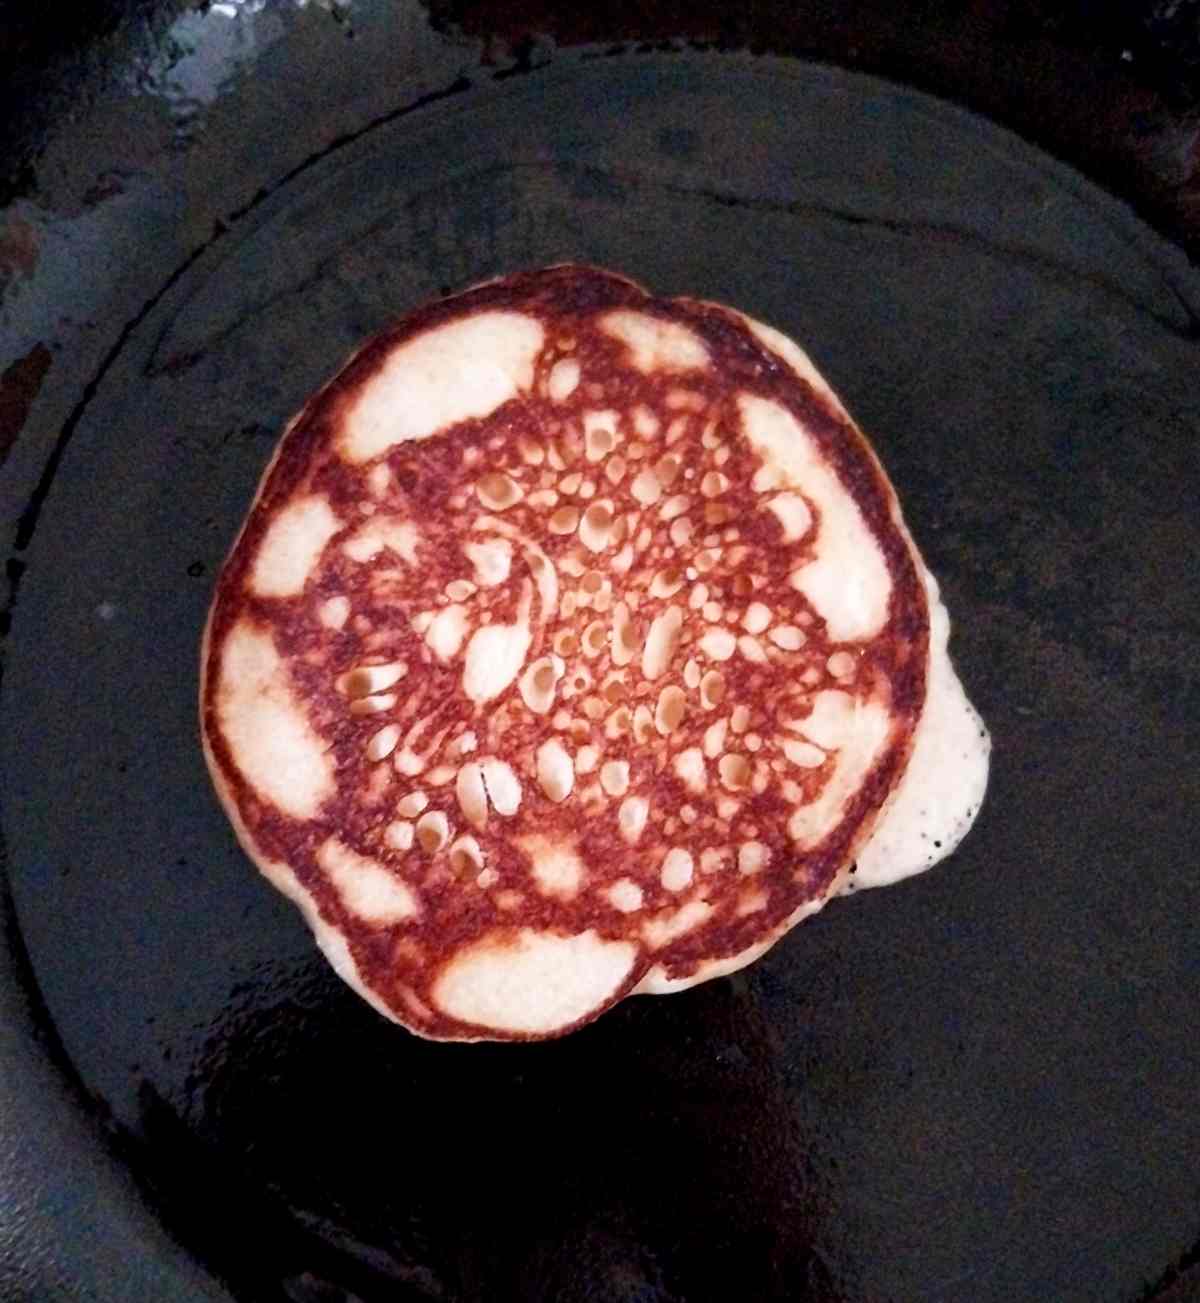
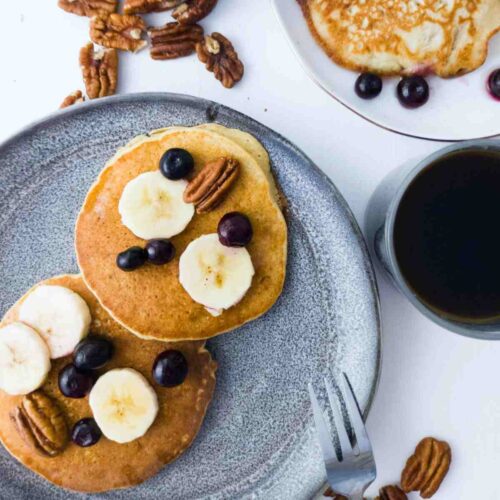
Then, flip and fry for another minute on the other side. Repeat with all the pancakes and enjoy! Top with maple syrup, honey, or jam (I have a great recipe for elderberry jam!)
Expert Tips
- If at all possible, use a cast iron pan, otherwise, a non-stick griddle or skillet will do! I noticed that when I fry my pancakes in a cast iron pan they fry through evenly without me having to change the heat level halfway through baking. A non-stick pan, on the other hand, had to be adjusted all the time and I would have dark pancakes on the outside and wet on the inside from time to time!
- The first pancake is the test one! You will see, based on the results, whether or not to adjust the heat levels or wait a bit longer for the pan to preheat. To check if the pan is hot enough, sprinkle a droplet or two of water onto the surface and if it sizzles and evaporates quickly, you should be good to go!
- I fry one pancake at a time to avoid them overlapping with each other. But if you make smaller ones, you can fry more at one time!
- Rest the batter for at least 5-10 minutes before frying. If your pancakes are gritty, rest the batter for 20-30 minutes.
- With gluten-free flour, it is always better to use a digital scale vs cups as it is very easy to overpack flour. Every gram makes a difference when it comes to baking gluten-free!
- Check my elderberry recipe collection for ideas of what to serve with these pancakes!
FAQ
Yes! Freeze them individually by laying them out on a piece of parchment paper first, then place them into a freezer bag or container and store them for months! To reheat, wrap the pancakes in foil and heat in the oven at 350F/175C for about 5 minutes. If you don't wrap them, they will dry out too much.
Yes, you can. Cover the bowl with plastic wrap or a kitchen towel and store it in the refrigerator overnight.
If made with gluten-free flour, sourdough is gluten-free. Otherwise, it is not.
Get my new gluten-free sourdough recipes eBook
The top 32 recipes of 2026!
Gluten Free Sourdough Pancakes
Equipment
- 1 cast iron pan (non-stick is ok, too)
- 1 wisk
- 1 digital scale (optional but recommended)
Ingredients
- 2 eggs room temperature
- 1 cup Gluten-free sourdough starter discard fed or unfed
- 2 tablespoon milk plant-based for dairy-free
- 2 tablespoon oil any seed or vegetable oil
- 2 tablespoon honey maple syrup or sugar work, too
- ½ cup (60g) gluten-free flour I used my GF flour mix without potato starch which for this recipe would be: 15g brown rice flour, 15g white rice flour, and 30g starch of choice (cornstarch/tapioca/arrowroot/potato)
- ¼ teaspoon xanthan gum optional, helps with fluffiness
- ½ teaspoon gluten-free baking powder
- a pinch of salt optional but helps with flavor
SAVE THIS RECIPE!💌
Instructions
- Combine sourdough starter, oil, milk, eggs, and honey in a large mixing bowl and whisk until incorporated.
- Combine GF flour, baking powder, and xanthan gum (if using) and add to the wet ingredients. Whisk to combine.
- Preheat a frying pan for a few minutes and start frying the pancakes. Use ¼ cup to scoop the pancakes onto the pan. Fry on one side for about a minute or until bubbles show up in the middle.
- Flip the pancake and fry for another minute on the other side. Repeat with the rest of the pancakes. Serve with some maple syrup, honey, or jam!


Susan says
Thank you for the recipe. I made these yesterday for breakfast and they were wonderful. I added blueberries. Thanks again.
Lisa says
Natasha, I am new to gluten free sourdough and made these pancakes for the first time. While the flavor was great, mine came out so thick and dense. I followed your recipe - weighing the flour and resting the batter before frying. I kept adding more milk a tablespoon at a time, but maybe I didn't add enough? Maybe it just has to do with the quality of my discard (It was unfed)? I also added in some cinnamon, chopped bananas and pecans, which were yummy. 🙂
Sky says
I just made these and yum! My daughter loves the taste of buttermilk, so I subbed half the sourdough amount with buttermilk.and added a titch more flour. The crumb is tender and soft and the taste has a sweet nutty flavor. I served ours with sautéed cinnamon apple slices. Delicious!
Cheryl says
I am so impressed with these gorgeous pancakes; these are truly the best pancakes I have ever made or eaten. Also, the easiest recipe I've ever seen for pancakes. This batter cooks like a dream. Yes, I'm very happy to have stumbled onto this page. I will be cooking everything on here and I'm sure several times over. Thank you and God Bless.
Michael says
1 cup of starter is how many grams?
Natasha Levai says
About 260g
DebB says
Natasha! We had breakfast for lunch today. I cannot have milk or eggs so…. I substituted 2 bananas for eggs and coconut milk for milk.
These were excellent! I am so glad that I knew that bananas were a legitimate substitute for eggs. I will definitely make these again! ⭐️⭐️⭐️⭐️⭐️
Anne says
These pancakes are amazing! I highly recommend this recipe. I have to use egg replacers due to intolerances recipe still is wonderful! Thank you! Its such a treat to have a yummy pancake again after so long without!
ann says
Can I sub eggs with flax eggs or applesauce?
Natasha Levai says
Yes!
Heather says
These are incredible! They are reminiscent of a dutch baby. We love to add blueberries and squeeze lemon on top! Thank you for this recipe that even my gluten eaters love!
Joan says
Easy to make, well worth it as they are delicious 😀