These delicious gluten-free sourdough soft pretzels are just like the "regular" soft pretzels thanks to psyllium husk, the secret ingredient in gluten-free baking. You will be surprised how simple it is to make these!

Jump to:
Why You Will Love This Recipe
- Easy to make. Mixing, shaping, and baking these pretzels is a breeze. And they only need 1 hour of fermenting!
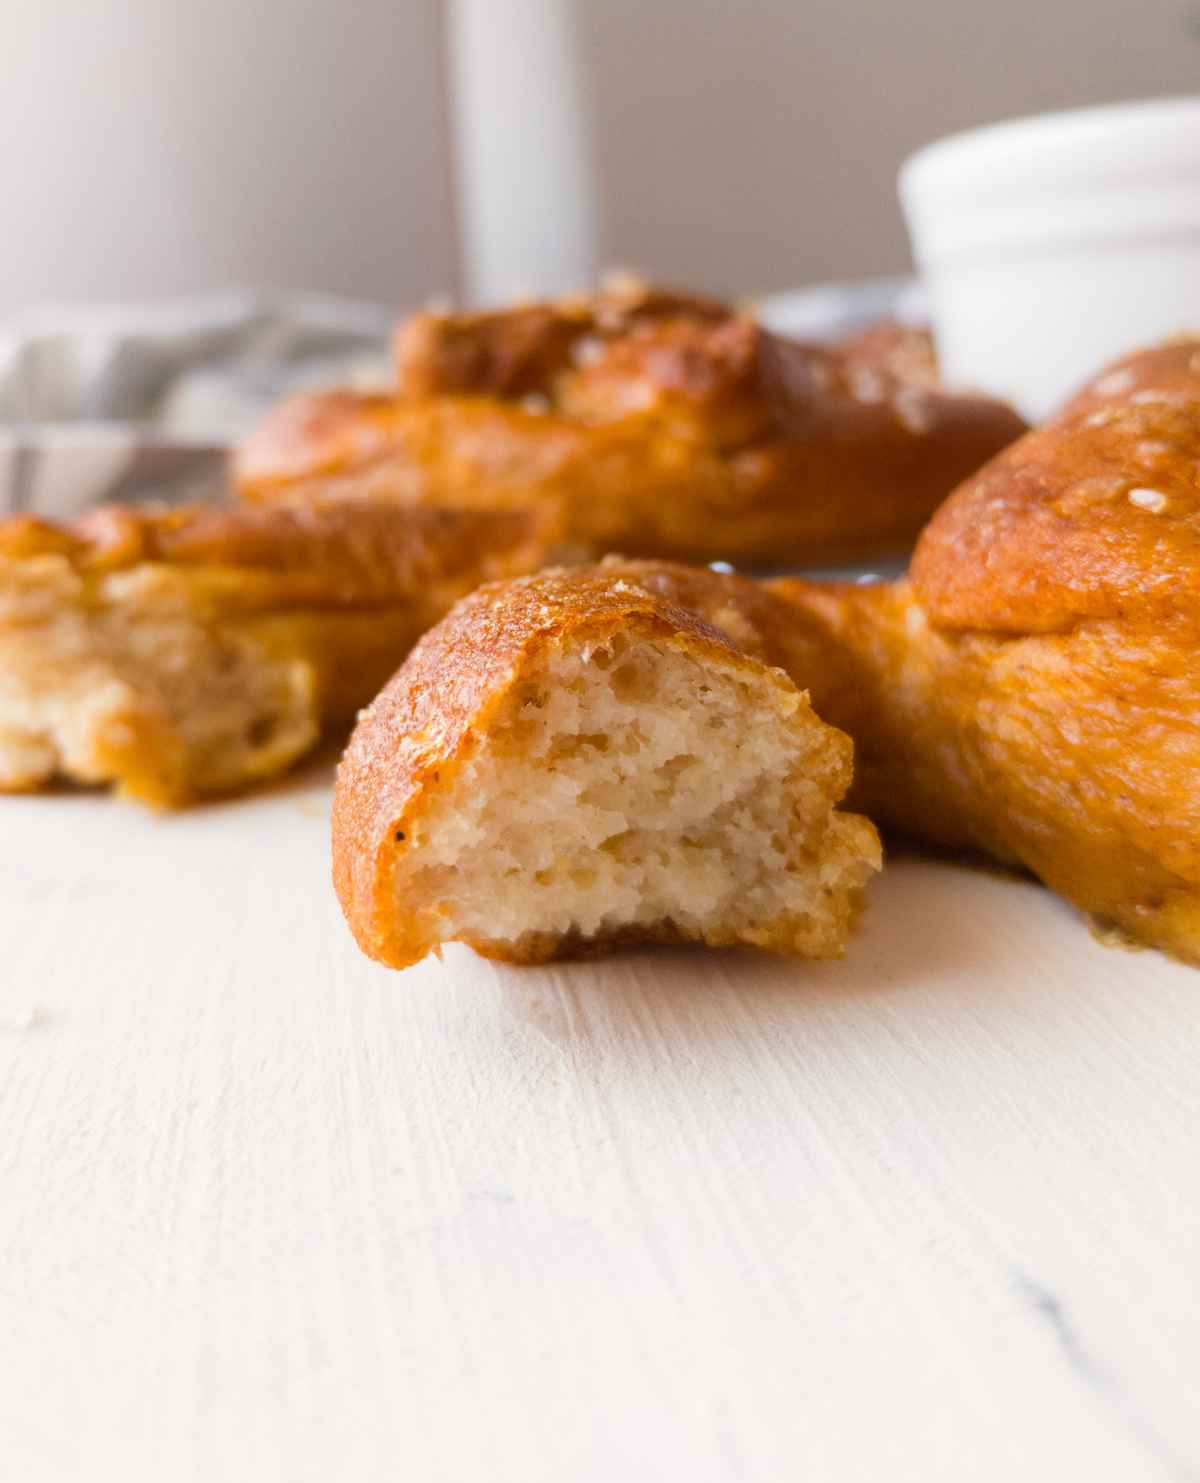
- Texture. Thanks to psyllium husk, these pretzels are soft and fluffy on the inside just like you would expect them to be!
- Flavor. Along with a basic pretzel sauce, these are a true indulgence! A great tailgate snack idea.
What Is A Gluten-Free Sourdough Starter?
Gluten-free sourdough starter is simply a mix of gluten-free flour and water that is "discarded" and "fed" regularly. Discarding is a term used for taking some part of the starter out, and feeding means adding fresh flour and water to the starter.
You need to always feed the starter in proportion to its size so discarding allows you to feed it less thus saving you resources.
It is best to use whole grain gluten-free flour to make a starter. Some of the best options include sorghum flour, millet flour, brown rice flour, teff flour, buckwheat flour, quinoa flour, and chickpea flour. You should avoid almond and coconut flour as they are least friendly to the bacteria present in a sourdough starter.
Here is a simple recipe for a starter with brown rice flour and here is one for a millet starter.
New to gluten-free sourdough? Watch my 16-minute video tutorial for beginners!
Ingredients

Gluten-free sourdough starter - a mature starter will work better but you can also use discard with an addition of regular yeast. You can make your own gluten-free starter if you don't have one yet!
Gluten-free flour - I used my gluten-free rice-free flour mix but any other premade GF flour should work! GF bread flour would work better than pastry flour.
Psyllium husk - you can use either whole husks or powder! There are two types of psyllium powder, so make sure you know which one you are using. They normally won't tell you on the package whether the powder is coarse grind or very fine but you can tell from its look. For more details check out this post on psyllium husk.
Water - I used tap water. If your tap water is drinkable you should be fine! Otherwise, use bottled water.
Substitutes
Psyllium husk - the only good substitute for psyllium husk is psyllium husk powder. If using psyllium husk powder, use 10g, add it to the dry ingredients instead of the water, and let the dough sit for 10-20 minutes until psyllium husk absorbs enough water to thicken the dough!
Step-By-Step Instructions
Step 1 - Mix the dough
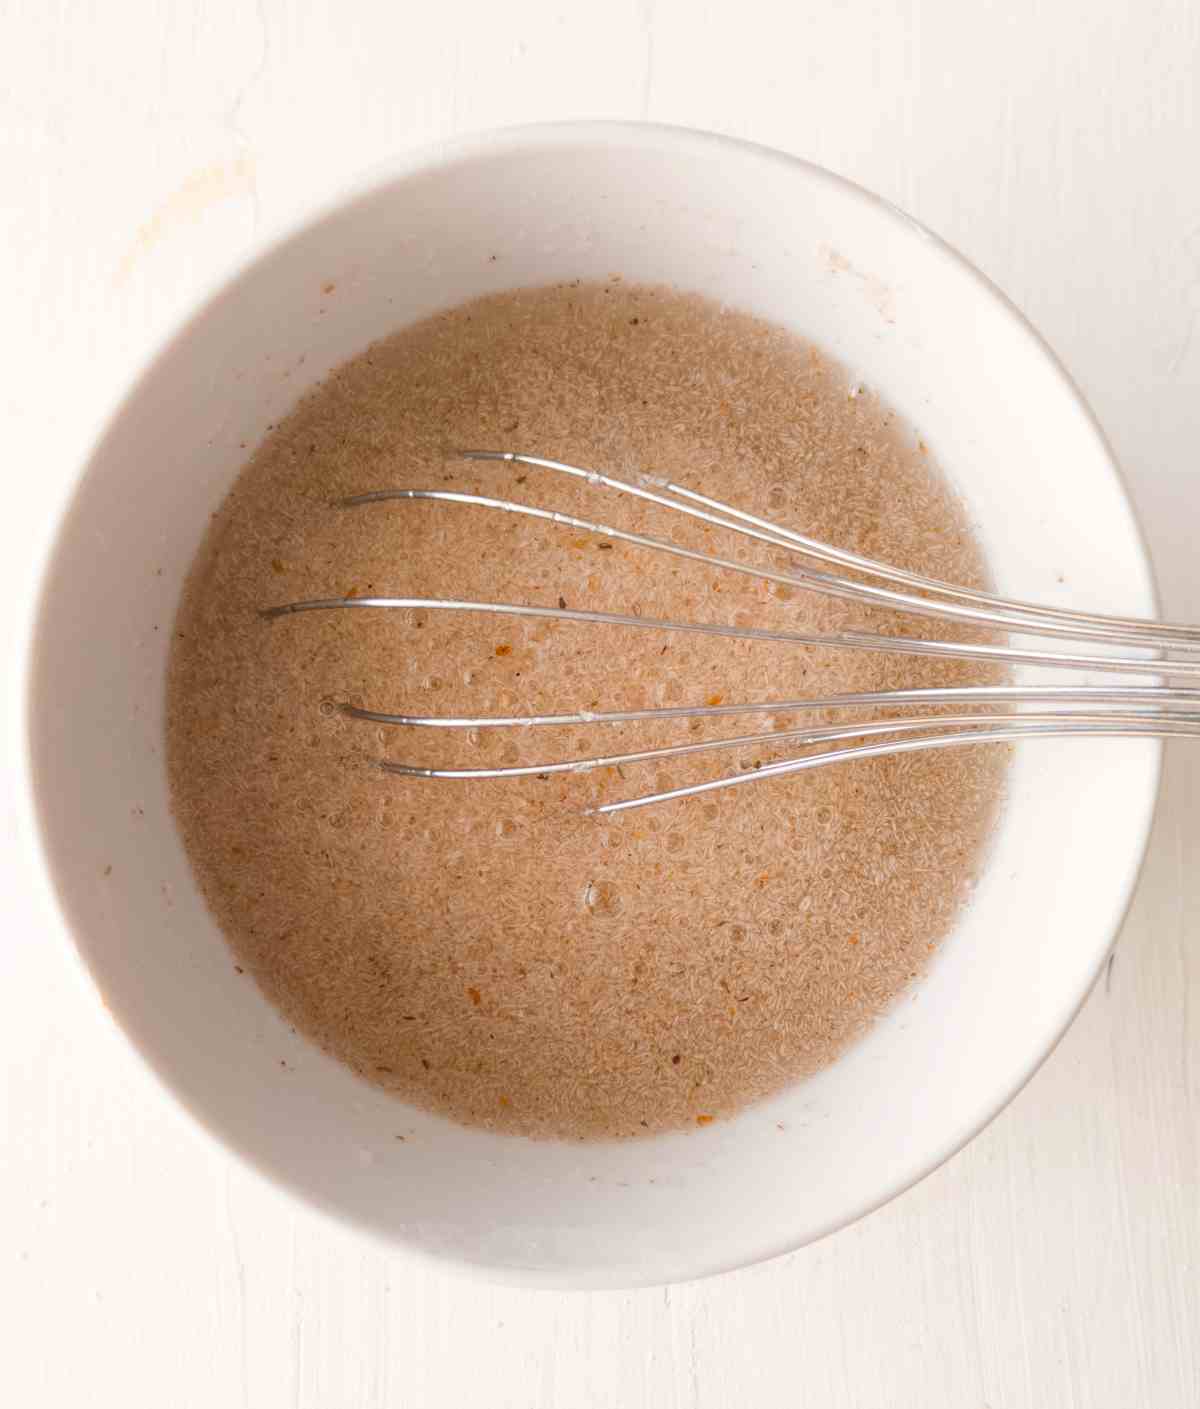
Add psyllium husk, sugar, and water to a small bowl and whisk to combine. Set aside until psyllium gel forms (1-2 minutes).
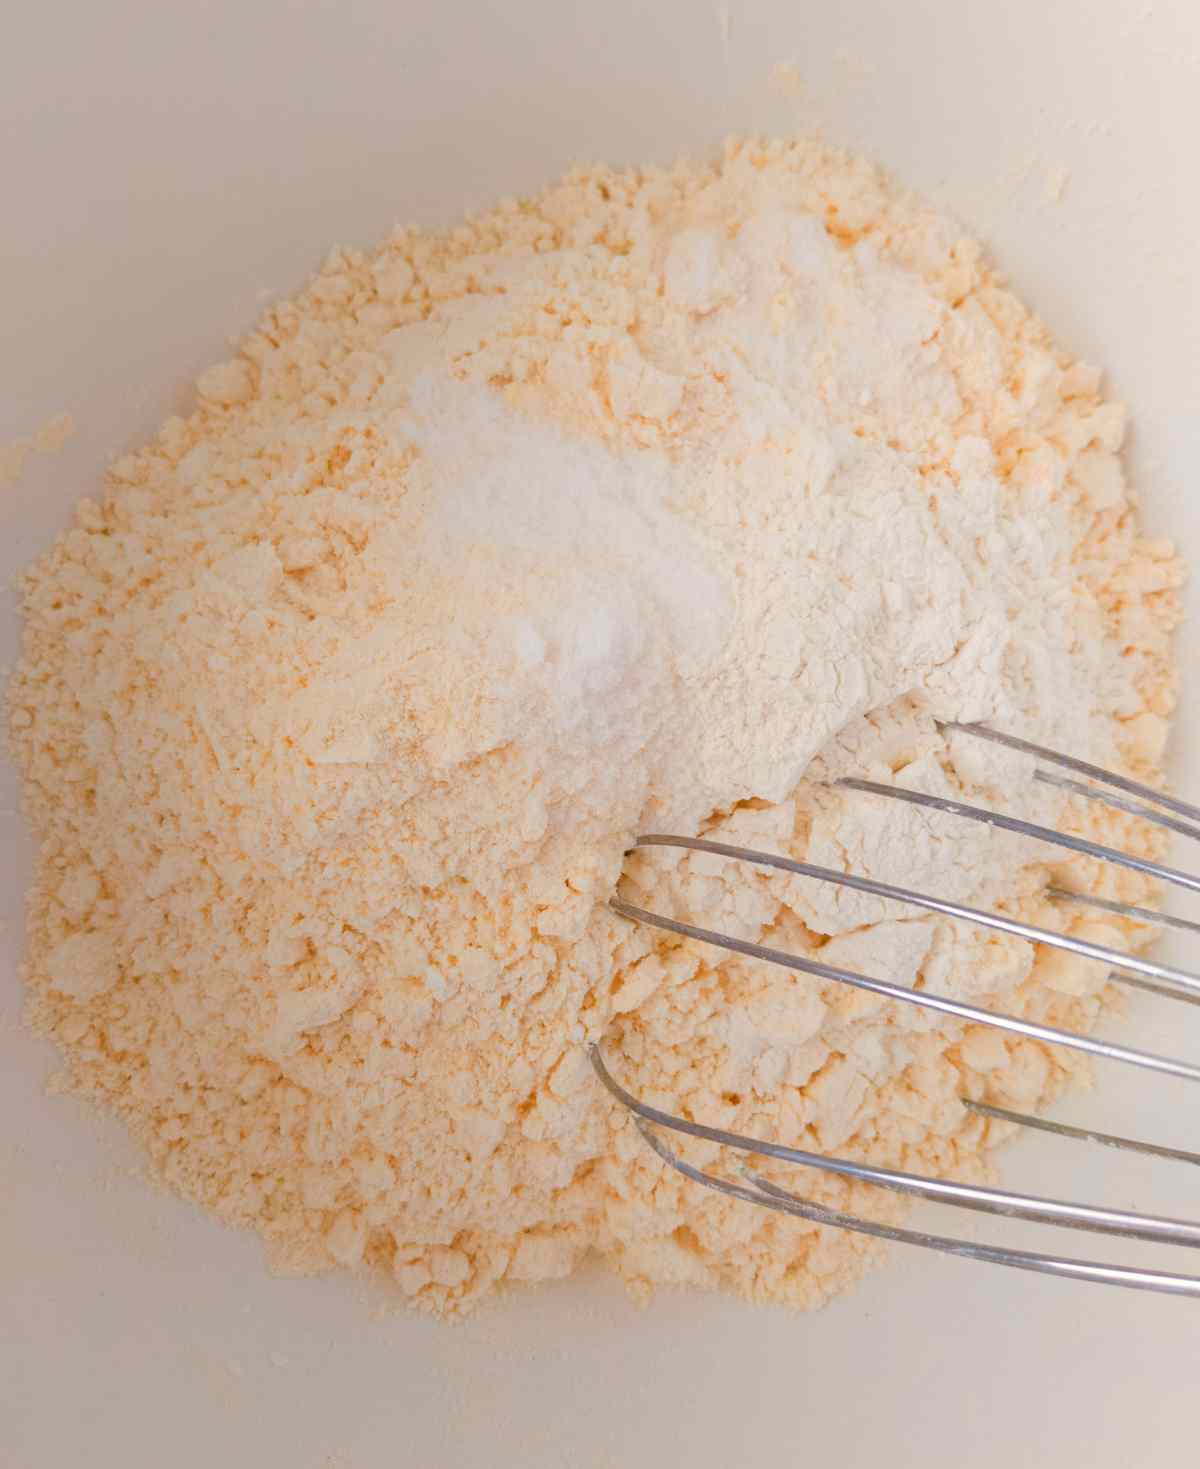
In a bowl of a stand mixer (or a large mixing bowl) combine all the dry ingredients using a whisk.
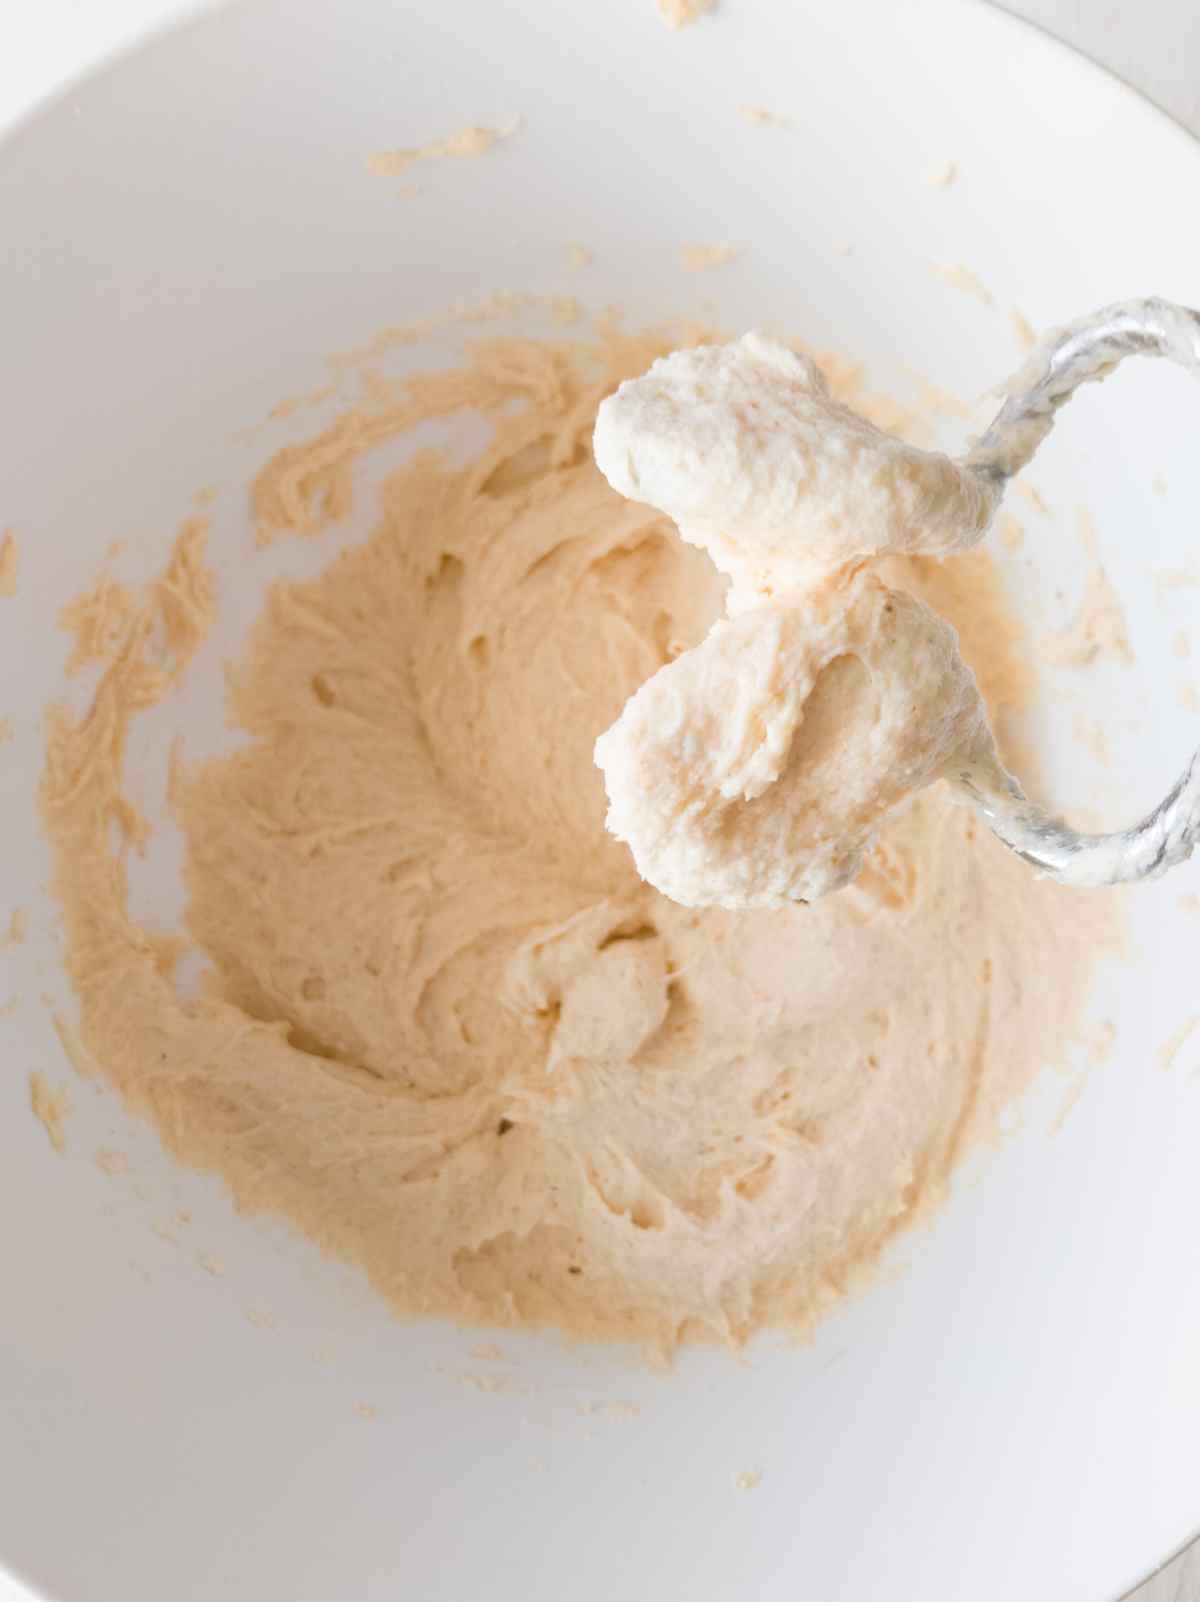
Then, add psyllium gel and the sourdough starter to the bowl with the dry ingredients and knead the dough in a stand mixer for 5 minutes using a dough hook. You can also use a hand mixer for this step.
If you don't have a mixer, you can knead the dough by hand, in that case, knead for 10 minutes to achieve a very smooth dough!
If you are using starter discard, add 7g of active dry/instant yeast or 20g of fresh yeast at this point.
Step 2 - Shape the pretzels
Separate the dough into 6 equal pieces. Mine were about 120-130 grams per pretzel. It is important to make sure all pretzels are the same size so that they bake at the same speed! The dough will be very sticky, don't add extra flour! Rather, grease your hands with oil to prevent sticking.
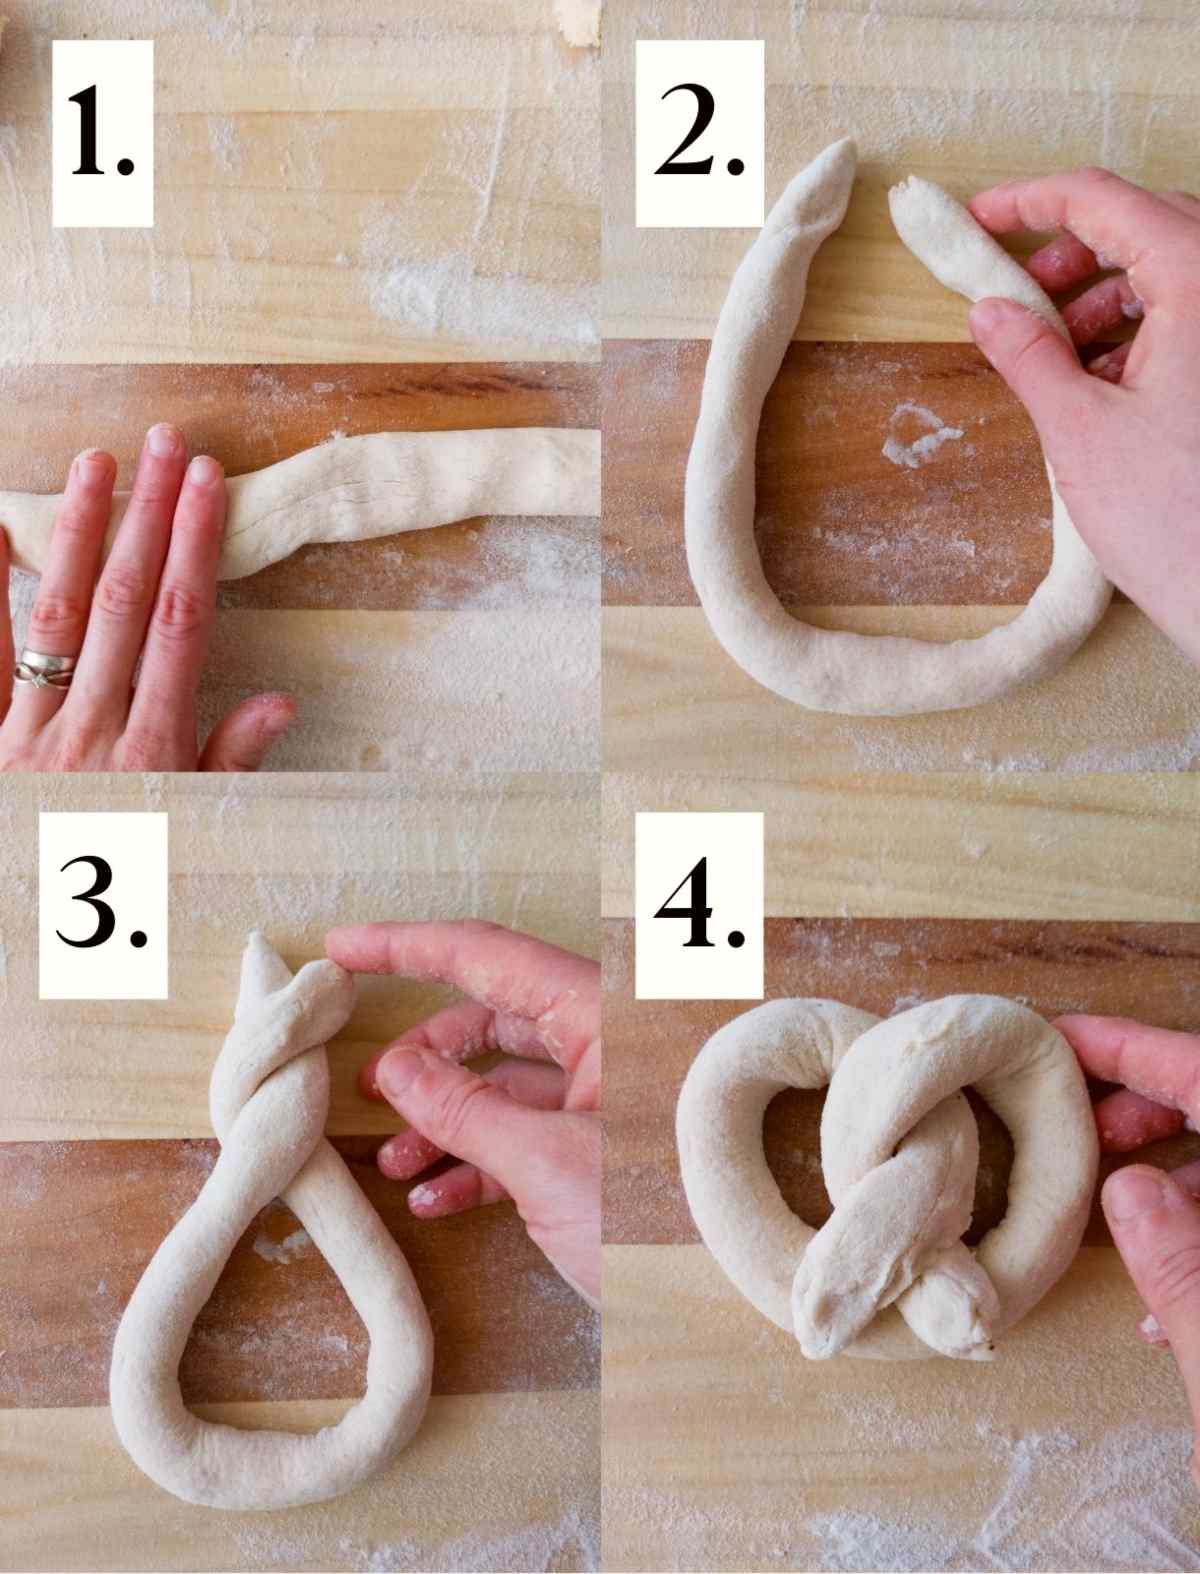
Once the dough is separated into 6 parts, flour the working surface, take one of the dough pieces, and start rolling it into a rope with your hands. As you are rolling the dough, carefully pull it to stretch it out. The length should be about 16 inches/40 cm.
Then, bring the dough into a U-shape, twist the ends over each other twice, and finally, bring the tops to the bottom part of the dough to make the traditional pretzel shape.
Step 3 - Bake the pretzels
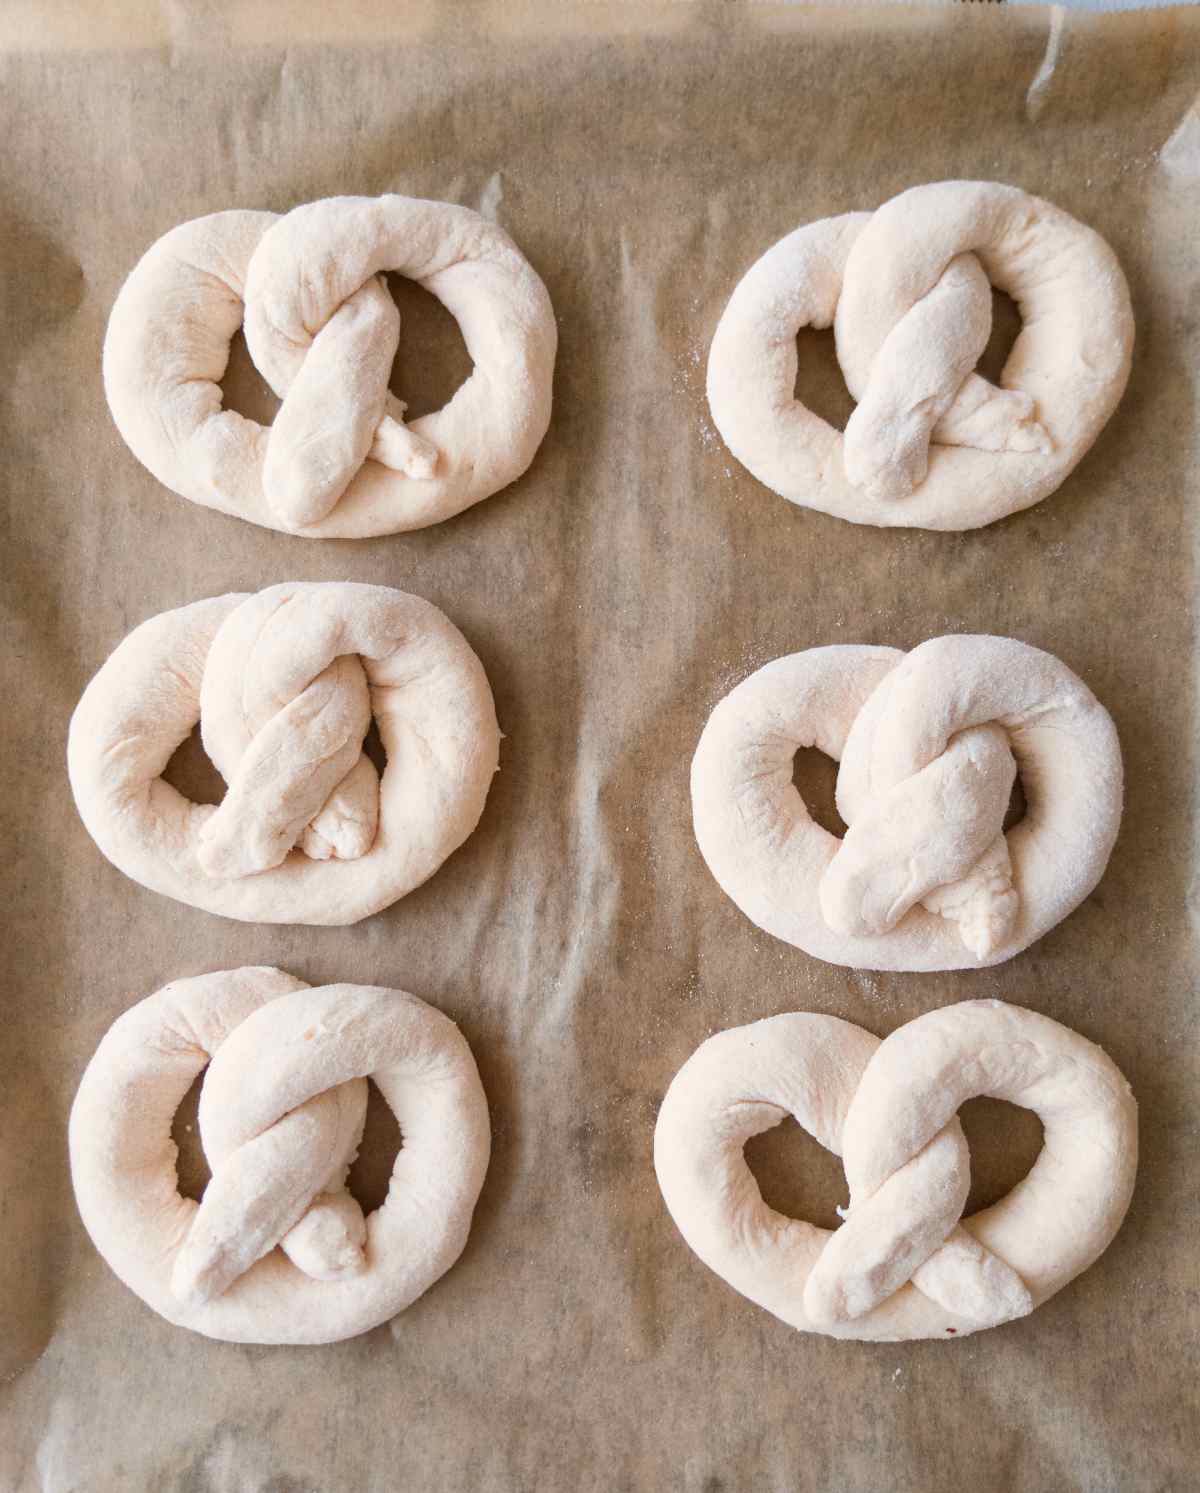
Place shaped pretzels on the baking sheet lined with a piece of parchment paper. Cover them with a tea towel and let them proof for 1-2 hours. I let mine sit for 1 hour before the water bath! If you are using starter discard with additional yeast, let the pretzels rise for 40-60 min.
30 minutes before the end of proofing start preheating the oven to 445F/230C.
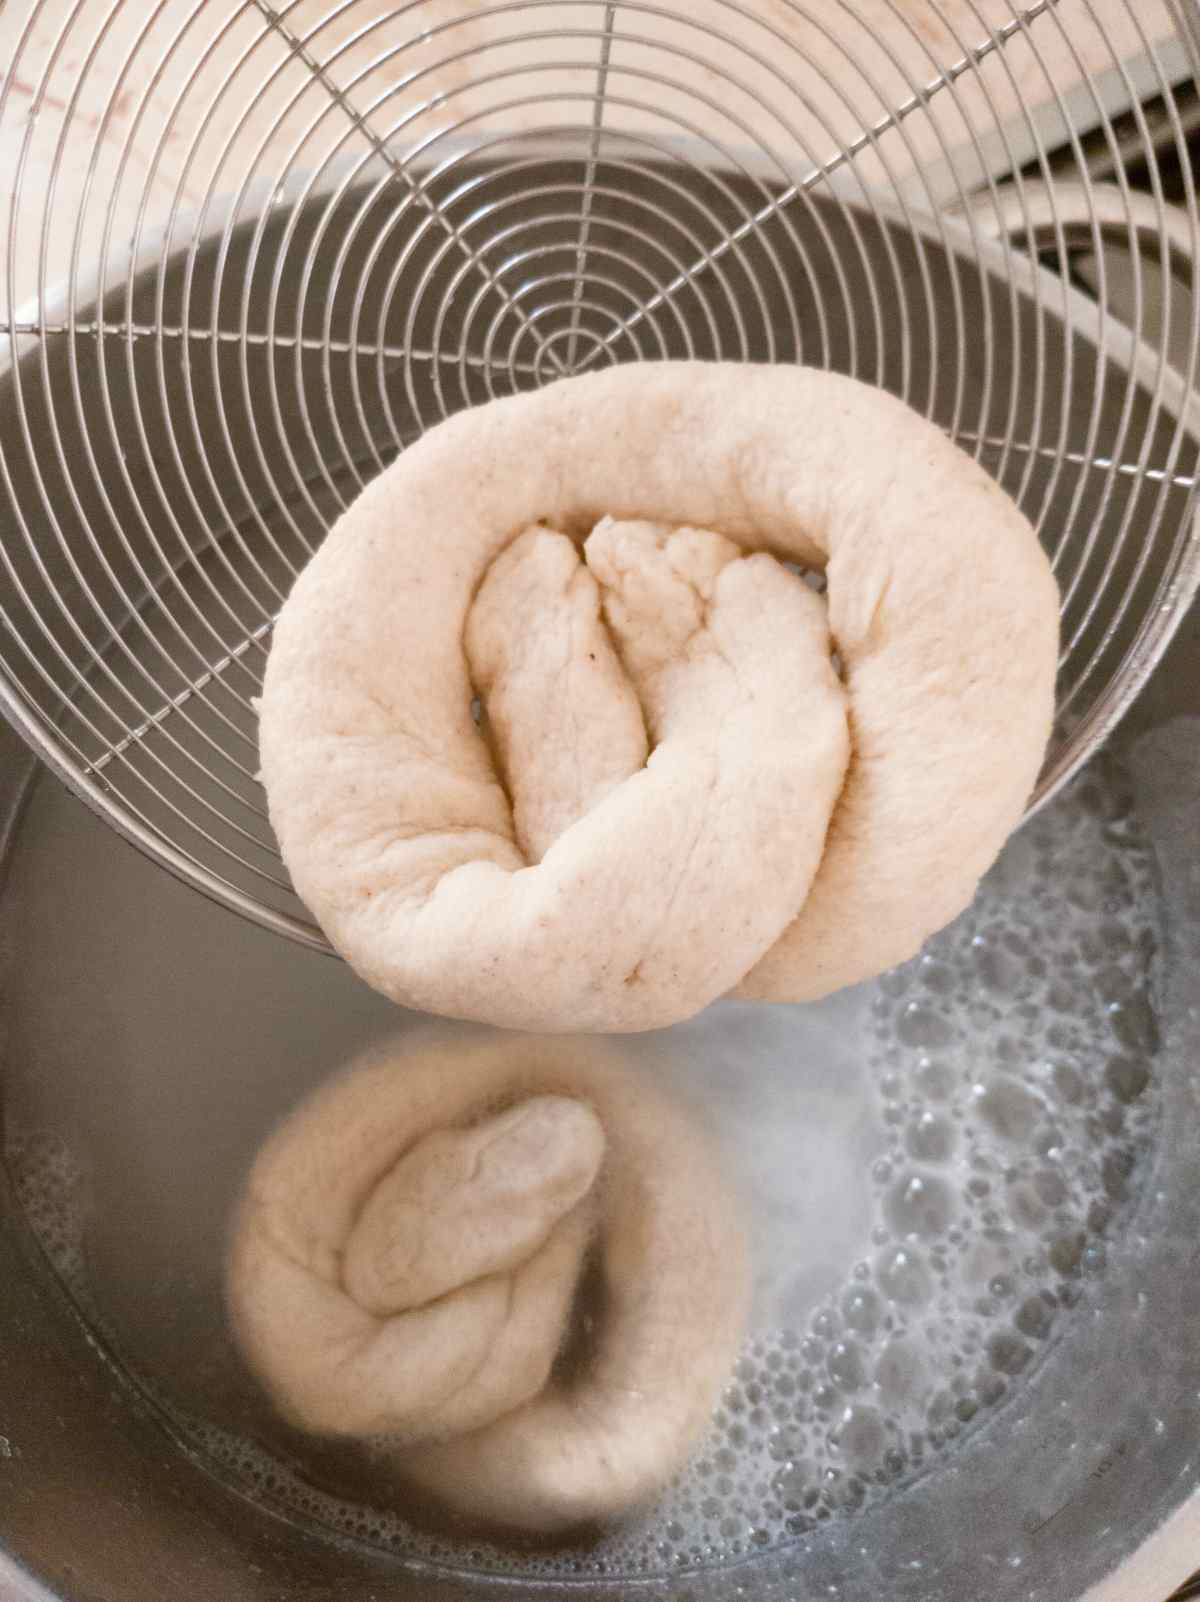
Once the pretzels are done proofing, boil 5 cups of water in a medium-large pot with 5 tablespoon of baking soda. If your pot is too large, you can add more water. Remember to add 1 tablespoon of baking soda per each added cup of water.
Once the water starts boiling, carefully lower the pretzels into the pot (mine fits 2 at once). Boil for 30-50 seconds, you can push the pretzels underwater if they are floating on top.
Finally, transfer the pretzels from the water bath to the parchment paper using a spider or any other tool that works for you, just be gentle with the pretzels.
Don't worry if your pretzels move and fall out of shape. You can reshape them gently once they are out of the water!
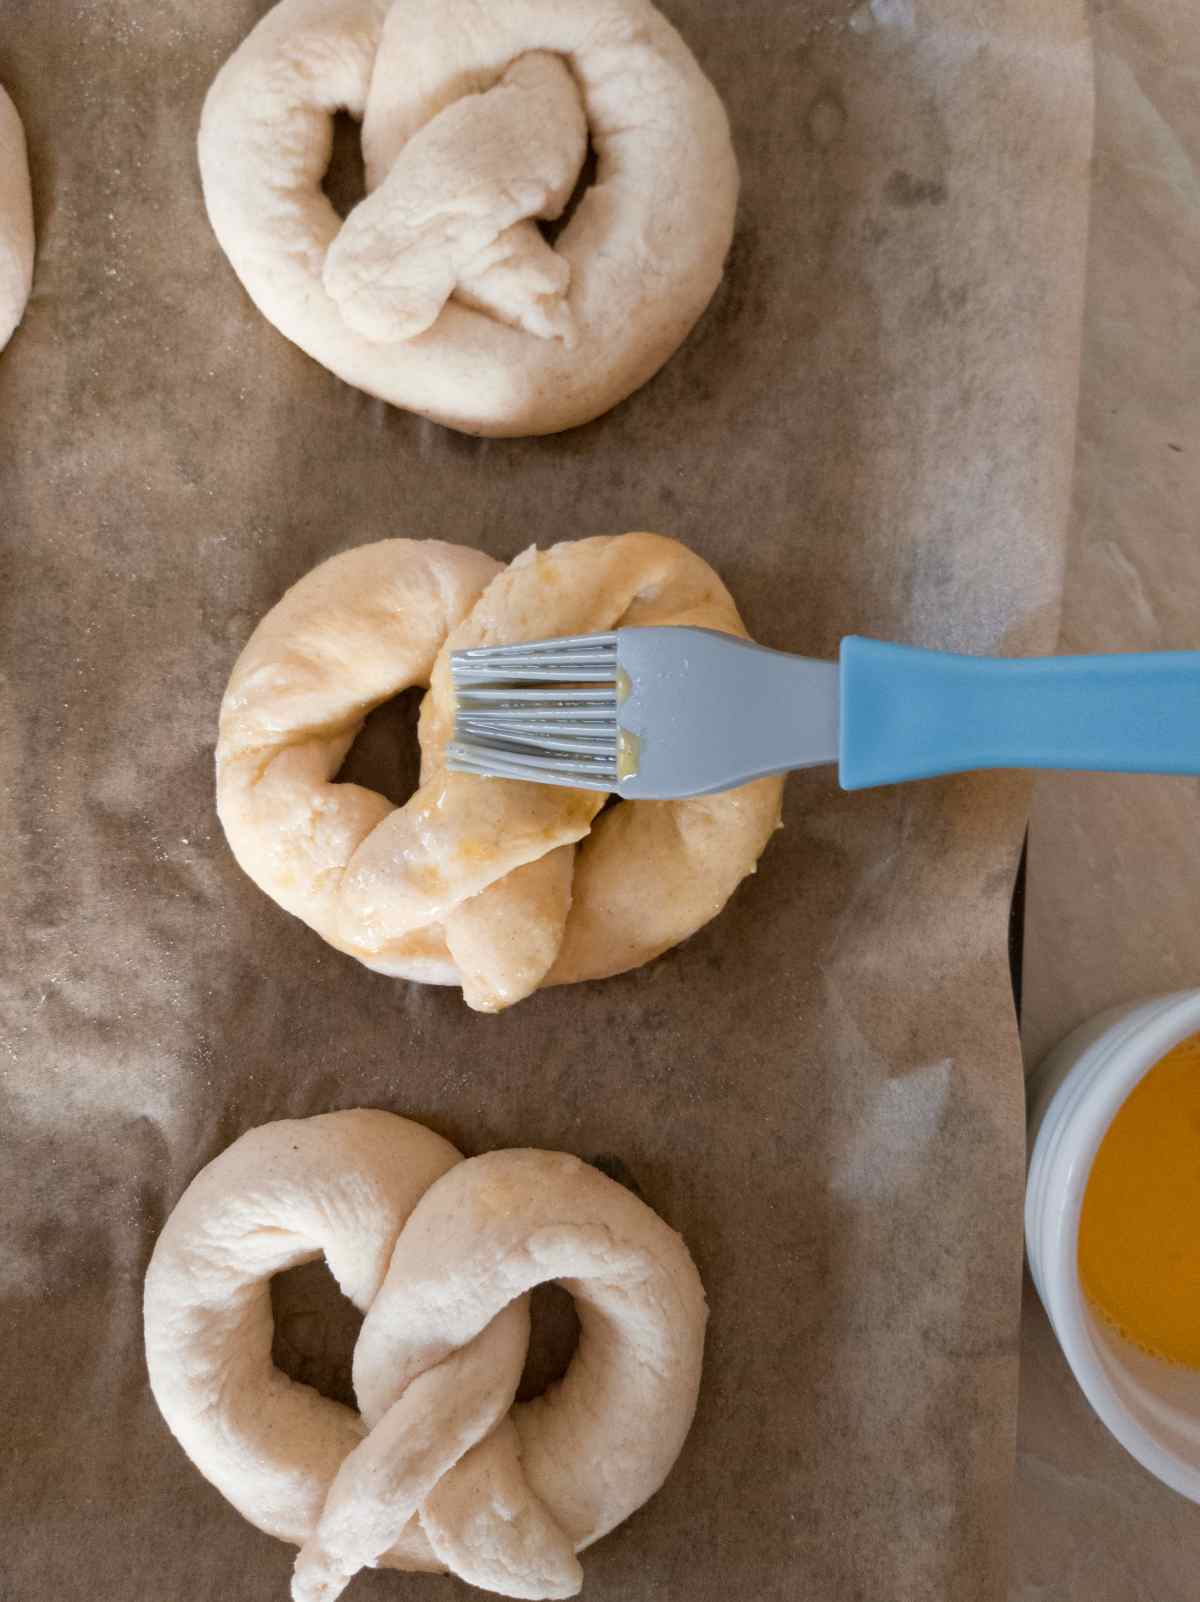
Once all pretzels have gone through the water bath, prepare the egg wash. To make an egg wash just whisk one egg with a fork in a small bowl. Then, brush the pretzels with it using a silicone brush or a baking brush. Don't use the whole egg, brush just enough to cover the pretzels to avoid baked eggs on top!
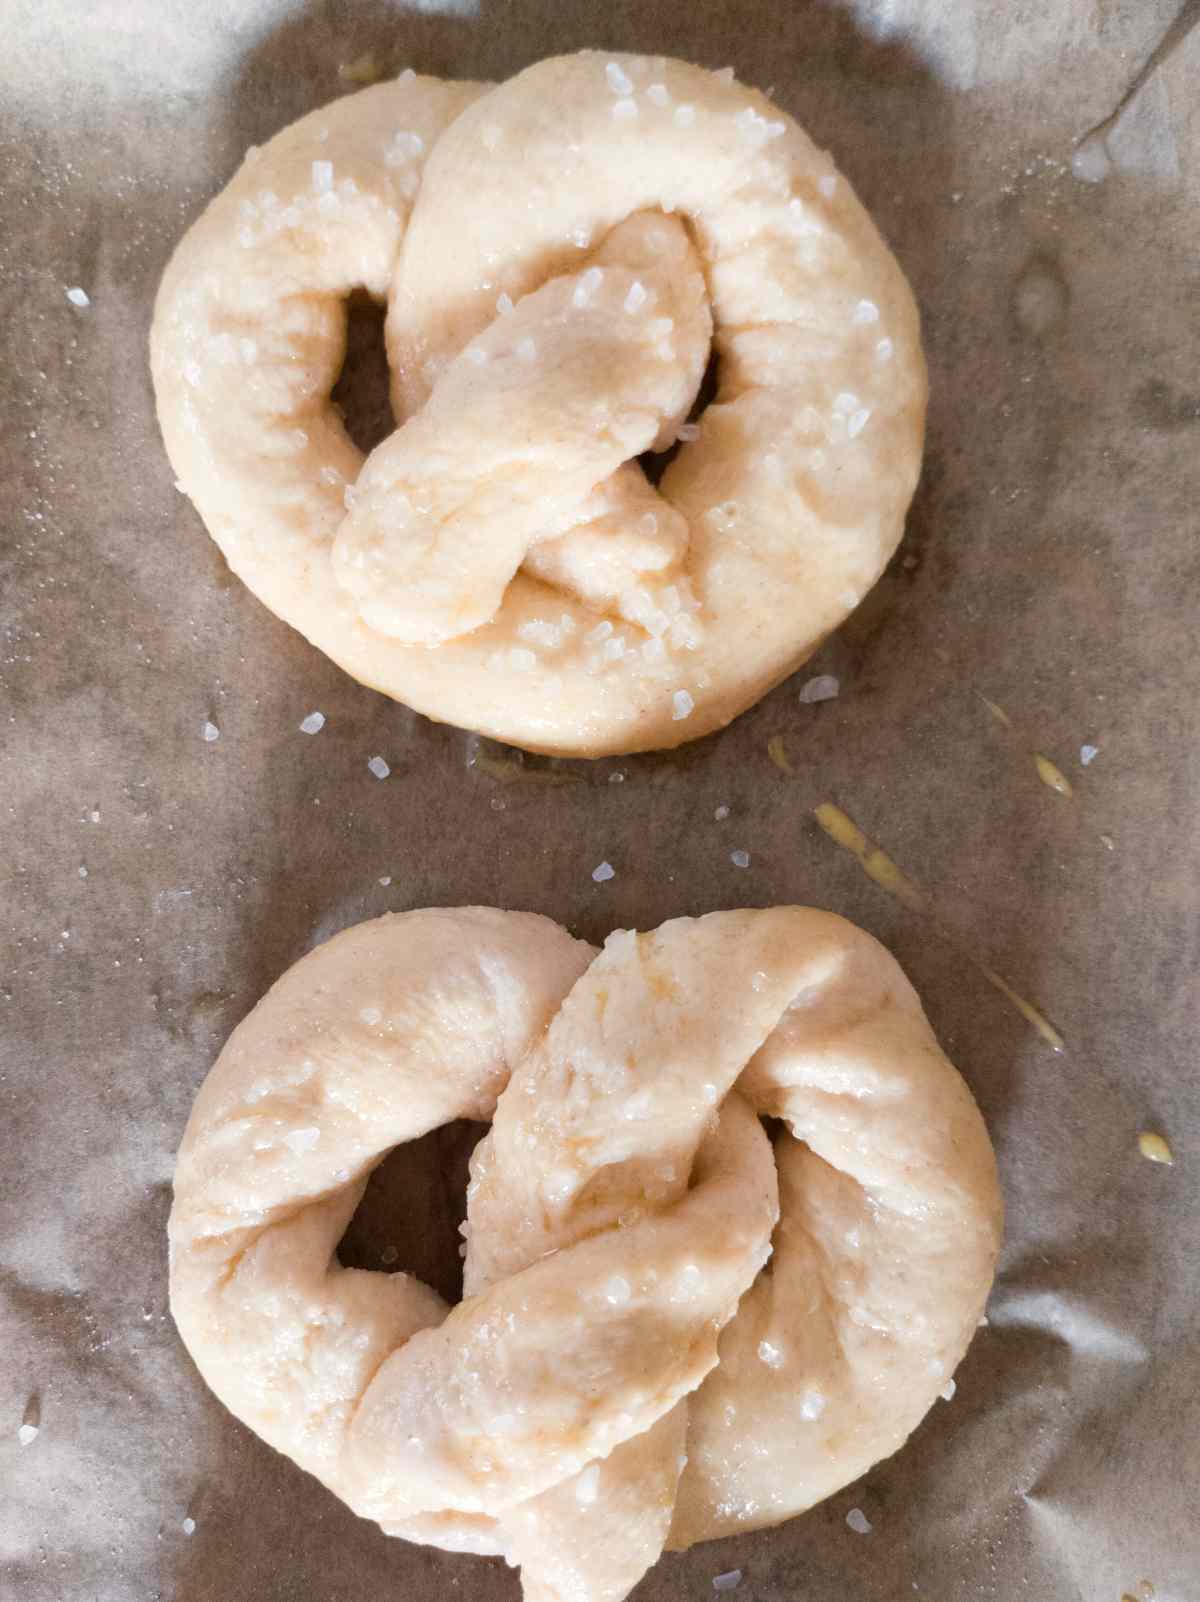
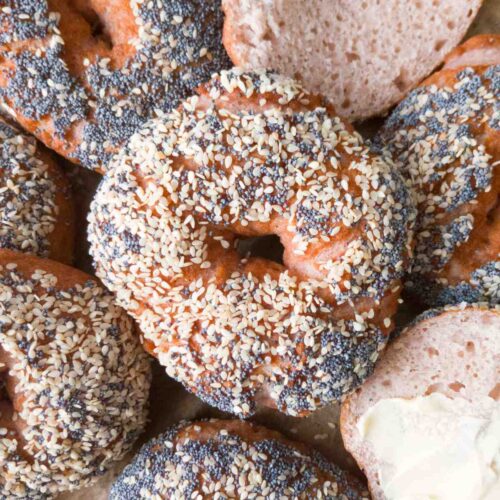
Finally, sprinkle your gluten-free sourdough pretzels with flaky salt!
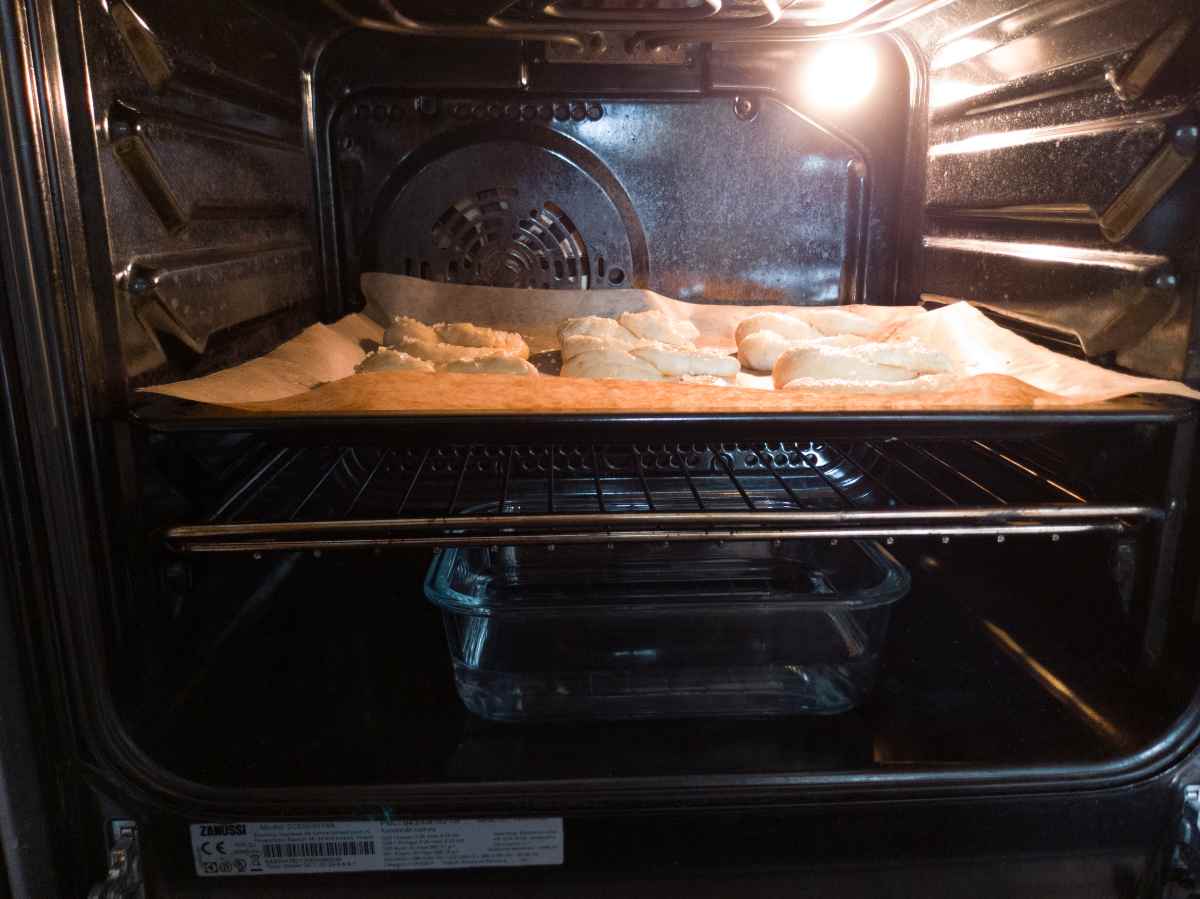
Place a dish with water in the bottom of the oven to create extra steam and prevent the pretzels from browning too quickly. Bake your gluten-free sourdough pretzels at 445F/230C for 15-20 minutes.
The inner temperature should read 210F/100C and a toothpick should come out without much raw dough sticking to it. Keep checking on the pretzels after 15 minutes to make sure they don't burn!
Let baked pretzels cool for 5 minutes on the baking tray, then transfer them to a cooling rack. Let them cool for 10-15 minutes and enjoy!
How To Store
These gluten-free sourdough pretzels are best on the day when you baked them but they will keep for a few days in an air-tight container! You can store them at room temperature for 2 days and in the refrigerator for 3-4 days.
To reheat, just pop them in a microwave for half a minute! You can freeze these pretzels for up to 3 months. To reheat, place them in a microwave until completely soft.
Expert Tips
- Don't roll your pretzels out too thin or they will be hard to handle.
- Use a digital scale to make sure your pretzels turn out the way they should! It is easy to overpack or underpack the flour into the measuring cups which interferes with the recipe.
- If the dough sticks to your hands don't add flour. Grease your hands with oil and flour the working surface, that should be enough! Adding extra flour will make pretzels harder and less fluffy.
- Don't worry if your pretzels fall out of shape during the water bath. You can carefully reshape them after they are back on the baking sheet!
- If you need to increase the amount of water for the water bath remember to add 1 tablespoon of baking soda per each added cup of water.
- Don't forget to add a dish with water in the bottom of the oven to prevent pretzels from browning too quickly and to allow for a better rise.
FAQ
Yes! Place them in an air-tight container and freeze them for up to 3-4 months. To reheat, just place them in a microwave until soft and completely thawed!
It could happen if pretzels did not bake through all the way. Make sure you place a dish with water or ice in the bottom of the oven during baking. The inner temperature of the pretzels should be 210F/100C and a toothpick should come out almost clean. It is easy to undertake these pretzels as they brown very quickly.
Your oven might be running hot. I recommend using an oven thermometer to make sure you are baking at the right temperature. It is very common for ovens to run hot or cold. Mine does!
More like this

Get my new gluten-free sourdough recipes eBook
The top 32 recipes of 2026!

Gluten-Free Sourdough Soft Pretzels
Equipment
- 1 stand mixer or a hand mixer (optional)
- 1 small bowl
- 1 Spider utensil
- 1 digital scale strongly recommended
- 1 oven thermometer strongly recommended
Ingredients
Gluten-Free Sourdough Pretzels
- 12 grams psyllium husk whole husks, not powder (if using powder, use 10g) read my psyllium husk guide for more info
- 20 grams sugar
- 320 grams water room-temperature or warm water, not hot
- 150 grams sourdough starter a mature starter works best but discard can be used, too with an addition of 7g of active dry/instant yeast or 20g of fresh yeast
- 300 grams gluten-free flour I used my gluten-free rice-free flour mix which uses 40% starch and 60% gluten-free flour
- 5 grams salt
- 1 tablespoon xanthan gum
Water Bath
- 5 tablespoon baking soda for the water bath
- 5 cups water for the water bath
You Will Also Need
- 1 egg for the egg wash
- flaky salt to sprinkle on top
SAVE THIS RECIPE!💌
Instructions
Mixing the dough
- Add psyllium husk, sugar, and water to a small bowl and whisk to combine. Set aside until psyllium gel forms (1-2 minutes).12 grams psyllium husk, 20 grams sugar, 320 grams water
- In a bowl of a stand mixer (or a large mixing bowl) combine all the dry ingredients using a whisk.300 grams gluten-free flour, 5 grams salt, 1 tablespoon xanthan gum
- Then, add psyllium gel and the sourdough starter to the bowl with the dry ingredients and knead the dough in a stand mixer for 5 minutes using a dough hook. You can also use a hand mixer for this step. If you don't have a mixer, you can knead the dough by hand, in that case, knead for 10 minutes to achieve a very smooth dough!150 grams sourdough starter
Shaping
- Separate the dough into 6 equal pieces. Mine were about 120-130 grams per pretzel. It is important to make sure all pretzels are the same size so that they bake at the same speed! The dough will be very sticky, don't add extra flour! Rather, grease your hands with oil to prevent sticking.
- Once the dough is separated into 6 parts, flour the working surface, take one of the dough pieces, and start rolling it into a rope with your hands. As you are rolling the dough, carefully pull it to stretch it out. The length should be about 16 inches/40 cm. Then, bring the dough into a U-shape, twist the ends over each other twice, and finally, bring the tops to the bottom part of the dough to make the traditional pretzel shape (pictures in the post).
Baking
- Place shaped pretzels on the baking sheet lined with a piece of parchment paper. Cover them with a tea towel and let them proof for 1-2 hours. I let mine sit for 1 hour before the water bath!
- 30 minutes before the end of proofing start preheating the oven to 445F/230C.
- Once the pretzels are done proofing, boil 5 cups of water in a medium-large pot with 5 tablespoon of baking soda. If your pot is too large, you can add more water. Remember to add 1 tablespoon of baking soda per each added cup of water. Once the water starts boiling, carefully lower the pretzels into the pot (mine fits 2 at once). Boil for 30-50 seconds, you can push the pretzels underwater if they are floating on top. Finally, transfer the pretzels from the water bath to the parchment paper using a spider or any other tool that works for you, just be gentle with the pretzels.
- Don't worry if your pretzels move and fall out of shape. You can reshape them gently once they are out of the water!
- Once all pretzels have gone through the water bath, prepare the egg wash. To make an egg wash just whisk one egg with a fork in a small bowl. Then, brush the pretzels with it using a silicone brush or a baking brush. Don't use the whole egg, brush just enough to cover the pretzels to avoid baked eggs on top!
- Finally, sprinkle your gluten-free sourdough pretzels with flaky salt!
- Place a dish with water in the bottom of the oven to create extra steam and prevent the pretzels from browning too quickly. Bake your gluten-free sourdough pretzels at 445F/230C for 15-20 minutes. The inner temperature should read 210F/100C and a toothpick should come out without much raw dough sticking to it. Keep checking on the pretzels after 15 minutes to make sure they don't burn!
- Let baked pretzels cool for 5 minutes on the baking tray, then transfer them to a cooling rack. Let them cool for 10-15 minutes and enjoy!


Julia says
This recipe turned out great! I used my active starter and King Arthur’s gluten free all purpose flour 🙂
Erika Mullins says
Could extra Xanthan has caused a more doughy texture or did they need more cook time?
Natasha Levai says
It could be both! You can try reducing the xanthan gum and increasing the baking time by 5-10 minutes. Add 2 tsp baking powder to the dough to allow for more rise and less gumminess!
Lakeysha says
Hey, quick question! I don't have xanthan gum so can I not use it? Thanksss
Natasha Levai says
You can leave it out, although it will affect the texture of the dough.
Valerie Howell says
loved these pretzels! I've missed soft pretzels so much! What's the best way to store them, please. Hubby ain't getting any of these!!
Petra says
I was wondering what else I can use instead of millet flour? It is hard to find one that is GF. Thanks
Natasha Levai says
Hi Petra! You can use brown rice flour or sorghum flour instead.
Snejana says
Should I avoid adding xanthan gum if I’m using GF 1:1 King Arthur flour? It already has xanthan gum.
Natasha Levai says
Yes! Leave out the xanthan gum if your mix already contains it.
Marci says
These are excellent! I haven't located millet flour in my area yet, so I used sorghum and brown rice equally for the 165g along with the 135g starch. I'm also going to try pretzel nuggets and give them as a Christmas gift.
Carissa McClary says
How did that substitute work out?