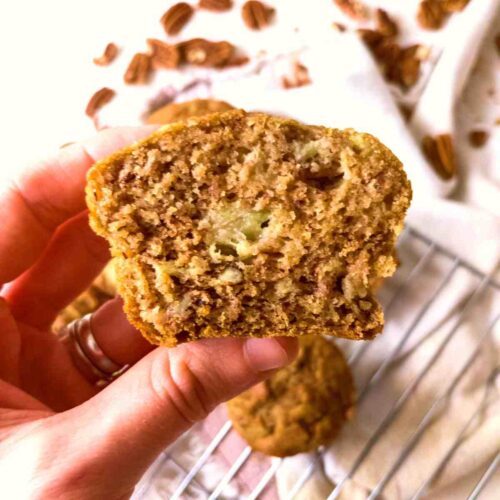
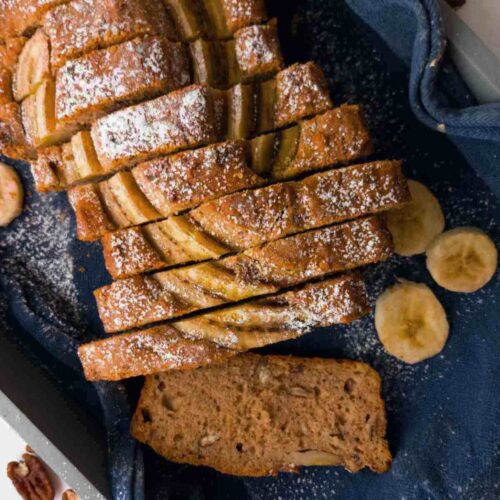
This moist Gluten-Free Banana Nut Bread is so soft and tender that you can pick the crumbs up with the back of the fork. And you only need 20 minutes of hands-on work! To add an even more nutty and earthy flavor try making my banana bread with buckwheat flour.

This delicious gluten-free banana bread is perfect for gatherings and celebrations making it a wonderful treat for Valentine's Day! It pairs especially well with this 2-ingredient no-churn ice cream.
Jump to:
- Why You Will Love This Recipe
- 🍌Ingredients for Gluten-Free Banana Nut Bread
- 📋Substitutes & Variations
- How to Make Gluten-Free Banana Nut Bread
- Expert Tips
- 🧾Common Questions
- 🌡️Storage & freezing
- More Gluten-Free Banana Recipes You Will Love!
- Gluten-Free Bread Recipes eBook
- The BEST Banana Nut Bread (Gluten-Free)
- 💬 Community
Why You Will Love This Recipe
- It is a 1-bowl recipe just like my buckwheat banana muffins!
- This banana bread is EXTRA moist and soft compared to all the other recipes.
- Requires only 20 minutes of hands-on work!
🍌Ingredients for Gluten-Free Banana Nut Bread

Recipe notes:
- Ripe bananas - bananas that are turning brown or even black add more natural sweetness, soften the texture, and create a stronger banana flavor!
- Gluten-free flour 1:1 flour - I used my homemade nightshade-free flour blend. Most store-bought blends should work for this recipe.
- Almond flour - helps retain moisture and makes the bread extra moist.
- Oil - any neutral vegetable or seed oil will work, I used sunflower oil.
- Xanthan gum - helps hold the structure of the loaf. Skip if your blend already has a binder!
- Optional add-ins - you can add chocolate chips, M&Ms, cranberries, or raisins.
See the recipe card for quantities.
📋Substitutes & Variations
- Eggs - for the vegan version check out this vegan gluten-free banana bread.
- Almond flour - if you are allergic, use ground sunflower seeds instead.
- Brown sugar - you can use all white sugar instead but it's best to use both for the best flavor.
- Sourdough - you can make a gluten-free sourdough banana bread if you have a gluten-free sourdough starter!
- Zucchini - I have a great recipe for zucchini bread with buckwheat flour.
- Muffins - divide the batter into 9-12 muffin tins and bake for 25-28 minutes at 375F/190C.
How to Make Gluten-Free Banana Nut Bread

Step 1. Start preheating the oven to 190C/375F.
Then, mash the bananas in a medium-sized bowl using a potato masher or a fork. You can sprinkle some lemon juice on it to prevent bananas from browning too quickly (optional).

Step 2. Add the sugars, eggs, and oil to the mashed bananas and whisk until incorporated. You can use an electric mixer for this step (optional).

Step 3. Finally, add all the dry ingredients to the bowl and mix until evenly incorporated. Don't worry about overmixing!
Then fold in the crushed walnuts/pecans and the add-ins (if using).

Step 4. Line a light-colored 9x5" metal baking pan (aluminum is great, don't use glass) with non-stick parchment paper.
Transfer the batter to it and decorate with sliced bananas and nuts (optional).
Bake the banana nut bread for 40 minutes at 375F/190C, then cover the pan with aluminum foil (shiny side up) and bake for another 20 minutes.
Do a toothpick check and if it comes out with raw dough attached, bake for another 10 minutes, then take the bread out.
Let the banana bread cool in the bread pan for 30 minutes, then transfer it to a cooling rack. Enjoy!
Expert Tips
- Use a digital kitchen scale to ensure the best results (see the "metric" tab in the recipe card).
- Avoid opening the oven during the first 40 minutes of baking or the bread will collapse.
- Wait for the bread to cool down before slicing. If sliced too soon it might fall apart!
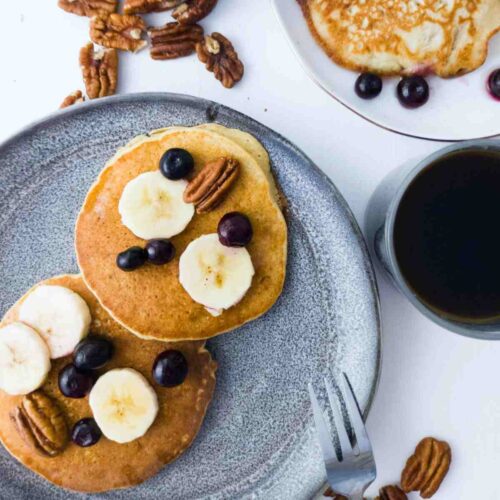
- If you have extra mashed bananas make these quick buckwheat banana pancakes!
🧾Common Questions
Your banana bread will not rise if your baking powder is expired or the ingredients are not measured properly. This is why I always recommend using a digital scale if at all possible!
A gluten-free blend that contains both flours and starches is your best choice. Starches add fluffiness while heavier flour adds substance to the bake. You can use Bob's Red Mill 1:1, King Arthur Measure for Measure, Cup4Cup, or make your own rice-free gluten-free blend!
Whole psyllium husk is the secret ingredient to the soft, moist, and chewy gluten-free bread! Using both psyllium and xanthan gum will improve the texture even more (see this Dutch oven gluten-free bread recipe).

🌡️Storage & freezing
Store this banana bread at room temperature for up to 3-4 days in an air-tight container or plastic wrap.
To freeze:
- Let the bread cool completely (no longer warm to the touch).
- Slice the bread and arrange the slices on a tray or a piece of parchment.
- Place the tray in the freezer and once the slices are cold enough (about 30 min), transfer them to an air-tight container or a freezer bag and keep for up to 3 months.
More Gluten-Free Banana Recipes You Will Love!

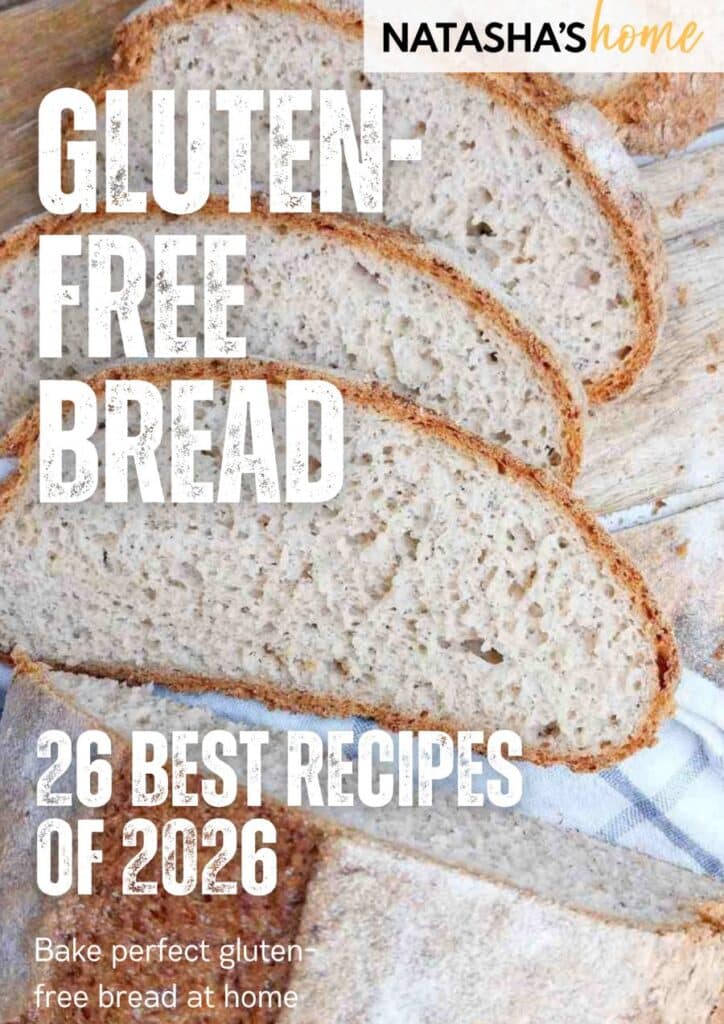
Get my new
Gluten-Free Bread Recipes eBook
The top 26 recipes of 2026! Includes a bonus conversion chart for gluten-free flour.

The BEST Banana Nut Bread (Gluten-Free)
Ingredients
Wet Ingredients
- 330-350 grams ripe bananas
- 85 grams brown sugar light or dark
- 65 grams granulated white sugar
- 50 grams oil any neutral vegetable or seed oil
- 2 eggs at room temperature
Dry Ingredients
- 270 grams gluten-free all-purpose flour I used my nightshade-free blend (25% rice flour, 25% brown rice flour, 25% tapioca starch, 25% potato starch)
- 50 grams almond flour for moisture
- 1 teaspoon baking powder
- 1 teaspoon baking soda
- ½ teaspoon salt
- 1 teaspoon xanthan gum or 3-5 teaspoon psyllium husk powder
- 1 tsp cinnamon optional
Add-Ins
- 100-150 grams crushed walnuts
- ½ cup optional add-ins chocolate chip, cranberries, raisins, etc.
SAVE THIS RECIPE!💌
Instructions
- Start preheating the oven to 190C/375F.
- Then, mash the bananas in a medium-sized bowl using a potato masher or a fork. You can sprinkle some lemon juice on it to prevent bananas from browning too quickly (optional).330-350 grams ripe bananas
- Add the sugars, eggs, and oil to the mashed bananas and whisk until incorporated. You can use an electric mixer for this step (optional).85 grams brown sugar , 65 grams granulated white sugar, 50 grams oil, 2 eggs
- Add all the dry ingredients to the bowl and mix until evenly incorporated. Don't worry about overmixing!270 grams gluten-free all-purpose flour , 50 grams almond flour, 1 teaspoon baking powder, 1 teaspoon baking soda, ½ teaspoon salt, 1 teaspoon xanthan gum, 1 teaspoon cinnamon
- Finally, fold in the crushed walnuts/pecans and the add-ins (if using).100-150 grams crushed walnuts, ½ cup optional add-ins
- Line a light-colored 9x5" metal baking pan (aluminum is great, don't use glass) with non-stick parchment paper.
- Transfer the batter to it and decorate with sliced bananas and nuts (optional).
- Bake the banana nut bread for 40 minutes at 375F/190C, then cover the pan with aluminum foil (shiny side up) and bake for another 20 minutes.
- Do a toothpick check and if it comes out with raw dough attached, bake for another 10 minutes, then take the bread out.
- Let the banana bread cool in the bread pan for 30 minutes, then transfer it to a cooling rack. Enjoy!
Notes
- Use a digital kitchen scale to ensure the best results (see the "metric" tab in the recipe card).
- Avoid opening the oven during the first 40 minutes of baking or the bread will collapse.
- Wait for the bread to cool down before slicing. If sliced too soon it might fall apart!
- If you have extra mashed bananas make these quick buckwheat banana pancakes!
- Let the bread cool completely (no longer warm to the touch).
- Slice the bread and arrange the slices on a tray or a piece of parchment.
- Place the tray in the freezer and once the slices are cold enough (about 30 min), transfer them to an air-tight container or a freezer bag and keep for up to 3 months.


Natasha Levai says
This gluten-free banana nut bread is super easy to make - just one bowl and only 20 minutes of prep! Almond flour helps keep it moist for longer, so it stays fresh and delicious for longer.