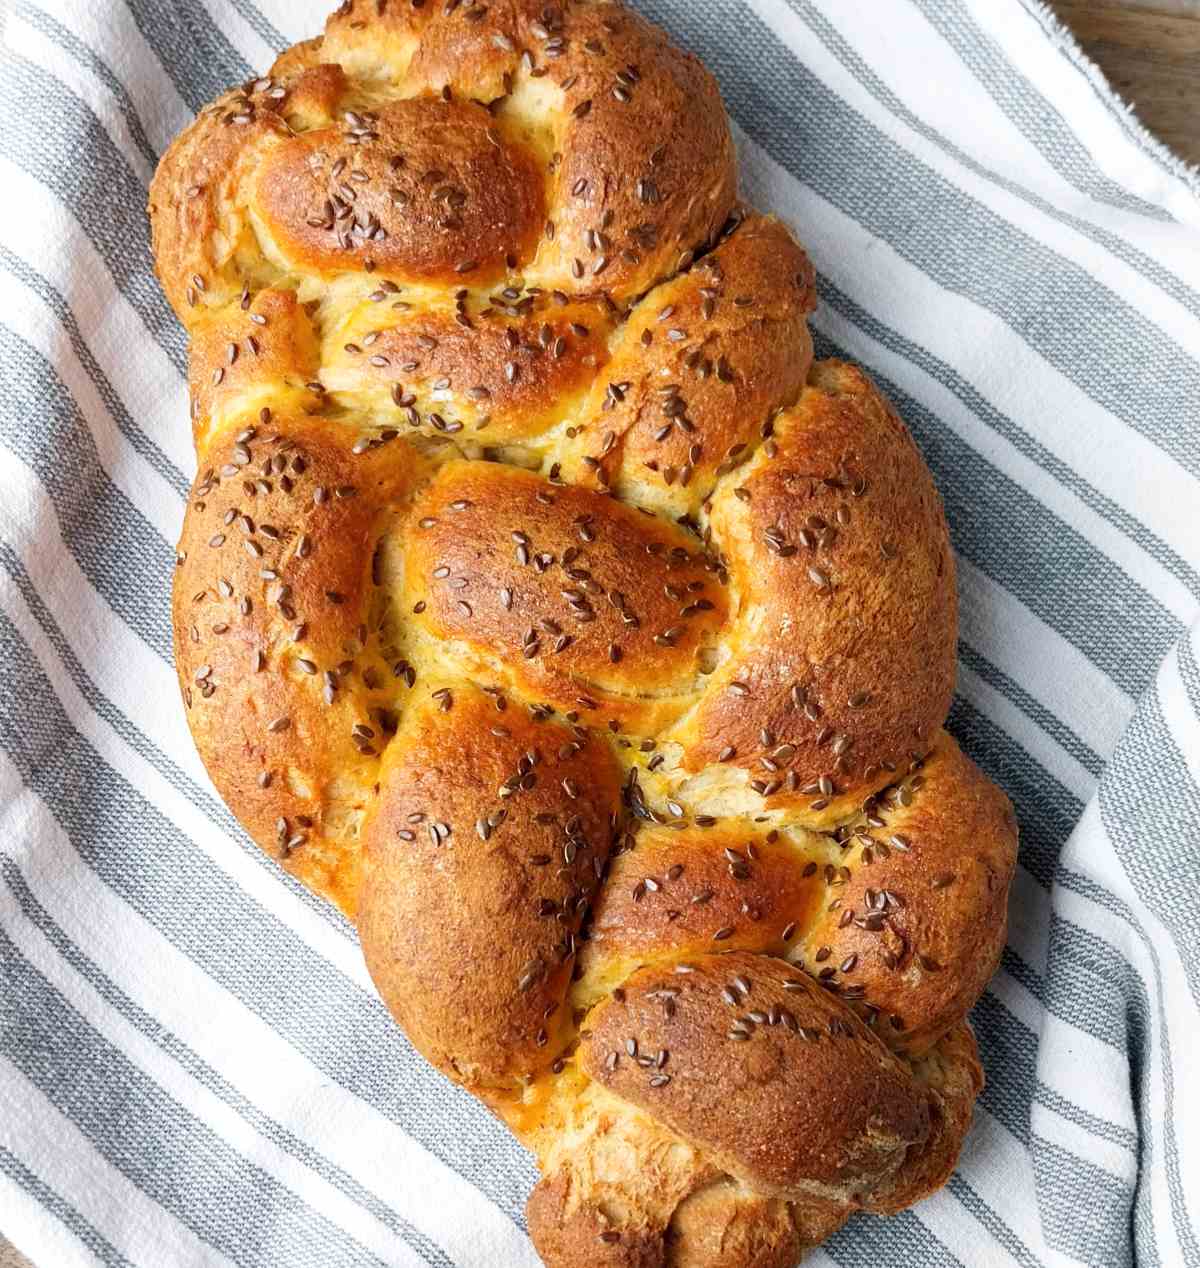
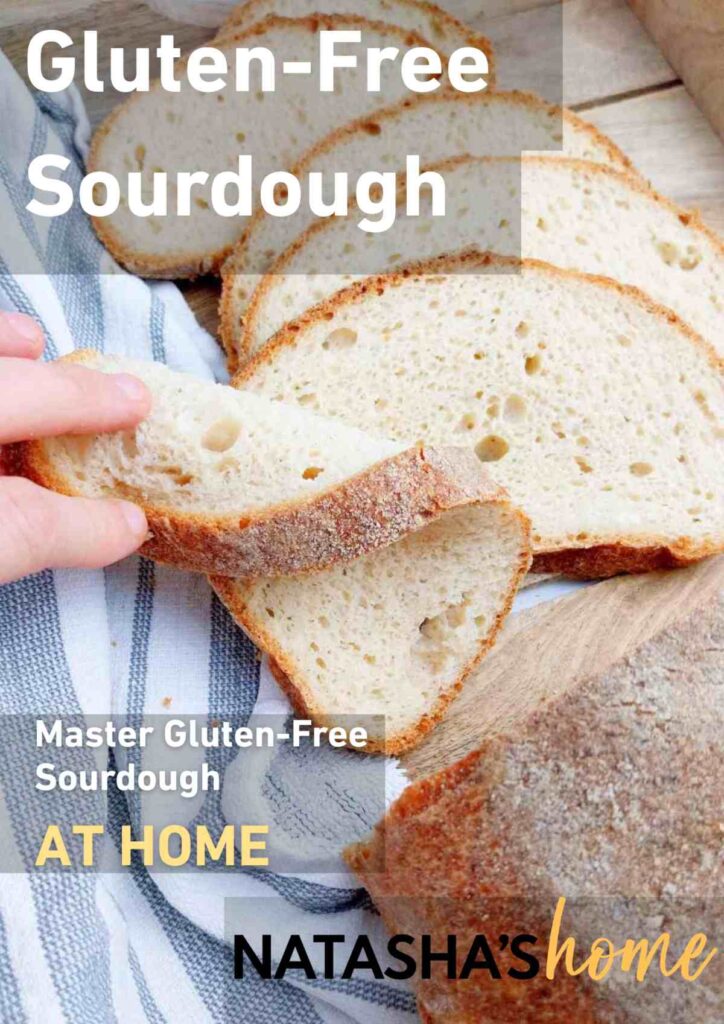
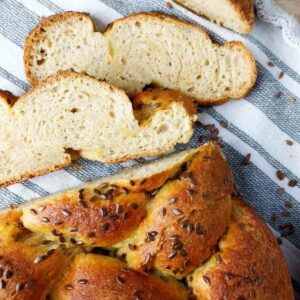
This delicious, soft, and tangy gluten-free sourdough challah is great with butter, honey, elderberry jam, or even on its own with a cup of tea or coffee. Sourdough takes an already great flavor to a whole new level! For a non-sourdough version, check out my gluten-free Tsoureki.
This recipe was in large inspired by The Loopy Whisk's gluten-free challah recipe. I love all of her ideas and recommend you check her blog as well!
Challah originated in Jewish tradition as a Sabbath bread and has spread to the rest of the world (Poland, Ukraine, Belarus, and Europe) because of its original shape and delicious and tender flavor.
However, in the Western world challah is a frequent dish on the Easter table just like this gluten-free Easter bread!
Jump to:
New to gluten-free sourdough? Watch my 16-minute video tutorial for beginners!
Ingredients
See the recipe card at the end of the post for the exact measurements!
- Gluten-free flour - I recommend sticking with the flour types listed in the recipe for the best results, but you are free to experiment. Make sure not to use a blend that already contains xanthan or other gums.
- Gluten-free sourdough starter - use an active starter instead of the discard from the fridge. The starter is best 3-6 hours after it is fed.
- Psyllium husk - it serves as a binder that keeps the crumb moist and the bread flexible. For more about this game-changing ingredient read my "psyllium in baking" article.
- Xanthan gum - it is important to use both psyllium husk AND xanthan gum in this recipe for a fluffy, soft, and easily braidable challah.
- Sugar - both adds sweetness to the dough AND feeds the natural bacteria found in the sourdough starter. Don't leave it out!
- Baking powder - read the package to make sure it is gluten-free!
Substitutes
Psyllium husk - none of the common psyllium substitutes are recommended for this recipe. However, you can experiment with konjac if necessary!
Sourdough starter - this is a sourdough challah recipe, if you want to make one with yeast, check out this yeasted challah.
Xanthan gum - allows for fluffiness in the dough and aids in handling during braiding. I don't recommend leaving it out, however, you can use guar gum instead.
Eggs - I haven't tried this recipe with egg substitutes but you can experiment with chia or flax eggs.
Sugar - use coconut sugar instead. I don't recommend using honey or maple syrup to avoid overhydrating the dough!
Step-By-Step Instructions
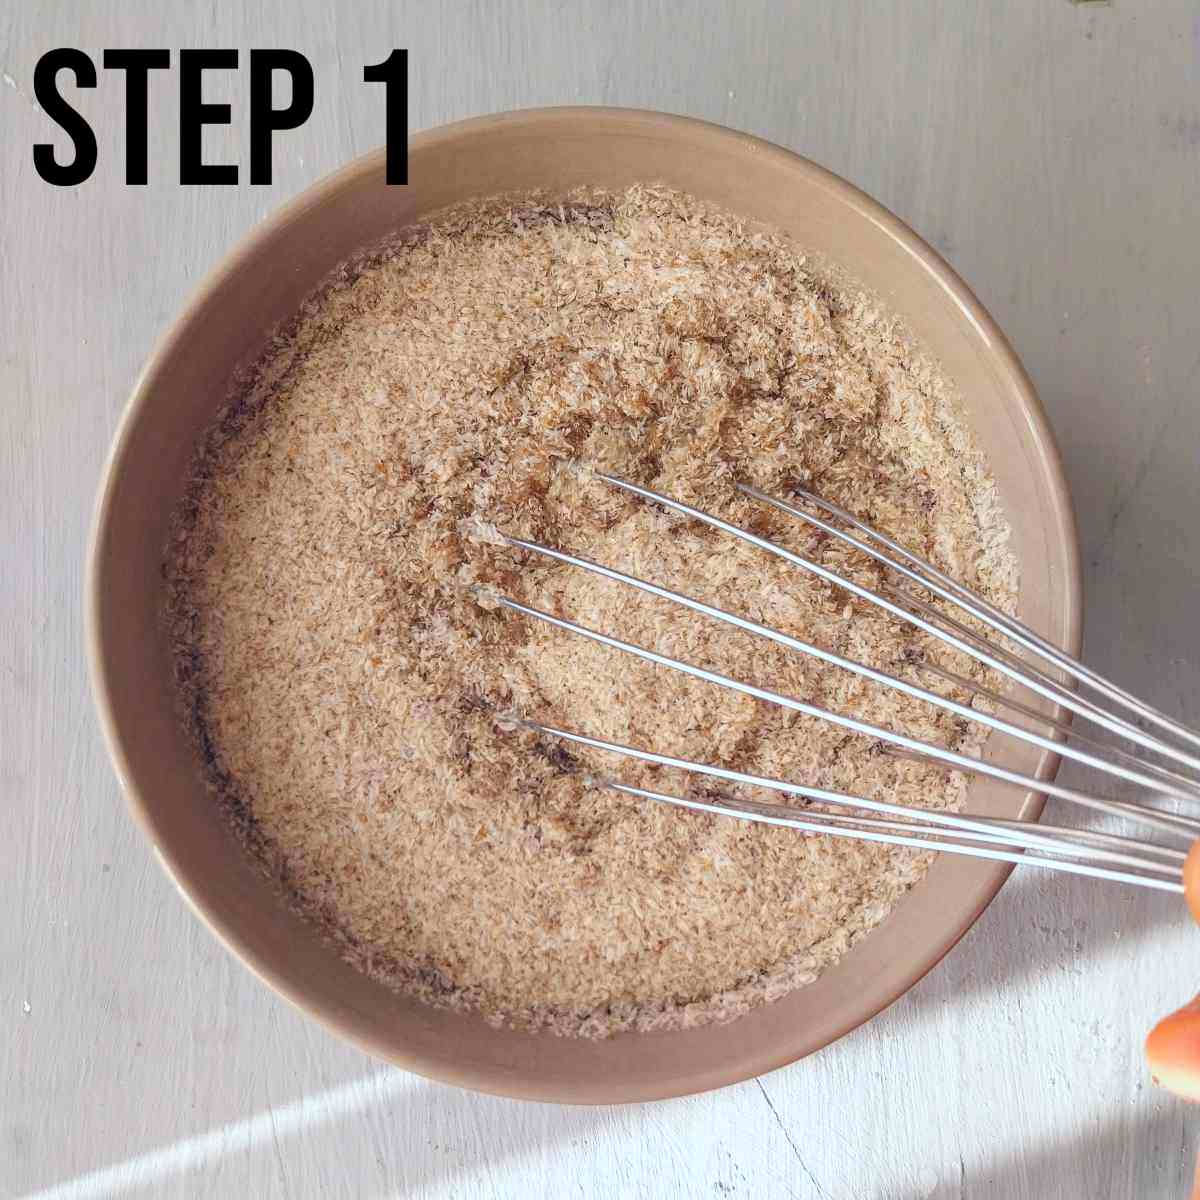
First, we will make psyllium gel. Add psyllium husks to the warm water and whisk to combine.
Set the mixture aside for a couple of minutes to let the gel form.
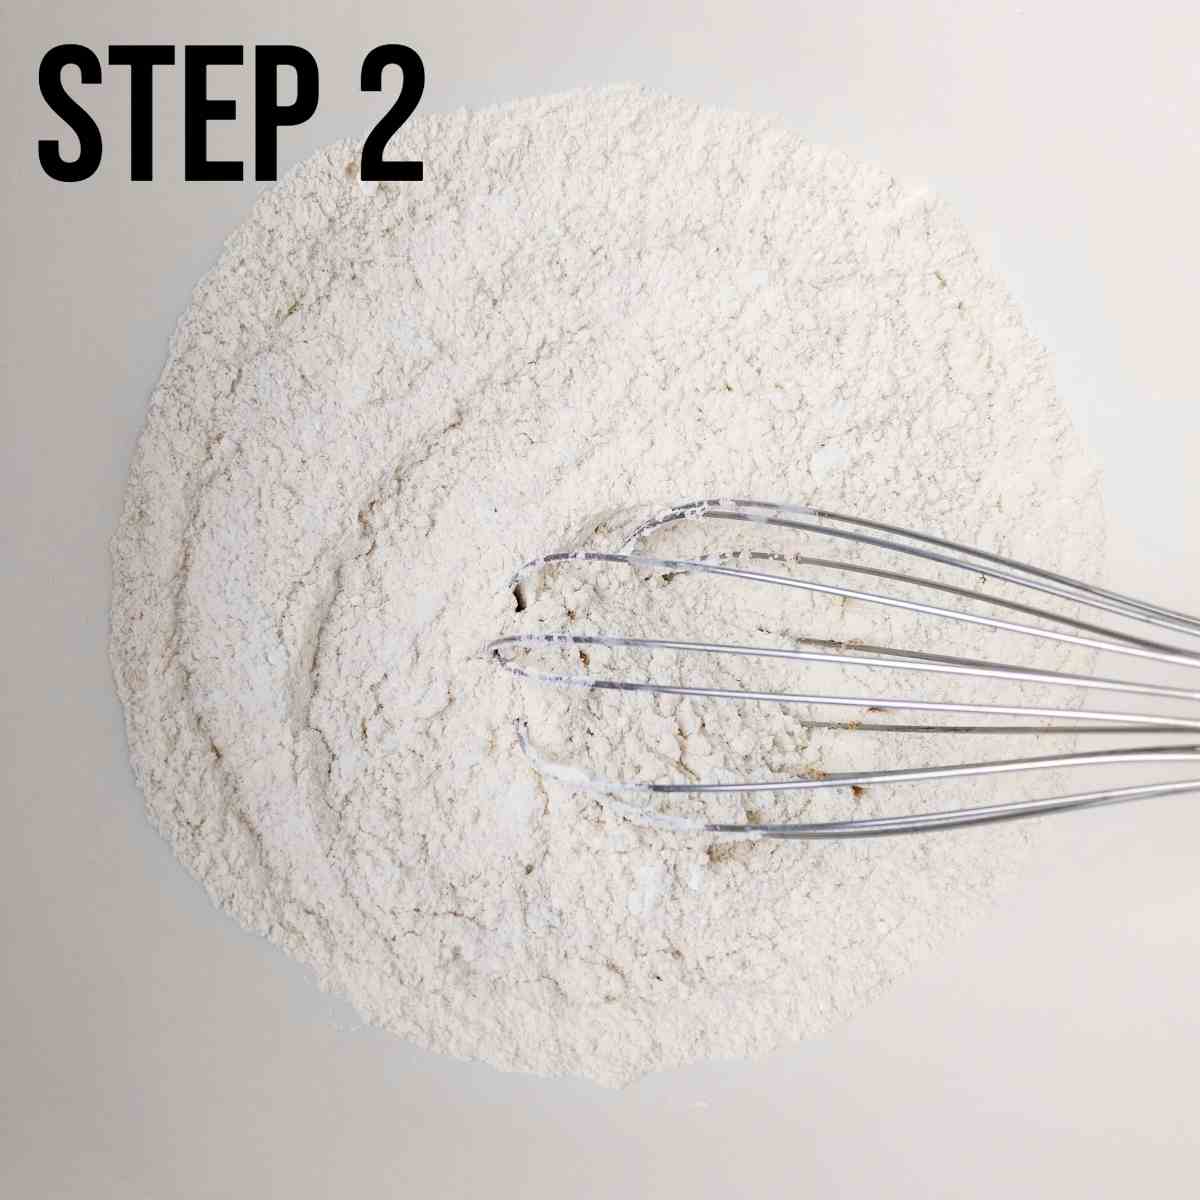
In another large mixing bowl combine all of the dry ingredients: flours, starch, baking powder, sugar, xanthan gum, and salt.
Stir to combine.
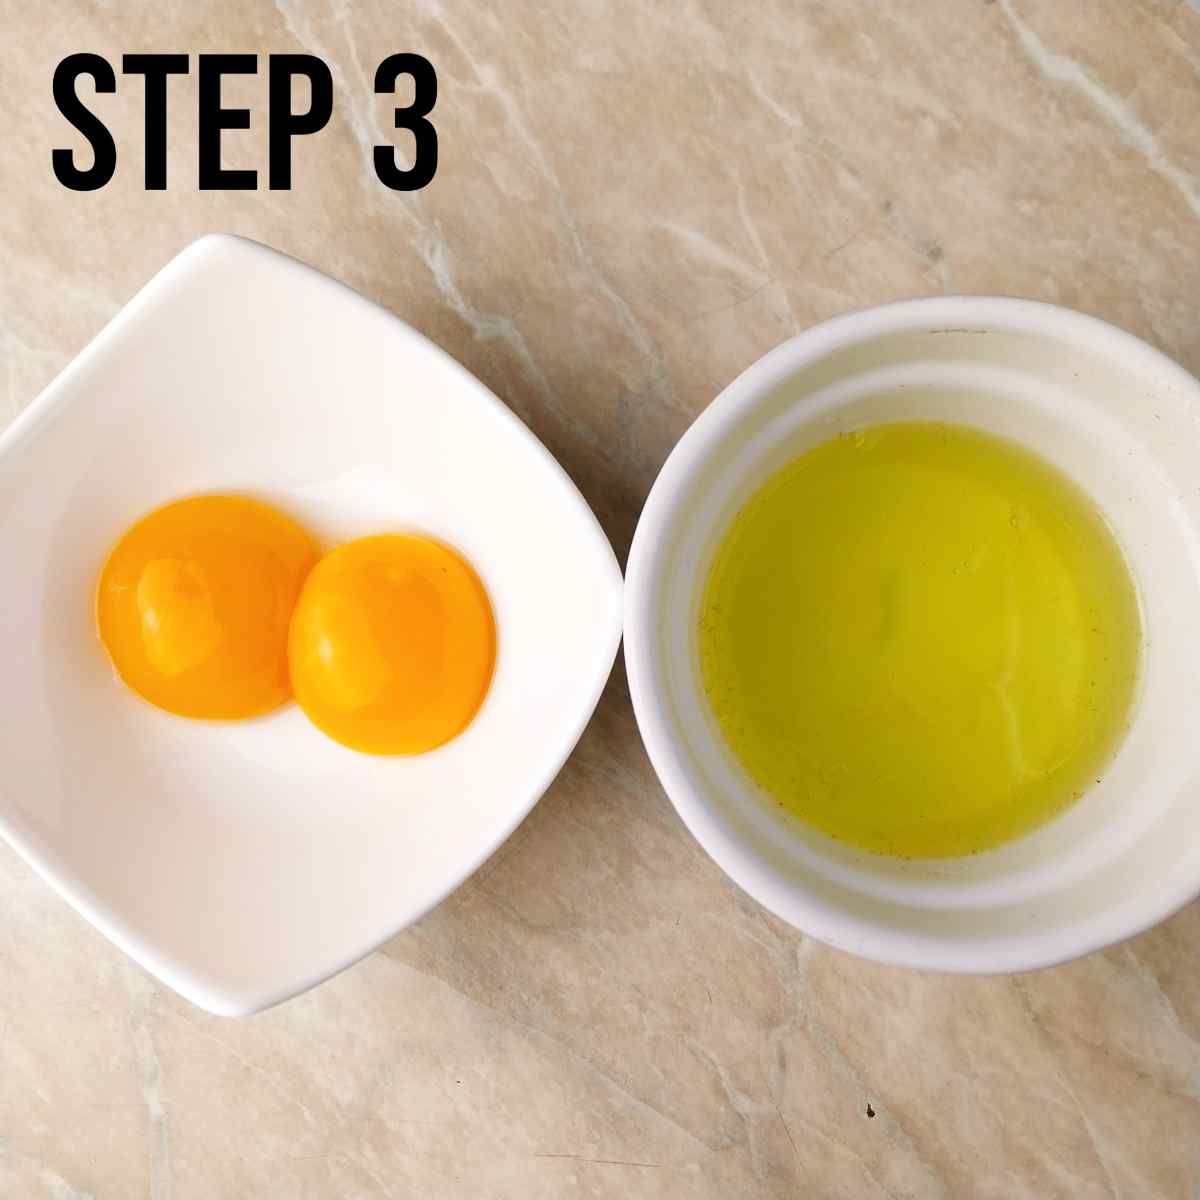
Take 2 eggs and separate the yolks from the whites. Cover the whites with a plastic wrap and place in the fridge.
We will only need the yolks for this recipe!
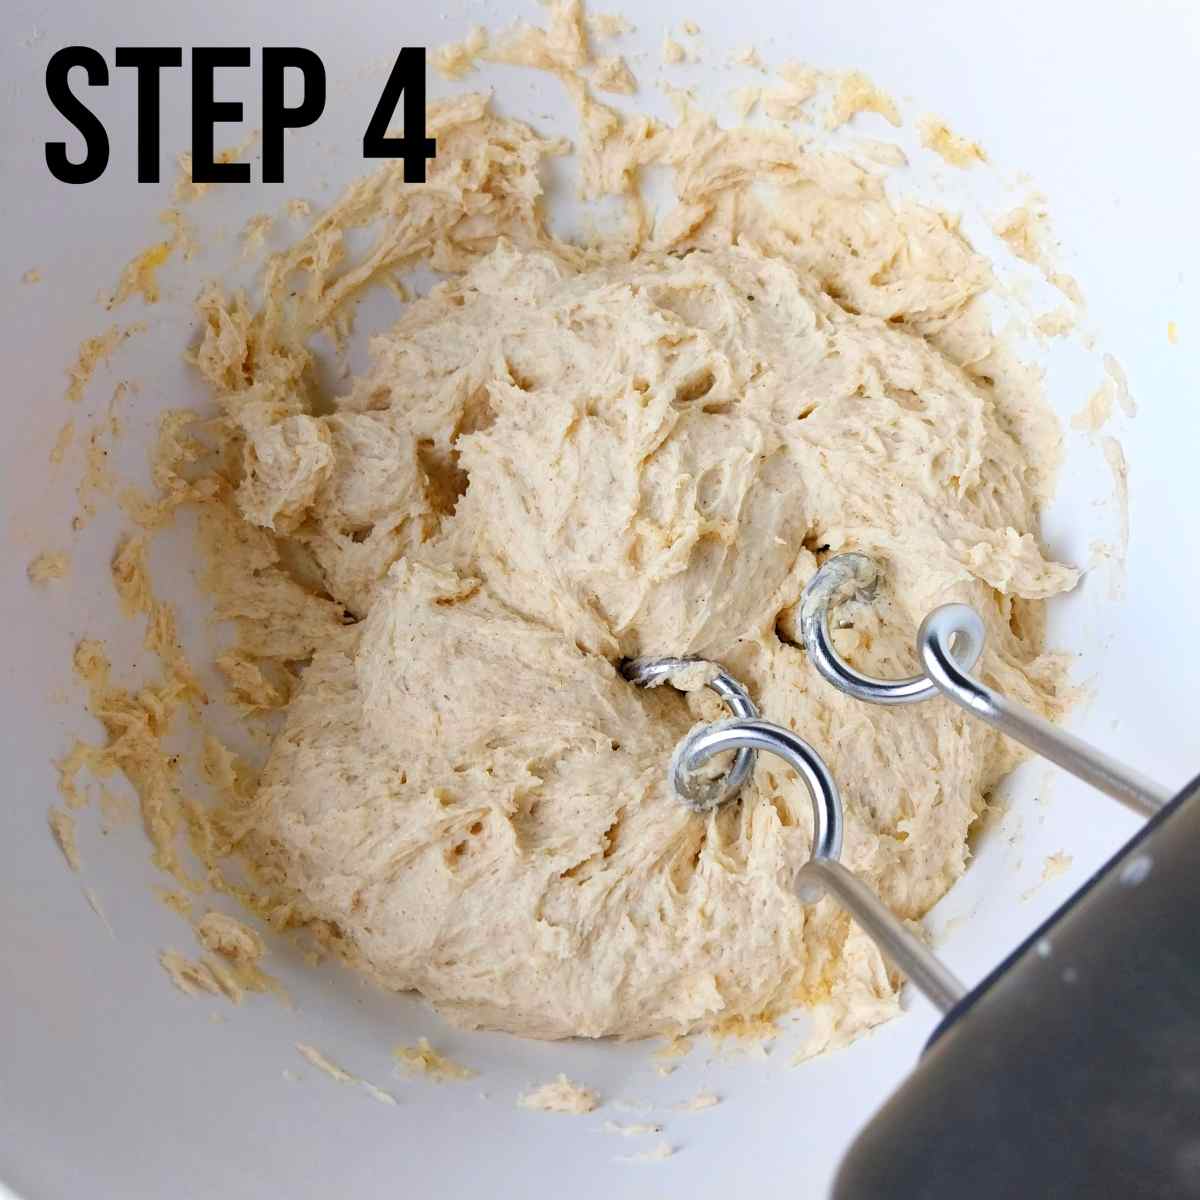
Add all of the wet ingredients to the bowl with the dry ingredients: psyllium gel, sourdough starter, egg yolks, egg, and oil.
Mix the dough very well. I prefer using an electric mixer with dough hooks but you can use your hands or a wooden spoon.
Mix for 5 minutes if using a mixer and longer if doing it by hand. You want a smooth and evenly incorporated dough.
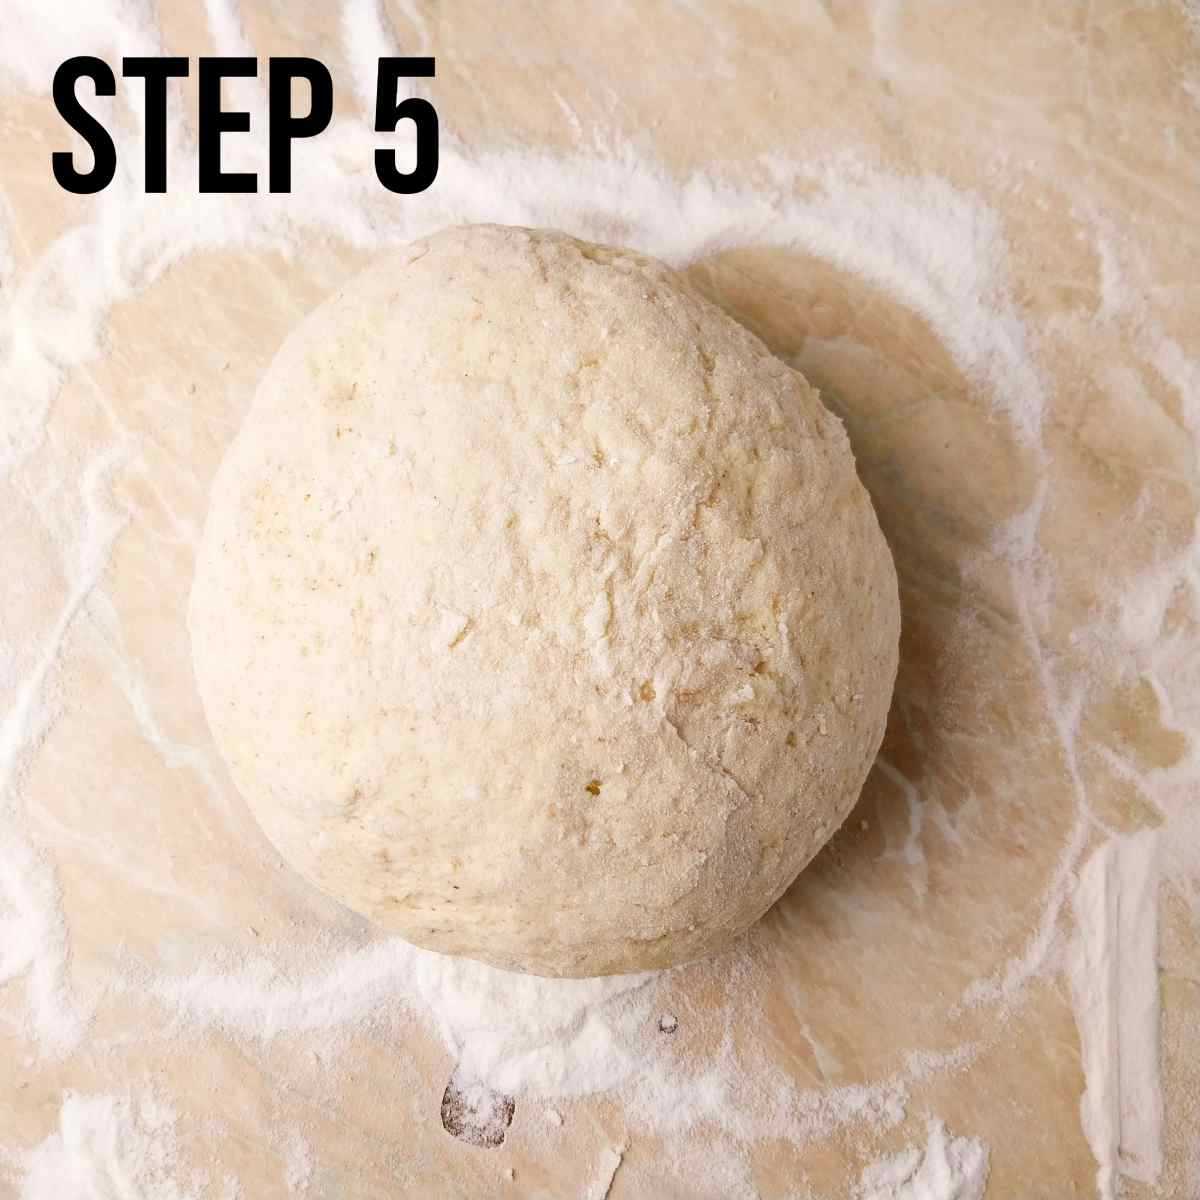
Flour the working surface and transfer the dough to it. The dough will be very sticky at first but avoid the temptation to mix in more flour!
Rather, dust the dough with flour on the outside and shape it into a ball. Use as much flour as you need to shape the dough.
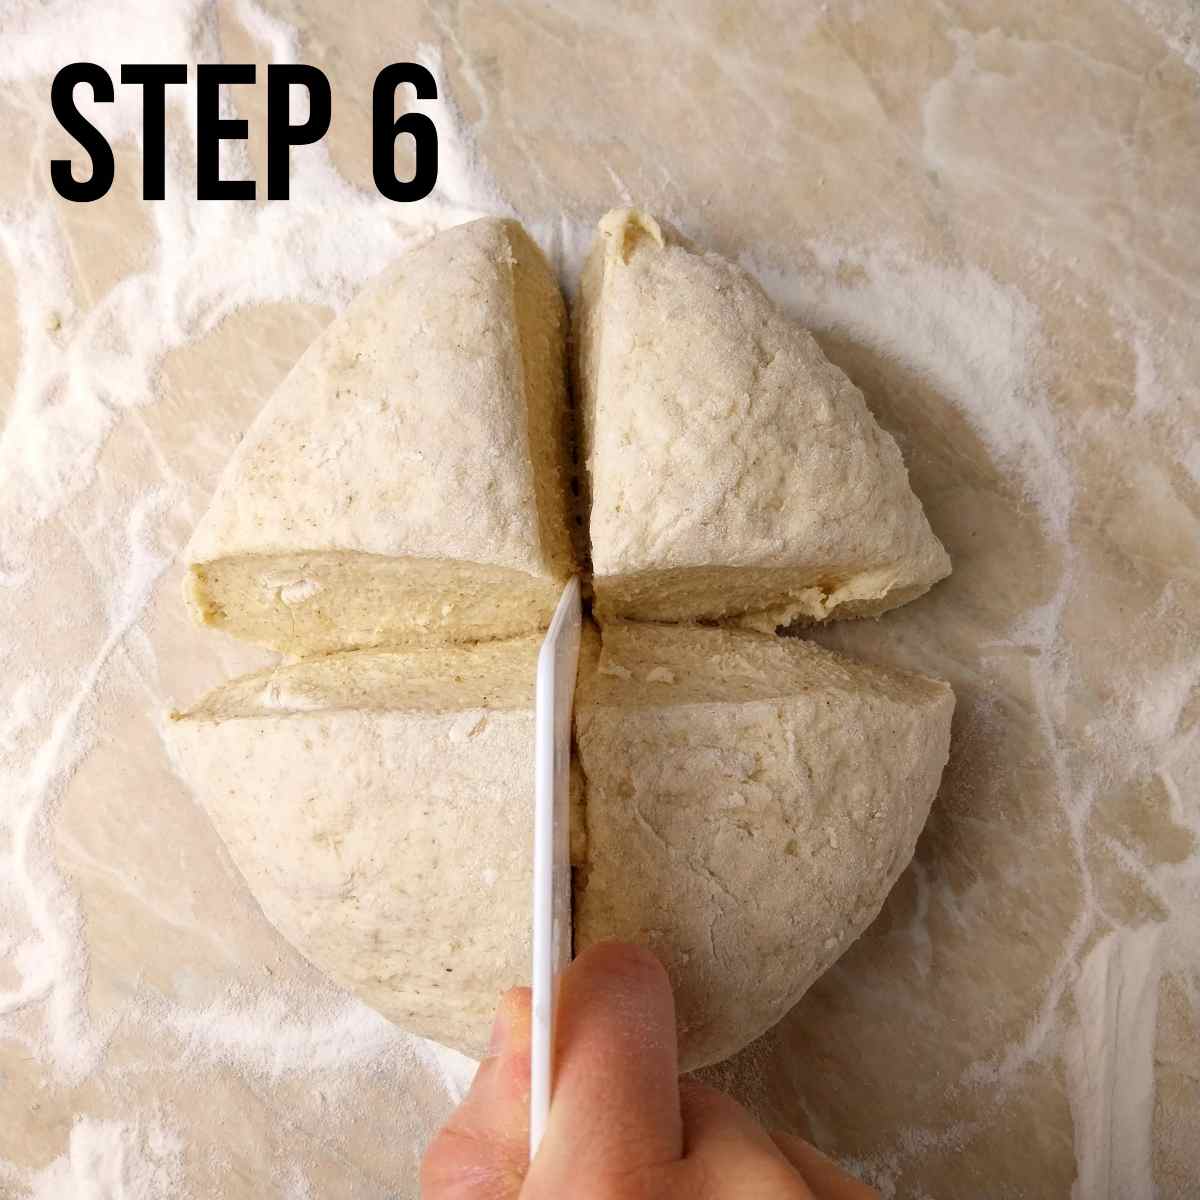
Divide the dough ball into four equal parts using a bench scraper or a knife.
You can weigh each part to make sure they are all the same size.
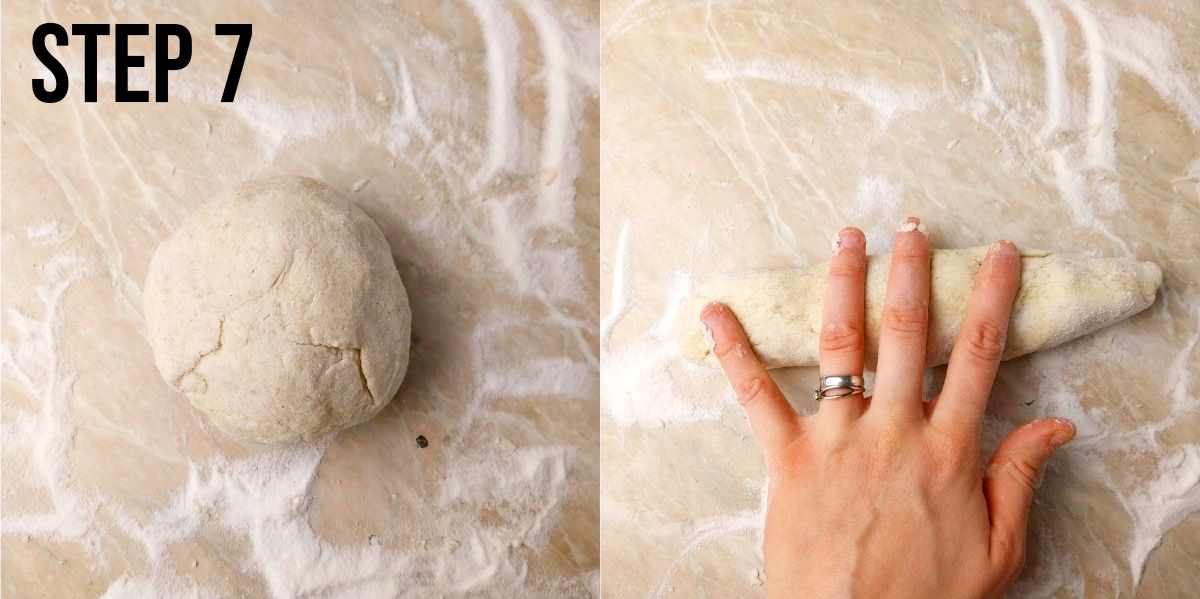
Take one part of the dough and shape it into a small ball. Then, start rolling it out on the working surface into a long rope with the palms of your hands.
Keep rolling back and forth until the rope is about 16in/40cm. Try to make the rope thicker in the middle and thinner on the ends.
Repeat the rolling out process with the rest of the dough parts.
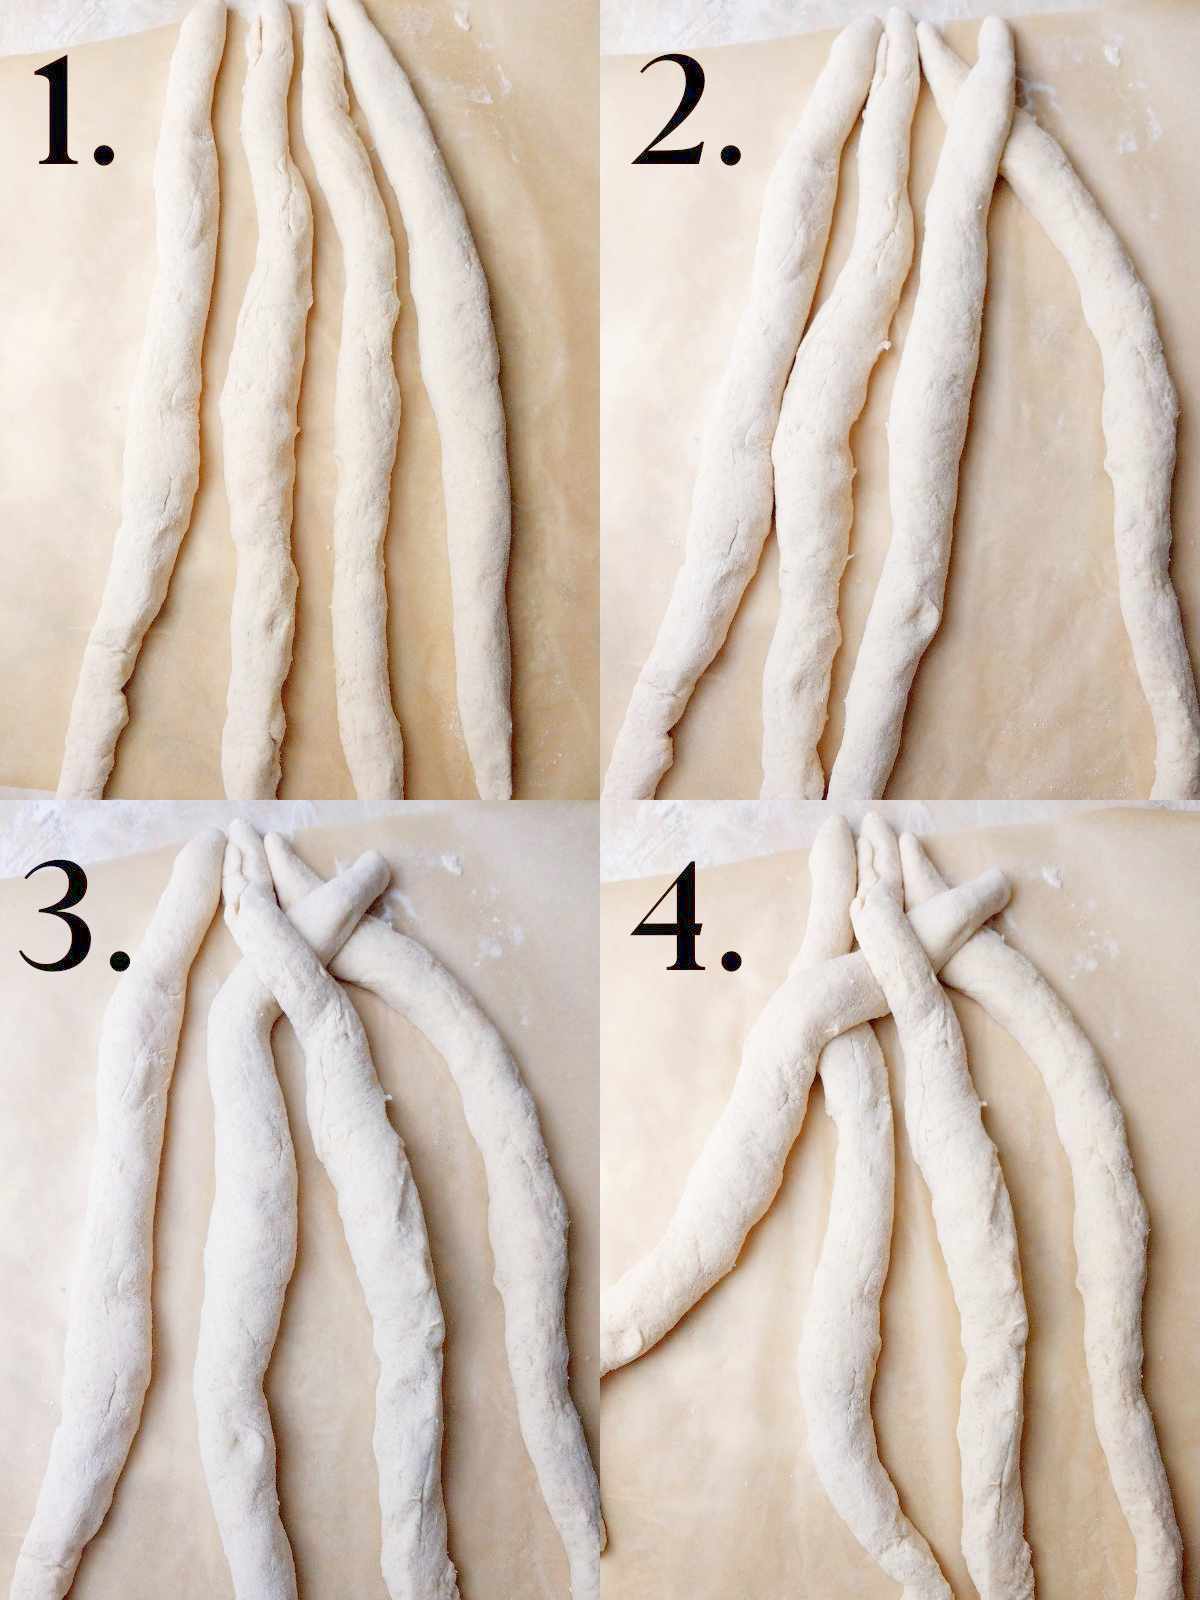
Place the ropes onto a piece of parchment paper as you see in the picture. Be careful and gentle with the dough to avoid tearing or breaking it!
Take the farthest right rope and start weaving it through the other three. Then, take the one that is on the right now and weave it towards the left. Continue the process until the challah is fully braided.
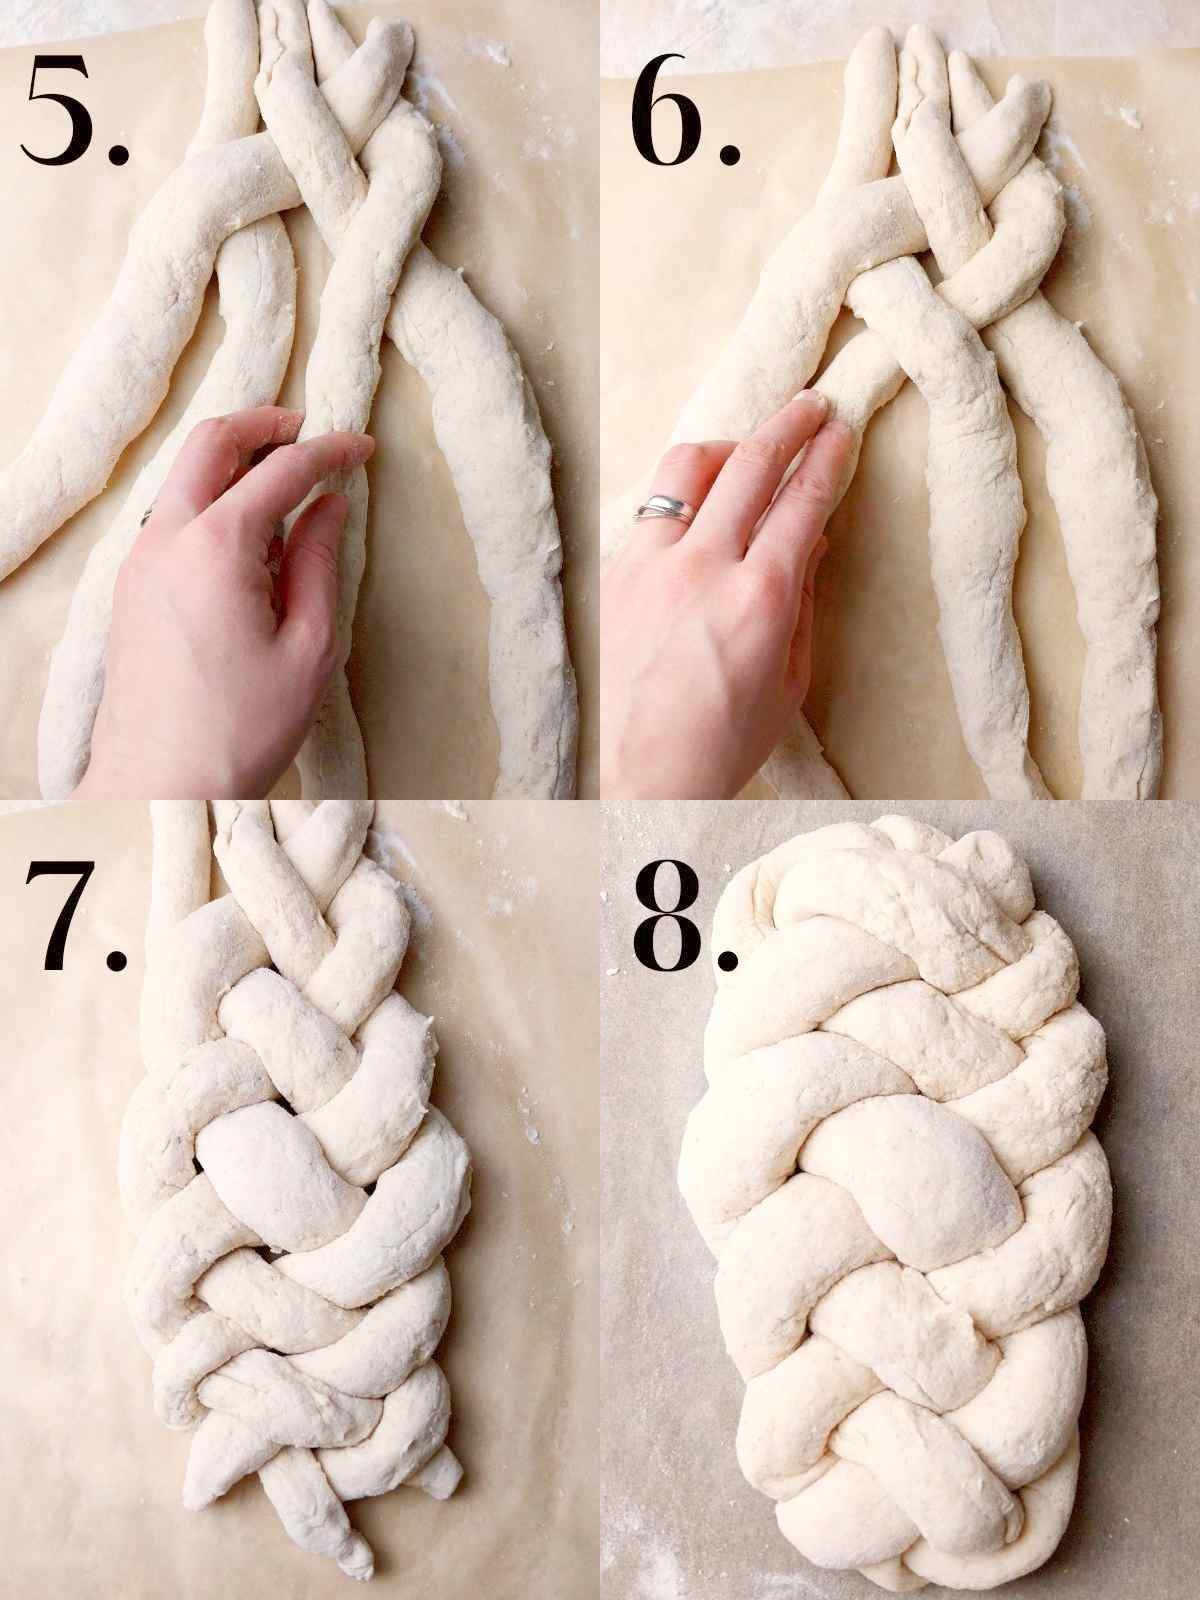
Tuck the ends of the challah under the dough, then repeat with the other side.
Let the challah proof for 3.5-4 hours in a warm and draft-free spot. I like leaving my challah to ferment in the oven with the oven light turned on. This creates the perfect temperature for rising.
If you are going to proof the dough on the counter, make sure to cover it with a kitchen towel. It is best if you figure out a way to cover it without the towel touching the dough!
Once the dough is proofed, it will puff up but it won't quite double in size.
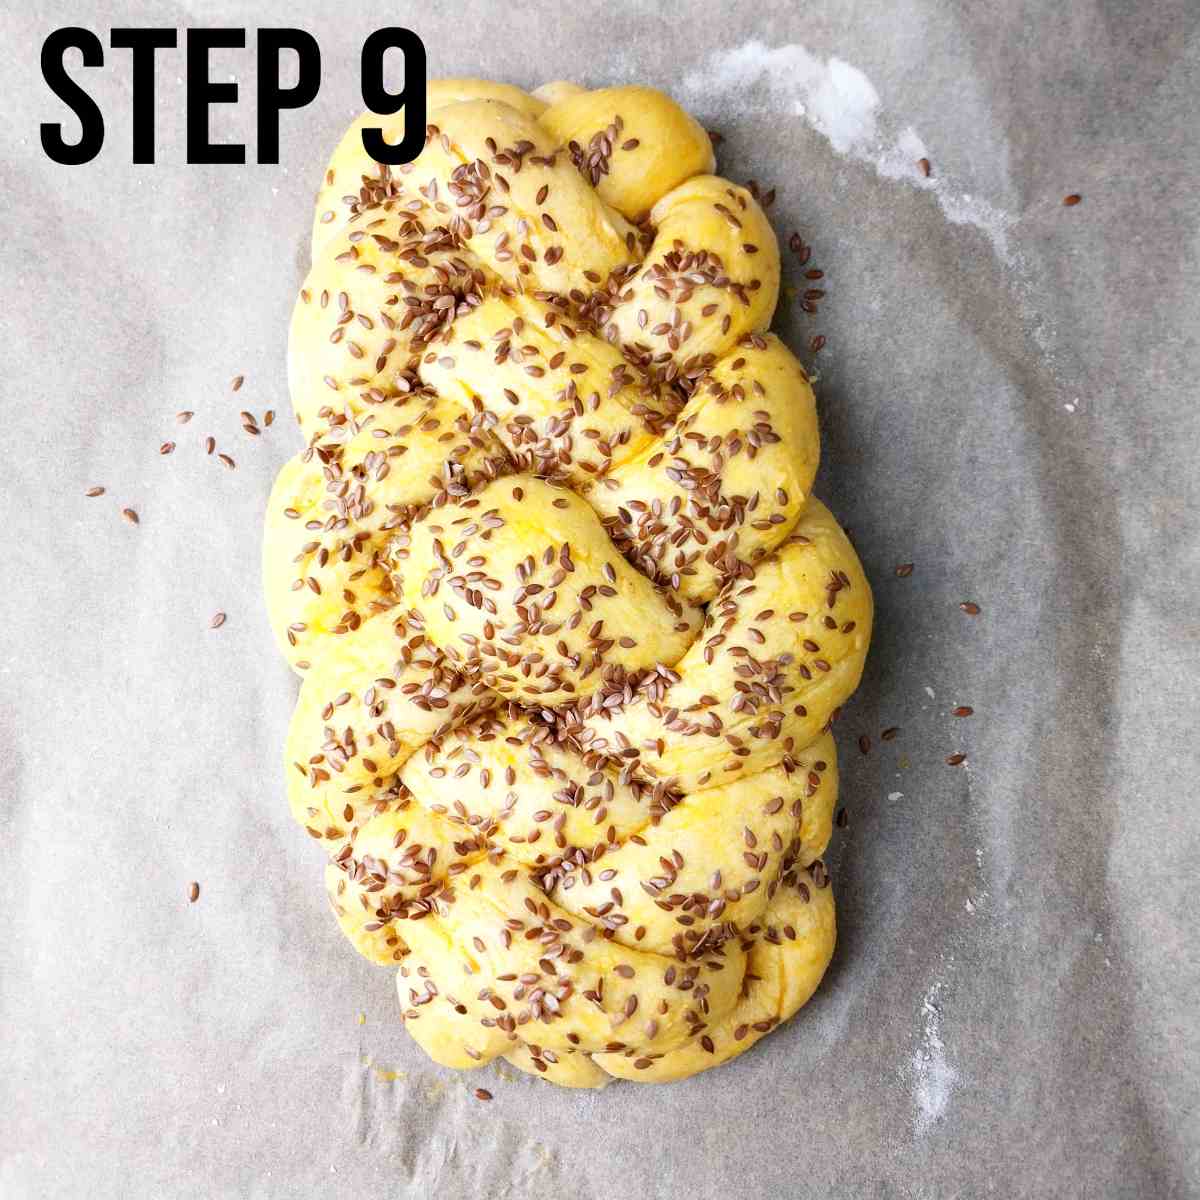
Whisk an egg with a fork and brush the challah with it. You can use a silicone brush!
Generously sprinkle the challah with sesame or linseeds.
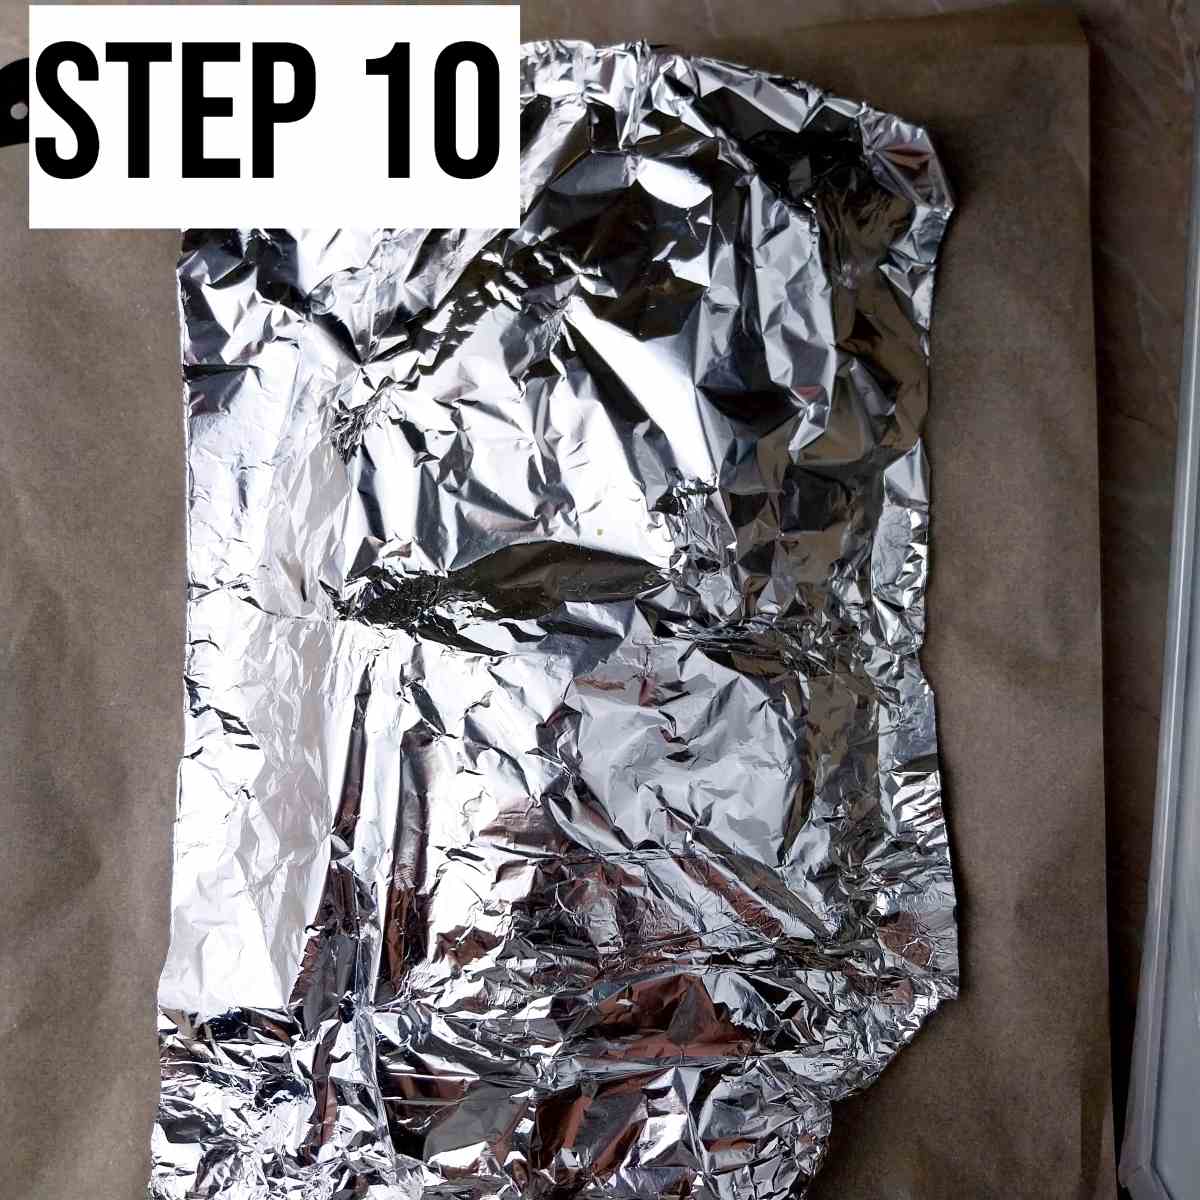
Cover the dough with foil loosely (shiny side up) so as not to press it down.
This way we prevent the top from burning during the first baking part.
Place the covered dough into the oven, add a baking dish with water to the bottom of the oven, and turn the oven on to 430F/220C.
You don't need to have a preheated oven for this step. Let the dough heat up together with the oven.
Once the oven is fully preheated, start the timer and bake the challah for 30 minutes.
Then, take the water and the foil out, lower the temperature to 350F/175C, and continue baking for another 20 minutes.
Let the challah cool for 20 minutes before eating. Enjoy!

Storage and freezing
Store this challah at room temperature for up to 3 days or in the fridge for up to 5 days.
You can slice and freeze this challah in an air-tight freezer container or freezer zip-lock bags for up to 3 months.
To reheat, simply pop a slice or two in the microwave or a toaster!
Expert tips
- Make sure your starter is active. If you store it in the refrigerator, take it out 1-2 days before baking!
- Check that your baking powder has not expired.
- Don't leave out psyllium husk and xanthan gum.
- Avoid opening the oven during the first stage of baking!
- Dip in some homemade sweetened condensed milk for extra sweetness.
More Easter Recipes You Will Love


Get my new gluten-free sourdough recipes eBook
The top 32 recipes of 2026!
Gluten-Free Sourdough Challah
Ingredients
For the dough
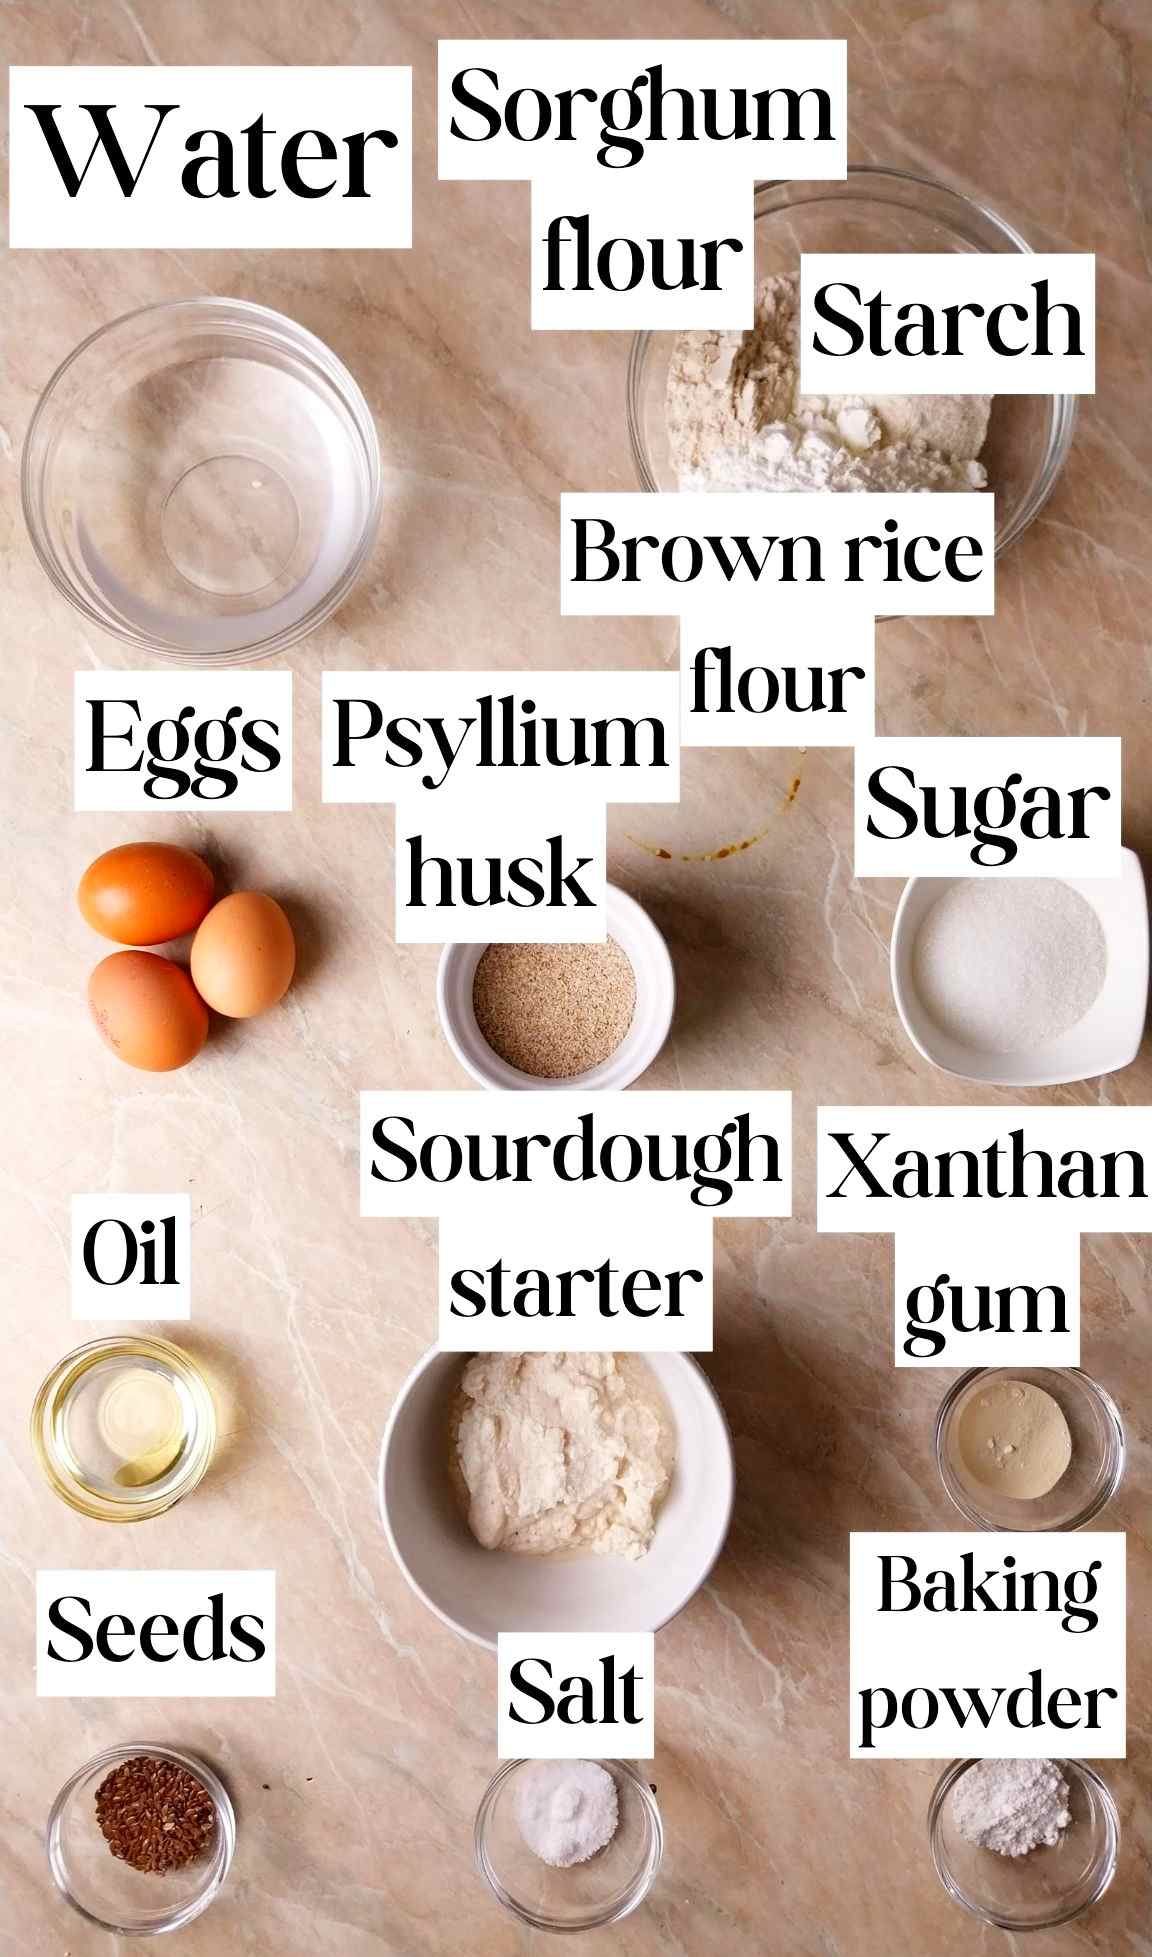
- 20 grams whole psyllium husks, not powder
- 225 grams warm water, not hot
- 115 grams potato starch, or cornstarch, or tapioca starch
- 55 grams brown rice flour
- 60 grams sorghum flour, not millet or amaranth
- 55 grams sugar, or coconut sugar
- 8 grams baking powder, make sure it is gluten-free
- 6 grams xanthan gum, or guar gum
- 8 grams salt
- 220 grams gluten-free sourdough starter, active, not from the fridge
- 40 grams neutral seed or vegetable oil
- 1 egg
- 2 egg yolks
For topping
- 1 egg for the egg wash
- 1-2 tablespoon seeds of choice (sesame seeds, linseeds, etc.)
SAVE THIS RECIPE!💌
Instructions
Mixing the dough
- First, we will make psyllium gel. Add psyllium husks to the warm water and whisk to combine. Set the mixture aside for a couple of minutes to let the gel form.
- In another large mixing bowl combine all of the dry ingredients: flours, starch, baking powder, sugar, xanthan gum, and salt. Stir to combine.
- Take 2 eggs and separate the yolks from the whites. Cover the whites with a plastic wrap and place in the fridge.We will only need the yolks for this recipe!
- Add all of the wet ingredients to the bowl with the dry ingredients: psyllium gel, sourdough starter, egg yolks, egg, and oil.Mix the dough very well. I prefer using an electric mixer with dough hooks but you can use your hands or a wooden spoon.Mix for 5 minutes if using a mixer and longer if doing it by hand. You want a smooth and evenly incorporated dough.
Shaping the challah (see pics in the post!)
- Flour the working surface and transfer the dough to it. The dough will be very sticky at first but avoid the temptation to mix in more flour!Rather, dust the dough with flour on the outside and shape it into a ball. Use as much flour as you need to shape the dough.
- Divide the dough ball into four equal parts using a bench scraper or a knife.You can weigh each part to make sure they are all the same size.
- Take one part of the dough and shape it into a small ball. Then, start rolling it out on the working surface into a long rope with the palms of your hands.Keep rolling back and forth until the rope is about 16in/40cm. Try to make the rope thicker in the middle and thinner on the ends.
- Repeat the rolling out process with the rest of the dough parts. Place the ropes onto a piece of parchment paper as you see in the picture in the post. Be careful and gentle with the dough to avoid tearing or breaking it!Take the farthest right rope and start weaving it through the other three. Then, take the one that is on the right now and weave it towards the left. Continue the process unit the challah is fully braided.
- Tuck the ends of the challah under the dough, then repeat with the other side.
Proofing/Fermentation
- Let the challah proof for 3.5-4 hours in a warm and draft-free spot. I like leaving my challah to ferment in the oven with the oven light turned on. This creates the perfect temperature for rising. If you are going to proof the dough on the counter, make sure to cover it with a kitchen towel. It is best if you figure out a way to cover it without the towel touching the dough!
Baking
- Once the dough is proofed, it will puff up but it won't quite double in size. Whisk an egg with a fork and brush the challah with it. You can use a silicone brush! Generously sprinkle the challah with sesame or linseeds.
- Cover the dough with foil loosely (shiny side up) so as not to press it down.This way we prevent the top from burning during the first baking part. Place the covered dough into the oven, add a baking dish with water to the bottom of the oven, and turn the oven on to 430F/220C.You don't need to have a preheated oven for this step. Let the dough heat up together with the oven.Once the oven is fully preheated, start the timer and bake the challah for 30 minutes. Then, take the water and the foil out, lower the temperature to 350F/175C, and continue baking for another 20 minutes. Let the challah cool for 20 minutes before eating. Enjoy!
Notes
- Make sure your starter is active. If you store it in the refrigerator, take it out 1-2 days before baking!
- Check that your baking powder has not expired.
- Don't leave out psyllium husk and xanthan gum.
- Avoid opening the oven during the first stage of baking!


Adri says
Szia Natasha!
Is there any way to replace the eggs with something else, like chia or flax eggs? Or perhaps something else, depending on their function in this recipe… any ideas would be welcome 🙂
Natasha Levai says
Hi Adri! I haven't tried egg substitute in this recipe yet! If I do, I will mention them here!
Gabby says
When braiding and baking, do you place dough on a baking sheet? Or just on parchment paper?
Also- can I use buckwheat or more brown rice flour in place of sorghum?
Thank you! I’m excited to try this recipe for our shabbat!
Natasha Levai says
Hi Gabby! Yes, you can try using buckwheat or brown rice in place of sorghum You can place the challah on the baking sheet lined with paper.
Jamie says
Hello,thank you for your wonderful recipes. Can I proof this overnight? If so, should I put in the oven, countertop or the refrigerator?
Thank you!
Natasha Levai says
Hi Jamie! Yes, you can proof this bread overnight in the refrigerator.
Rachel says
Is psyllium husk powder going to ruin the recipe? That’s all I have.
Natasha Levai says
Hi Rachel! It shouldn't ruin it, just try to whisk as soon as the powder hits the water to avoid lumps. Also, sometimes powder can turn bread purple! 🙂
Amy says
Can you use oat flour for this sourdough challah? Oat is the only gluten free grain that fits with the Jewish requirements to make challah. I made the starter with brown rice flour and would like to make the bread with oat flour.
Natasha Levai says
Hi Amy! If you use oat flour only then the challah will turn out gummy and dense. You need both flour and starches to make this recipe!
Amy Siegel says
Can I substitute all purpose GF flour?
Natasha Levai says
Hi Amy! No, I don't recommend substituting because every gluten-free flour blend has a different ratio of starches and flours which makes it impossible to predict how it will impact the recipe.
Annmarie says
Curious. Instructions include list to add of …“egg yolks, egg” …after stating “we only need egg yolks for this recipe.” Is any of this a typo? Thank you!
Natasha Levai says
Hi Annmarie! There are 3 eggs all together for the challah (not counting the egg wash), you take 2 egg yolks and 1 whole egg. Sorry I wasn't clear enough! I will go back and edit the instructions. Thank you!
Megan says
Did you update this? I could have sworn this recipe used lentil flour and was a 3 roll braid. Just curious! whatever I made before was so good!
Natasha Levai says
Yes I updated it! It is now much better 🙂