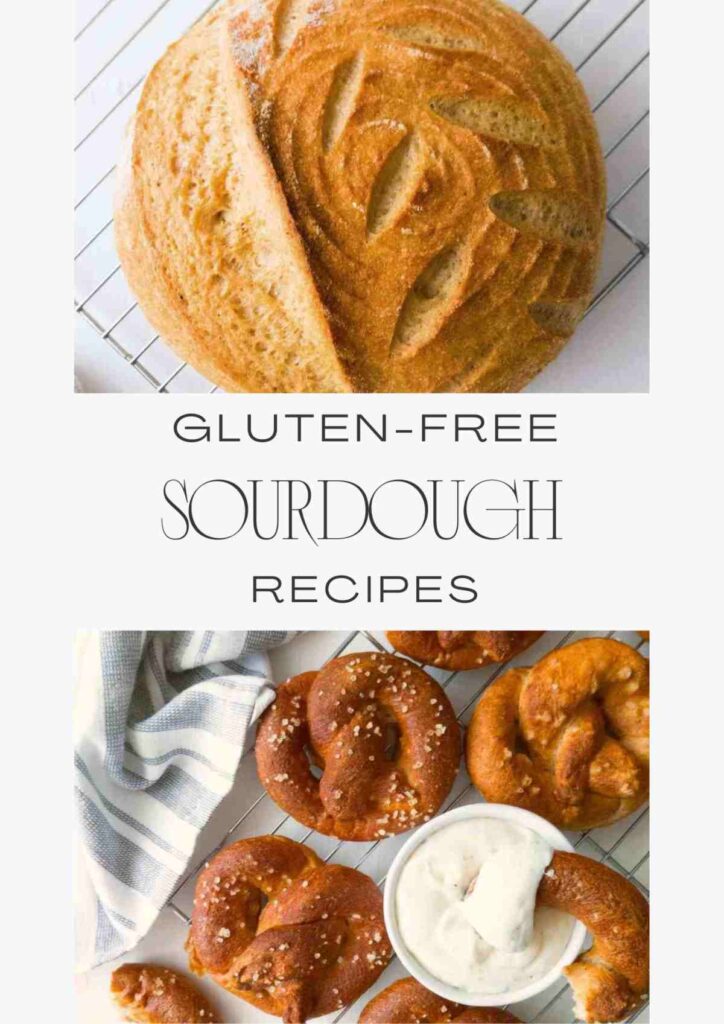
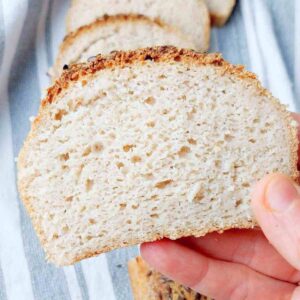
This vegan gluten-free sourdough bread is soft, fluffy, nutritious, and perfectly crusty! Once you master the skill, you will never go back to the store-bought gluten-free bread.

Jump to:
- Sourdough vs. Commercial Yeast
- Gluten-Free Starter
- Psyllium Husk
- Sourdough Terminology Explained
- 🍽 Tools You Might Need
- The Best Flour for GF Sourdough
- A note on flour types
- 🥘 Ingredients
- 📖 Substitutes
- 🔪 Step-by-step instructions
- Troubleshooting
- Frequently Asked Questions
- More Gluten-Free Sourdough Recipes to Try
- Get my GF sourdough recipes eBook
- Gluten Free Vegan Sourdough Bread
- 💬 Community
Sourdough vs. Commercial Yeast
Sourdough bread uses naturally grown yeast with wild bacteria that is naturally found in the air around us and in water and flour used to make a starter.
Commercial yeast is a single strain of bacteria created in a lab to speed up the fermentation process.
While commercial yeast is easier to use, sourdough will provide a unique flavor, more nutrients, and an authentic experience of artisan bread baking.
New to gluten-free sourdough? Watch my 16-minute video tutorial for beginners!
Gluten-Free Starter
You will need an active starter for this recipe, if you don't have a starter yet, make sure to read my minimal waste starter guide.
You can use any starter you have, I personally find sorghum flour starter and brown rice starter work best, but you can experiment with other types (like millet) as well.
Psyllium Husk
While some recipes use xanthan gum, I prefer using psyllium husk as a binder in gluten-free sourdough bread. I wrote more on this wonderful ingredient in my psyllium 101 article!
If you can't have psyllium, you might be able to use Konjac instead, although it makes the dough more crumbly, less shapable, and less stable.
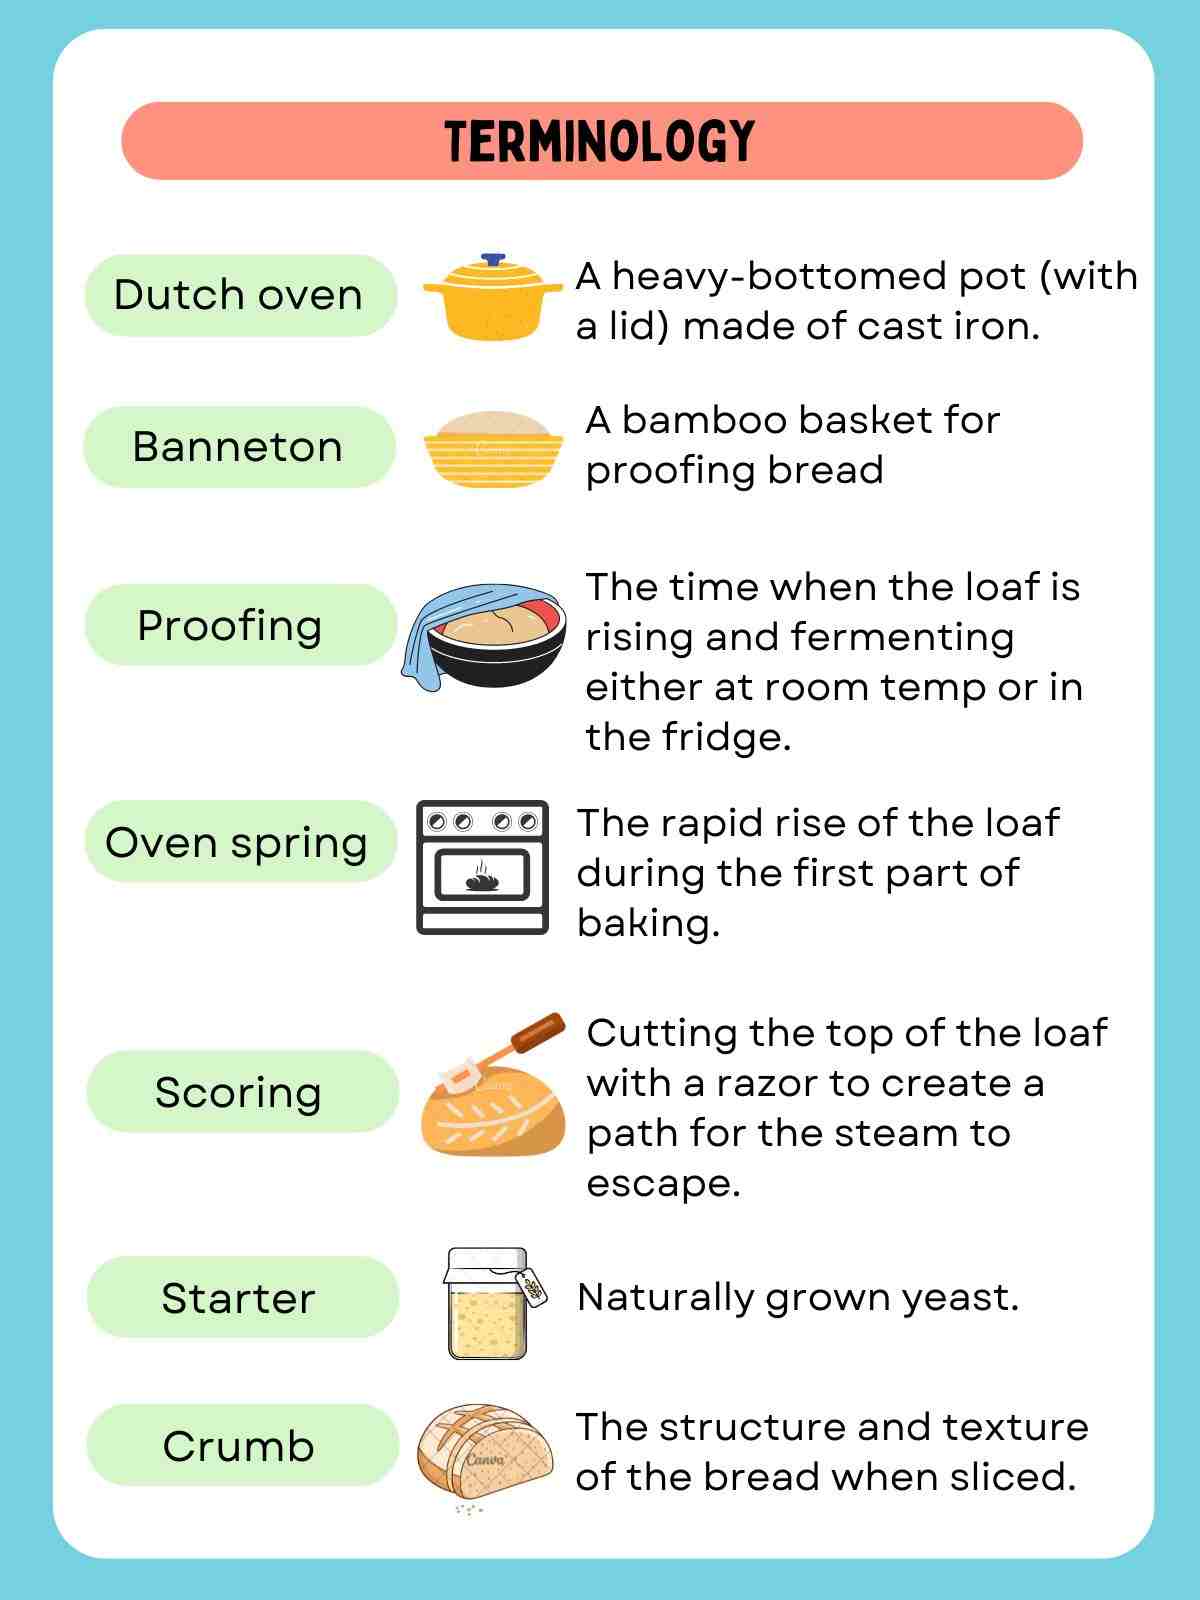
Sourdough Terminology Explained
🍽 Tools You Might Need
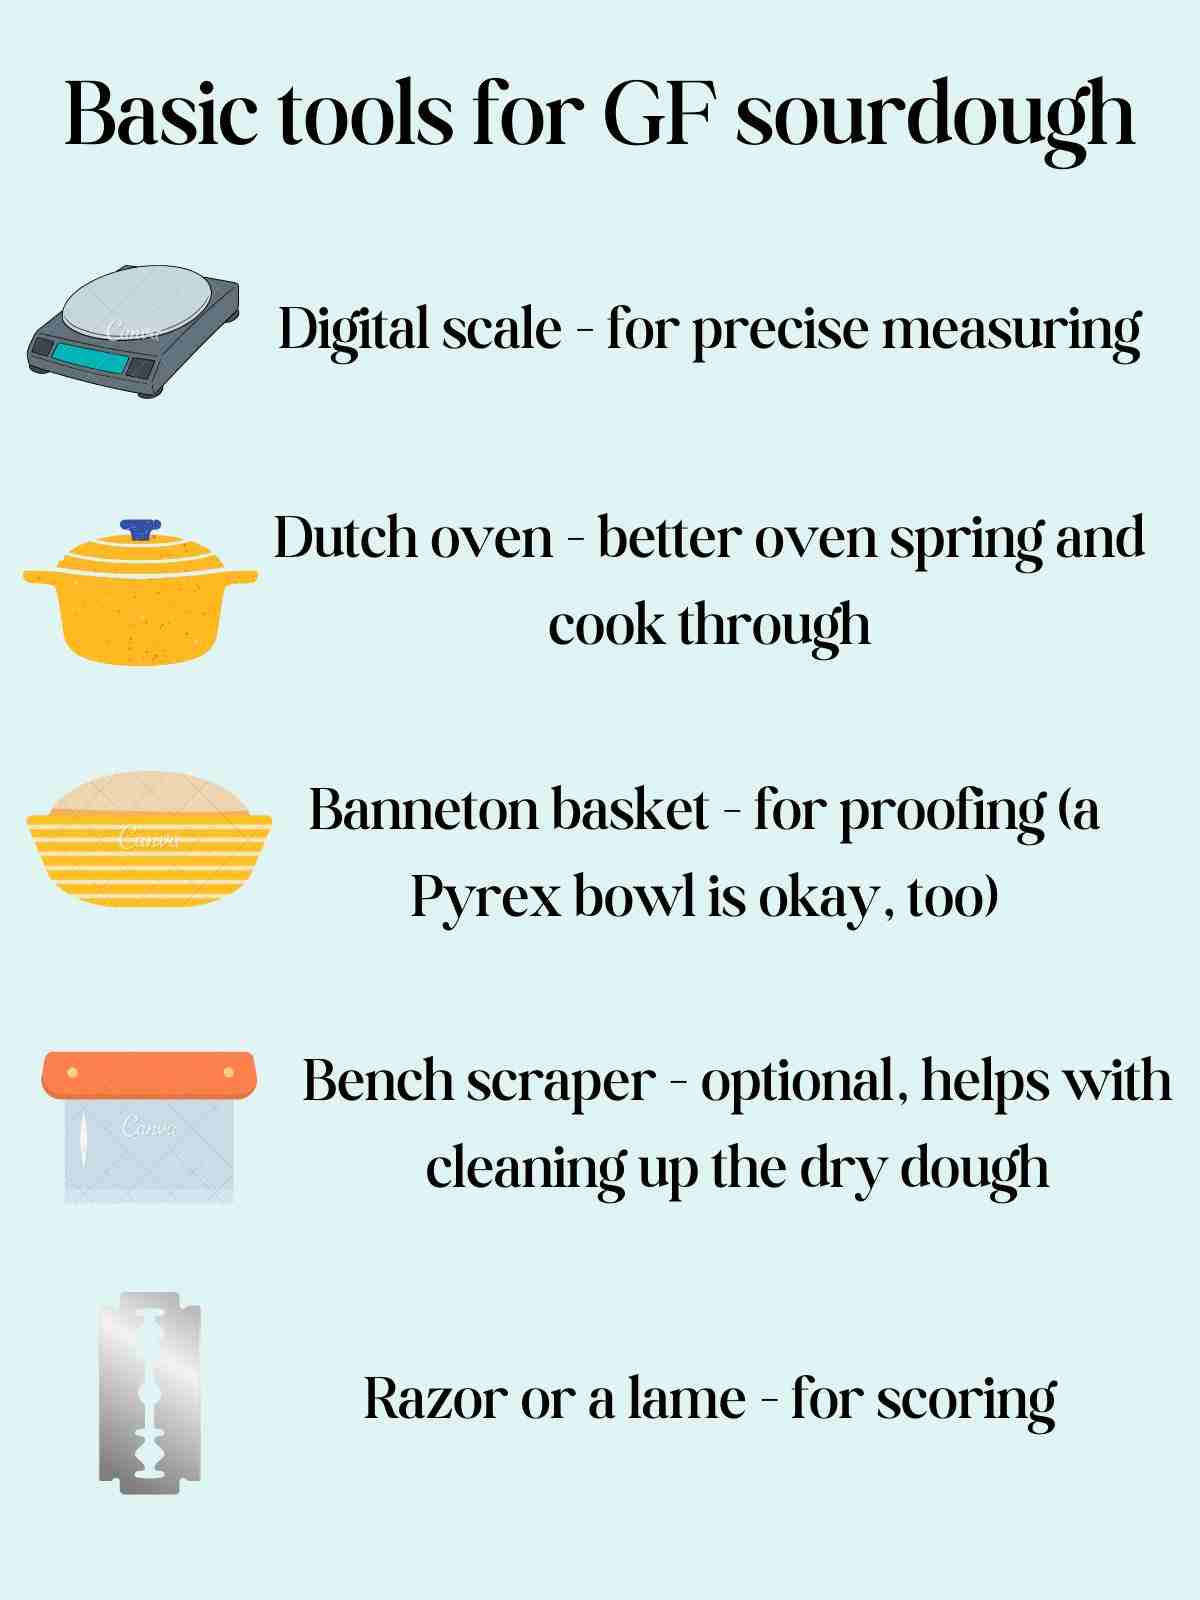
- A Dutch oven. You can also use a cast iron pan/baking sheet with a dish filled with water at the bottom to create extra steam during baking.
- A digital kitchen scale. I don't provide the cup measurements because it is so important for gluten-free sourdough to be measured by weight and not by volume!
- A banneton basket allows for a pretty pattern and better breathing of the dough. You can use a mixing bowl lined with a kitchen towel instead if you need to!
- A bench scraper. This tool is amazing when it comes to cleaning up the doughy mess off of the kitchen counter!
The Best Flour for GF Sourdough
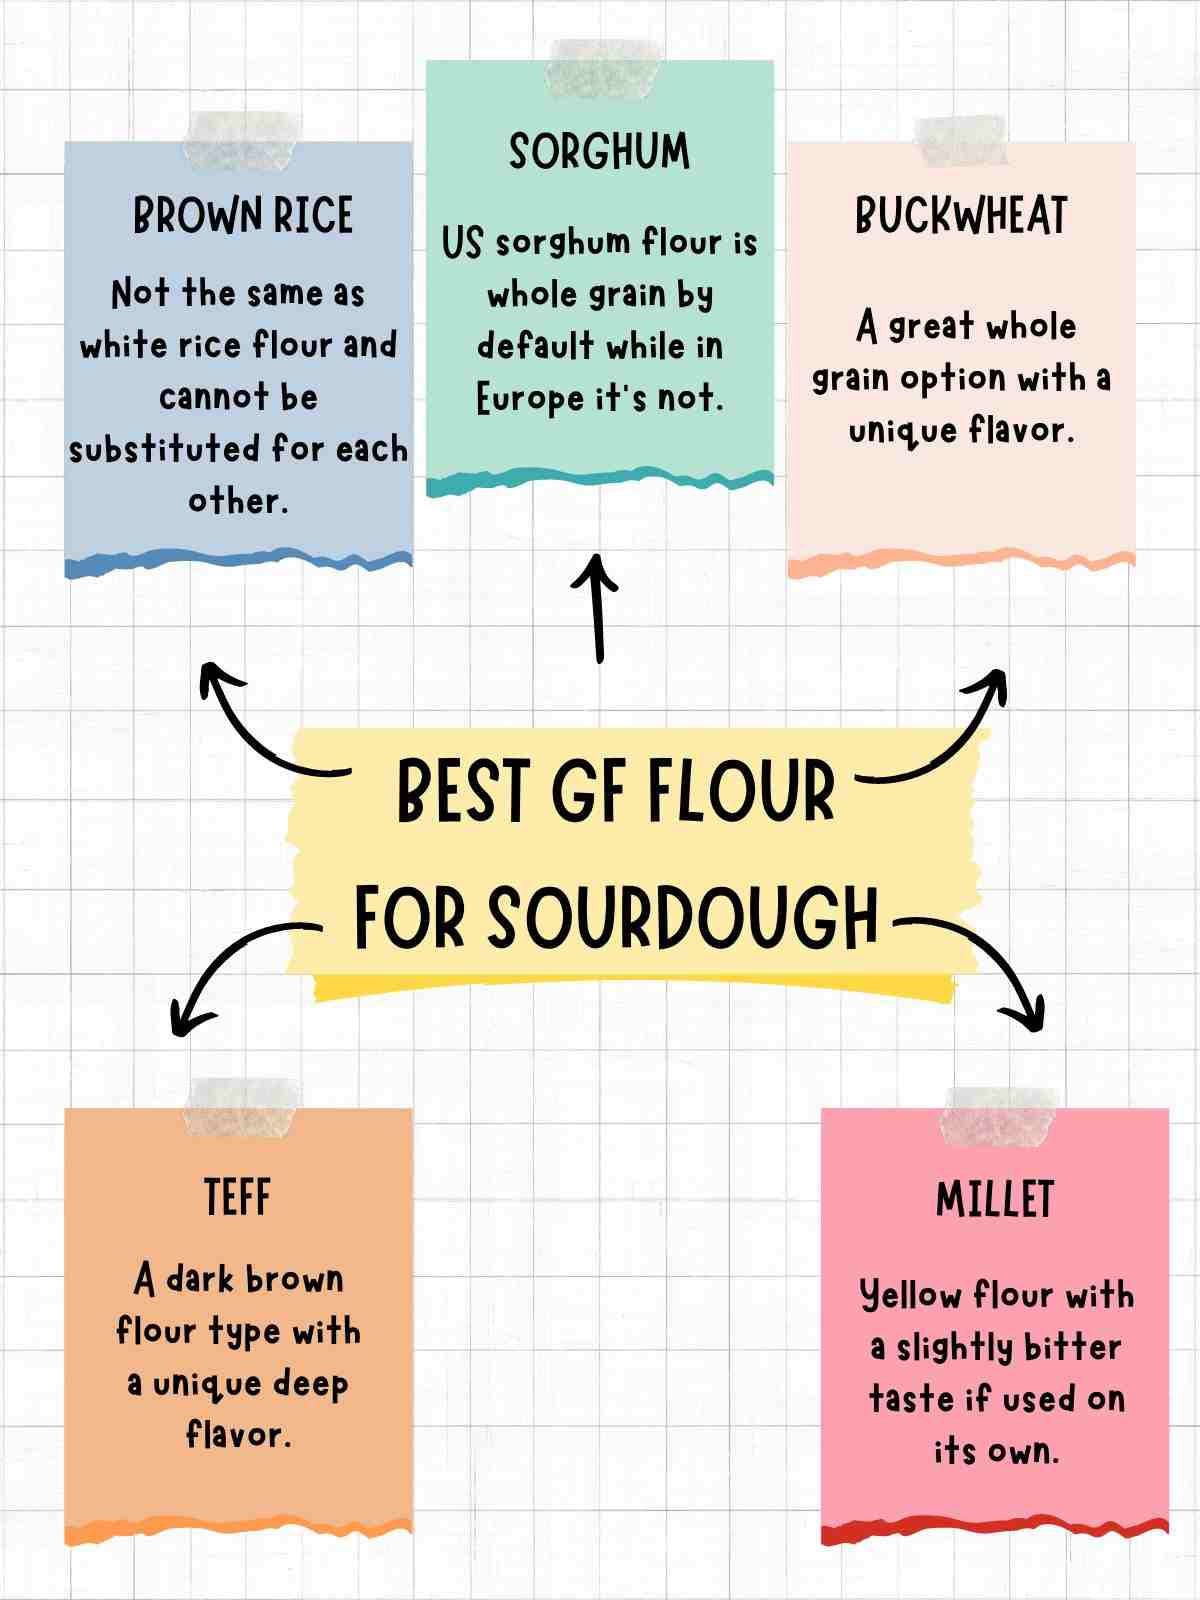
Almond and coconut flours are not the best for making sourdough bread because of their low carb content. You can, however, add some starter to my almond bread recipe if you need a keto sourdough recipe!
A note on flour types
It is important to add starches like potato, corn, tapioca, or arrowroot to the dough for a fluffier crumb. If you can't have starches, check out my 100% millet, 100% sorghum, and 100% brown rice flour sourdough recipes.
🥘 Ingredients
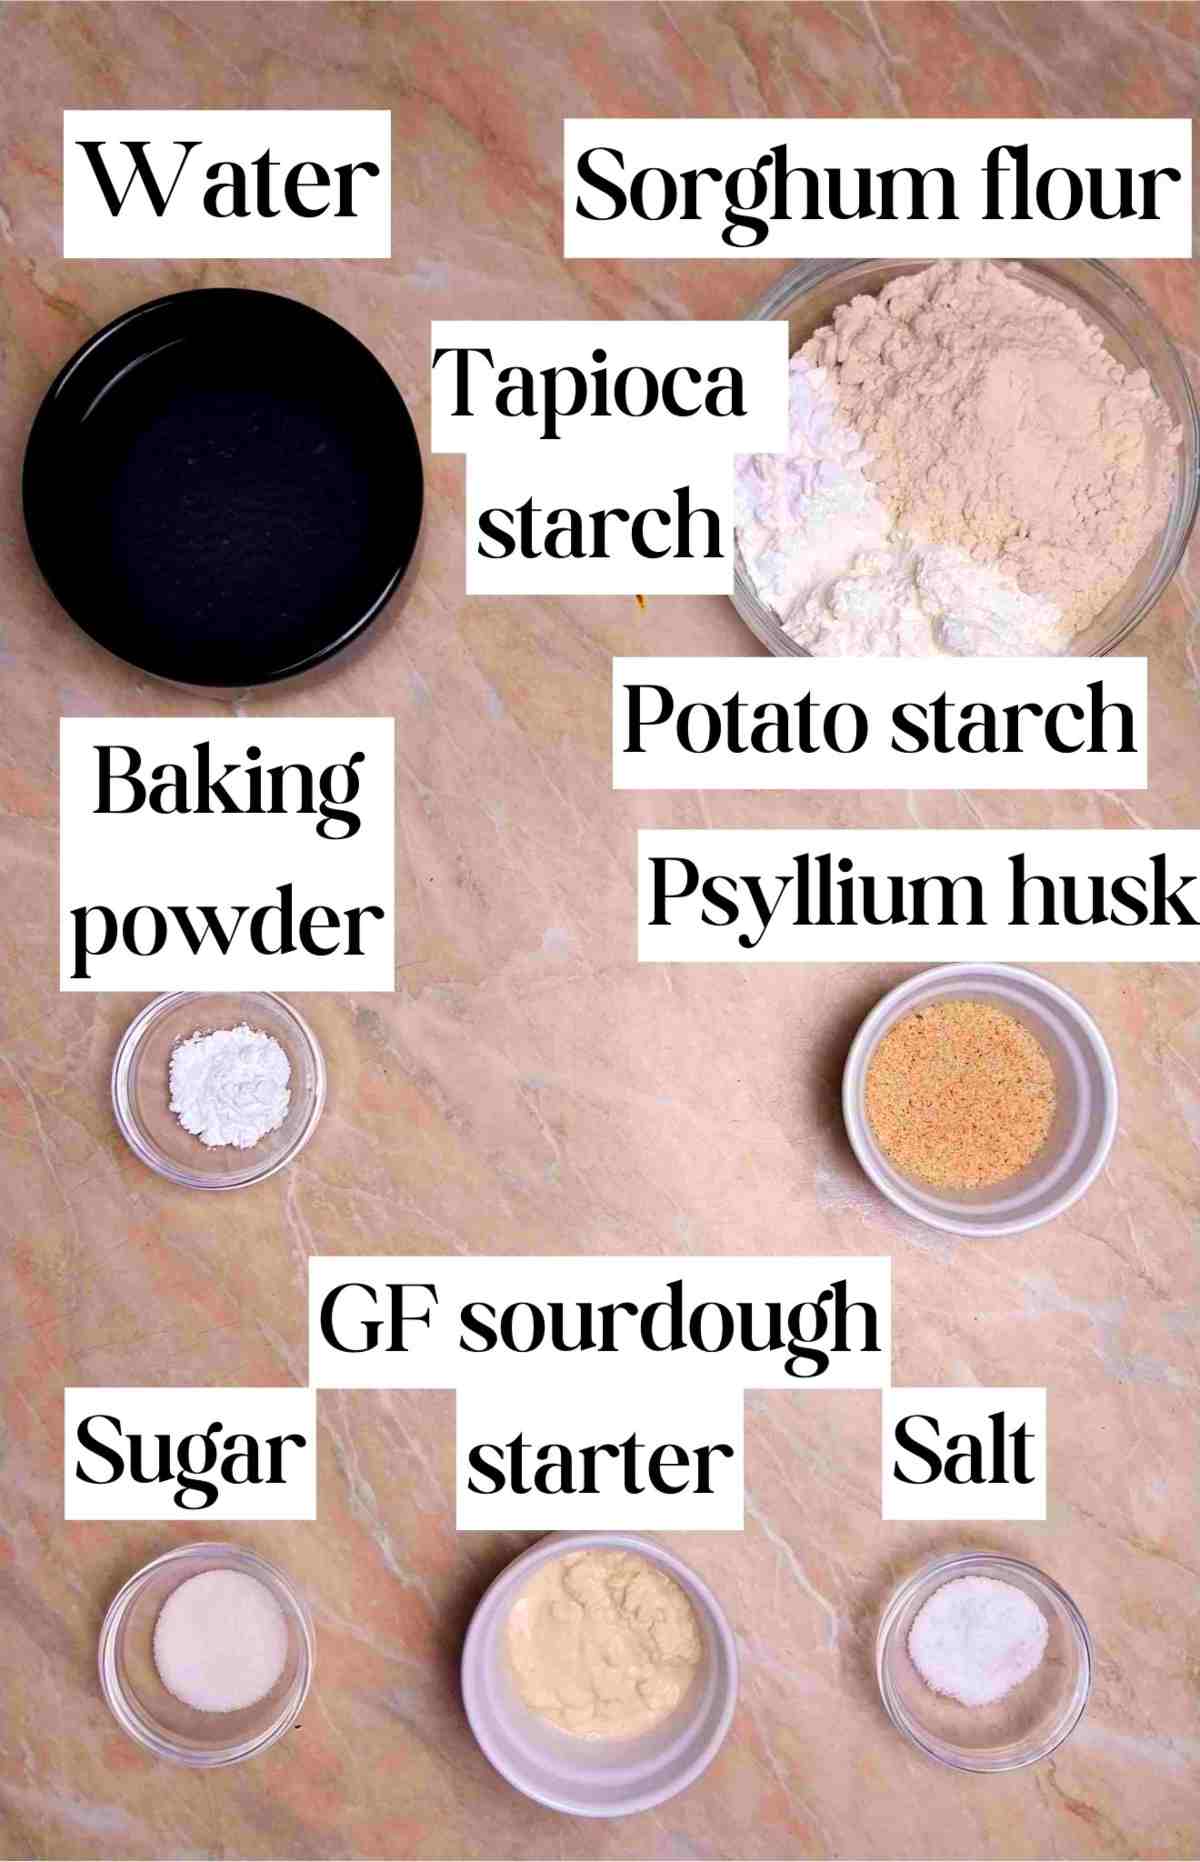
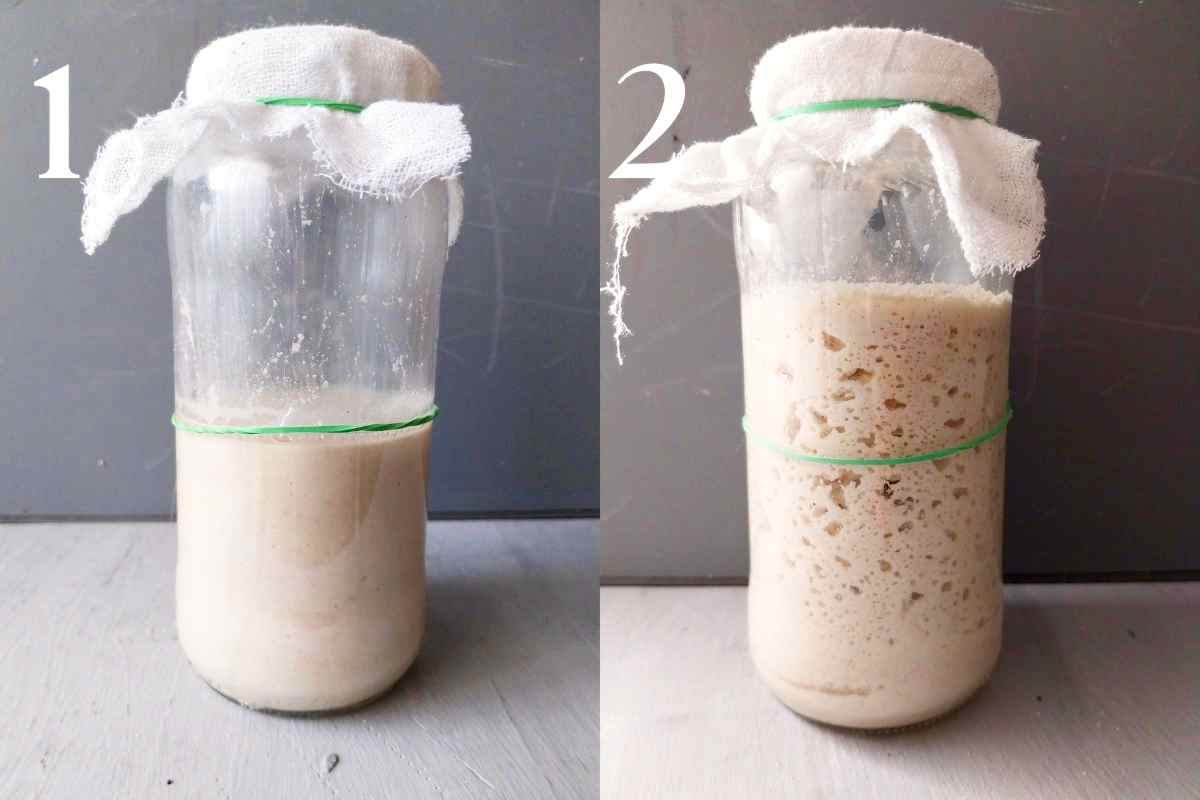
Gluten-free sourdough starter - use a mature starter that is at its peak activity, meaning when it is at its highest point of rising. Check out my gluten-free sourdough starter recipe if you don't have one!
Psyllium husk - you can use whole husks or powder. I prefer baking with whole husks as they are very easy to handle. But if you only have powder, then try avoiding very fine powder and opting for the coarser variety instead. For more information refer to my article about psyllium husk in baking.
Water - use room temperature water for the best results. I use tap water with no problems but if your tap water has chlorine in it, you will need to use filtered or bottled water.
Sorghum flour - European brands tend to be lighter than the US ones. You can use either sorghum flour, the results will be the same!
Starches - tapioca starch adds softness and chewiness to the texture while potato starch adds lightness to the loaf.
Baking powder - optional, but it helps raise the loaf and get more air in the bread.
Sugar - it is used for bacteria to feed on.
📖 Substitutes
Flour - feel free to experiment with other flour types keeping in mind that some of them might need more water than others!
Psyllium husk - I don't recommend substituting psyllium husk. You can use psyllium powder instead but keep in mind it might clump and/or turn your bread purple.
Sugar - use the same amount of maple syrup or honey in place of sugar.
🔪 Step-by-step instructions
Step 1
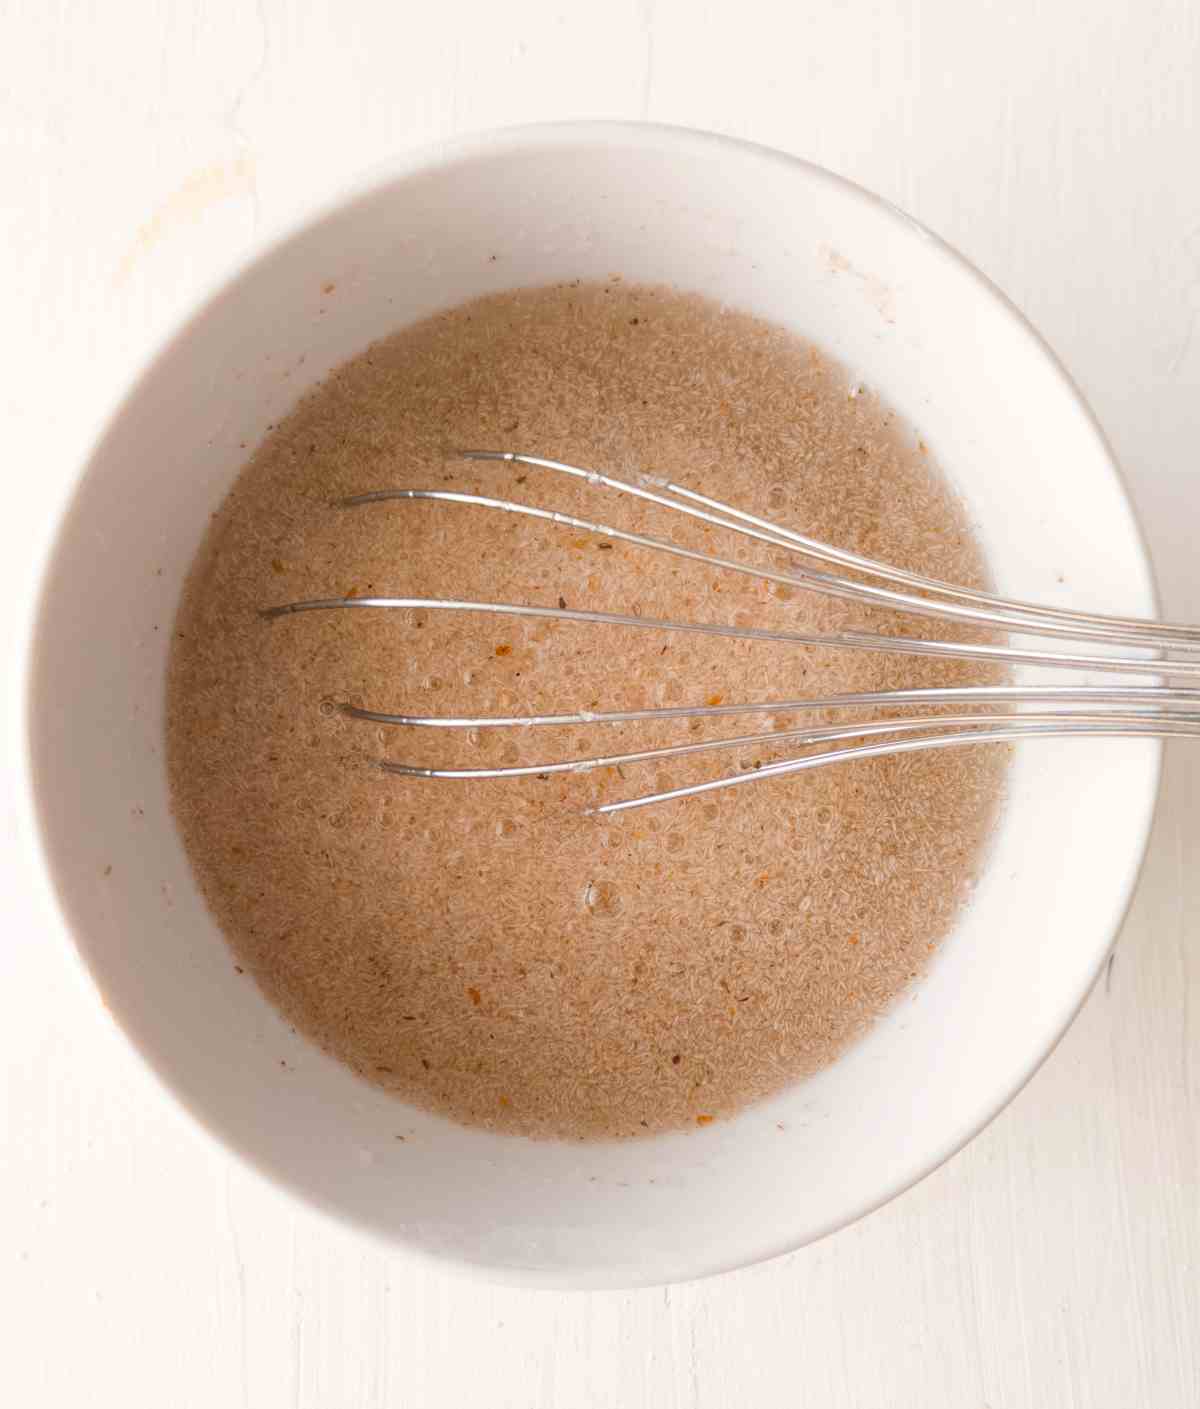
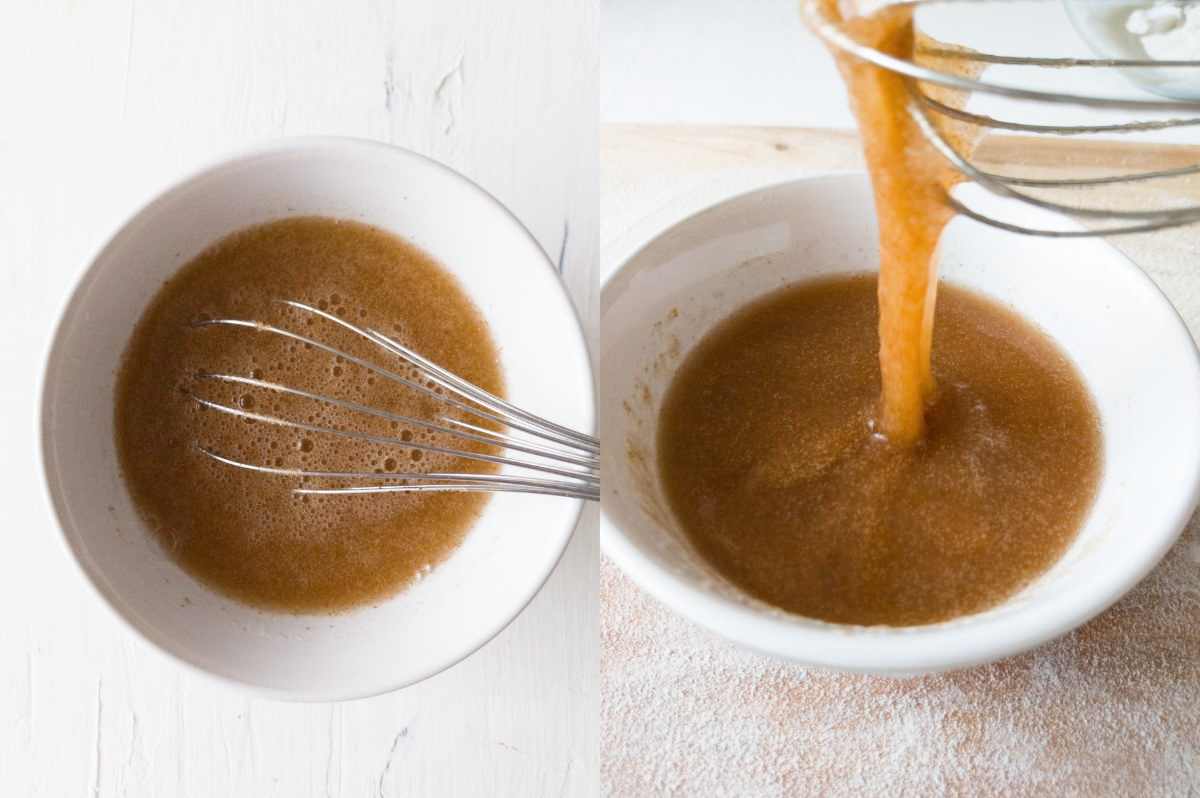
Combine psyllium husk, sugar, and room temperature/warm water in a medium-sized bowl, whisk to incorporate, and set aside.
Step 2
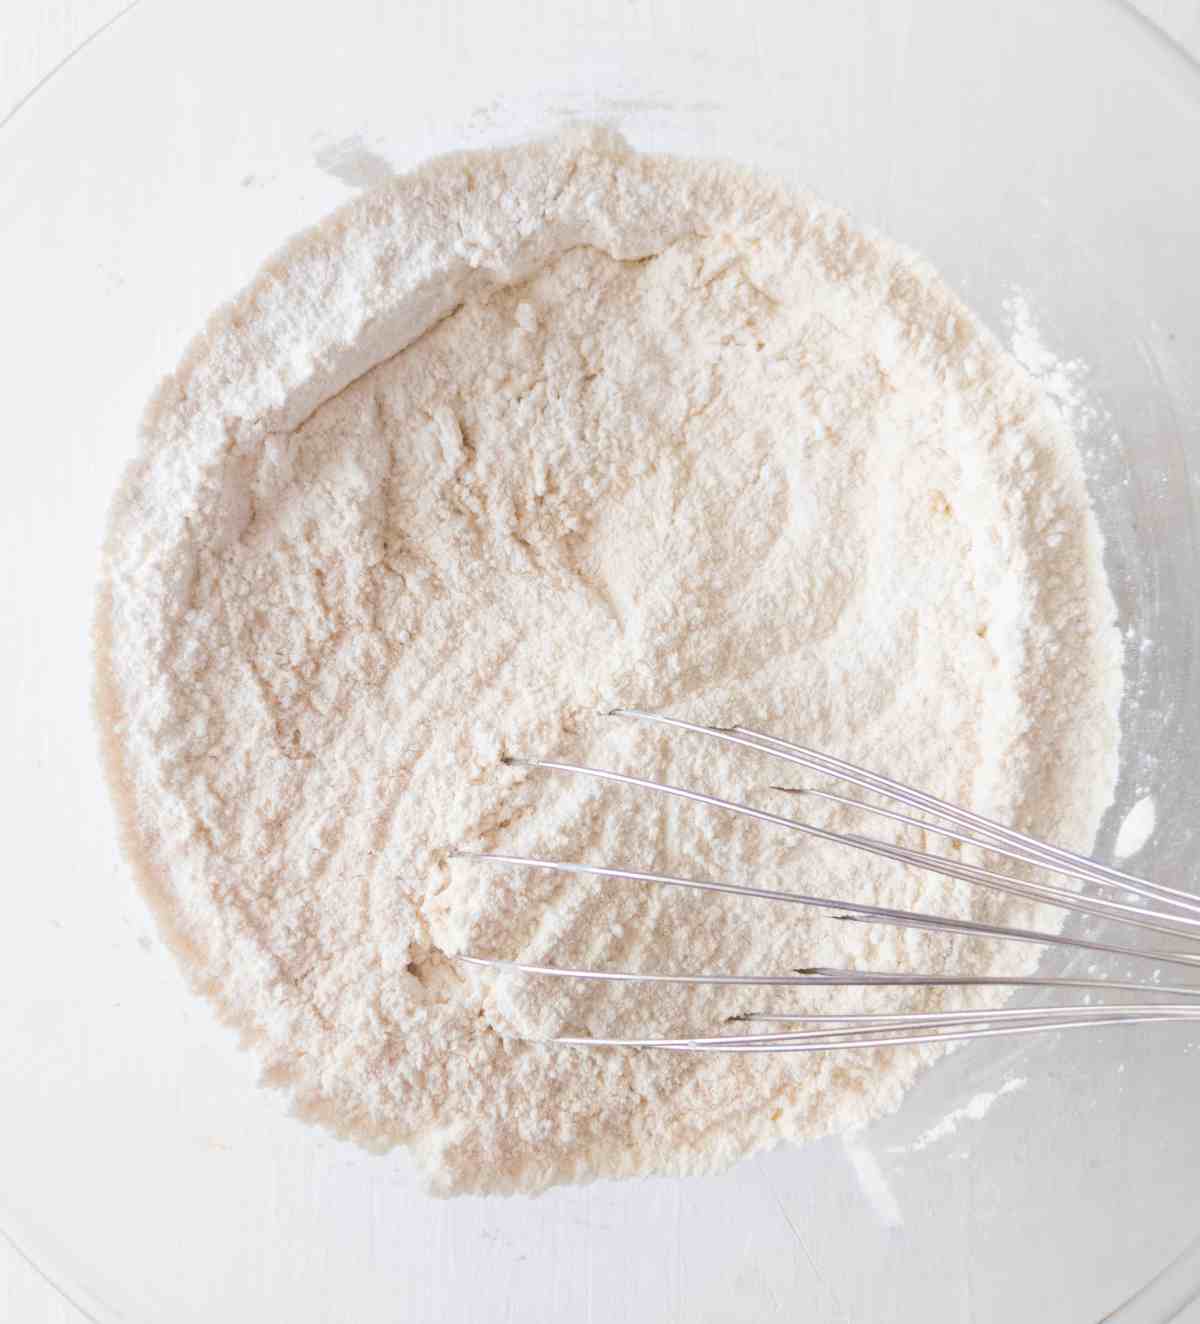
In a large mixing bowl combine all the dry ingredients (sorghum flour, starches, baking powder, and salt) and whisk to incorporate.
Step 3
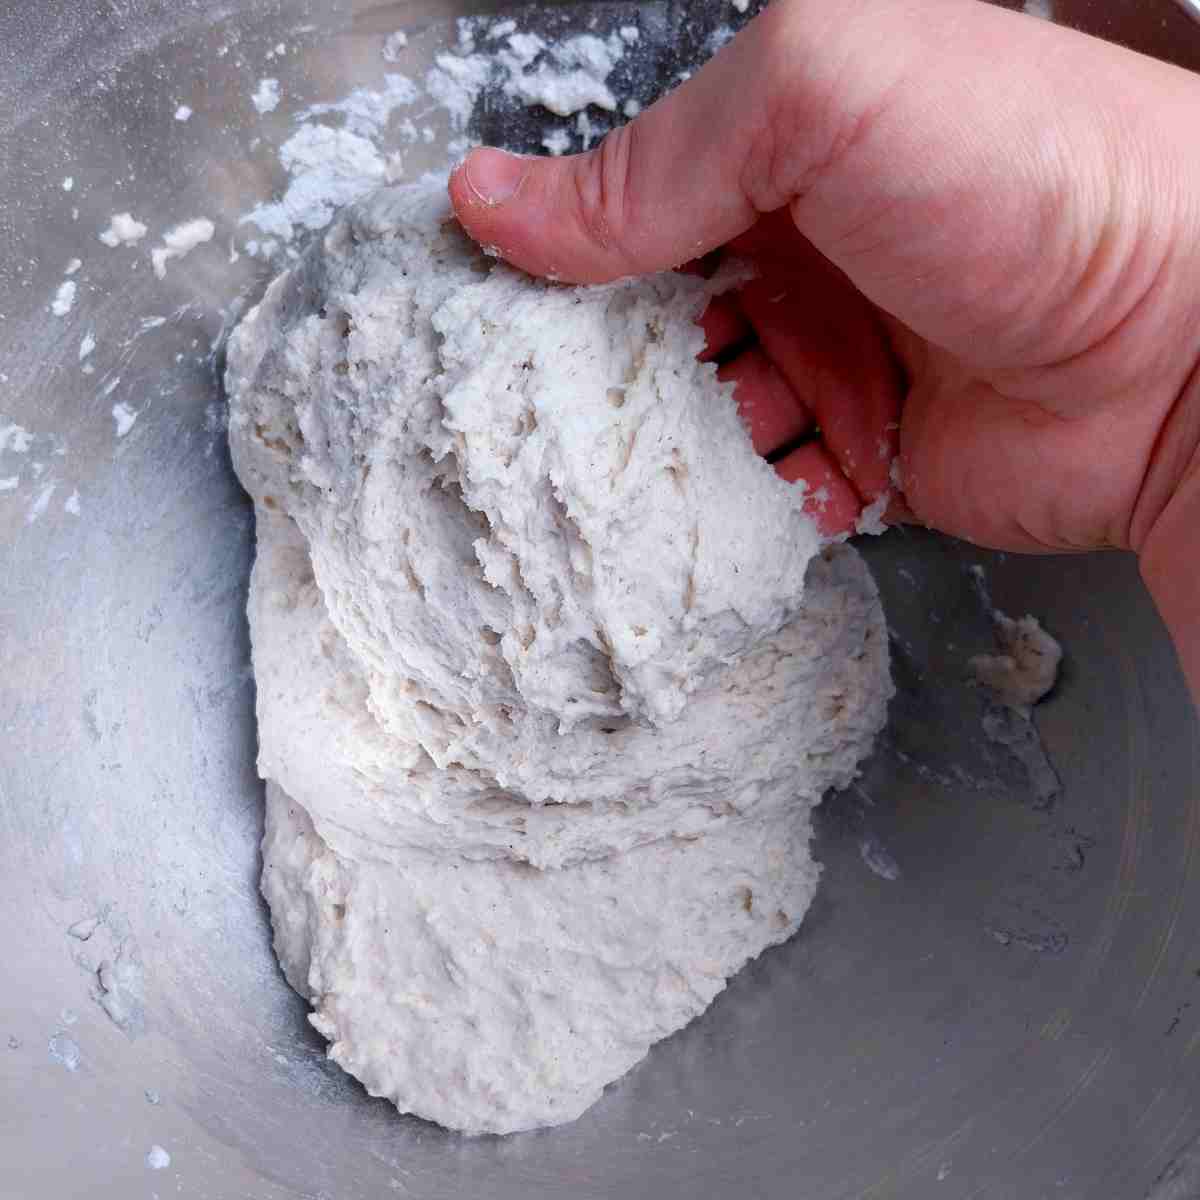
Once psyllium forms a gel, add it to the bowl with the dry ingredients.
Add mature gluten-free sourdough starter to the bowl and mix the dough thoroughly.
I like to use an electric mixer for this step but you can also do it by hand if you prefer.
Step 4
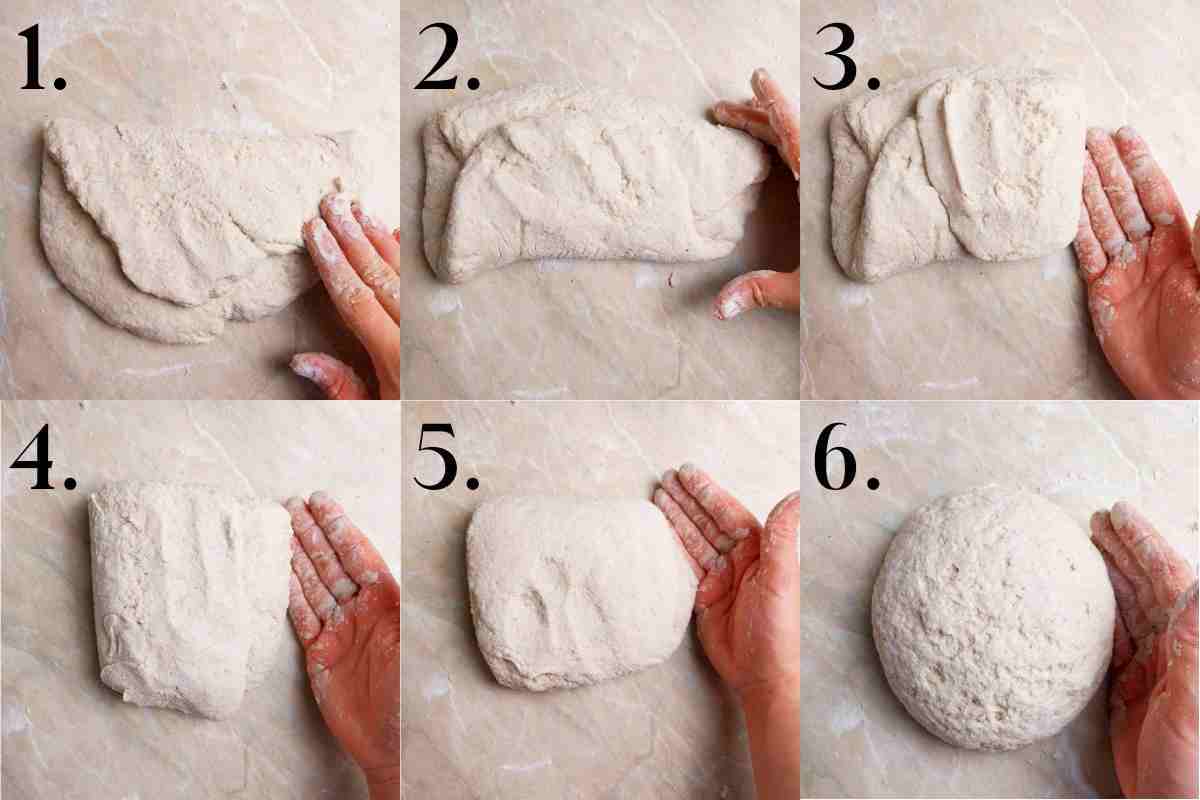
Once the dough is well incorporated, turn it over onto a lightly floured working surface and flatten it into a disc.
Fold each side of the disc onto its middle, flip the dough, and shape it into a ball (refer to the pictures for visual instructions).
Step 5

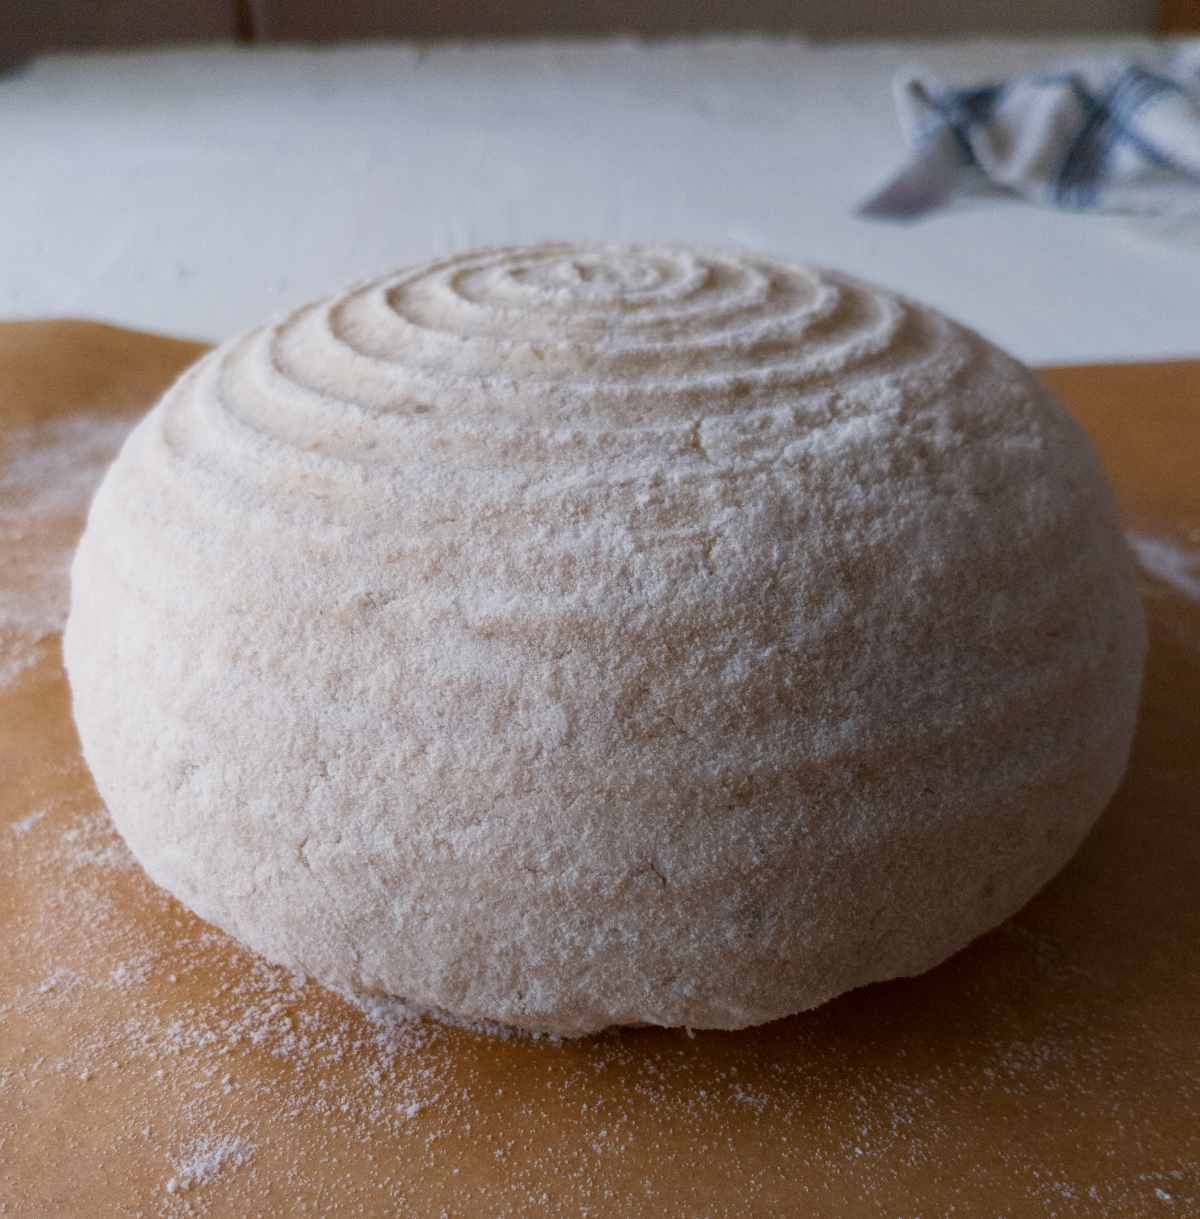
Flour the proofing basket or bowl lined with a kitchen towel and place the dough in it. Press the dough into the basket to create a flat top.
Cover the basket with a kitchen towel and leave to rise at room temperature for about 5 hours or in the refrigerator overnight (12-18 hours).
The dough should puff up during rising but it won't double in size. Don't worry if the dough doesn't rise a whole lot, it will do most of its job in the oven.
Step 6
Once the dough has been proofed, gently turn it over onto the working surface.
Carefully shape the dough into a tighter ball by turning the dough around and tucking its sides under itself.
Don't push the dough too hard to avoid losing the air bubbles formed during fermentation.
Step 7

Score the dough with a razor, a lame, or a sharp knife (be creative and make a nice pattern!). Scoring allows for a better oven spring.
Transfer the dough onto a piece of parchment paper and gently lower it into the cold Dutch oven.
Place the Dutch oven with the bread into the oven and start preheating it to 450F/230C. Once the oven is heated, bake for 40 minutes with the lid on.
Then, take the lid off, turn the temperature down to 350F/175C, and bake for another 30 minutes.
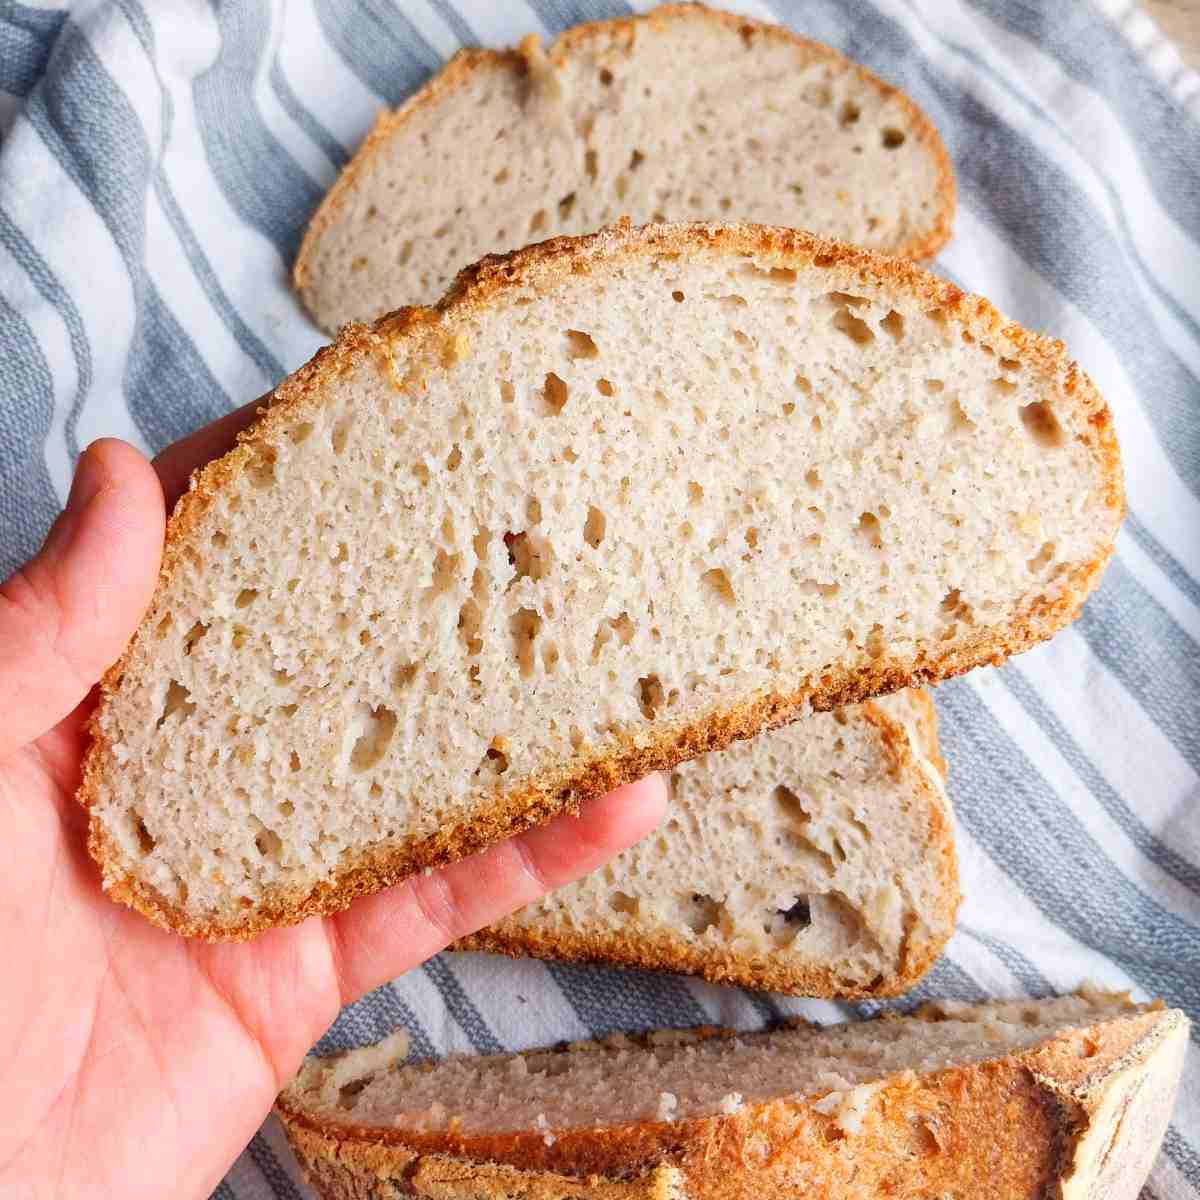
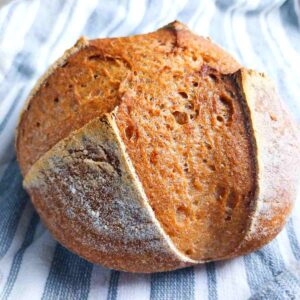
Transfer the bread onto a cooling rack and wait until it is no longer warm to the touch to slice it. Enjoy!
Troubleshooting
Gumminess - if your bread is gummy it might be due to underproofing/overproofing or not baking long enough. If you used other flour types than indicated in the recipe, you might need to adjust the water amount next time.
Too dense - if the bread doesn't have any bubbles and seems way too dense it could be due to a starter that isn't active enough or the cold proofing temperature.
A large hole in between the top crust and the crumb - this is a sign of overproofing the dough. Bake the dough sooner next time!
Frequently Asked Questions
Yes! Gluten-free starters won't always double and depending on the consistency, it might rise very little. You can still use it in bread as long as it is at least 2 weeks old!
You can give it a try but your bread might turn out gummier/drier depending on the contents of that flour blend.
I don't recommend making gluten-free sourdough in a bread machine due to its proofing timing and specific baking needs. Instead, check out these gluten-free bread machine recipes for ideas!
More Gluten-Free Sourdough Recipes to Try


Get my GF sourdough recipes eBook
The top 16 recipes of 2024!
Gluten Free Vegan Sourdough Bread
Ingredients
Wet ingredients
- 20 grams (3 tbsp) psyllium husk, whole husks, if using coarse powder use 20 grams, fine powder - 17g. For more details check my psyllium husk 101 article
- 410 grams (1⅔ cups) water, room-temperature
- 15 grams (1tbsp + 1tsp) sugar/maple syrup, helps the sourdough bacteria
- 70 grams (¼ cup) active sourdough starter
Dry ingredients
- 85 grams (¾ cup) tapioca starch or arrowroot starch
- 95 grams (½cup + 1tbsp) potato starch or 95g (¾ cup) cornstarch
- 180 grams (1⅓ cups) sorghum flour
- 12 grams (2 tsp) salt
- 2 teaspoon baking powder, check the package to make sure it is gluten-free
SAVE THIS RECIPE!💌
Instructions
- Combine psyllium husk, sugar, and room temperature/warm water in a medium-sized bowl, whisk to incorporate, and set aside.
- In a large mixing bowl combine all the dry ingredients (sorghum flour, starches, baking powder, and salt) and whisk to incorporate.
- Once psyllium forms a gel, add it to the bowl with the dry ingredients.Add mature gluten-free sourdough starter to the bowl and mix the dough thoroughly.I like to use an electric mixer for this step but you can also do it by hand if you prefer.
- Once the dough is well incorporated, turn it over onto a lightly floured working surface and flatten it into a disc.Fold each side of the disc onto its middle, flip the dough, and shape it into a ball (refer to the pictures in the post for visual instructions).
- Flour the proofing basket or bowl lined with a kitchen towel and place the dough in it. Press the dough into the basket to create a flat top.Cover the basket with a kitchen towel and leave to rise at room temperature for about 5 hours or in the refrigerator overnight (12-18 hours).The dough should puff up during rising but it won't double in size. Don't worry if the dough doesn't rise a whole lot, it will do most of its job in the oven.
- Once the dough has been proofed, gently turn it over onto the working surface.Carefully shape the dough into a tighter ball by turning the dough around and tucking its sides under itself.Don't push the dough too hard to avoid losing the air bubbles formed during fermentation.
- Score the dough with a razor, a lame, or a sharp knife (be creative and make a nice pattern!). Scoring allows for a better oven spring.Transfer the dough onto a piece of parchment paper and gently lower it into the cold Dutch oven and put the lid on.Place the Dutch oven with the bread into the oven and start preheating it to 450F/230C. Once the oven is heated, simply bake for 40 minutes without opening the oven.Then, open the oven, take the lid off, and transfer the loaf onto the oven rack. Turn the temperature down to 350F/175C and bake for another 30 minutes.Transfer the bread onto a cooling rack and wait until it is no longer warm to the touch to slice it. Enjoy!*If the bottom of your bread tends to burn, place a baking sheet in the bottom of the oven once you take the bread out of the Dutch oven.


Kelsey says
Hello! I was hoping to get the original recipe for this bread! I tried the new recipe and I’m just a bigger fan of how it used to be - thank you!
Natasha Levai says
Hi Kelsey! You can try Bakerita recipe, it is similar to the one I used to have.
David K says
Just baked this recipe and it turned out fantastic! I’ve been baking GF sourdough for several years now and it’s one of the best. Thank you for sharing your talents and knowledge with us. Wish I could post a photo of this boule.
Natasha Levai says
Hi David! I am honored you liked the recipe so much! Thank you for your comment!
Bridget Sydney Smith says
Hi! Do you have any tips on making a fluffier loaf? I've tried this recipe a few times, and the bread always comes out super dense. I've tried putting ice cubes in the bottom of the Dutch Oven to allow a nice oven spring, but it turned out to be dense, still.
Natasha Levai says
Hi Bridget! Did you do a cold start or did you preheat the oven? How long did you leave the loaf to ferment and at what temperature? Did you add baking powder?
If you are okay with using eggs, dairy, and xanthan gum, you can try this loaf, it is the fluffiest gluten-free sourdough I've made so far! https://www.natashashome.com/easy-sourdough-starter/
Suzanne S says
I've made the gluten free vegan sourdough twice and am not quite happy with it. the first loaf burnt, so I tried taking it out of the Dutch oven after the first 40 minutes, but that didn't help much. Am I missing something? Some recipes say to lower the temperature for the final 30 minutes, should I be doing that? It also isn't rising as much as I would like. The texture is good, not gummy, just rather flat. My starter is very vigorous.
Natasha Levai says
Hi Suzanne! Yes, you need to take the temperature down to 350F. I am sorry, I just noticed this instruction is missing! I fixed it. How long do you leave your bread to ferment?
Alina says
This recipe looks wonderful!
I clicked on "New to gluten-free sourdough? Watch my 16-minute video tutorial for beginners!" but there was nothing there.
Also the video for this recipe does not seem to exist either. Please clarify.
Thank you 🙂
Natasha Levai says
I just went to the sourdough bread video section and it is there! If you are using an Ad Blocker on your computer it might get rid of the video because it has ads in it. As to the video tutorial, I just fixed the link!
Natalie Murphy says
What size Dutch oven works best?
Natasha Levai says
It depends on the size of your loaves! As long as they fit it, the size is good.
Karla says
Is there a way to use gluten free flour
1:1 for this recipe? If so what ingredient would you omit?
Natasha Levai says
Hi Karla! No, this recipe cannot be made with 1:1 flour. I recommend you look up a recipe that is specifically designed for 1:1 flour!
Merilu Hill says
Thank you for posting the original!! I won’t use any other recipe but it and used to send everyone here to grab it. It came out perfect every time. Not sure why you changed it
Malia says
Hi Natasha!
Thank you so much for sharing all your amazing gf recipes. You’re a lifesaver!! <3 I was wondering if you still have the original recipe for this gf sourdough bread, as I noticed that you updated it:).
Thanks!
Malia
Natasha Levai says
Hi Malia! The original recipe was made with levain (100g brown rice flour, 120g water, and 100g starter) which is left to sit for 3-18 hours depending on how sour your want your bread to be. Then, once levain is ready, you mix 20g psyllium husks, 320g water, 15g sugar, 12g apple cider vinegar and whisk. Set it aside, and mix the dry ingredients: 75g tapioca starch, 75g potato starch, 75g brown rice flour, 75g sorghum flour, 12g salt.
Add the wet and dry ingredients together along with the levain. Mix well until incorporated, shape into a ball and let it proof (room temp 3-4h, fridge 12-18h). Bake at 450F/230C for 40 min (in a Dutch oven with the lid on), then bake at 350F/180C on the oven rack (without the Dutch oven) for another 30 minutes. Let the bread cool and enjoy!
Malia says
Hi Natasha!
Thank you SO much for sharing all the amazing gluten free recipes that you have created. Being gluten intolerant, I am so thankful that I found your blog.
I’ve been making this gluten free sourdough bread recipe for a few months now, and I noticed that the recipe recently changed. I was wondering if you would be willing to post the old version or email it to me as that is what worked best for me. I’m sure that I did something wrong this last time, so I’d rather stick to the recipe that I’ve got figured out 😂
Thanks for all that you do,
Malia
Judy Paton says
Hi, I’ve made this bread a number of times and it always turns out great! Thank you so much for the recipe and in depth instructions! I loved the flowchart that showed the times for feeding your starter, levain, refrigerator rise ,etc and now I can’t find that chart anywhere. Could you provide a link to it please? It was so helpful! Thank you!
Natasha Levai says
I have recently updated the recipe and now you don't need to make levain for it, so the charts are no longer appropriate for the recipe! I will work on the new ones!
Judy says
Thank you for your reply. I’ll give your new recipe a try. I make this sourdough every week and my husband, who’s not gluten free loves it! I appreciate all the work you put into your recipes and thank you again for sharing them.
Natasha Levai says
Curious to know how it turns out for you!
kim says
hi, as I’m weighing out the psyllium husk it seems 4 tablespoons equals 20g. Am I reading that right?
Natasha Levai says
20g is about 3 tbsp
McKenna Cullen says
I notice you changed the recipe a few days ago, do you still have the original one?
Natasha Levai says
Yes, the original one had levain (120g water, 100g brown rice flour, 100g starter), then for the dough it had 75g tapioca starch, 75g potato starch, 75 grams sorghum flour, 75 grams brown rice flour, 12 grams salt, 20 grams psyllium husk, 300-350 grams water, 15g sugar, 12g apple cider vinegar.
The method is the same!
Ella says
On my first attempt this is already my favorite gf sourdough recipe I’ve found! I don’t have sorghum so I replaced it with buckwheat which was perfect.
Kam says
Hi Natasha!
I love this loaf. My favorite gf sourdough recipe I’ve found, by far. I was wondering if it’s possible to make a bigger loaf by 1.5x or doubling the recipe? Or would that cause it to not rise or cook through? Any tips for creating a bigger gf sourdough loaf?
Thank you!
Natasha Levai says
Hi Kam! The reason the loaf is small is so that it rises better and cooks through well. If you increase the size of the loaf, your bread might be gummier and denser, but you can increase the recipe if you need to!
Janet says
I Ve been baking from a printed copy for this bread; keeping notes on what I tweak. Looking at the recipe on the website, I see you’ve made some changes. The increased water in the levain, a range of water in the recipe and in the flours. (I was already using brown rice and sorghum). I was curious about the changes in water especially in the levain. 20 more grams would definitely change the consistency. Why the changes and what should the consistency of levain be?
One other question , could this recipe be baked in a 8x4x4 Pullman?
Natasha Levai says
Hi Janet! Yes, I kept tweaking this recipe for some time as I was getting more and more feedback from our Facebook group. I increased the levain water because I find that brown rice flour needs about 20g more water to be the right thick paste consistency in the levain instead of creating a chunky mix. Plus, I changed the amounts of flour and water in the recipe to create a smaller and a more balanced loaf! You can bake it in a Pullman pan but for that I would suggest adding even more water to the dough. It won't hold shape but it will do better at rising!