These delicious gluten-free sourdough chocolate chip scones are chewy on the inside and crusty on the outside. You can make them with all-purpose gluten-free flour using sourdough starter discard! This recipe is a great side snack for a get-together.

Jump to:
Why You Will Love This Recipe
- Easy. Use any gluten-free flour blend with this recipe!
- Delicious. You can add any mix-ins of your choice to enhance the flavor!
What Is Sourdough Discard?
Sourdough discard is a portion of mature sourdough starter that is removed before feeding the starter with fresh water and flour. Sourdough starter consists of water and flour that are naturally fermented by bacteria and yeasts.
To keep your starter strong, you need to regularly refresh it with new water and flour and remove a portion of the starter to maintain a balance of yeast and bacteria. The word "discard" is partially misleading because it can be used to make scones, brown butter sourdough cookies, moist sourdough banana bread, muffins with starter, delicious cinnamon rolls, and many other delicious recipes!
Sourdough discard is not as potent as the mature starter, so instead of using it in sourdough bread, you can use it in recipes that don't rely on its fermenting and leavening abilities as much. For more of those check out my favorite recipes with sourdough starter discard.
New to gluten-free sourdough? Watch my 16-minute video tutorial for beginners!
Ingredients
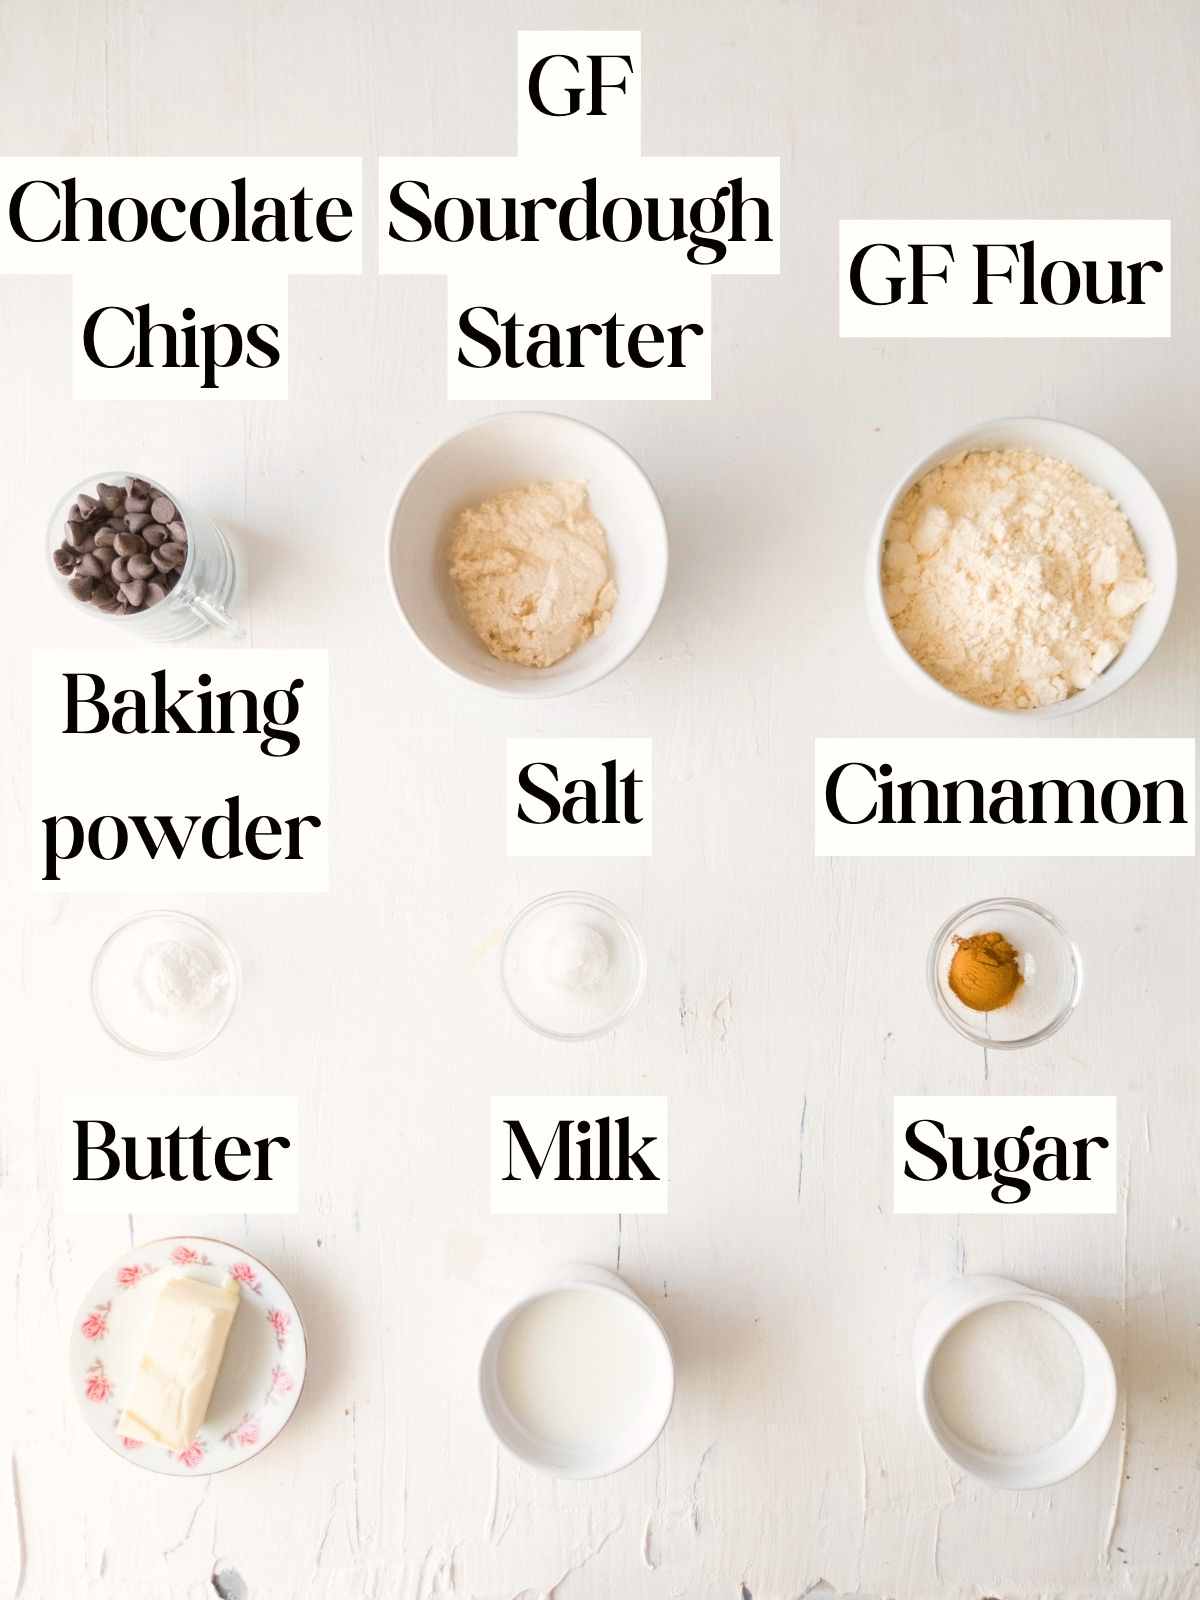
Butter - use cold and firm butter for this recipe.
Gluten-free flour - I like using my homemade millet flour blend or rice flour blend but you can use any other premade gluten-free flour mix. You can use blanched almond flour with a little bit of tapioca or arrowroot flour for a nuttier flavor, just make sure the final volume of flour is the same as in the recipe.
Gluten-free sourdough starter - you can use unfed discard straight out of the fridge if you want to! Or you can use a mature starter and leave the scones to ferment. If you don't have a starter, you can make one with my easy gluten-free brown rice starter recipe.
Xanthan gum - you can make these gluten-free sourdough scones without xanthan gum, although they will be more crumbly then.
Substitutes
Dairy-free and vegan
Milk - use plant-based milk.
Butter - you can use margarine, vegetable oil, coconut oil, vegan butter, or nut butters. Keep in mind that those substitutes might affect the texture and flavor of the scones!
Sugar-free
You can use honey, maple syrup, or artificial sweeteners like stevia, erythritol, or xylitol. To learn more about them read this alternative sweeteners guide! Keep in mind that using any of these substitutes might affect the texture and flavor of the scones.
Step-By-Step Recipe
Step 1 - Mix the dough
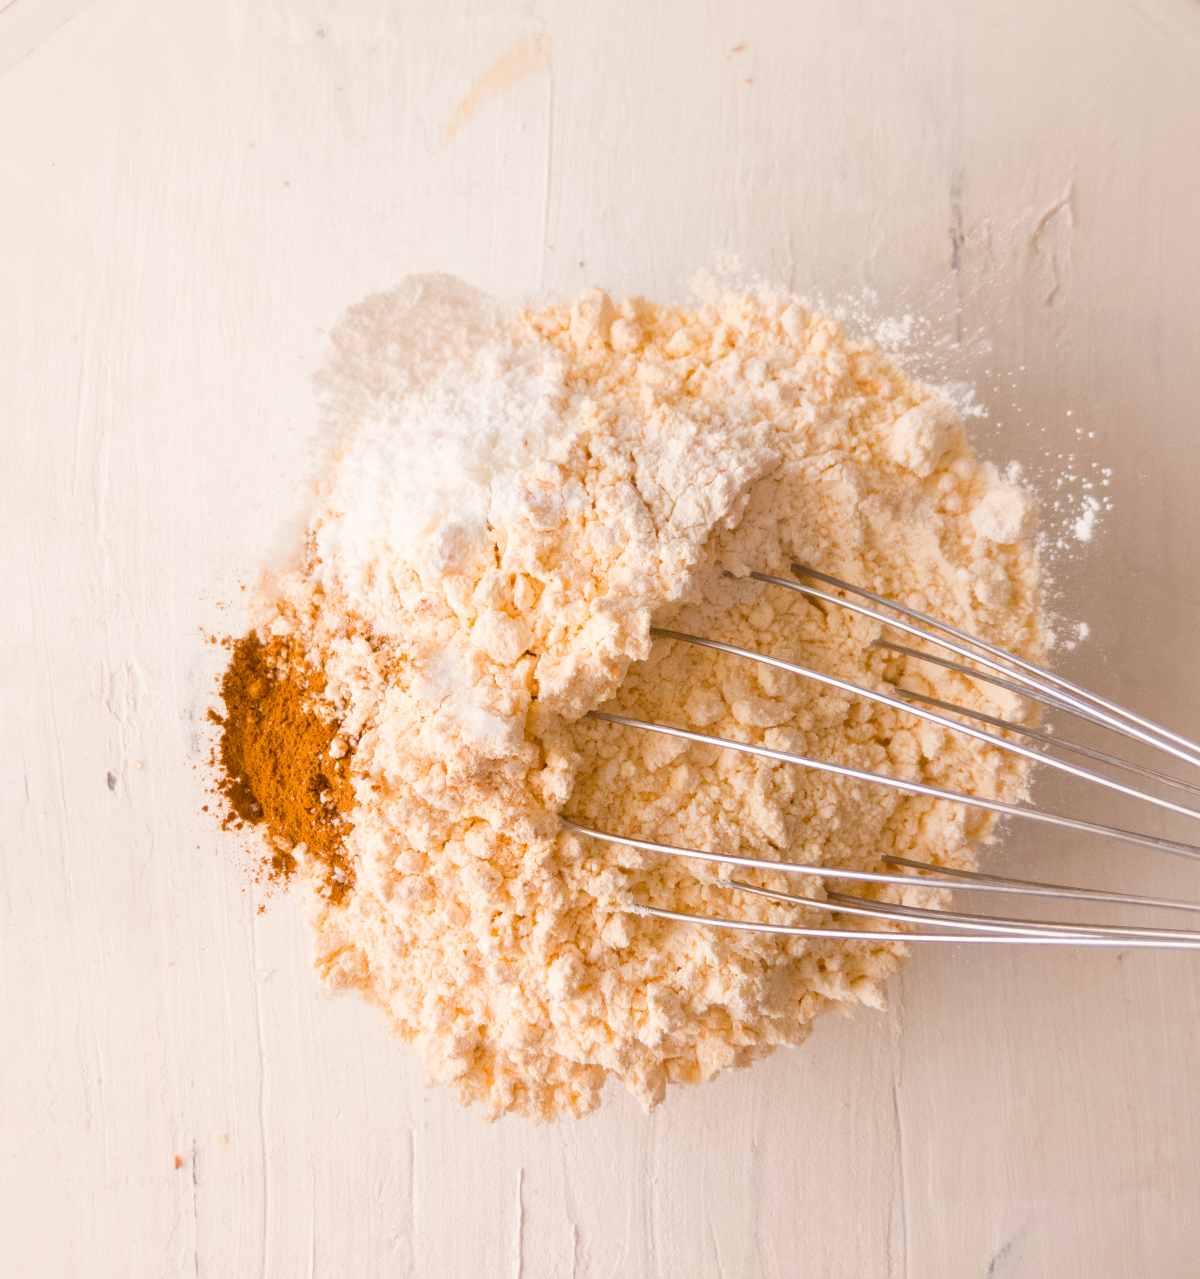
Add all the dry ingredients to a large mixing bowl and whisk together to combine.
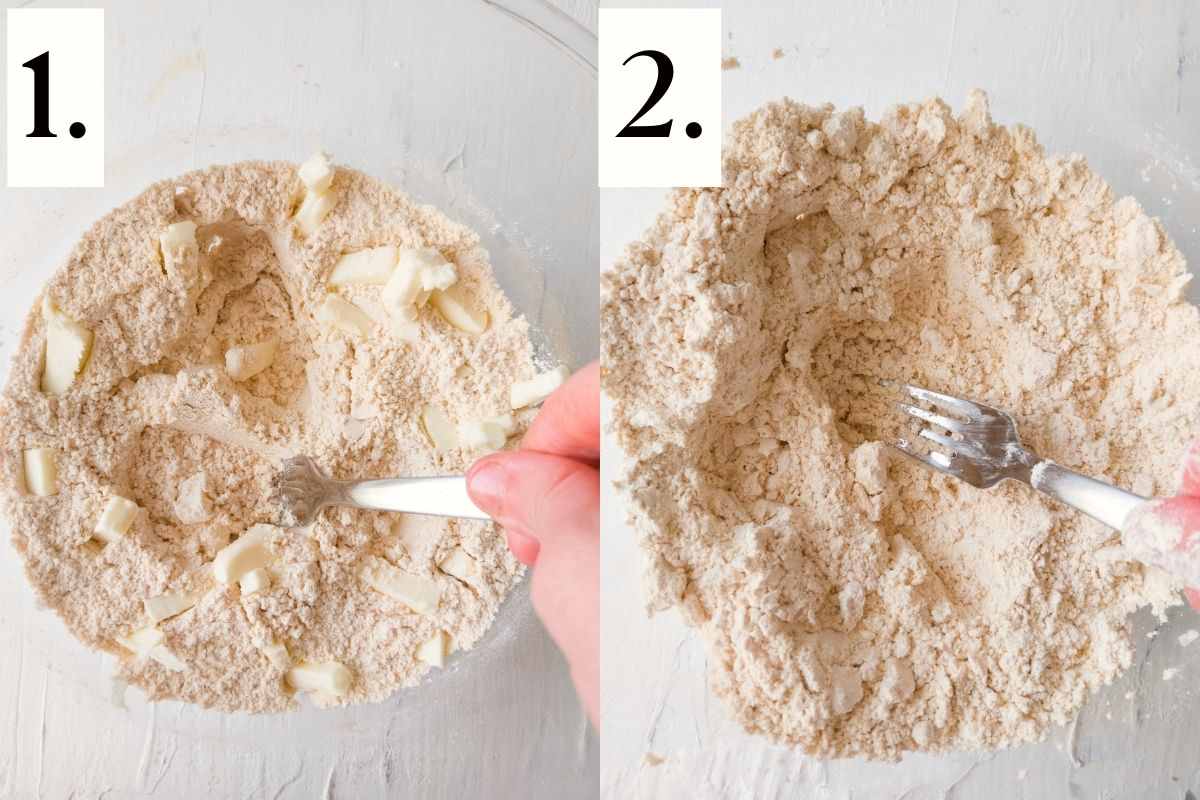
You can use a pastry blender, a knife, or a fork to cut the butter into the flour. The idea is that the butter won't be completely worked into the dough which will allow for steam to escape from the scones during baking and allow for a more flaky texture. So, don't use your hands for this step! The butter should be cold or even frozen.
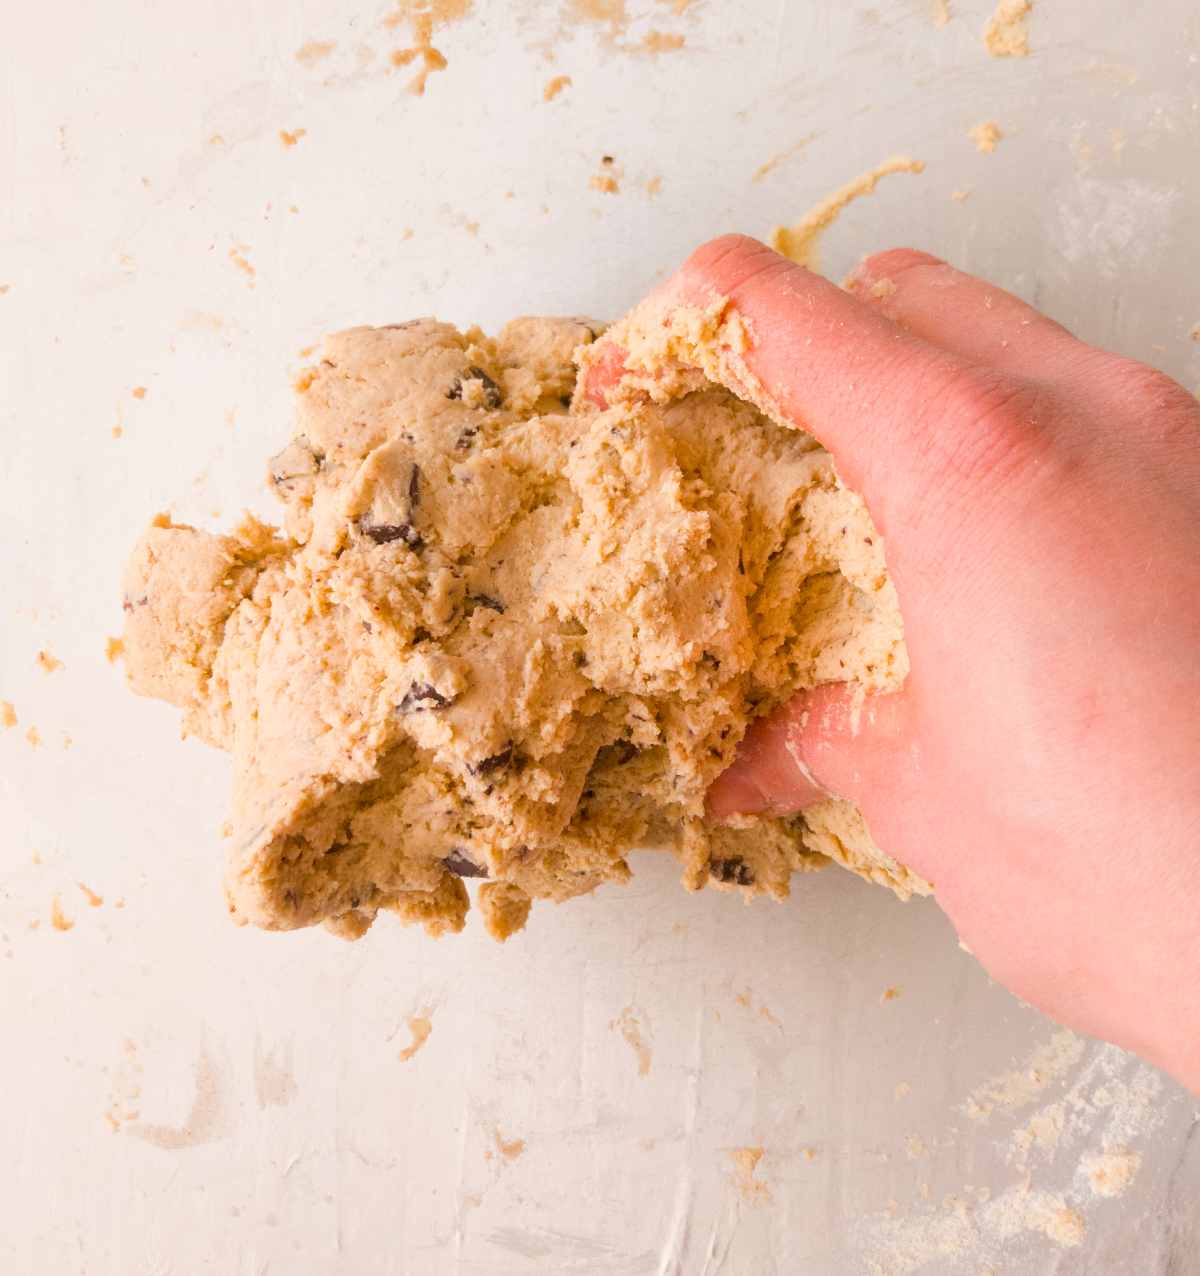
Finally, add wet ingredients and chocolate chips to the flour and mix with your hands until everything is incorporated.
Step 2 - Shape the scones
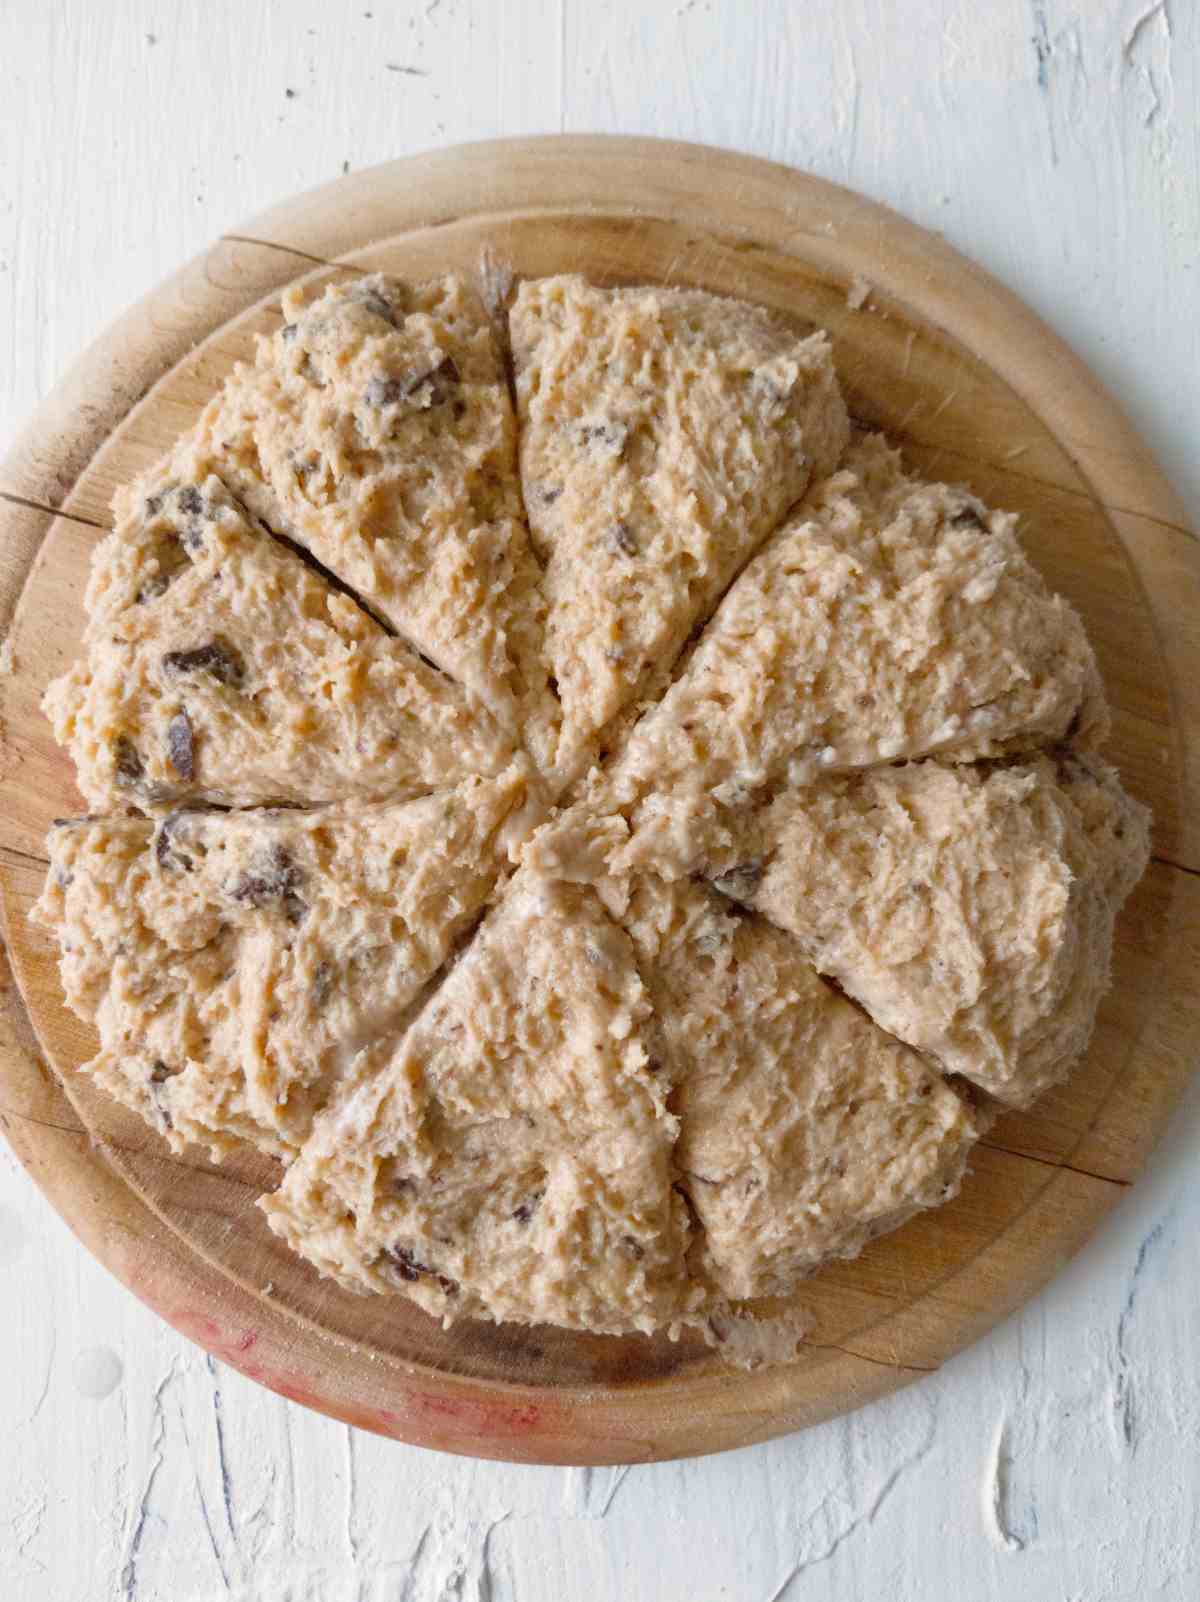
Flour the working surface, grease your hands with oil, and then transfer the dough onto the surface. The dough will be very sticky and stick to your hands even if you grease them. That is okay! Shape the dough into a ball and flatten it with your hands. Then, separate the dough into 8 pieces using a bench scraper or a knife.
Note: for fermented scones leave the dough to ferment for 1-12 hours in the refrigerator or on the kitchen counter at room temperature. If you don't want to wait, proceed to the next step right away!

Preheat the oven to 350F/170C. Carefully transfer the scones onto the baking sheet lined with parchment paper. If the scones broke, reshape them now. You can add extra chocolate chips on top for decoration! Bake for 20-25 minutes at 350F/175C. The scones will be golden brown when ready. Let them cool for 5-10 minutes and enjoy!

Variations
Blueberry scones - add fresh or frozen blueberries for a fruity flavor.
Lemon and poppy seed scones - add fresh lemon zest and poppy seeds for a tangy flavor.
Cinnamon raisins scones - add 1 teaspoon more cinnamon and a handful of raisins for a comforting treat!
Cranberry-orange scones - add fresh orange zest and dried cranberries for a festive twist!
Savory herbal scones - skip the sugar and add a couple of tablespoon of your favorite herbs (like rosemary or thyme) for a savory snack that goes with soups and salads.
Maple-pecan scones - replace sugar with maple syrup and add chopped pecans to the dough for a nutty treat!
Expert Tips
- For fermented scones, leave the dough to ferment for 1-12 hours.
- Don't worry if the dough is very sticky and don't add extra flour. If the scones lose shape as you transfer them onto the baking sheet, just reshape them afterward!
- Cutting butter into flour is a crucial step when making scones because it helps create a light, flaky texture. When the butter is cut into the flour, the butter pieces are coated in butter, which creates a crumbly mix with pockets of butter. During baking, the pockets of butter melt and release steam, which helps lift the scones and create a light and airy texture. You can use a pastry blender, a knife, or a fork for this step!
- Don't overbake the scones as it will make them overly dry and crumbly. Bake them until golden brown or until a toothpick comes out without raw dough sticking to it!
FAQ
Make sure you are not using baking soda or overdoing baking powder. If you followed the recipe to the T and your scones still spread instead of rising, try chilling the dough for at least 30 minutes in the refrigerator before baking!
Traditionally scones are a bit more dry and crumbly than muffins and cakes but they are not overly dry. Some people will add dairy products to their scones to create more moisture which will make scones have a soft and chewy crumb. It is a matter of personal preference!
More like this

Get my new gluten-free sourdough recipes eBook
The top 32 recipes of 2026!

Gluten-Free Sourdough Discard Scones
Ingredients
- 260 grams gluten-free flour I used my homemade millet flour blend: 40% millet flour, 30% sorghum flour, 15% tapioca starch, 15% potato starch
- 100 grams sugar or honey/maple syrup/coconut sugar
- 1 teaspoon cinnamon
- ½ teaspoon salt
- 1 teaspoon xanthan gum if your blend doesn't contain it/ leave out if allergic to gums
- 1½ teaspoon baking powder check the package to make sure it is gluten-free
- 70 grams butter cold or frozen, for dairy-free use coconut oil, vegetable oil, margarine, or vegan butter
- 140 grams gluten-free sourdough starter discard it can be straight out of the fridge
- 120 grams milk use plant-based milk for dairy-free
- 150 grams (1 cup) chocolate chips or dried fruits, shredded coconut, or nuts
SAVE THIS RECIPE!💌
Instructions
- Add all the dry ingredients to a large mixing bowl and whisk together to combine.
- You can use a pastry blender, a knife, or a fork to cut the butter into the flour. The idea is that the butter won't be completely worked into the dough which will allow for steam to escape from the scones during baking and allow for a more flaky texture. So, don't use your hands for this step! The butter should be cold or even frozen.
- Finally, add wet ingredients and chocolate chips to the flour and mix with your hands until everything is incorporated.
- Flour the working surface, grease your hands with oil, and then transfer the dough onto the surface. The dough will be very sticky and stick to your hands even if you grease them. That is okay! Shape the dough into a ball and flatten it with your hands. Then, separate the dough into 8 pieces using a bench scraper or a knife.
- Note: for fermented scones leave the dough to ferment for 1-12 hours in the refrigerator or on the kitchen counter at room temperature. If you don't want to wait, proceed to the next step right away!
- Preheat the oven to 350F/170C. Carefully transfer the scones onto the baking sheet lined with parchment paper. If the scones broke, reshape them now. You can add extra chocolate chips on top for decoration! Bake for 20-25 minutes at 350F/175C. The scones will be golden brown when ready. Let them cool for 5-10 minutes and enjoy!


Michelle says
Can you freeze them? How would you thaw?
MW says
Just made these and they were delicious. Thank you for the recipe. We all enjoyed and I am so happy to use my starter discard. I made maple pecan. They had a mild flavor with a hint of cinnamon. I found them a bit doughy, which my son liked. Next time will flatten the circle to 2" tall. Yum!
Julia says
These are really tasty! I used almond flour in place of the millet flour because I didn’t have it, but other than that I followed the recipe. They’re not as dry as a typical scone so even my six-year-old loves them!
Mim says
Do you have a sub for potato starch? My daughter has reaction to potato
Natasha Levai says
Hi Mim! You can use cornstarch or tapioca starch instead.