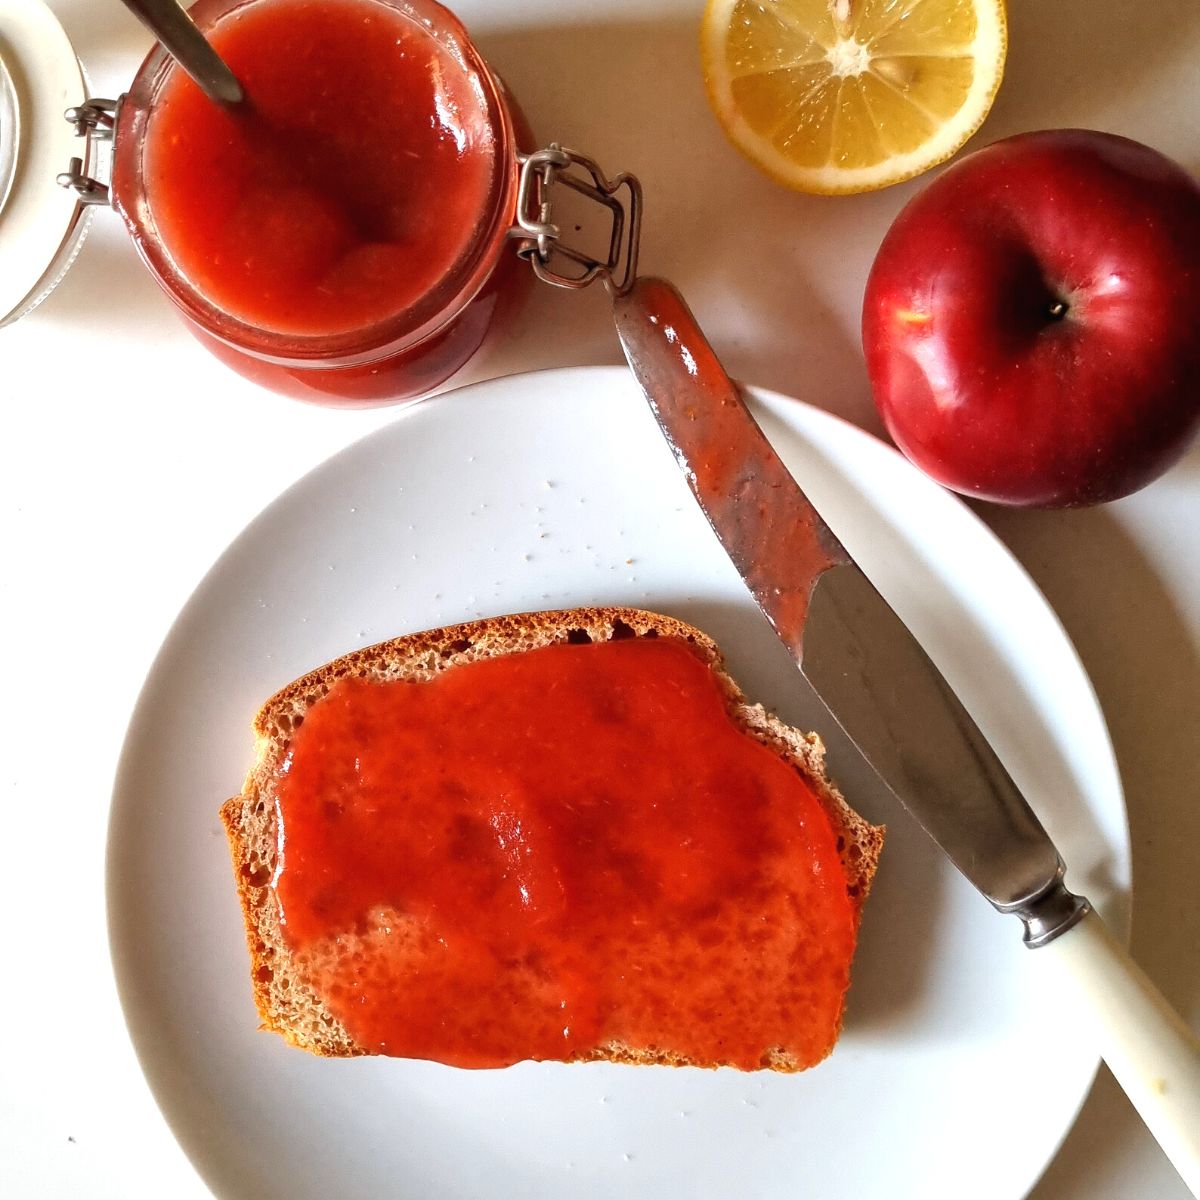
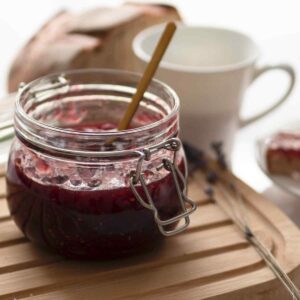
This delicious apple and plum jam is a great way to preserve the Fall fruits, especially if you have them in your backyard. It is another easy jam recipe just like my homemade elderberry jam.
Jump to:
Making jam is so fun in the summer when the produce is plentiful! We have a huge cherry tree, so I LOVE canning cherries and using them for this gluten-free cherry cobbler later. If you don't have apples for this recipe, you can make a pure plum jam instead!
Tools You Might Need
- A jam funnel, helps to avoid extra mess!
- A large thick-bottomed pot like a Dutch oven (if you get one, you can make so many more Dutch oven recipes!)
- An immersion blender. I really like to blend my jam to avoid peeling the fruit!
- A can lifter. You will burn your hands if you try to get the cans out of the water without a can lifter (ask me how I know that!)
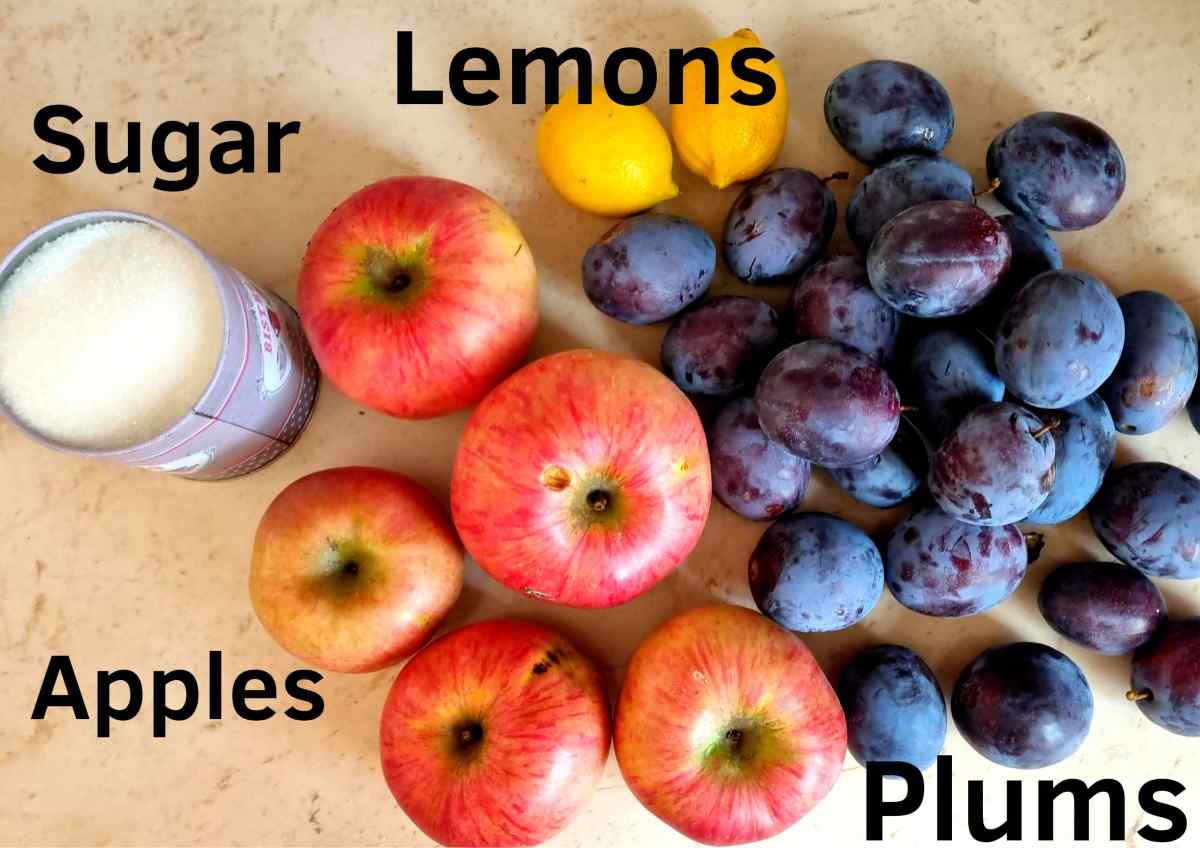
Ingredients
How to Make Apple and Plum Jam
Step 1 - Sterilize the jars
Wash your jars and lids in soapy water and place the jars into an oven at 150C/300F for at least 20 minutes. Boil the lids in water for 10-20 minutes. I tried placing the lids into the oven along with the jars but some of the lids burnt as they had material in them that was not highly heatproof. From then on I started sterilizing the lids separately in a small saucepan with boiling water.
TIP: use a larger pot for boiling the fruit as you will most likely need more space than you think. Make sure the pot has a thick bottom or stir continuously (and raise the heat gradually after the sugar is dissolved) to prevent burning.
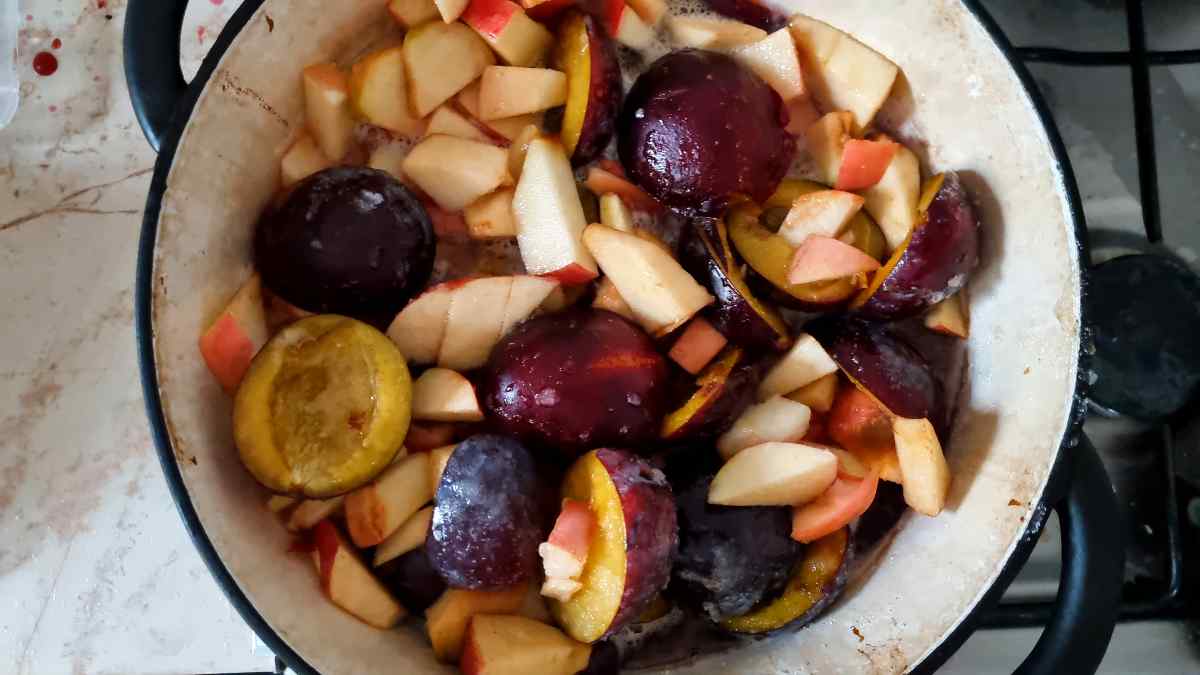
Step 2 - Prepare the fruit
Get rid of the stones inside the plums and core the apples. You don't need to peel either of them.
Step 3 - Boil the Jam
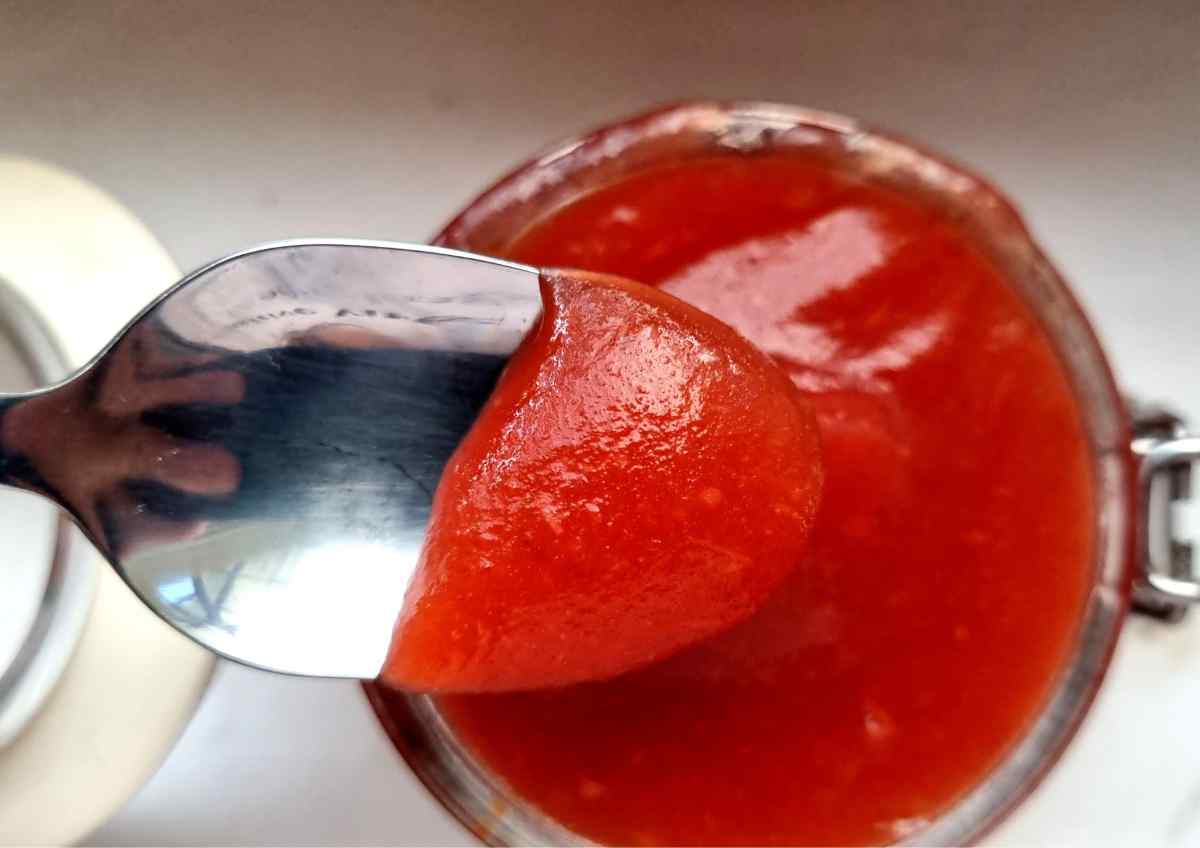
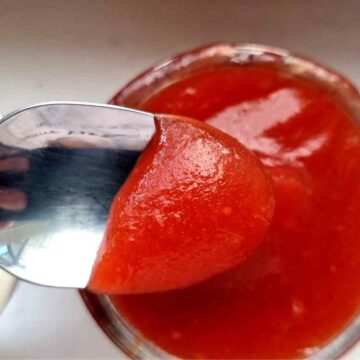
Place the plums, apples, water, and sugar into the pan and heat until the sugar is dissolved. The fruit will start letting out the juice and eventually will start simmering. Add the lemon juice and any spices of your choice (I really like this jam with cinnamon, cloves, some nutmeg, and ginger) and let simmer for at least 20 minutes. While the jam is boiling use a potato masher to break up the fruit.
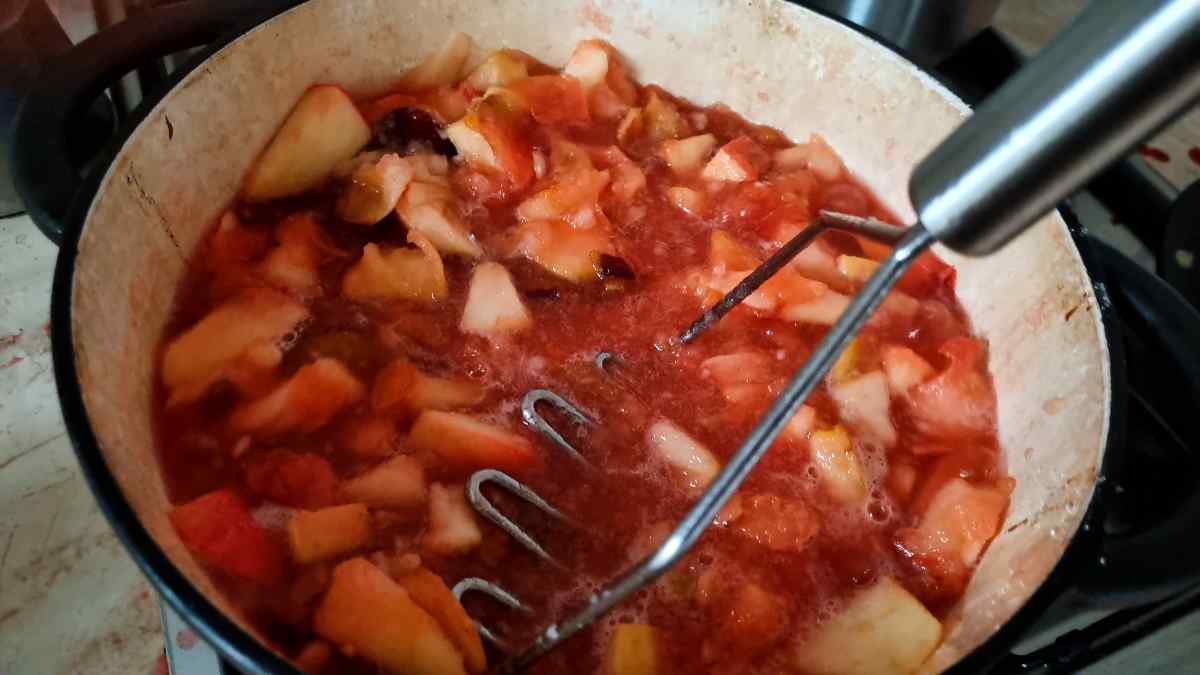
You don't need to cover the pot with a lid! After the jam is done boiling use a stick blender to break up the rest of the chunks along with the skins. You can also utilize a countertop blender, just make sure to blend in batches. Also, close the hole on the top to prevent the jam from going onto your kitchen walls!
TIP: for thicker jam skip the water.
Step 4 - Jar the jam
Scoop the jam into warm sterilized jars, screw the lids on tightly, and place the jams into a large pot with water (make sure the water covers the jars completely). Bring to a rolling boil and process the cans for 15-20 minutes. This process is called a water bath and is used to prevent dangerous bacteria from growing on the inside of the jars.
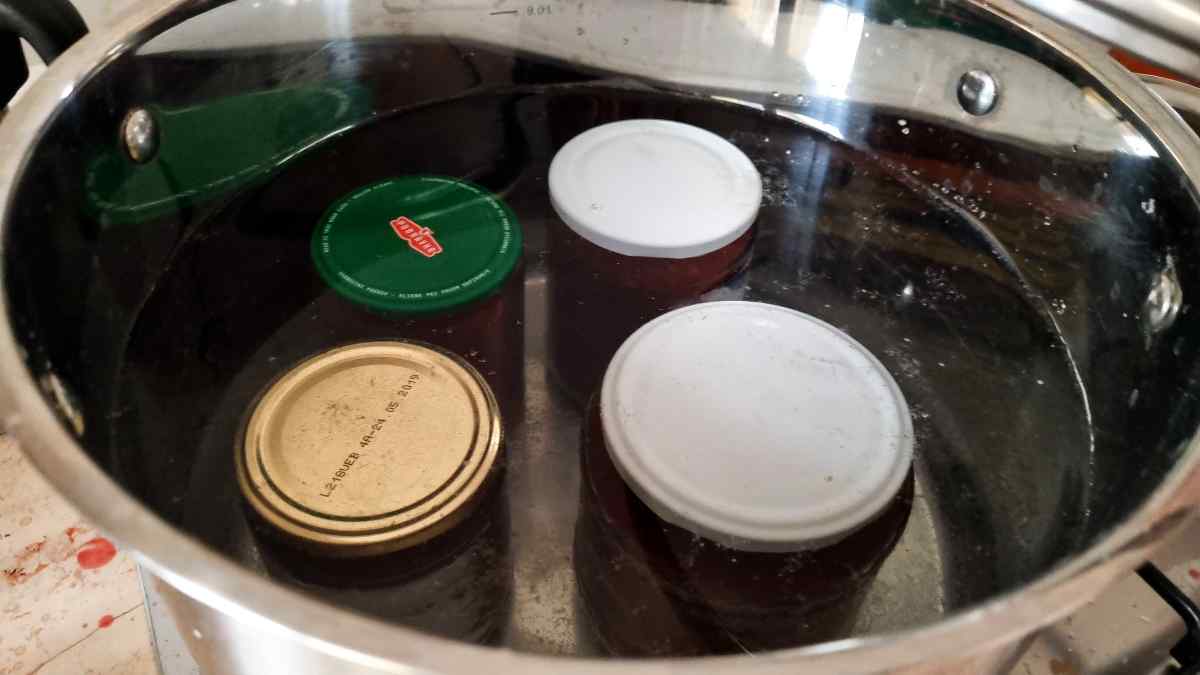
TIP: make sure to let the jars set in the hot water with the lid off for 5 minutes before taking them out of the water bath.
Expert Tips
- Make sure the jars are still hot when you scoop the jam into them as combining hot jam with cold jars can cause the glass to crack.
- Keep the jars in the hot water after the water bath for about 5 minutes. Turn off the heat and take off the lid while letting the jars sit. This will prevent the temperature shock as you take the jars out.
- Use water bath processing for extra protection. It is true that people canned jam without any water bath for generations but there is a risk of deadly bacteria growth if you don't process your jars in that way.
- Make sure to cut out any parts of the fruit that are starting to brown or rot.
- Use a blender to break up the skins before scooping the jam into the jars.
- Keep the jars in a cool and dark place to prevent spoiling!
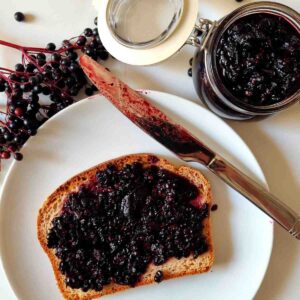
If you liked this jam recipe, you might also like my collection of elderberry desserts!
FAQ
No. You don't need to remove the skins as they will blend beautifully if you use a stick blender to break up the bigger chunks in the jam. I am not a fan of big chunks of plum in jams as skins make it hard to eat it bit by bit, so I use a blender to ensure a smooth texture.
The main thing is for your plums to be ripe. You want to make sure you cut out any part that is starting to brown and go bad but the riper the better!
Runny jam means there is not enough pectin or not enough sugar. Adding slightly unripe apples to the jam helps it thicken! If you don't use apples then add more sugar.
If you are using a thick-bottomed saucepan like a Dutch oven then you just need to make sure the sugar dissolves. Then you can just stir from time to time. However, if you are using a thin-bottomed pan you have to stir continuously to make sure nothing burns.
I did burn my last batch of apple jam just because I had so many that I decided to use the biggest pot I had and it did not have a thick bottom. Needless to say, the black layer of burnt apples and sugar broke apart into little pieces which penetrated the jam all through. You still can see the little black dots in the jars of my apple jam!
It totally depends on your method of making it. If you add more sugar you will ensure better durability. If you can your jam and make sure the jars are sterilized then you prolong the shelf life of the jam.
The water bath is a debatable question since many people don't use this step but if you do process the jars in a water bath it will take the safety one level forward. So, if you follow all the safety steps your jam should definitely last you at least a year and potentially a few years. However, the flavor will be best in the first 12-18 months!
Generally, I would be very cautious about moldy foods. To be on the safe side I would rather throw away jam that is covered in mold, yet, there are sources claiming that it is totally fine to eat what is beneath a moldy layer.
Without! First, I pitted the plums and got rid of the cores of the apples, and then weighed the fruit.
Did you like this apple plum jam recipe? Please, leave a 5-star rating in the recipe card below! And if you REALLY liked this recipe, consider supporting it by buying me a coffee! 🙂 Thank you and have a great day!
Apple Plum Jam without Pectin
Equipment
Ingredients
- 1200 grams (2.6 lbs) apples after chopping
- 1000 grams (2.2 lbs) plums after pitting
- 1 lemon
- 500 grams (2.5 cups) sugar add more for better thickening and preservation if prefer
- 200 ml (¾ cup) water omit if you want a thicker jam
SAVE THIS RECIPE!💌
Instructions
- Wash your jars and lids in soapy water and place the jars into an oven at 150C/300F for at least 20 minutes. Boil the lids in water for 10-20 minutes. I tried placing the lids into the oven along with the jars but some of the lids burnt as they had material in them that was not highly heatproof. From then on I started sterilizing the lids separately in a small saucepan with boiling water.
- Get rid of the stones inside the plums and core the apples. You don't need to peel either of them.
- Place the plums, apples, water, and sugar into the pan and heat until the sugar is dissolved. The fruit will start letting out the juice and eventually will start simmering. Add the lemon juice and any spices of your choice (I really like this jam with cinnamon, cloves, some nutmeg, and ginger) and let simmer for at least 20 minutes. While the jam is boiling use a potato masher to break up the fruit.
- You don't need to cover the pot with a lid! After the jam is done boiling use a stick blender to break up the rest of the chunks along with the skins. You can also utilize a countertop blender, just make sure to blend in batches. Also, close the hole on the top to prevent the jam from going onto your kitchen walls!
- Scoop the jam into warm sterilized jars, screw the lids on tightly, and place the jams into a large pot with water (make sure the water covers the jars completely). Bring to a rolling boil and process the cans for 15-20 minutes. This processing is called a water bath and is used to prevent dangerous bacteria from growing on the inside of the jars.
Cindy Raymer says
Hi and greetings from Canada!
I just made my first batch of your Plum Apple jam. (actually 1/2 recipe as I didn't have enough plums) It is absolutely delicious!! Easy peasy to make and is so thick even after using the water in the recipe. I'm so excited as I've never even tasted plum jam before.
I used a variety of apples to give it a very unique taste.
Thank you for such an incredible recipe! I would highly recommend this recipe to anyone!
Naomi says
Natasha, we love your recipes! Can’t wait to try this jam recipe!
Natasha Levai says
Aw, I'm glad you are enjoying them!!
Carol says
Do you use reused lids on jars as I see in the photo?
Natasha Levai says
Oh yes! We don't buy new lids on this side of the world to make jam. These lids don't get damaged as they are very sturdy. When it comes to mason jar lids, those bend sometimes after opening which ruins them!
Mariann says
Looks great!