Did you know you can make jam within 30 minutes even on a busy weekday? Jam making doesn't have to be difficult and with this recipe, you will see how simple it actually is to use up a bunch of plums (or apples, elderberries, etc.) and make a delicious plum jam for your family to enjoy all winter long.
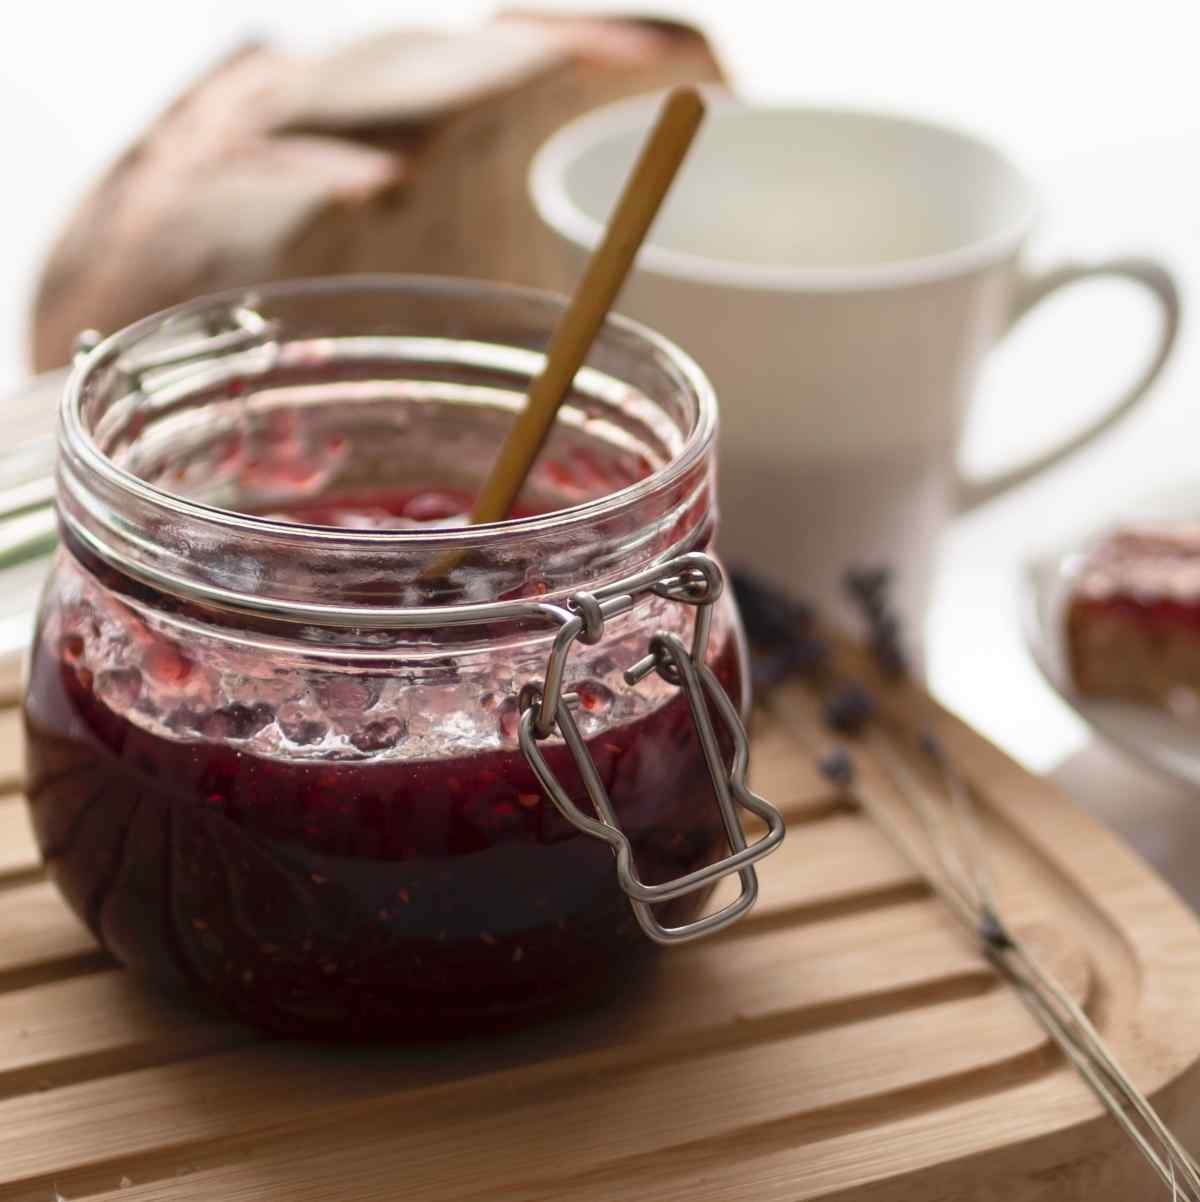
I love preserving the summer fruit and berries for colder months making jams and canning (I love canning cherries!). This is one of my go-to recipes when I have extra plums lying around in the garden!
Jump to:
Why You Will Love This Recipe
- Fast and easy way to preserve fresh plums for winter.
- No pectin is needed, so you can make this jam with simple pantry ingredients.
- Water bath canning is easy and is done within 20 minutes.
Ingredients
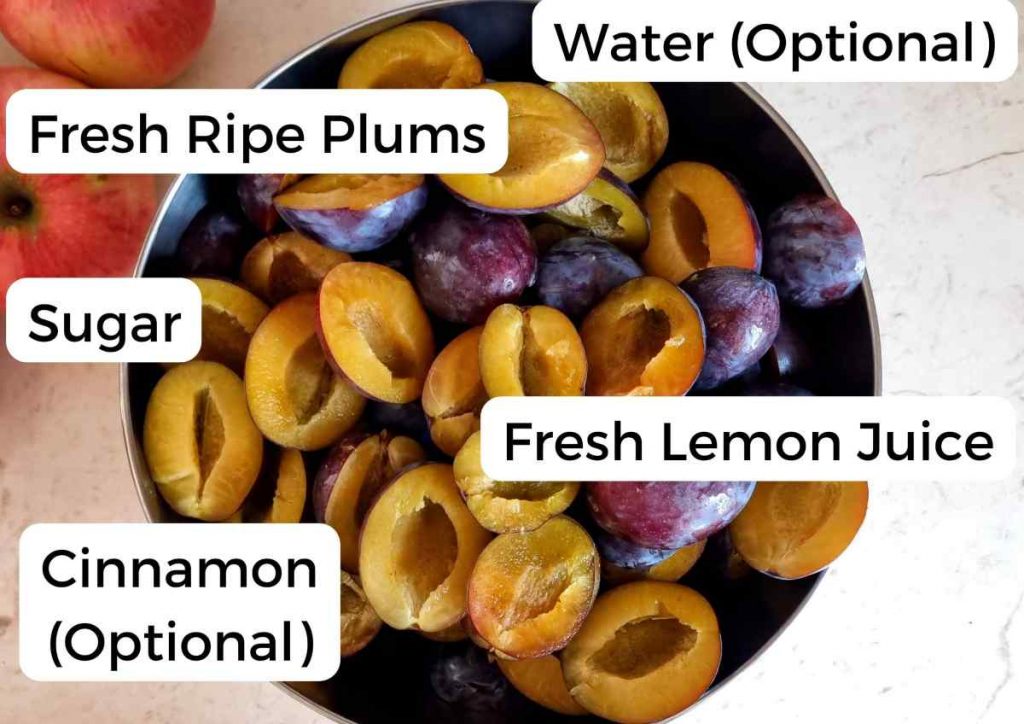
Plums - use ripe plums for best results but make sure to cut out any parts that are starting to brown and go bad.
Sugar - this recipe uses less sugar than an average jam would call for. Feel free to increase the amount according to your liking! However, I found that making jam with this much sugar doesn't cause problems in the long run especially since I am processing the cans in a water bath.
Water - if you would like a thicker jam just omit the water. Otherwise, tap water works since you will boil it anyways!
Lemon juice - lemon has natural pectin which allows for the jam to set better without adding any extra pectin to the pot!
Cinnamon - feel free to experiment with other Fall spices you think would go well with your jam.
Tools You Might Need
- A jam funnel, helps to avoid extra mess!
- A large thick-bottomed pot (a Dutch oven is my favorite! Plus, you can make so many gluten-free recipes in a Dutch oven!);
- An immersion blender. I really like to blend my jam to avoid peeling the fruit!
- A can lifter. You will burn your hands if you try to get the cans out of the water without a can lifter (ask me how I know that!)
Step-by-step recipe
Step 1 - Prepare the jars
You don't need to sterilize your jars if you are processing them in a water bath or in a pressure canner. Just make sure you wash the jars in warm soapy water.
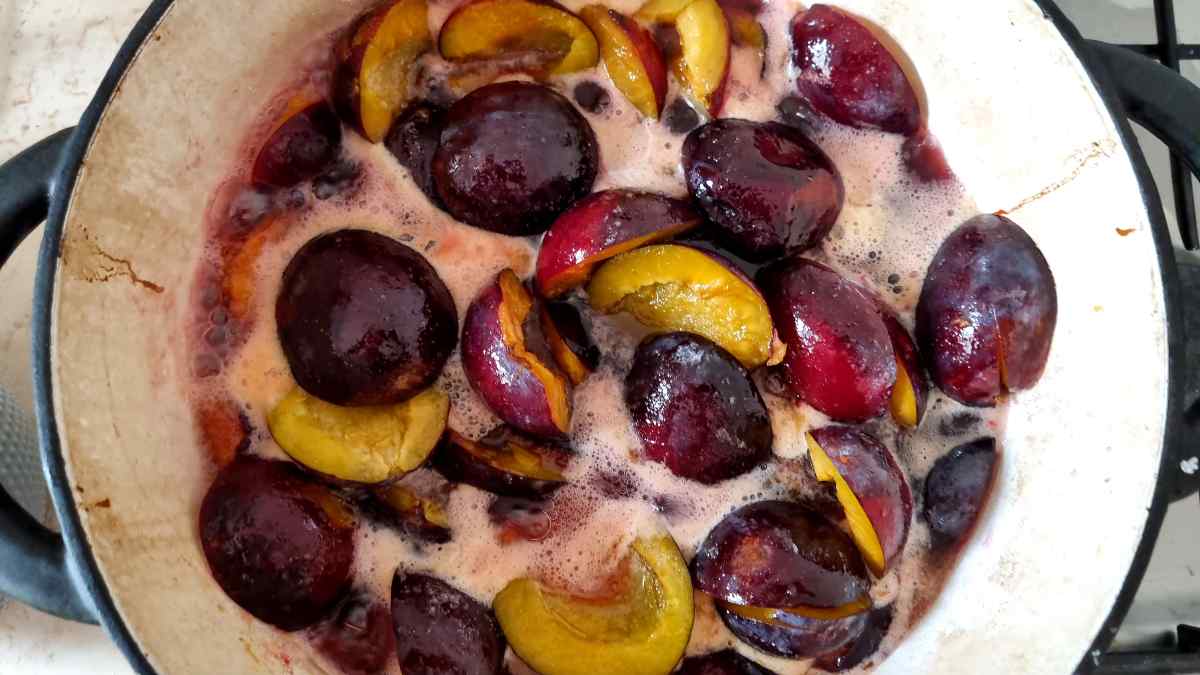
Step 2 - Cook the fruit
Wash and pit the plums and place them into a thick-bottomed pot (a dutch oven is a safe choice). Add the sugar, water, and lemon juice and bring to a simmer. Let the plums simmer for about 20 mines breaking up the pulp with a potato masher as the fruit softens.
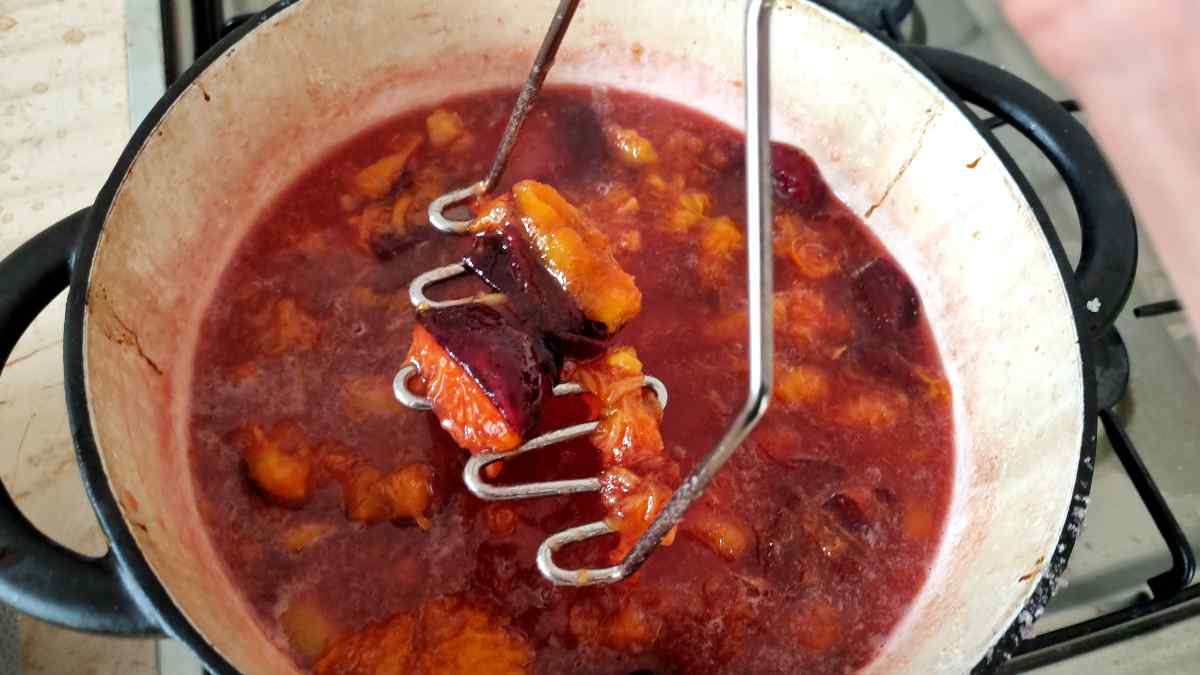
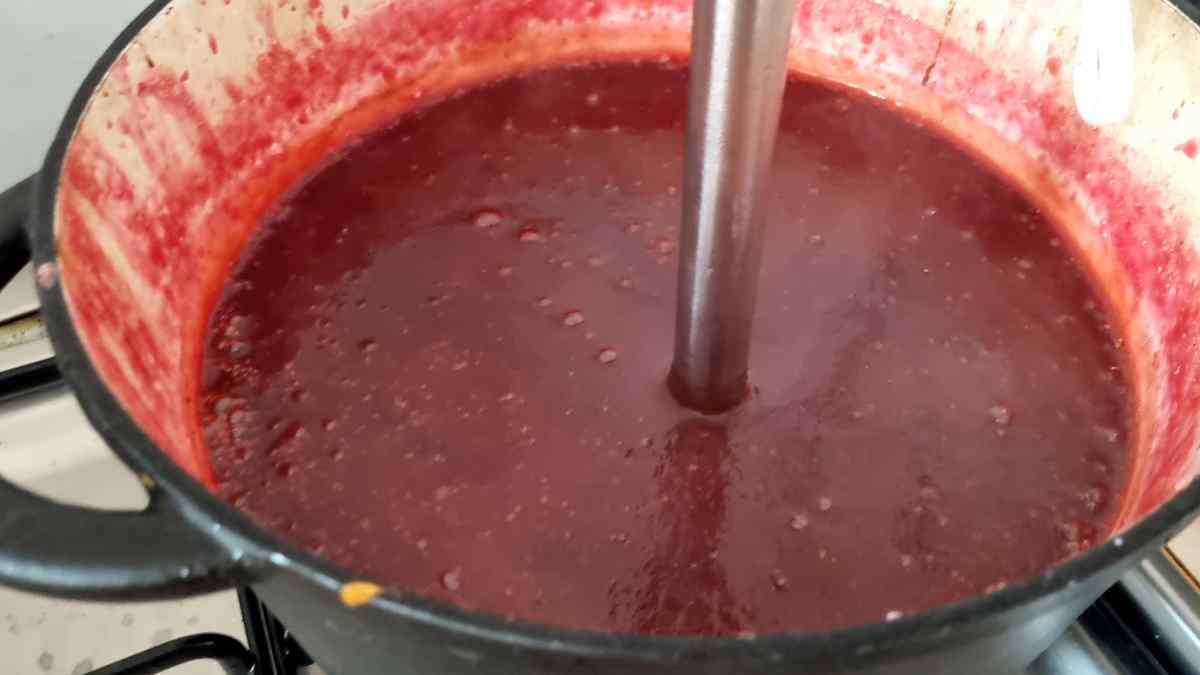
Step 3 - blend and jar
Puree the fruit by using an immersion blender and jar right away. Make sure your jars are not cold (warm is fine) and fill them up leaving a little bit of head space (about ¼ of an inch, ½ of a cm). Place the lids onto the jars (you don't have to screw them on super hard).
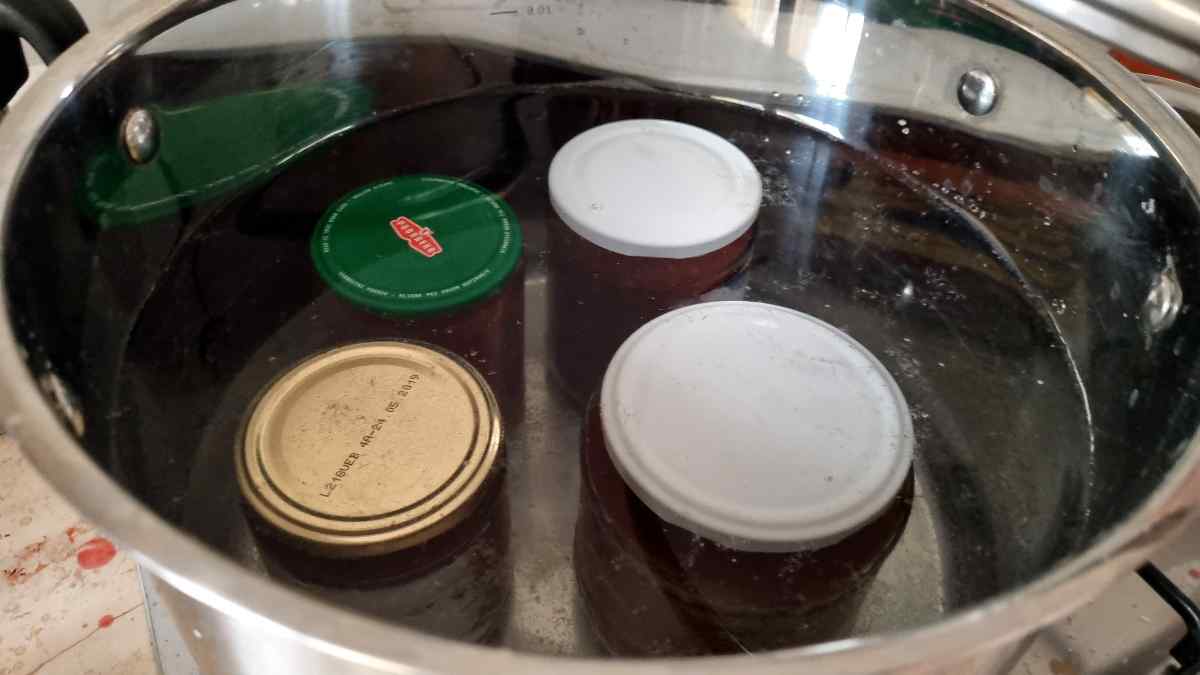
Step 4 - water bath
Prepare a large pot that can fit the jars. Fill the pot with water (hot or cold) and bring it to a boil. Turn off the heat and place the jars into the water. The water should reach above the jar lids.
Turn the heat back on and bring the water to a boil again. Leave the jars in for 15-20 minutes, then turn off the heat, take off the lid and let the jars sit for a few minutes before taking them out. Let the jars cool completely before placing them in the pantry.
Expert Tips
- Use a jam funnel to avoid extra mess.
- Before placing the lid onto the jar wipe the top of the rim with a clean kitchen towel and then run your finger around the rim once again to make sure no food remains left on it. Cleaning the rim will ensure a good seal!
- Don't do anything with the jars while they are cooling down. Let them sit on your kitchen counter until they are fully cooled. As the jars are sitting they are still sealing and you want to make sure you don't intervene in that process!
- Experiment with other fruit pairings. I have made plum jam with apples before and it tastes great! Plus slightly unripe apples add natural pectin to the pot which assists in the setting of the jam. Try other pairings and let me know how you liked them in the comments below!
FAQ
Do You Skin the Plums Before Making Jam?
If you are going to blend the jam then no, you don't need to peel the plums. However, if you like the chunky jam then you should peel your fruit as the skins will take away from the texture! For detailed instructions on how to peel plums check out this article.
Do I Need to Sterilize the Jars?
There is no need to sterilize the jars apart from washing them in warm soapy water because you will be processing them in a water bath. If you are not doing either the water bath or pressure canning step then you do need to sterilize jars.
However, it is safer for you and your family to process the cans as it will prevent deadly bacteria from growing. It is rare that this type of bacteria happens to grow in a jar but if it does then it can be deadly. So, if you don't want to take chances you are better off at least doing a water bath, and in that case you don't need to sterilize the jars.
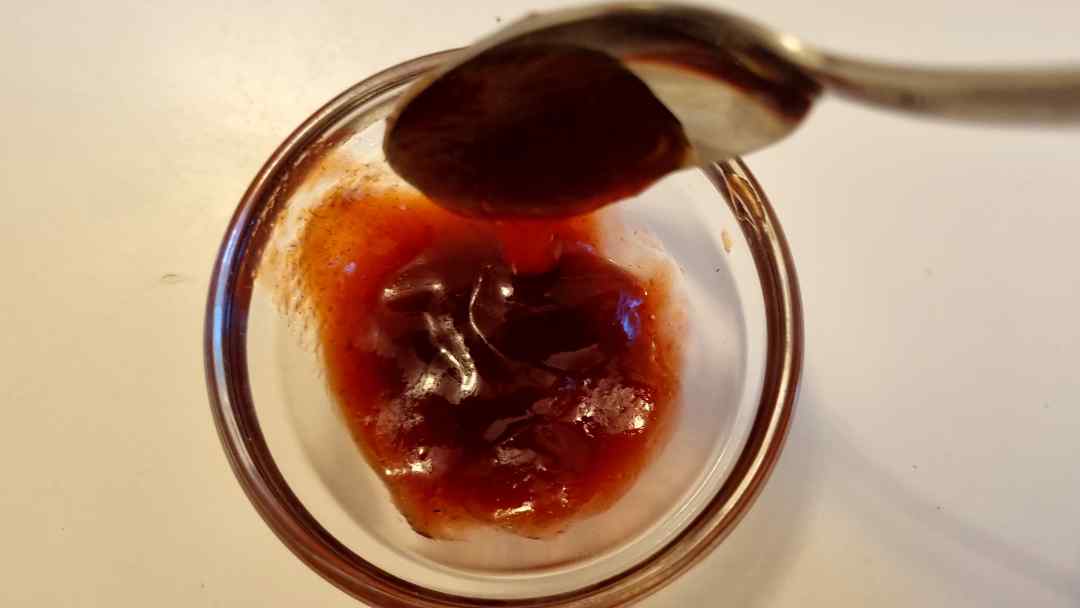
How Can I Thicken My Jam without Pectin?
Plums and lemon juice have natural pectin which allows for a better setting of the jam. However, if you find your jam too thin then add some cornstarch to thicken it during the boiling process.
How Long Will this Jam Keep?
If properly canned, this jam will be good for years. However, if you don't can it and rather keep it in the refrigerator then it should be good for at least 3-4 weeks.
Can I Eat Jam If There Is Mold On the Top?
I would not recommend eating a moldy jam because you simply don't know how far it has reached into the can. Having said that, there are other opinions out there suggesting you can just scoop off the mold along with some jam and eat the rest but I definitely would be careful about that!
Enjoyed this easy low sugar no pectin plum recipe? Please leave a 5-star rating on the recipe card below! If you REALLY liked this recipe for preserving ripe plums for winter consider supporting it by buying me a coffee! 🙂 Thank you and have a great day!
If you liked this jam recipe, you might also like my collection of delicious elderberry recipes!

Plum Jam Recipe without Pectin
Equipment
- 1 thick-bottomed pan (I used a dutch oven)
- 1 jam funnel (helps with avoiding extra mess)
- 1 immersion blender (allows for a smooth texture, no need to peel the fruit!)
- 1 Ladle
- 4 medium jars (note that I use European style of canning which allows for store-bought cans from products. Totally safe!)
- 1 large pot (for water bath canning)
Ingredients
- 2 kg (4½ lbs) pitted plums ripe
- 500 grams (about 1 lb) sugar add more if prefer
- 200 ml (¾ cup) water for thicker jam skip this ingredient
- juice of 1 lemon
- 1 tablespoon cinnamon optional
SAVE THIS RECIPE!💌
Instructions
- You don't need to sterilize your jars if you are processing them in a water bath or in a pressure canner. Just make sure you wash the jars in warm soapy water.
- Wash and pit the plums and place them into a thick-bottomed pot (a dutch oven is a safe choice). Add the sugar, water, and lemon juice and bring to a simmer. Let the plums simmer for about 20 mines breaking up the pulp with a potato masher as the fruit softens.
- Puree the fruit by using an immersion blender and jar right away. Make sure your jars are not cold (warm is fine) and fill them up leaving a little bit of head space (about ¼ of an inch, ½ of a cm). Place the lids onto the jars (you don't have to screw them on super hard).
- Prepare a large pot that can fit the jars. Fill the pot with water (hot or cold) and bring it to a boil. Turn off the heat and place the jars into the water. The water should reach above the jar lids. Turn the heat back on and bring the water to a boil again. Leave the jars in for 15-20 minutes, then turn off the heat, take off the lid and let the jars sit for a few minutes before taking them out. Let the jars cool completely before placing them in the pantry.
Sally B says
Made this with Missouri cherry plums, no water or spice, and followed cooking instructions to a tee. Used just plums, sugar and lemon. Turned out fabulous. Great flavor and jam consistency. Thank you!
Diane says
I skipped the water wanting a thicker jam. Never set. Added more sugar. Added more lemon juice. Tried to heat to 220 degrees…couldn’t get over 214 without sticking. Gave up and added cornstarch. Darn. Lots of time invested.
Natasha Levai says
Hi Diane! If the jam doesn't seem to get thick you simply need to let it simmer for as long as needed until all the extra moisture evaporates.
Susie says
That is a good idea to just use a blender instead of peeling the fruit. Saves so much time! I actually want to try this now.