If you are familiar with baking sourdough, this recipe will be a piece of cake for you! I personally love to make sourdough babka around Christmas time every year. If you are new to sourdough, this recipe is the perfect place to start!
This post contains affiliate links, which means that if you purchase the products recommended in this post, I make a small commission at no cost to you. You will not be charged extra for purchasing through the links. To read my full disclosure click here.
You Will Need
- Kitchen Scale
- Mixing Bowl
- Rubber Spatula
- Medium size jar (for levain)
- Bread Baking Tin
What Is a Sourdough Starter?
Sourdough starter is wild yeast that was traditionally used in bread baking until the invention of commercial yeast that most bakers use today. Sourdough dough adds a sour taste to the dough making the flavor profile deeper and richer! If you don't have a sourdough starter already, check out my easy sourdough starter recipe! If you are looking at this recipe because you don't know what to do with sourdough starter discard, then you might also want to check out this easy fried sourdough starter, traditional sourdough pancakes and 3-ingredient sourdough banana pancakes. For a gluten-free option, check out my gluten-free starter recipes.
Ingredients
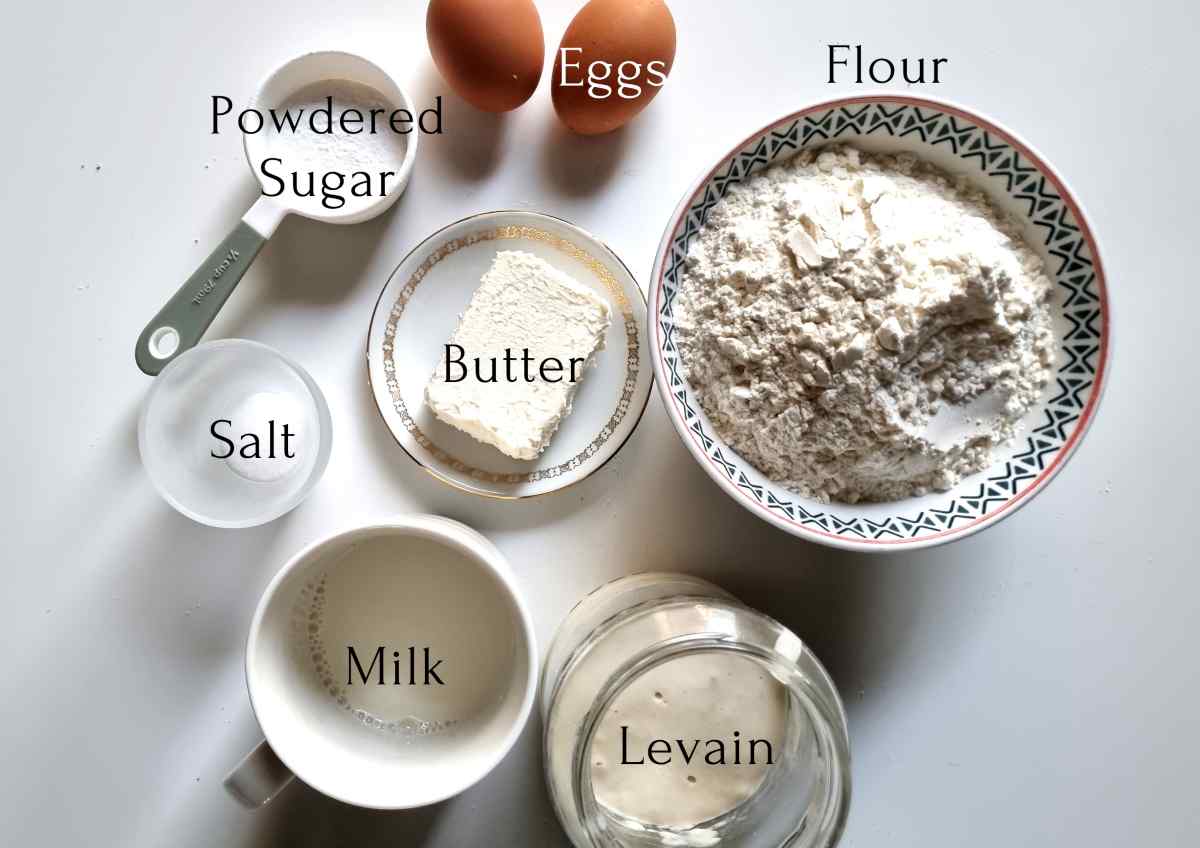
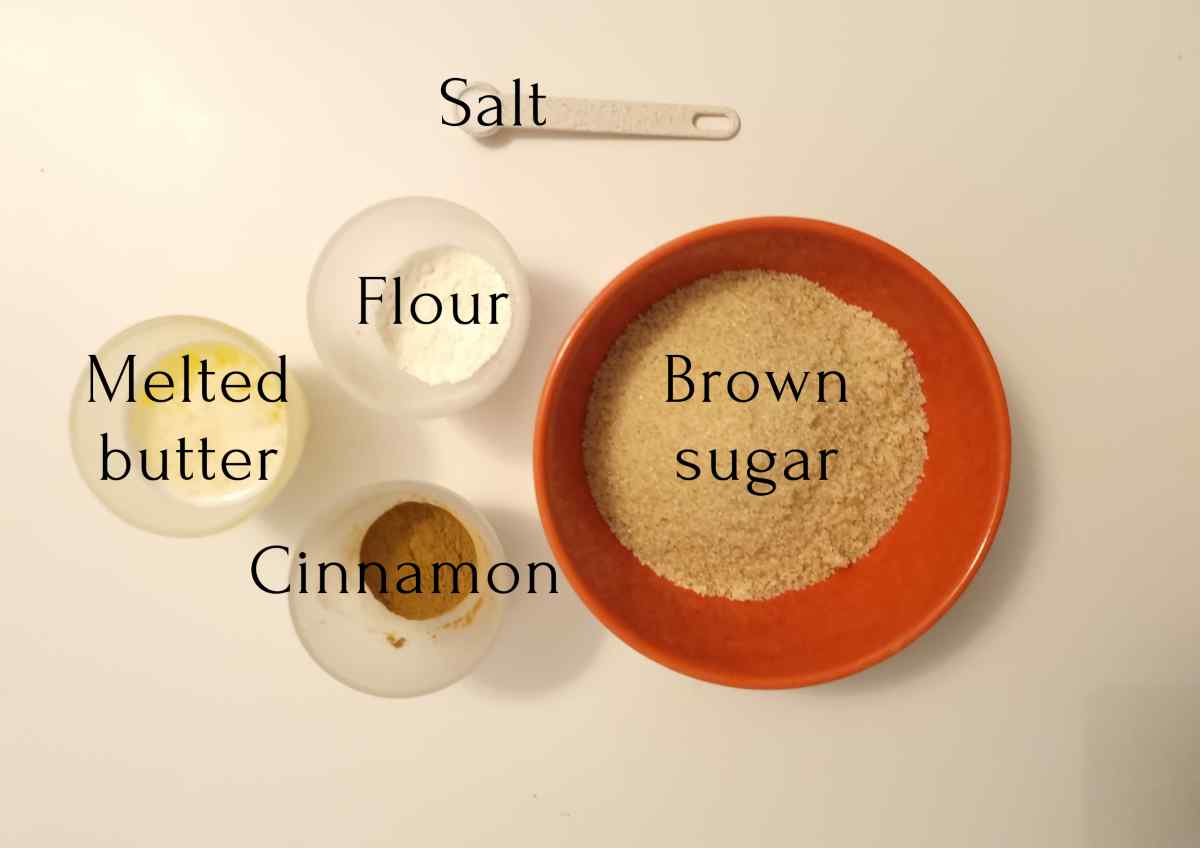
Levain – you can make levain with a mature sourdough starter, flour, and water. Instead of using the straight-up starter, some bakers choose to make levain which allows you to regulate the acidity and the sourness of the end product. However, you can use the mature starter itself (it will definitely save you a significant amount of time!)
Flour – I used all-purpose flour for this recipe. As babka is a sweet bread so you probably don’t want whole wheat or rye flour in it!
Water – this ingredient is only needed for the levain and I used warm tap water. If your water has lots of chemicals in it you can simply use filtered or bottled water. Leaving the water on the counter overnight lets all the chlorine out (if you have chlorine in your local tap water).
Eggs – this ingredient provides strength and extra flavor to your sourdough cinnamon babka!
Milk – moisturizes the dough, plus brings in extra flavor to the end product.
Butter – softens the babka and adds richness to the flavor.
Salt – brings out more sweetness!
Watch How to Make Sourdough Cinnamon Babka
Download my FREE sourdough babka baking timeline to keep at hand during baking!
[convertkit form=2857830]
Step by Step Recipe
STEP 1 - Make the Levain
For this recipe, you can use levain OR mature starter. The difference is that with levain the dough will have a better chance of rising, however, using a mature starter will save you time if you are on a schedule!
To make levain you need to feed a mature starter and let it mature again. This adds strength to the bacteria and gives a better chance for the dough to rise and ferment.
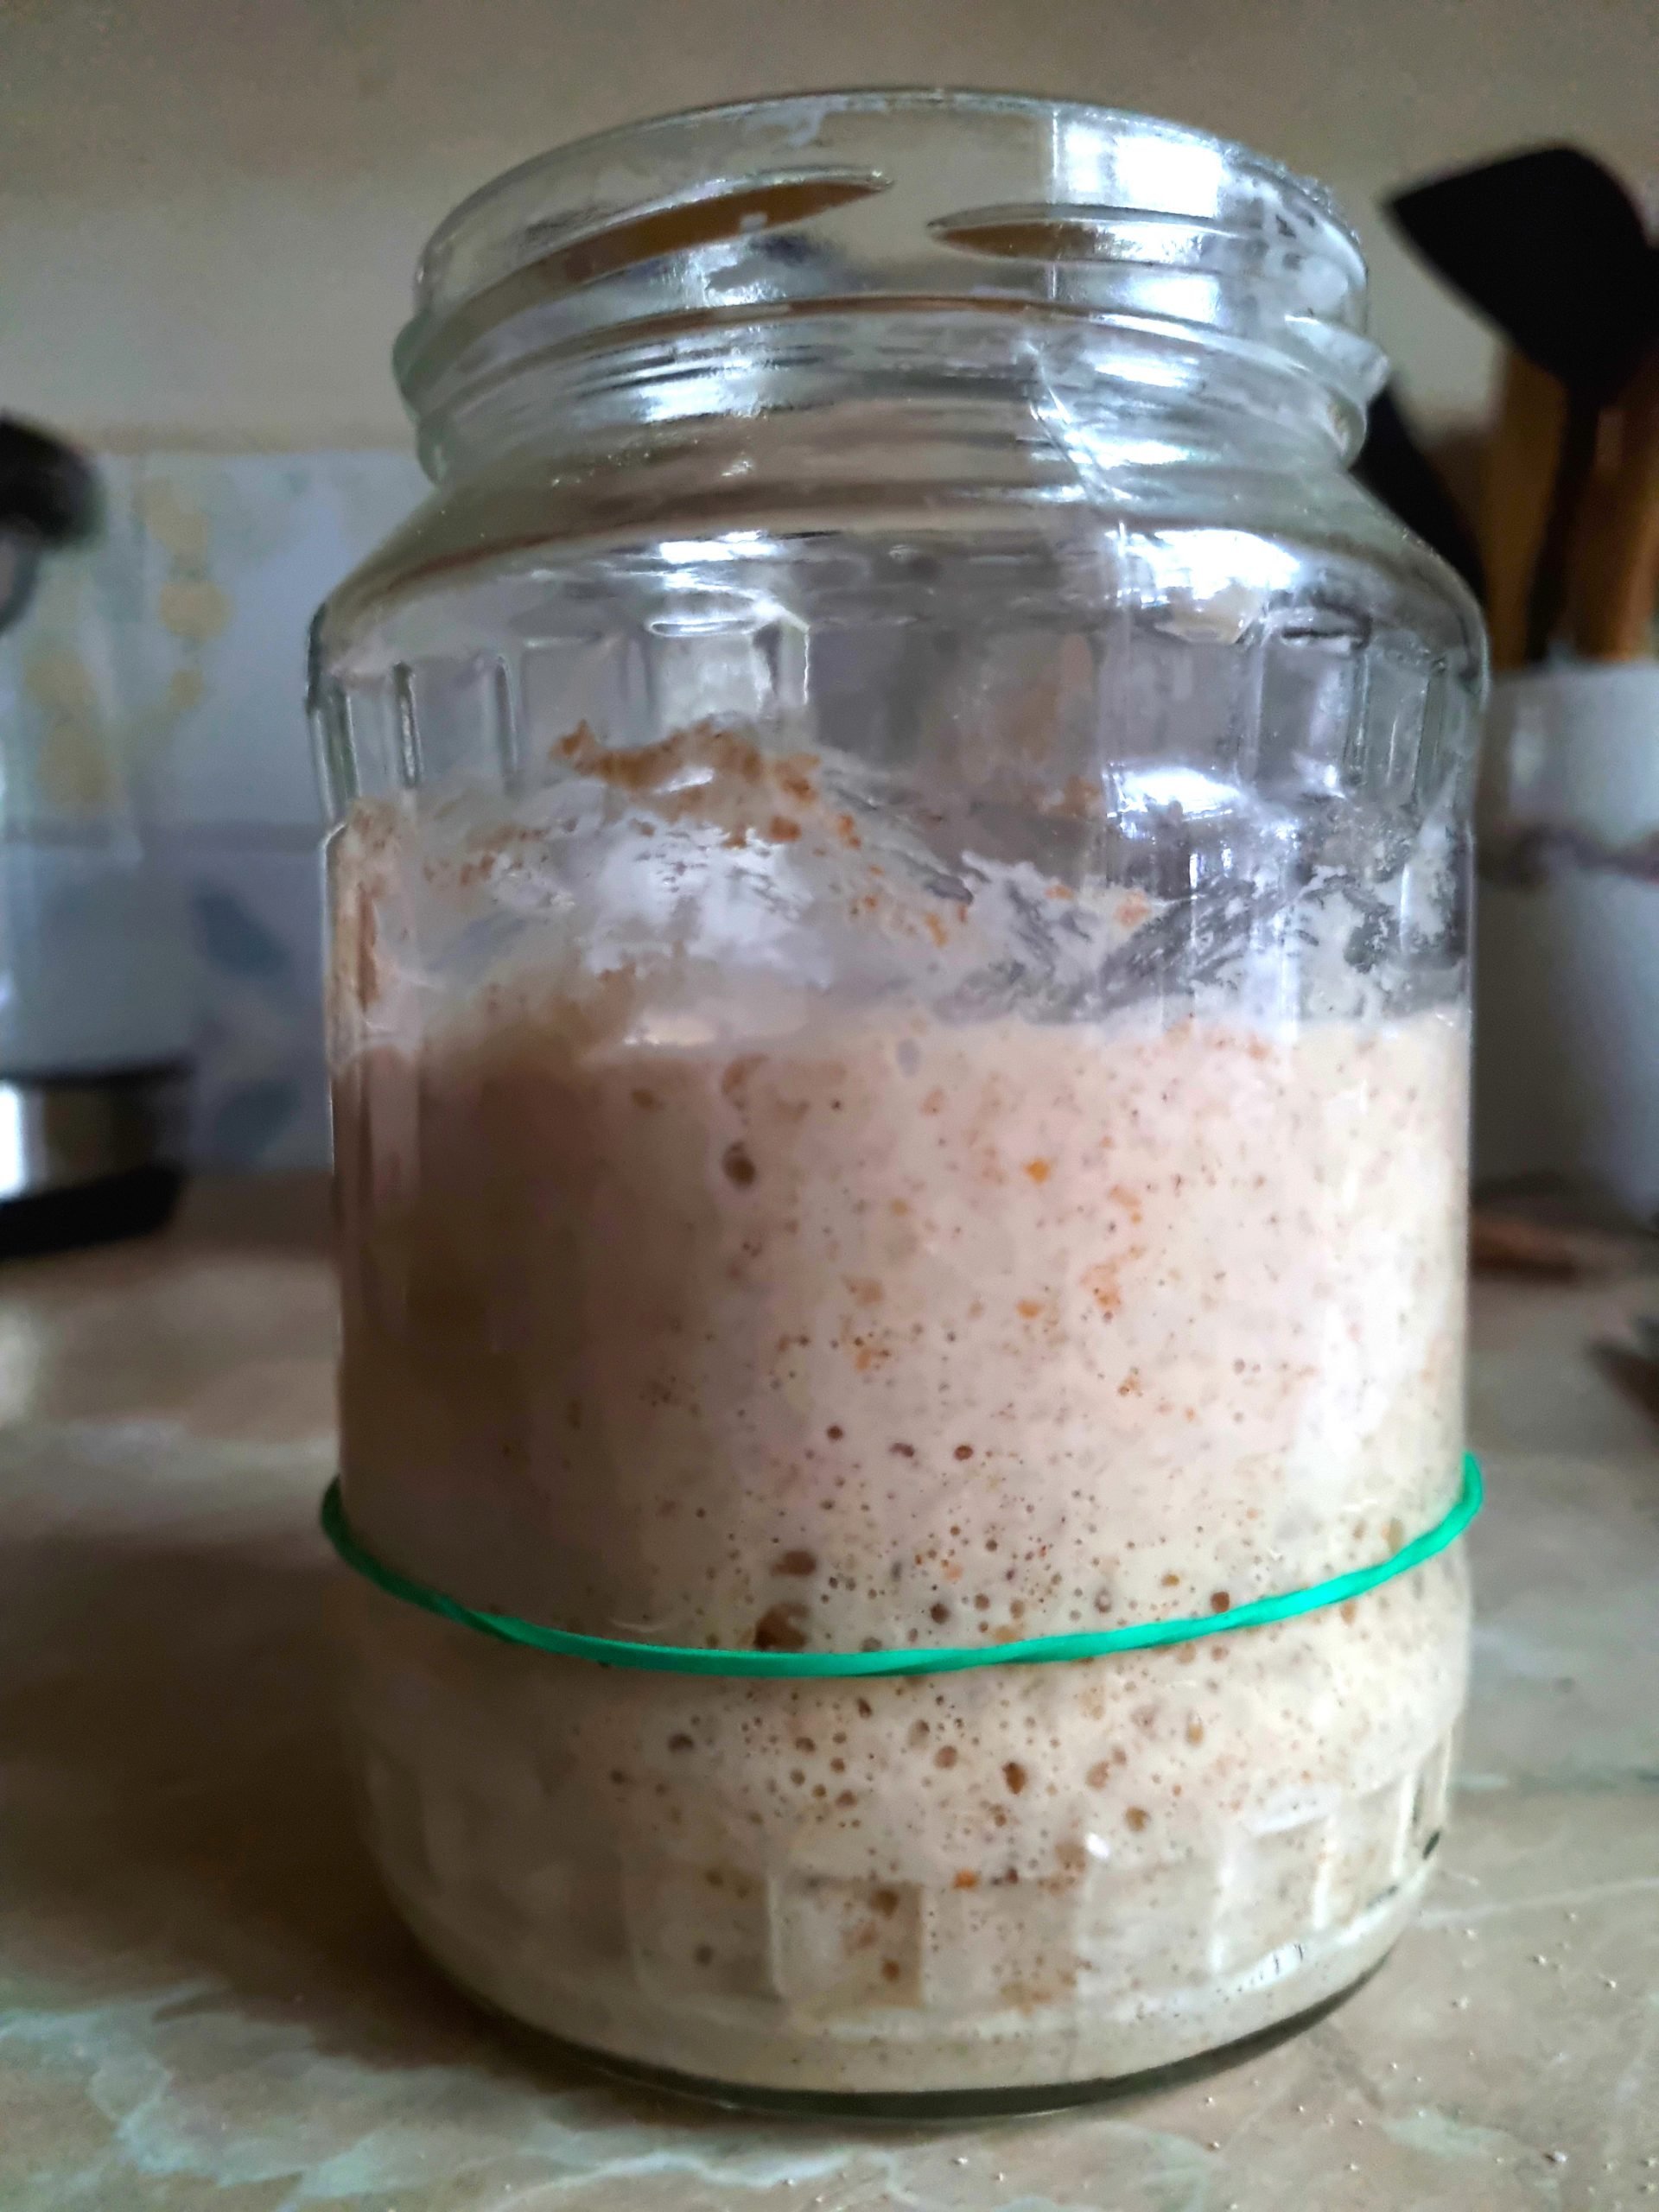
The maturity of a starter is defined by its peak activity – when it is risen to the maximum capacity and is bubbling but hasn’t started to go back down yet.
To make levain, add 50g (3 tbsp) mature starter, 50g (½ cup) flour, and 50g (⅕ cup) water to a jar and mix. Leave it to rise to its full capacity (3-5 hours depending on the temperature in your house).
STEP 2 - Mixing the Dough
Mix together the milk, eggs, flour, levain, sugar, and salt. You can use a stand mixer with a dough hook if you have one or you can do it as I did and do a little workout with your hands! When you feel that the dough has come together and is not sticking to the sides as much, let the dough rest in the mixing bowls for 10-15 minutes.
After that start adding butter little by little and mixing it into the dough. When the butter is fully incorporated continue mixing for some time (2-3 minutes) to make sure the dough comes together.
STEP 3 - Rising Time
Now leave your dough in the mixing bowl covered with a wet kitchen towel, place in a warm place in your house (but not too hot!), and let the dough rise. You want to cover it with a wet towel so that the moisture doesn’t escape the dough too much during the rising time.
During the rising time, you want to do 2 sets of stretch and folds for gluten to strengthen more. Do the first one 45 minutes after the start of the rising time and the second one 45 minutes after that.
You are looking for some rise – definitely not doubling in size! It might take a little bit over 2 hours to start seeing the rise. As soon as you do though, it is time for the next step.
STEP 4 - Overnight Fermentation
As your dough started to rise a bit, transfer the mixing bowl covered with a towel into the fridge. You want to let your dough sit in the fridge overnight for about 12-15 hours (depending on when you would like to bake your babka in the morning!)
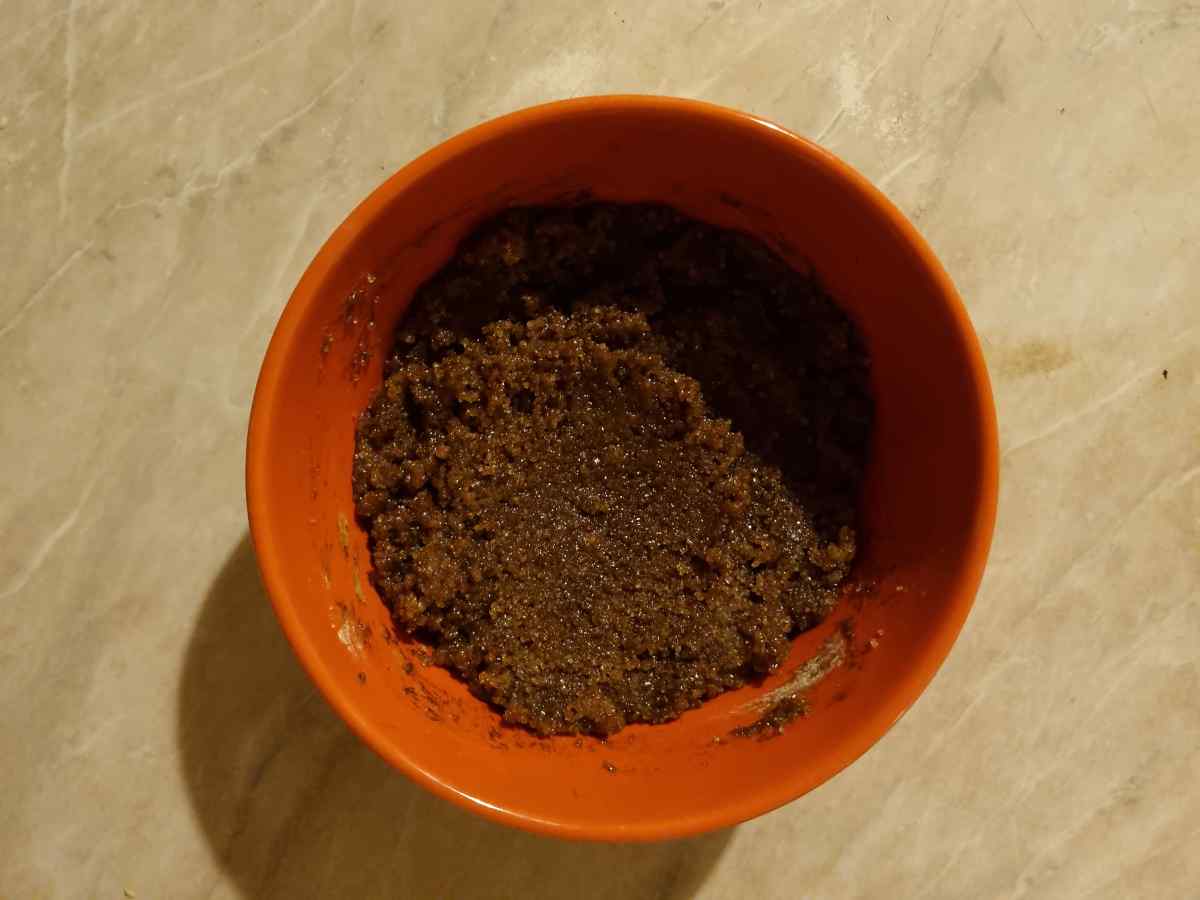
STEP 5 - Make the Filling
Melt the butter, but be careful not to burn it. Then mix all the ingredients together until incorporated and set aside until ready to use.
STEP 6 - Roll the Dough
Take the dough out from the refrigerator and roll it into about 22x45 cm rectangle (or about 10x20 inches). Then spread the filling leaving about 2 cm clean from the top and the bottom sides.
Roll the dough up and make sure to get it rolled up as tight as you can. As the dough is soft right now it might be hard to work with, so just place your roll into the freezer for 10-15 minutes before proceeding to the next step.
STEP 7 - Split the Babka and Braid
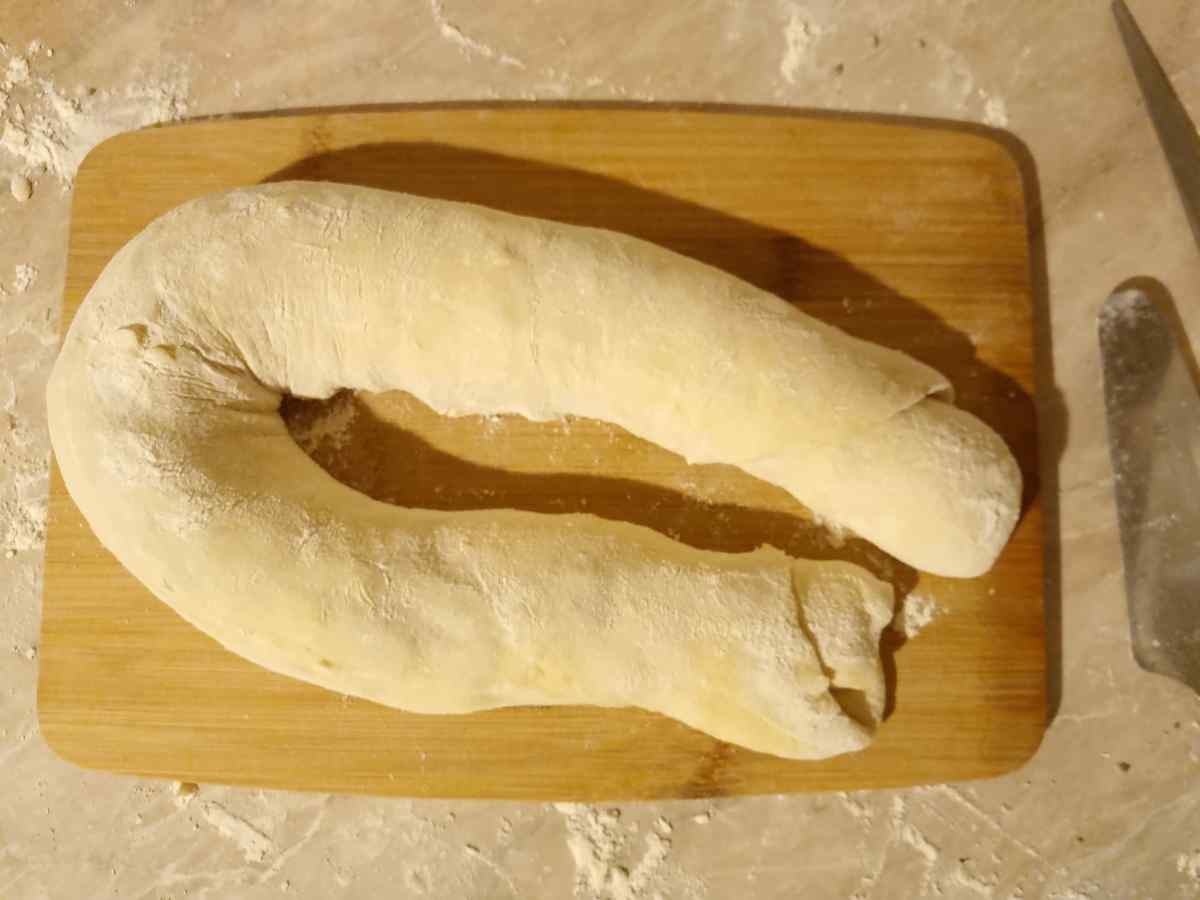
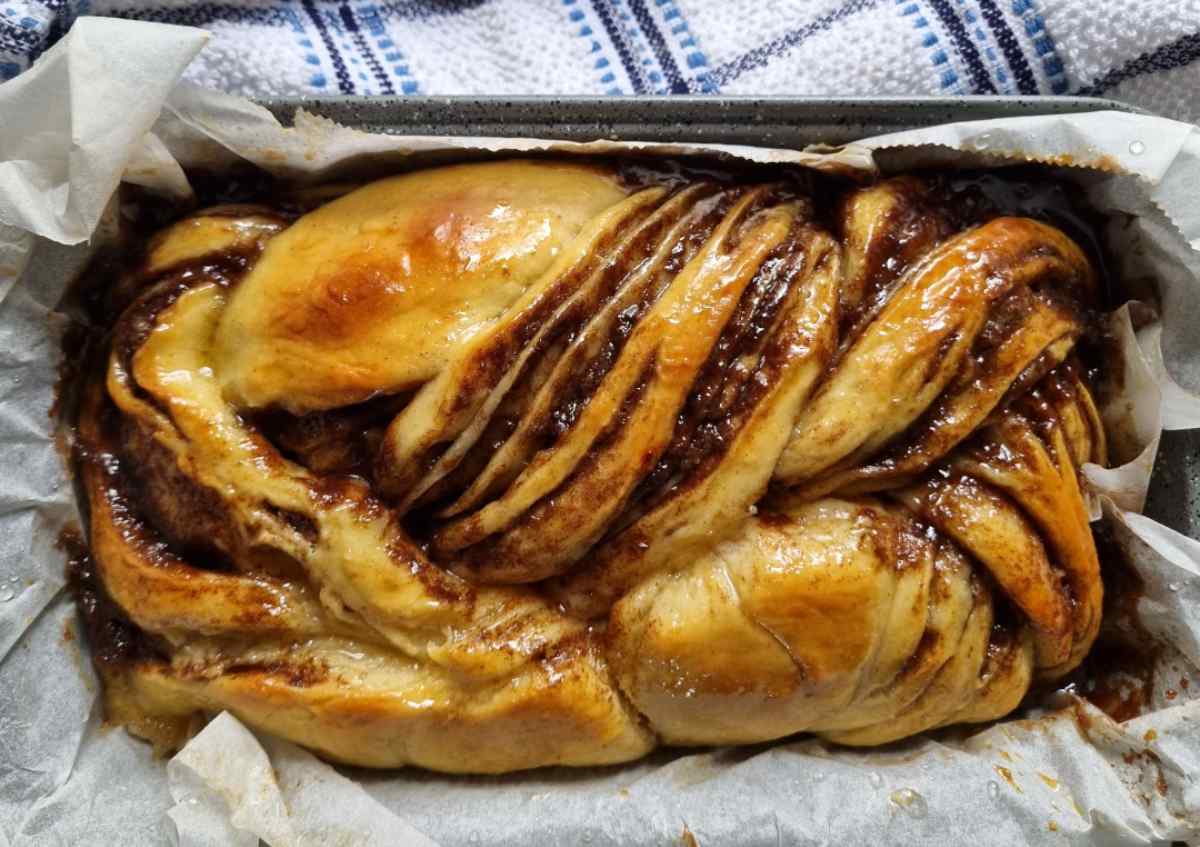
Take the roll out from the freezer and cut it into 2 long strands. After that pinch the tops of the strands and braid them like in the picture.
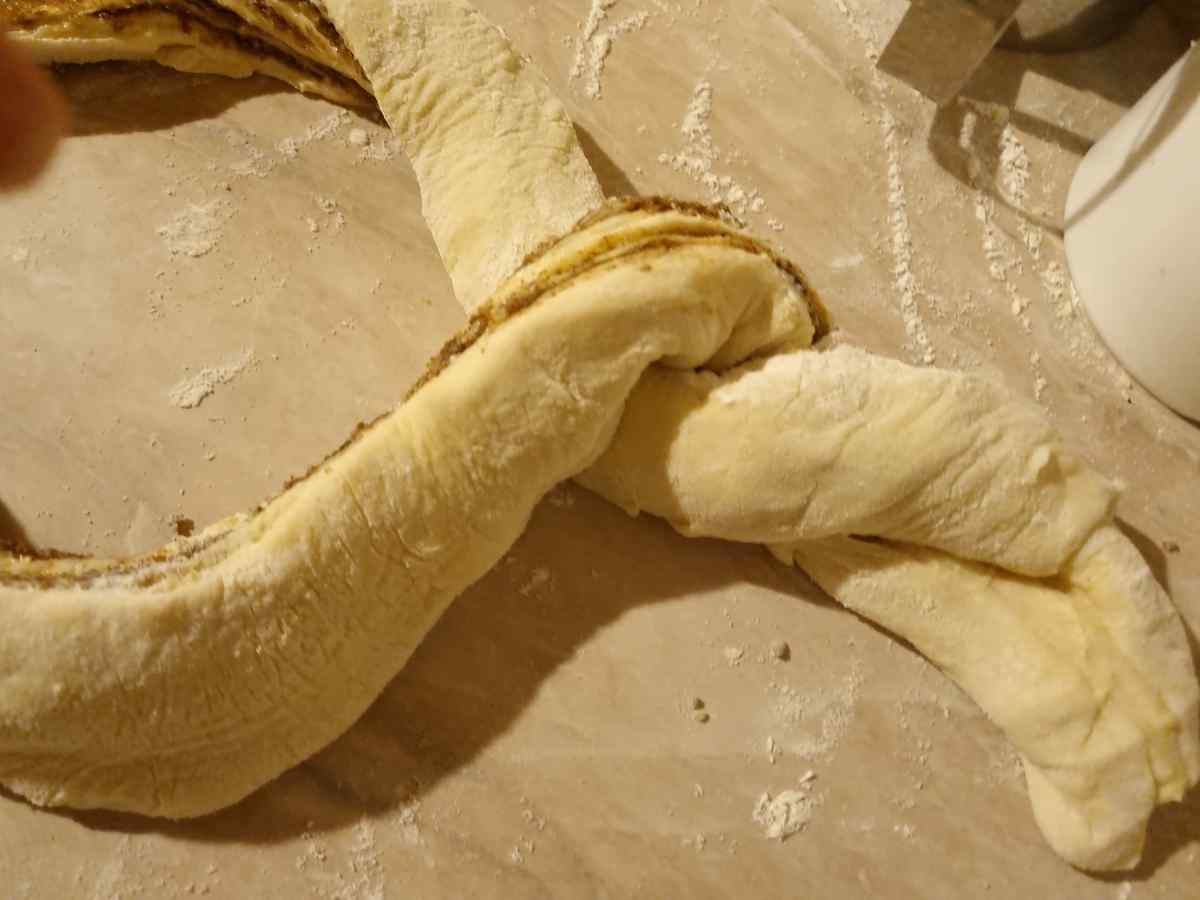
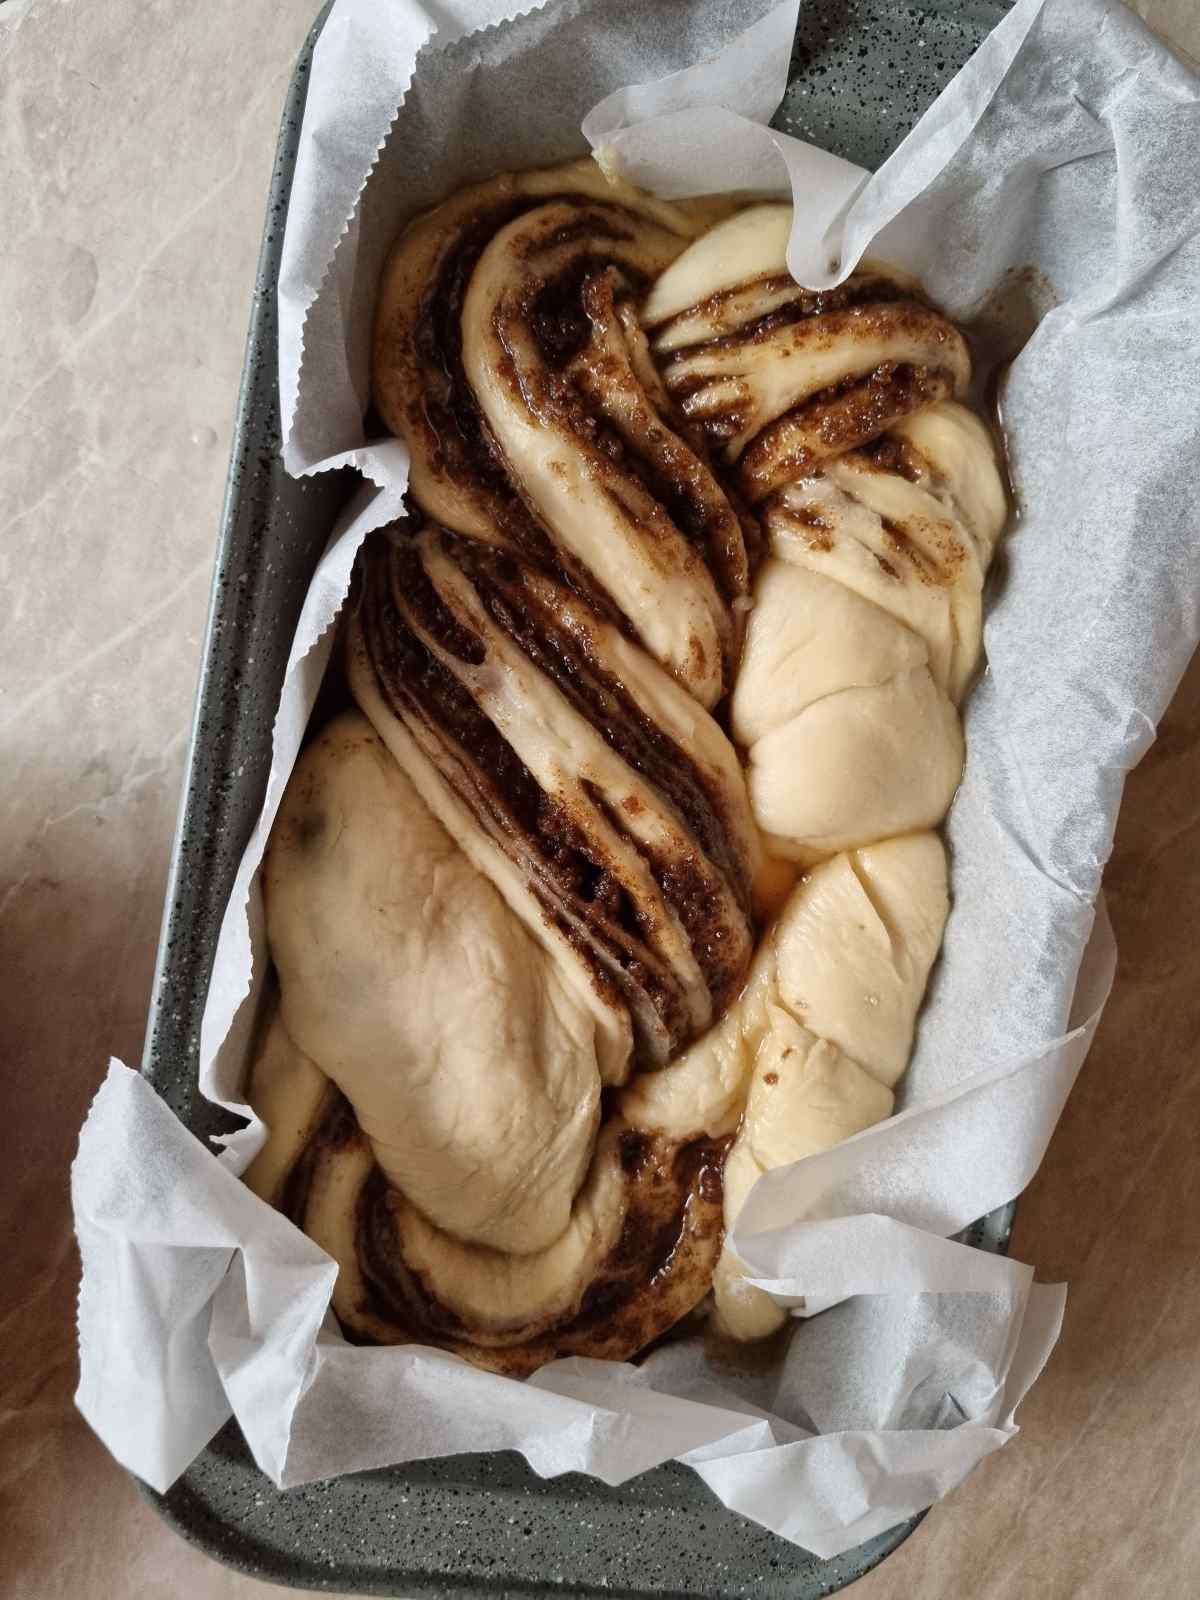
Prepare the bread baking tin lined with parchment paper. Place the braid into the tin and let it sit in a warm place to rise once again. This stage might take anywhere from 2.5 to 3.5 hours depending on how quickly your babka starts to rise. It doesn’t have to double in size but rise to about 10-20% of its original size.
STEP 8 - Bake
The moment has come! Preheat your oven to 175C/ 350F. While it is preheating prepare the egg wash. You will need 1 egg and 1 tablespoon of water mixed together. Brush your sourdough cinnamon babka with the egg wash so that it browns nicely on the top.
Then place the babka into the oven for 40-50 minutes (check with a toothpick for readiness.)
STEP 9 - Sugar Syrup on the Top!
In a small pot heat up ¼ cup of sugar and ¼ cup of water and mix until the sugar gets dissolved. This will go on top of your cinnamon babka right after it is out of the oven!
When you take out your sourdough cinnamon babka spread the sugar syrup you made on top of it and let the babka rest in the baking tin for about 15 minutes. Then you can take the babka out and let it cool completely before cutting into it. This is one of the hardest parts! But trust me, it is worth the wait.
Download my FREE sourdough babka baking timeline to keep at hand during baking!
[convertkit form=2857830]
Expert Tips
- If you find it hard to work with the filling, spread melted butter onto the dough first, then sprinkle the sugar and cinnamon mixture on top.
- To make a gluten-free sourdough babka substitute all-purpose flour for gluten-free flour. I rarely recommend 1:1 substitution but I have made this recipe with GF flour and, surprisingly, it turned out even better than the original!
- For the dairy-free version, use coconut oil in place of butter and plant-based milk.
- To make this recipe vegan, try using chia egg in place of eggs.
FAQ
Yes, you can freeze this babka sliced or whole. In either case, cover the babka with plastic wrap and place it in the freezer. To defrost pop it in the microwave, oven, or toaster, or let the babka thaw until it reaches room temperature.
Yes, you can braid the babka, place it into the bread pan, and keep it in the refrigerator until ready to bake (no longer than 18-20 hours). When ready to bake, take the babka out and let it rise for 1-2 hours (or longer depending on the temperature in your kitchen) and bake.
Yes, you can use a mature starter for this recipe instead of levain. Levain helps with the rise (as your babka has to rise a couple of times) but a mature starter will work well, too.
As with sourdough bread, sourdough babka doesn't do well if you place it into the refrigerator for the first (bulk) rise. It is better to let it rise at room temperature.
It could be due to a weak starter (see how to strengthen your starter), letting the dough rise for too long in the previous rising stage, or leaving the dough in a cold room for rising. Even if your babka doesn't do a big rise at the final stage, the chances are it will still puff up and rise a bit during baking!
What's Next?
Do you have some of that sourdough discard still lying around waiting for the next baking party? No need to go far for ideas!
Try these fluffy sourdough pancakes for breakfast and these delicious sourdough discard chocolate chip pumpkin muffins for dessert!
If you made this Sourdough Cinnamon Babka at home, please share your experience in the comments below!
[convertkit form=2984496]
📖 Recipe
Sourdough Babka with Cinnamon
Equipment
- 1 hand or stand mixer (optional)
- 1 digital scale (optional but highly recommended)
Ingredients
Levain (optional)
- 50 g (3 tbsp) mature starter
- 50 g (½ cup) all-purpose flour
- 50 g (⅕ cup) water cold or warm, not hot
Dough
- 320 g (2½ cups) all-purose flour
- 110 g (⅓ cup) milk room temperature
- 2 eggs room temperature
- 105 g (½ cup) butter room temperature
- 30 g (¼ cup) powdered sugar for a better texture
- 8 g (1½ tsp) sea salt or other salt
Filling
- 200 g (1 cup) brown sugar
- 15 g (⅛ cup) all-purpose flour
- 43 g (3 tbsp) butter
- ¼ teaspoon salt
- 3 teaspoon ground cinnamon
Instructions
- For this recipe, you can use levain OR mature starter. The difference is that with levain the dough will have a better chance of rising, however, using a mature starter will save you time if you are on a schedule! To make levain you need to feed a mature starter and let it mature again. This adds strength to the bacteria and gives a better chance for the dough to rise and ferment.
- To make levain, add 50g (3 tbsp) mature starter, 50g (½ cup) flour, and 50g (⅕ cup) water to a jar and mix. Leave it to rise to its full capacity (3-5 hours depending on the temperature in your house).
- Mix together the milk, eggs, flour, levain, sugar, and salt. You can use a stand mixer with a dough hook if you have one or you can do it as I did and do a little workout with your hands! When you feel that the dough has come together and is not sticking to the sides as much, let the dough rest in the mixing bowls for 10-15 minutes.After that start adding butter little by little and mixing it into the dough. When the butter is fully incorporated continue mixing for some time (2-3 minutes) to make sure the dough comes together.
- Now leave your dough in the mixing bowl covered with a wet kitchen towel, place in a warm place in your house (but not too hot!), and let the dough rise. You want to cover it with a wet towel so that the moisture doesn’t escape the dough too much during the rising time.During the rising time, you want to do 2 sets of stretch and folds for gluten to strengthen more. Do the first one 45 minutes after the start of the rising time and the second one 45 minutes after that.You are looking for some rise – definitely not doubling in size! It might take a little bit over 2 hours to start seeing the rise. As soon as you do though, it is time for the next step.
- As your dough started to rise a bit, transfer the mixing bowl covered with a towel into the fridge. You want to let your dough sit in the fridge overnight for about 12-15 hours (depending on when you would like to bake your babka in the morning!)
- Melt the butter, but be careful not to burn it. Then mix all the ingredients together until incorporated and set aside until ready to use.
- Take the dough out from the refrigerator and roll it into about 22x45 cm rectangle (or about 10x20 inches). Then spread the filling leaving about 2 cm clean from the top and the bottom sides.Roll the dough up and make sure to get it rolled up as tight as you can. As the dough is soft right now it might be hard to work with, so just place your roll into the freezer for 10-15 minutes before proceeding to the next step.
- Take the roll out from the freezer and cut it into 2 long strands. After that, pinch the tops of the strands and braid them like in the picture.
- Prepare the bread baking tin lined with parchment paper. Place the braid into the tin and let it sit in a warm place to rise once again. This stage might take anywhere from 2.5 to 3.5 hours depending on how quickly your babka starts to rise. It doesn’t have to double in size but rise to about 10-20% of its original size.
- The moment has come! Preheat your oven to 175C/ 350F. While it is preheating prepare the egg wash. You will need 1 egg and 1 tablespoon of water mixed together. Brush your sourdough cinnamon babka with the egg wash so that it browns nicely on the top.Then place the babka into the oven for 40-50 minutes (check with a toothpick for readiness.)
- In a small pot heat up ¼ cup of sugar and ¼ cup of water and mix until the sugar gets dissolved. This will go on top of your cinnamon babka right after it is out of the oven!When you take out your sourdough cinnamon babka spread the sugar syrup you made on top of it and let the babka rest in the baking tin for about 15 minutes. Then you can take the babka out and let it cool completely before cutting into it. This is one of the hardest parts! But trust me, it is worth the wait.

Comments
No Comments