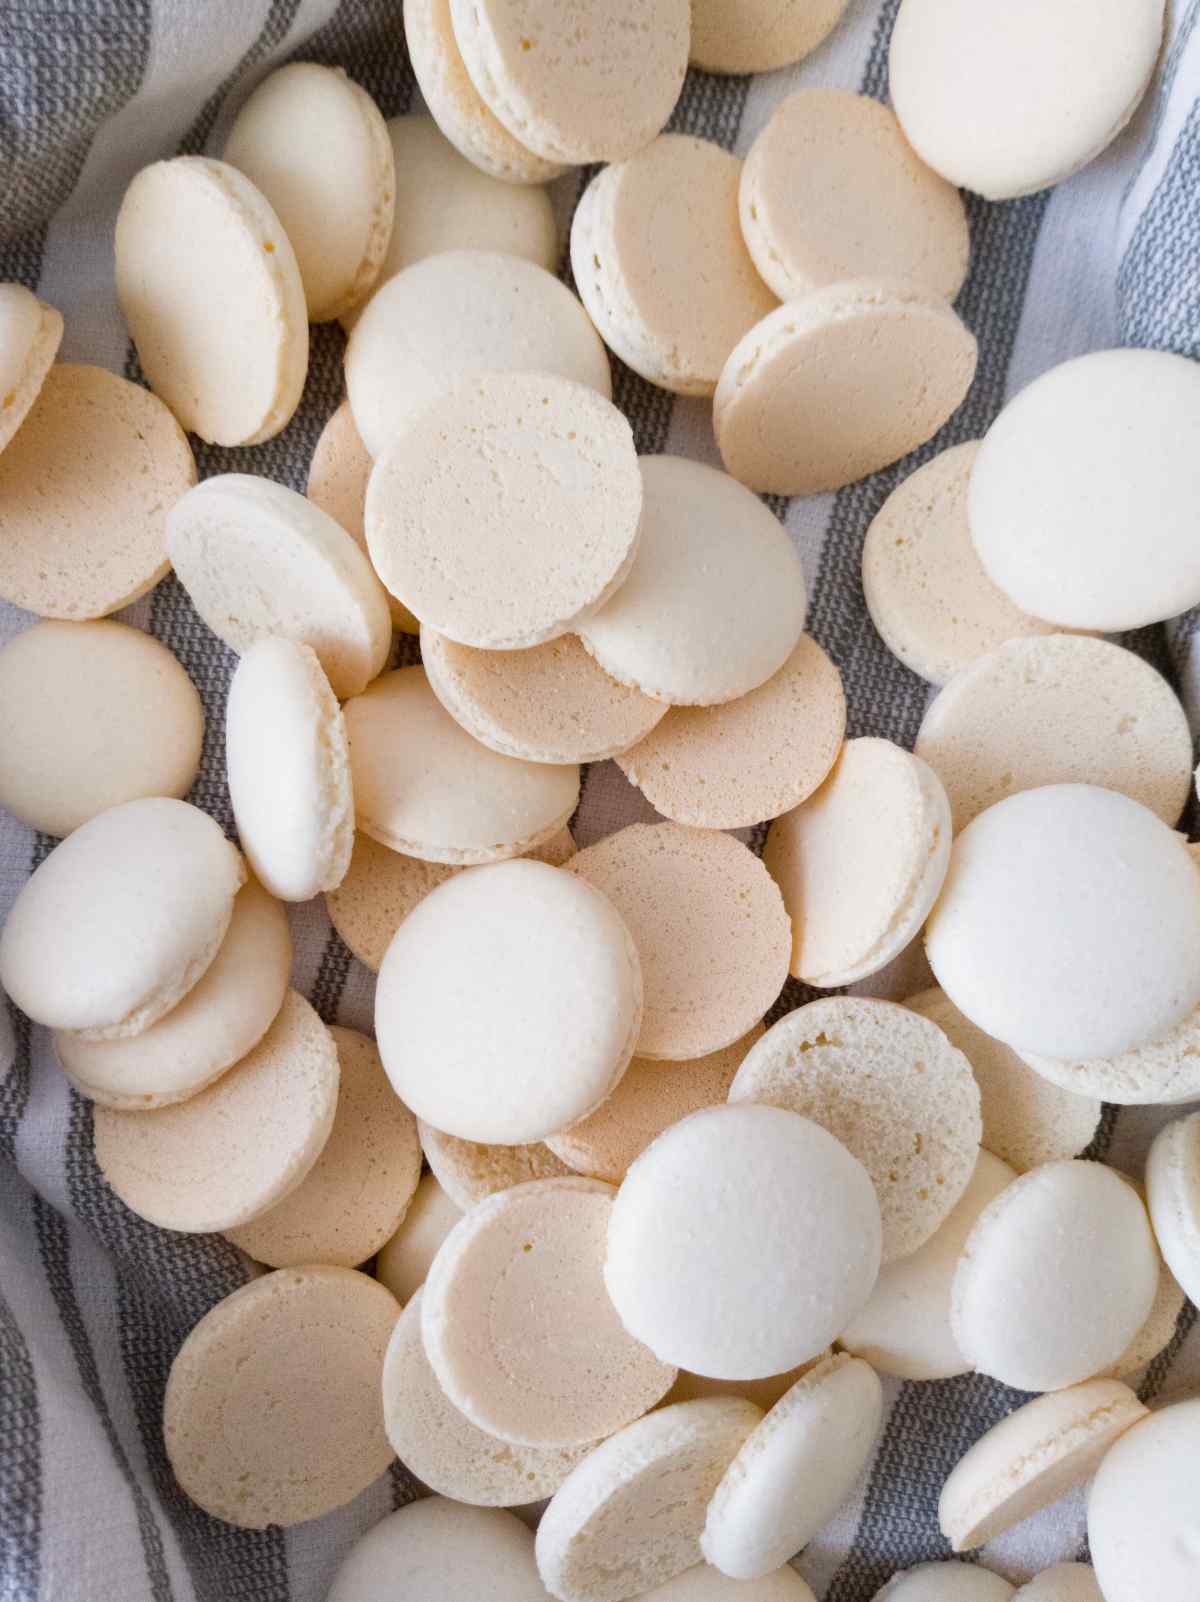
Swiss meringue macarons are somewhere in between the difficulty levels of the French and Italian methods. I personally like the Swiss method better because it seems to produce the most stable results!
Jump to:
- Why You Will Love This Recipe
- The Difference Between Swiss, French, and Italian Macarons
- Which Method Is More Consistent?
- Ingredients
- Substitutes
- Special Tools
- Step-By-Step Instructions
- Storage
- The Best Filling for Macarons
- Maturing the Macarons
- How To Serve
- Troubleshooting
- FAQ
- 📖 Recipe
- Storage
- Maturing the Macarons
- 💬 Community
Why You Will Love This Recipe
- Crispy outside combined with the soft interior make these cookies so special and irresistible! They melt in your mouth.
- This method is the most stable out of all. So, even if you are a beginner, you will most probably get great-looking macarons!
- You can make this recipe using a hand mixer.
The Difference Between Swiss, French, and Italian Macarons
There are three most popular methods for making macarons: French, Italian, and Swiss. They use the same ingredients but the process is different enough to prefer one over another. Here is a detailed breakdown of the three methods.
French Method
The French method is the simplest one. All you need to do is beat the egg whites with sugar and fold the sifted almond flour and powdered sugar into the whipped egg whites. The macaronage process is the same in all three methods. Once the batter is ready, you need to pipe and rest the macarons before baking. The baking times and temperature are the same for all methods.
These caramel buttercream macarons are made using the French method.
Italian Method
This method is the most complicated of all three and, in my experience, the results are not better than with other methods. For Italian meringue, you need to first make sugar syrup by bringing the syrup up to a very specific temperature. While you are making the syrup, you need to start whisking the eggs on low speed until foam forms. As soon as the syrup reached the needed temperature you need to start pouring it into the egg whites that are already at the foaming stage.
Other than that, you also need to make a paste by combining the almond flour, powdered sugar, and part of the egg whites in a separate bowl. Then, this paste is added to the whipped egg whites at the end and folded in until the right batter consistency.
So, for this method, you need to either have two people working or you need to have a stand mixer. I have tried this method with a hand mixer and it was difficult to get all the steps right by myself. Plus, as you pour the syrup, if it touches the whisks sugar crystallizes creating a lot of mess.
Swiss Method
Finally, there is the Swiss method which requires a bit more preparation than the French method but is not nearly as complex as the Italian method. With this recipe, you need to whisk the egg whites with sugar in a bowl over a double boiler until the sugar dissolves (you don't need a thermometer for that). Then, you whip the egg whites with the melted sugar until stable peaks and fold in the sifted almond flour with powdered sugar until the right batter consistency.
So, this method is similar to the French method, yet, it is more stable and yields more consistent results.
Which Method Is More Consistent?
In my experience, the Swiss method is the most stable and consistent one out of all three. While the French method is easy, it was difficult for me to get rid of the bumpy tops while Italian macarons oftentimes either caramelized at the batter stage or did not thicken at all, and I had to throw away egg whites with sugar.
With the Swiss method, my macarons turned out perfect each time (although I did learn a couple of skills while trying out all the other methods).
Ingredients
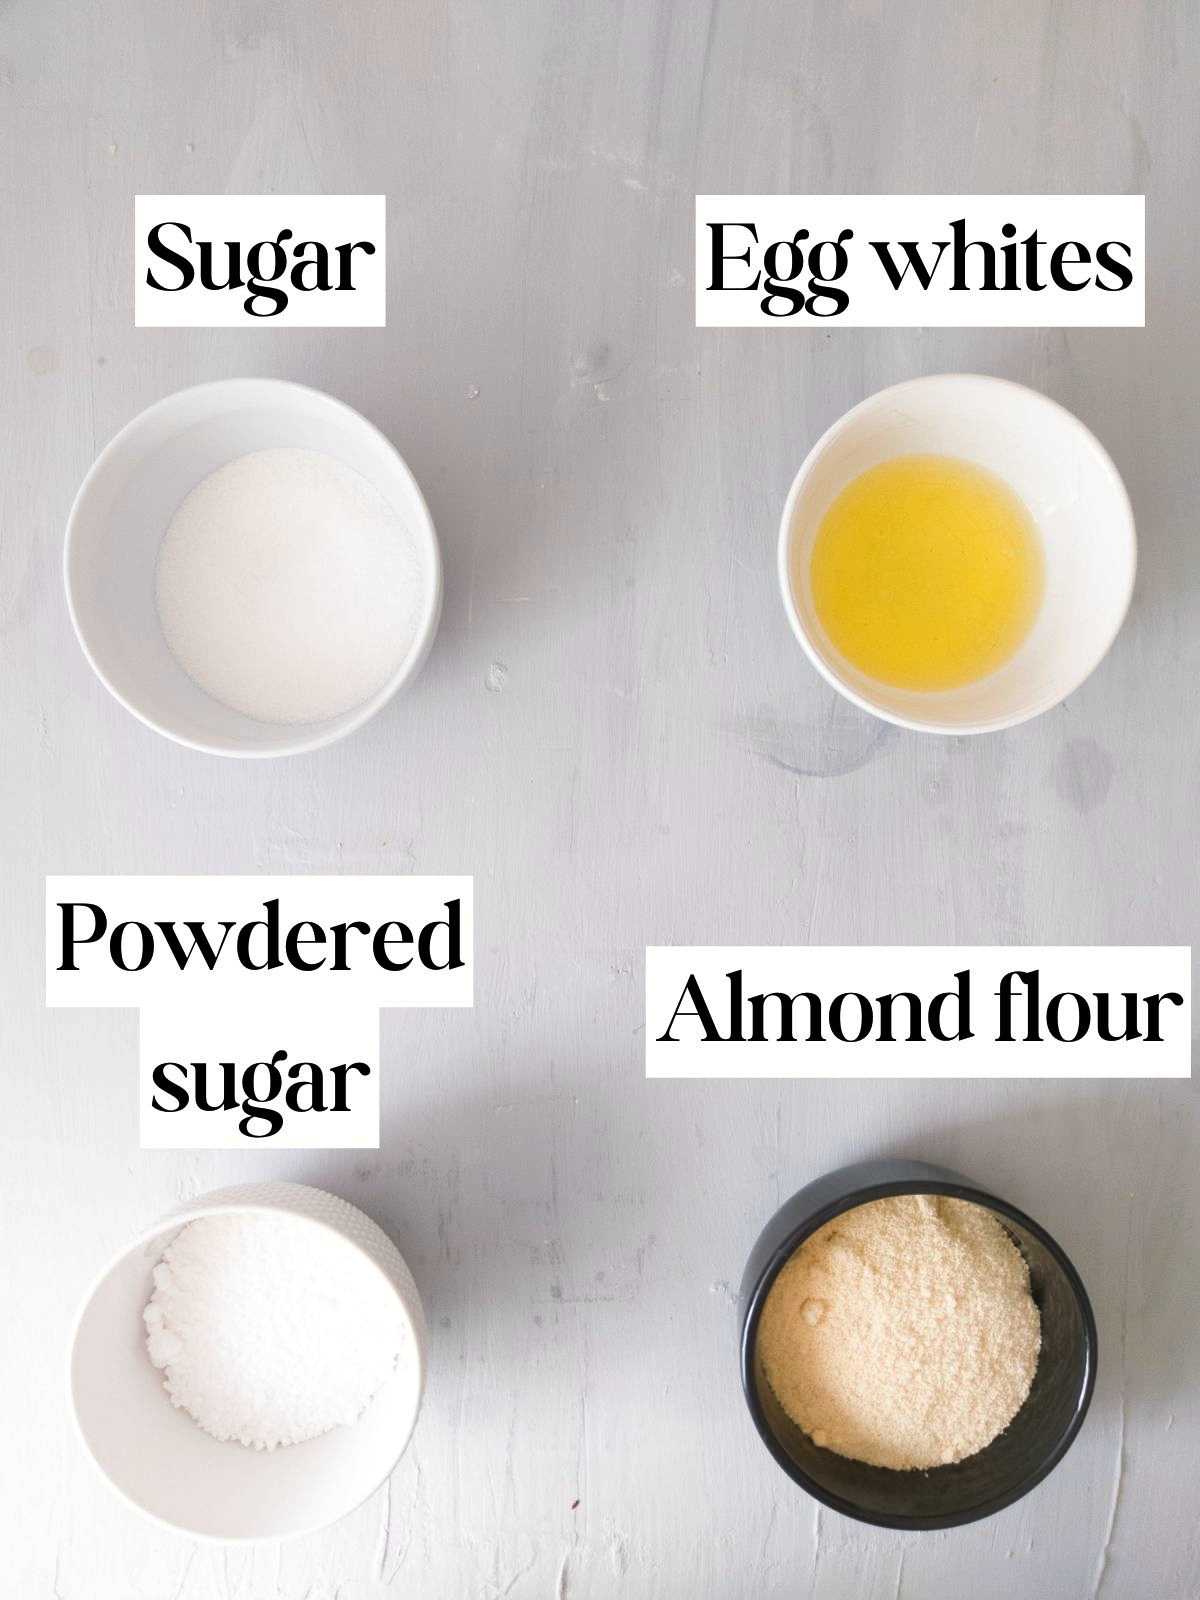
Sugar - you need both granulated and powdered sugar. The reason we are using granulated sugar is that it will dissolve in the egg whites anyways, so using a more expensive powdered sugar doesn't make sense for that specific step. We will, however, use powdered sugar for the macaronage stage!
Egg whites - do not use boxed egg whites already separated from the yolks! Separate your own egg whites to make sure they are clean and do not contain any traces of fat which can ruin your meringue.
Almond flour - you need your flour to be as fine as possible to avoid lumpy tops. If after sifting the flour you have more than 1 tablespoon left in the sieve, consider trying a different brand of almond flour the next time around! Some people recommend blending almond flour yourself in a food processor but the flour might release oil and potentially ruin the macarons. If you do decide to blend the flour anyways, make sure to add powdered sugar for absorption of any released oils.
Substitutes
This is the fun part where all the non-traditional macaron recipes come into the picture.
Almond flour - I have never made macarons with other flour types BUT you can check out this all-purpose flour macaron recipe.
*Update - I created these coconut flour macarons if you need to substitute almond flour and keep the recipe gluten-free.
Egg whites - to make vegan macarons you can use aquafaba (the water from canned chickpeas). Here is a good recipe for eggless macarons.
Sugar - it is possible to make macarons with a sugar substitute, for details refer to this sugar-free macaron recipe.
Special Tools
This post contains affiliate links which means I would earn a small commission at no cost to you. 🙂
There are a few specific tools you need to use for macarons to ensure success.
Silicone mats - parchment paper can mess up your macarons so the best way to go is to get a couple of silicone mats. You can use the ones with macaron circles already mapped out for you or the simple flat ones.
A metal/glass/ceramic bowl - some sources state that plastic bowls can be responsible for macaron failure. I personally always use a metal bowl but you can also try a glass or a ceramic bowl!
A hand mixer/stand mixer - egg whites need a lot of whipping so you will need an electric mixer of some sort. You can use either a hand mixer or a stand mixer for this recipe!
Piping bag - you can use any kind of piping bag. I personally use a silicone bag so that it is easy to clean/reuse but you can also use plastic bags that can be thrown away.
Piping tips - there is no strict rule on what size tip you should use. If you want normal-size macarons, use the tip that is not too large, not too small. If you are making large macarons, use a bigger tip. You can try out different tips to see what works best for you! For macarons with cartoon shapes, you might need a smaller tip.
A digital kitchen scale - you need to use a scale to make sure your macarons turn out great!
An oven thermometer - most ovens run hot or cold so you need to use an oven thermometer to make sure you are baking at the right temperature.
Step-By-Step Instructions
Preparation
First of all, you need to make sure all of your tools are clean. To ensure that no food traces stay on the tools, you can use a kitchen or a paper towel with a little bit of vinegar to wipe the tools and the bowl. You only need to wipe those tools that will be touching the egg whites before the macaronage. So, the sieve and the bowl for the almond flour don't need to be wiped.
You also want to prepare the silicone mats ahead of time. Take the metal sheet pans from the oven and place them upside down on a flat surface. Then, place the silicone mats on top of them. Placing the sheet pans upside down will ensure a steady airflow!
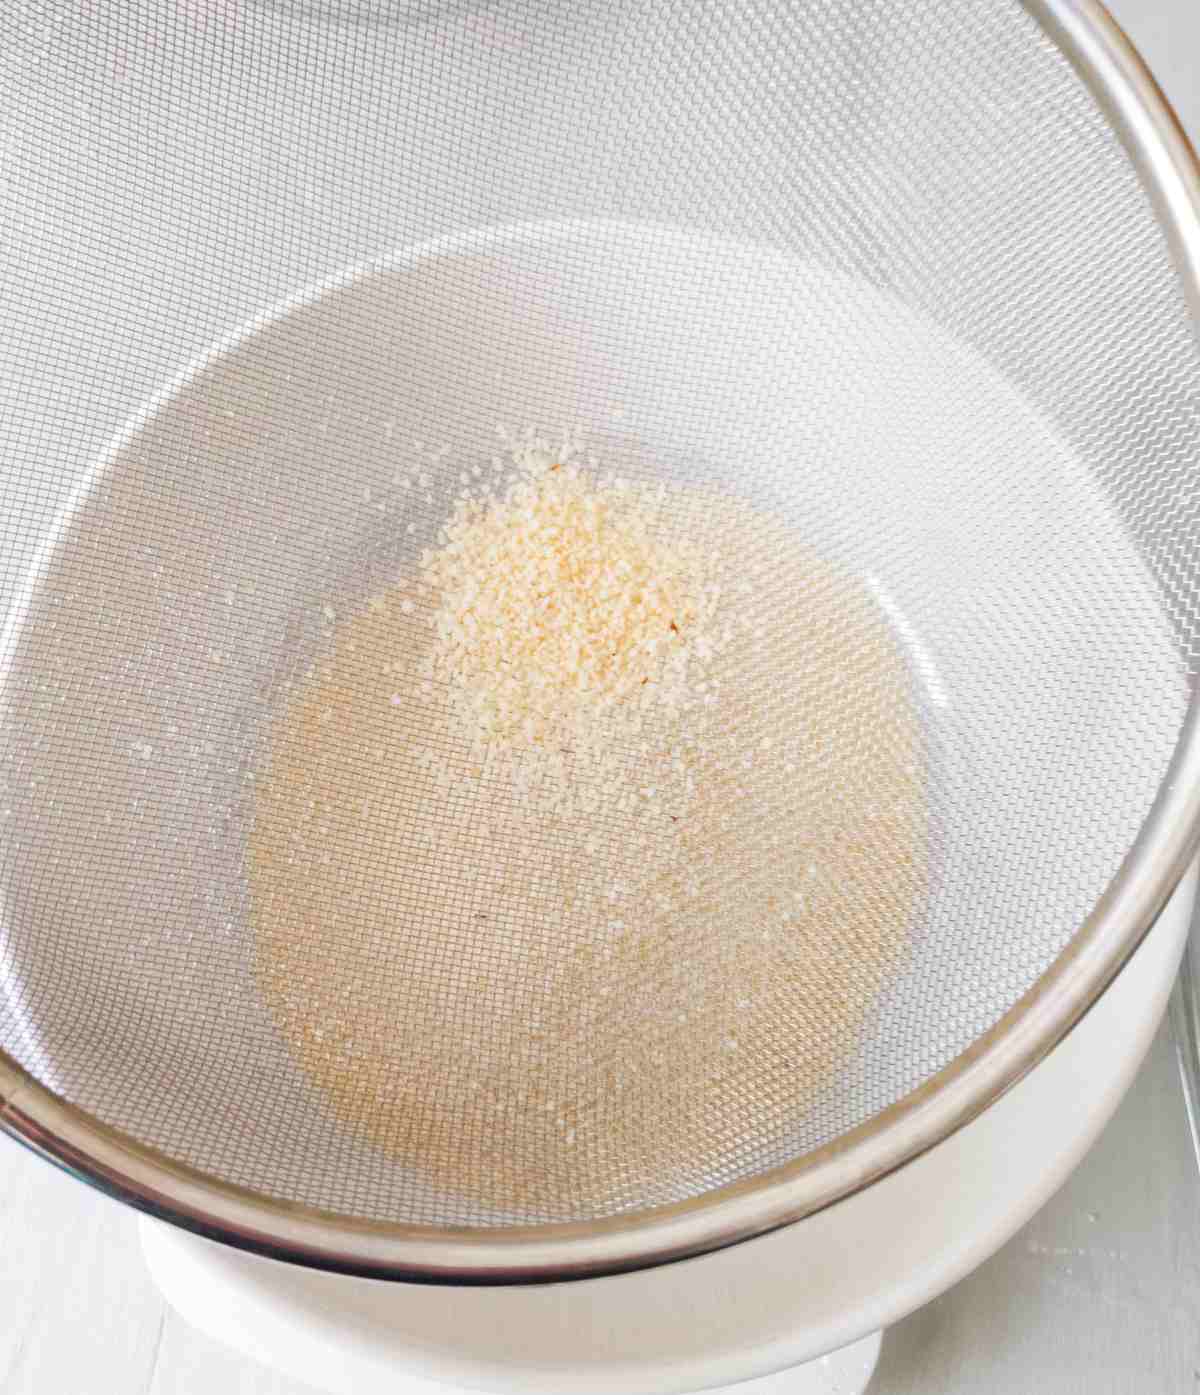
Measure the almond flour and the powdered sugar into separate bowls using a digital kitchen scale. Then, sieve the almond flour over a large bowl placed on a digital kitchen scale. You should have no more than 1 tablespoon of almond flour left in the sieve. If it is more than that, consider using a different flour brand next time! Place the leftover larger almond flour from the sieve into a small bowl and add it to oatmeal or a smoothie later.
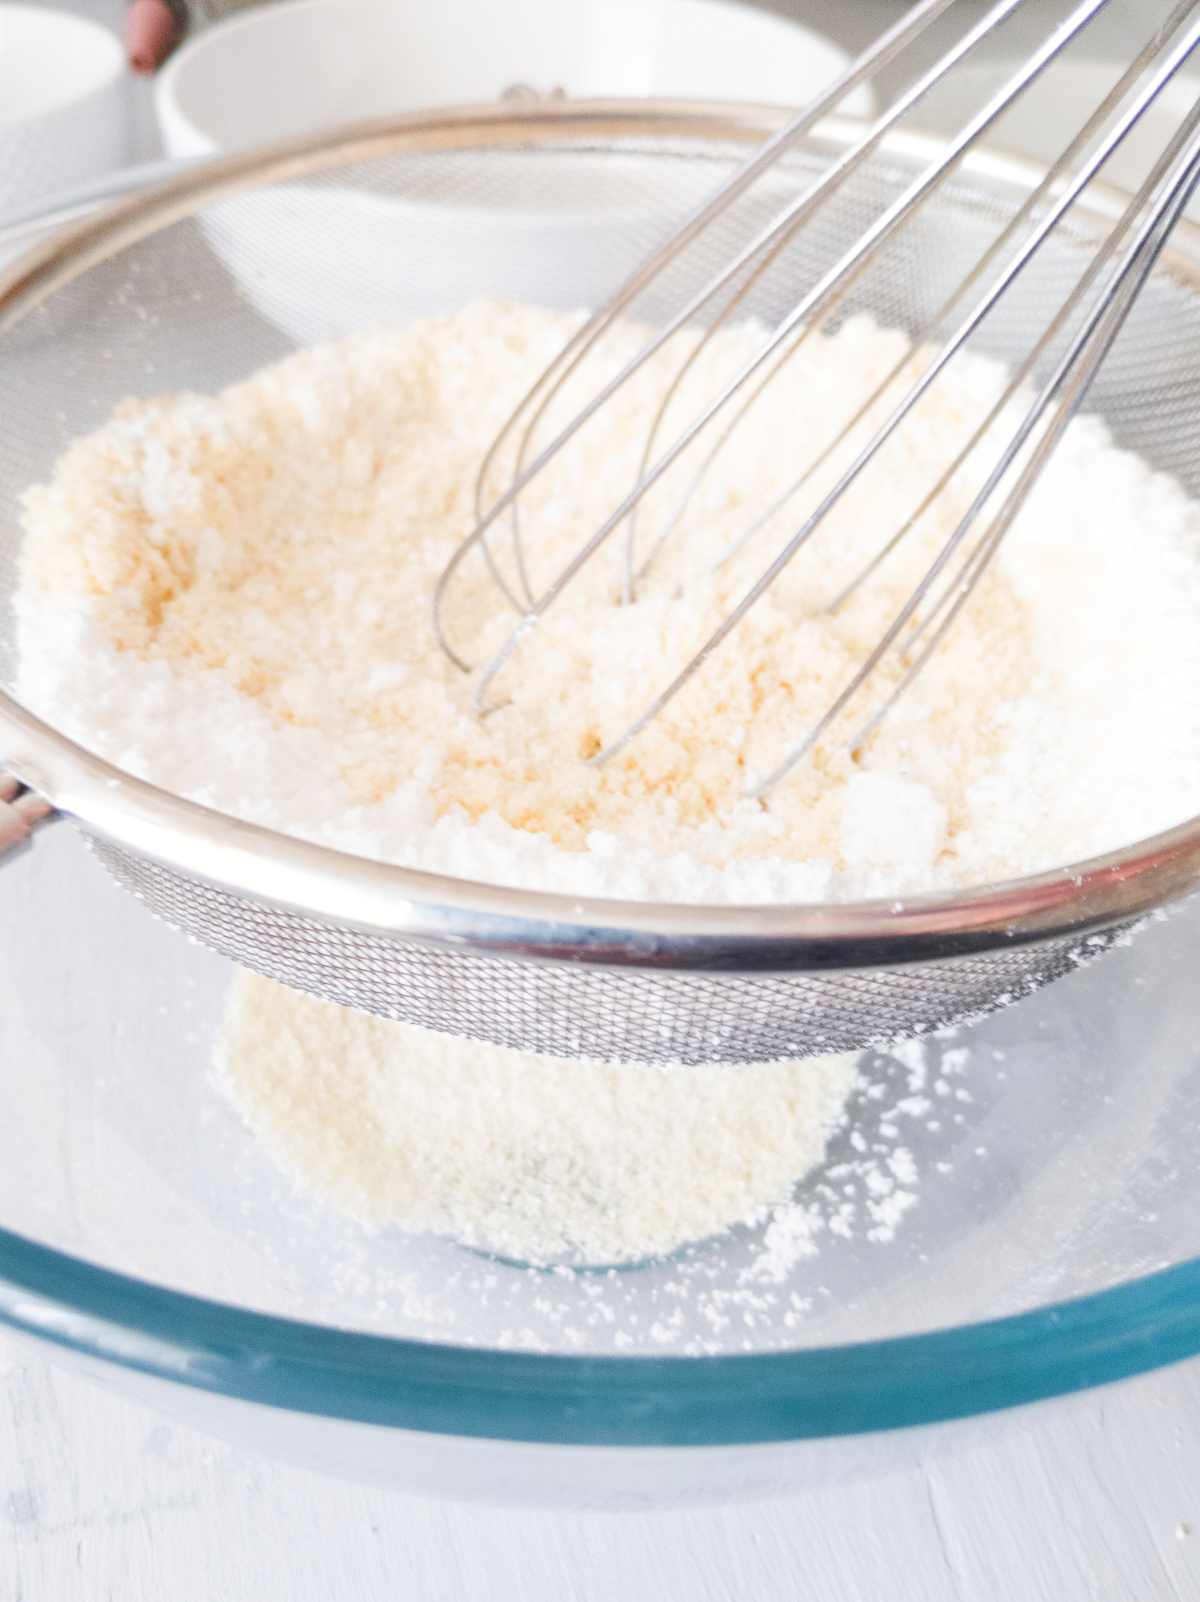
Add a little bit of almond flour to the sieve until the amount in the bowl reaches 120 grams. Then, sieve almond flour and powdered sugar together over a large bowl and set aside.
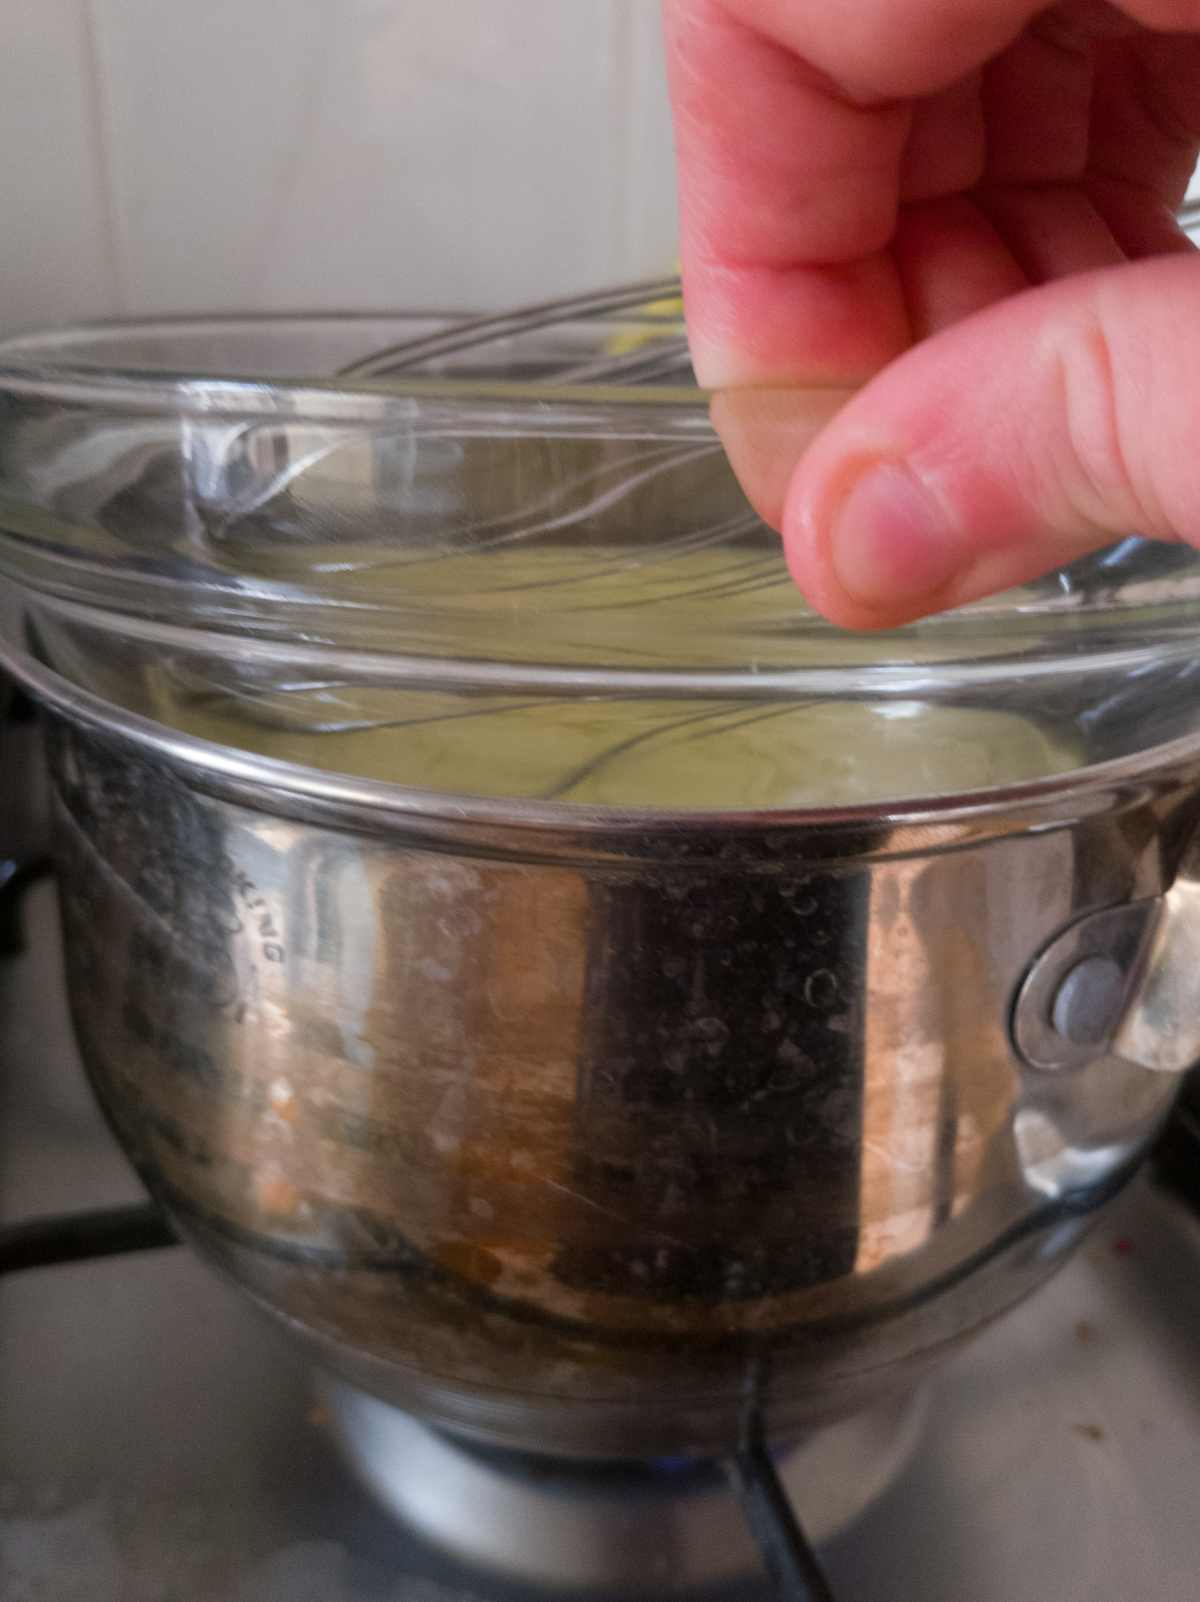
Add some water to a small saucepan and start heating it over medium heat. Place the egg whites with granulated sugar into a separate glass/stainless steel bowl and put on top of the small saucepan with water. Make sure the water doesn't touch the bowl with the egg whites to prevent them from cooking.
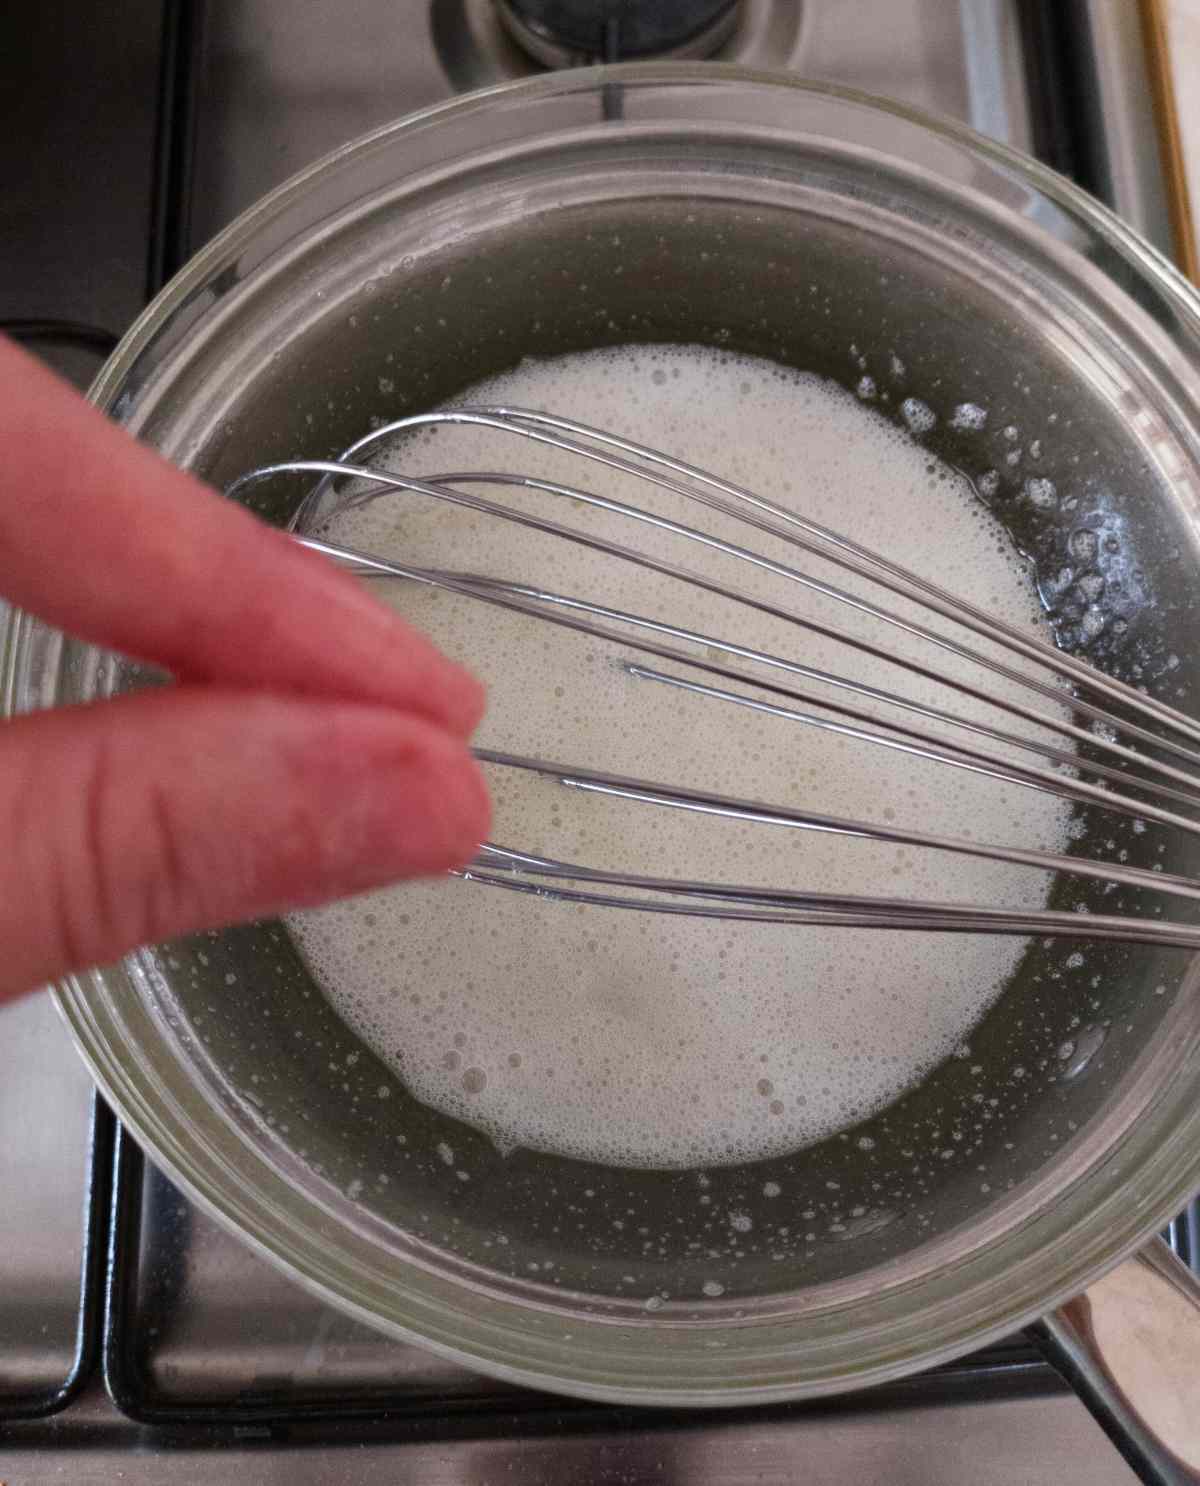
Continuously stir the egg whites with sugar as long as they are above the hot water to prevent cooking. Keep the egg whites over the heat until the sugar granules dissolve. You can touch the eggs with your fingers and if you still feel sugar granules, hold them over the heat a little bit longer. Take the egg whites off as soon as the sugar dissolves, don't heat for too long.
Whipping the Egg Whites
Once the sugar is dissolved, you can start whipping the egg whites. No need to hurry here! You can whip them right away or set the egg whites aside and whip them hours later if you need to. Just make sure that the egg whites are at least at room temperature before whipping them.
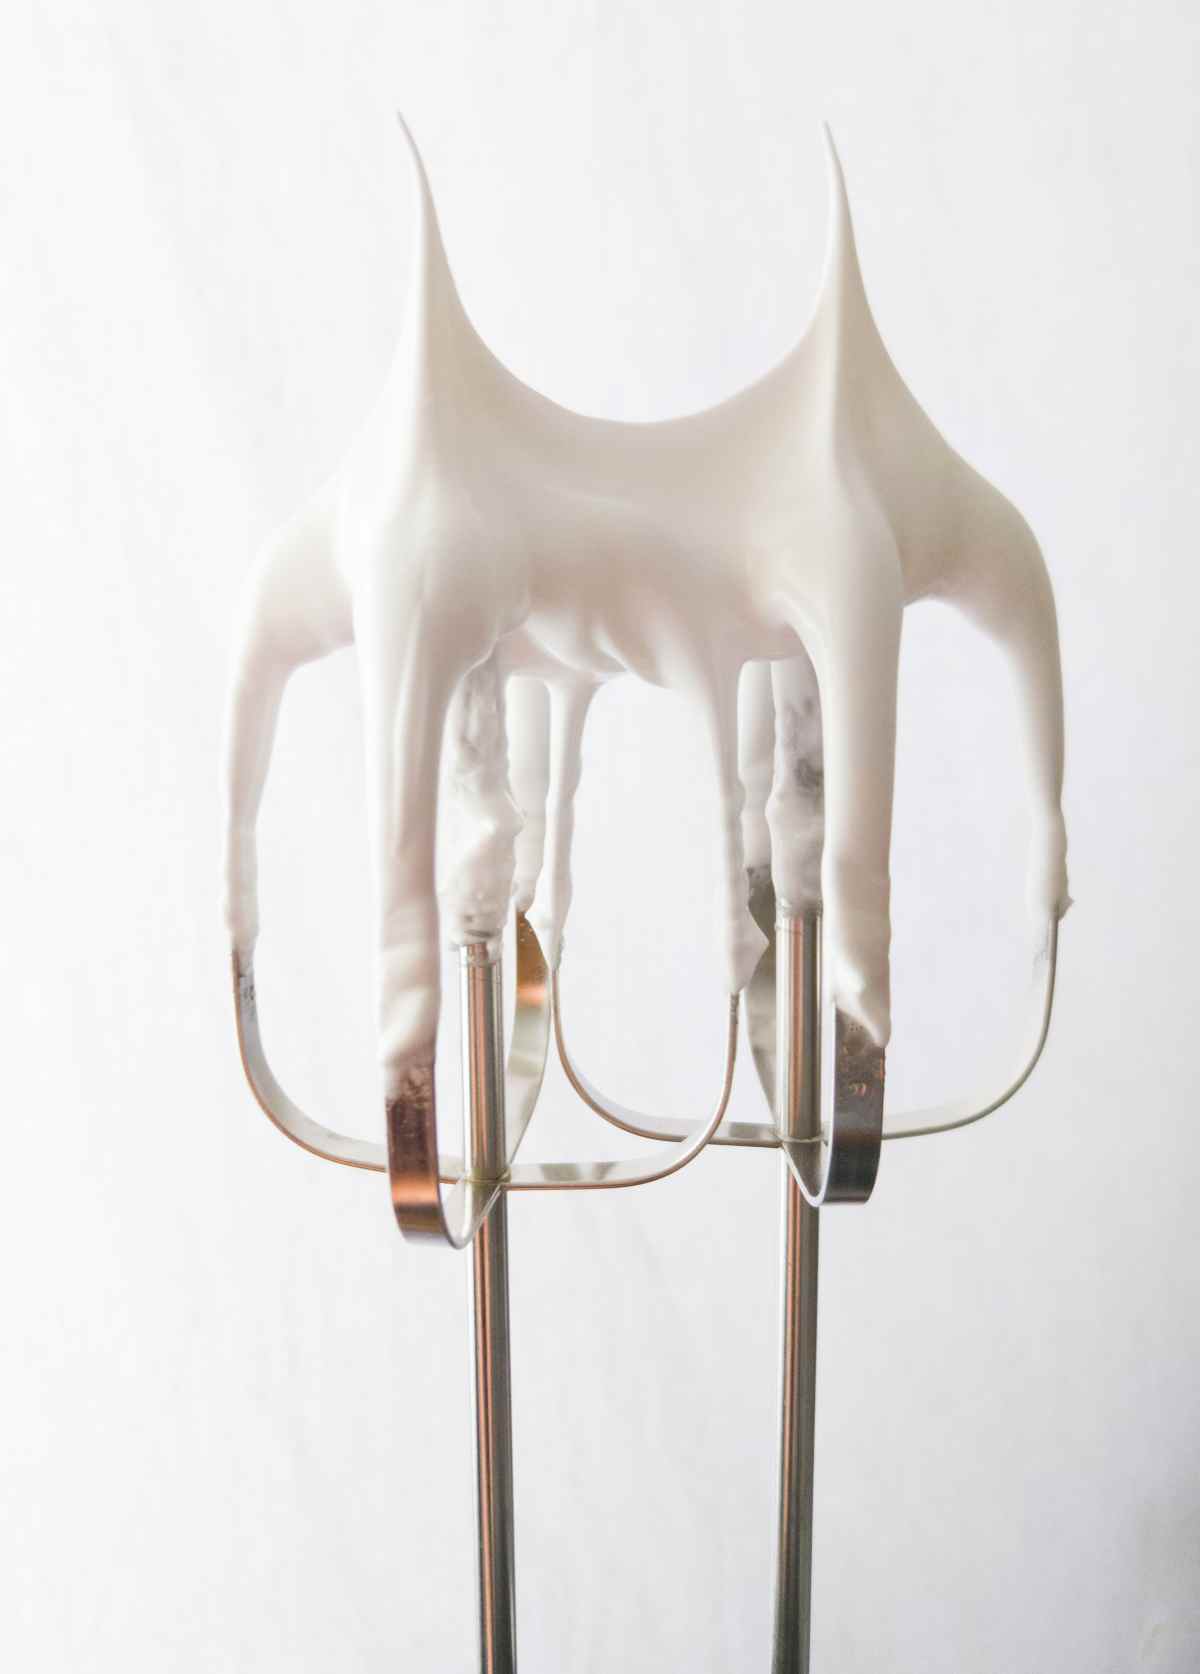
Continue beating the egg whites until the mixture shows stiff upward-looking peaks that don't bend. You should feel some resistance from the mixture when taking the whisks out (if there is none, continue beating a little bit more). Overall it can take anywhere from 7 to 16 minutes (or longer) depending on the speed and the type of mixer you are using.
Once the egg whites are ready, you can proceed to the macaronage step.
Macaronage
Note: if you are using food coloring, macaronage is the step where you want to add it. Use powder or gel form, avoid liquid food coloring!
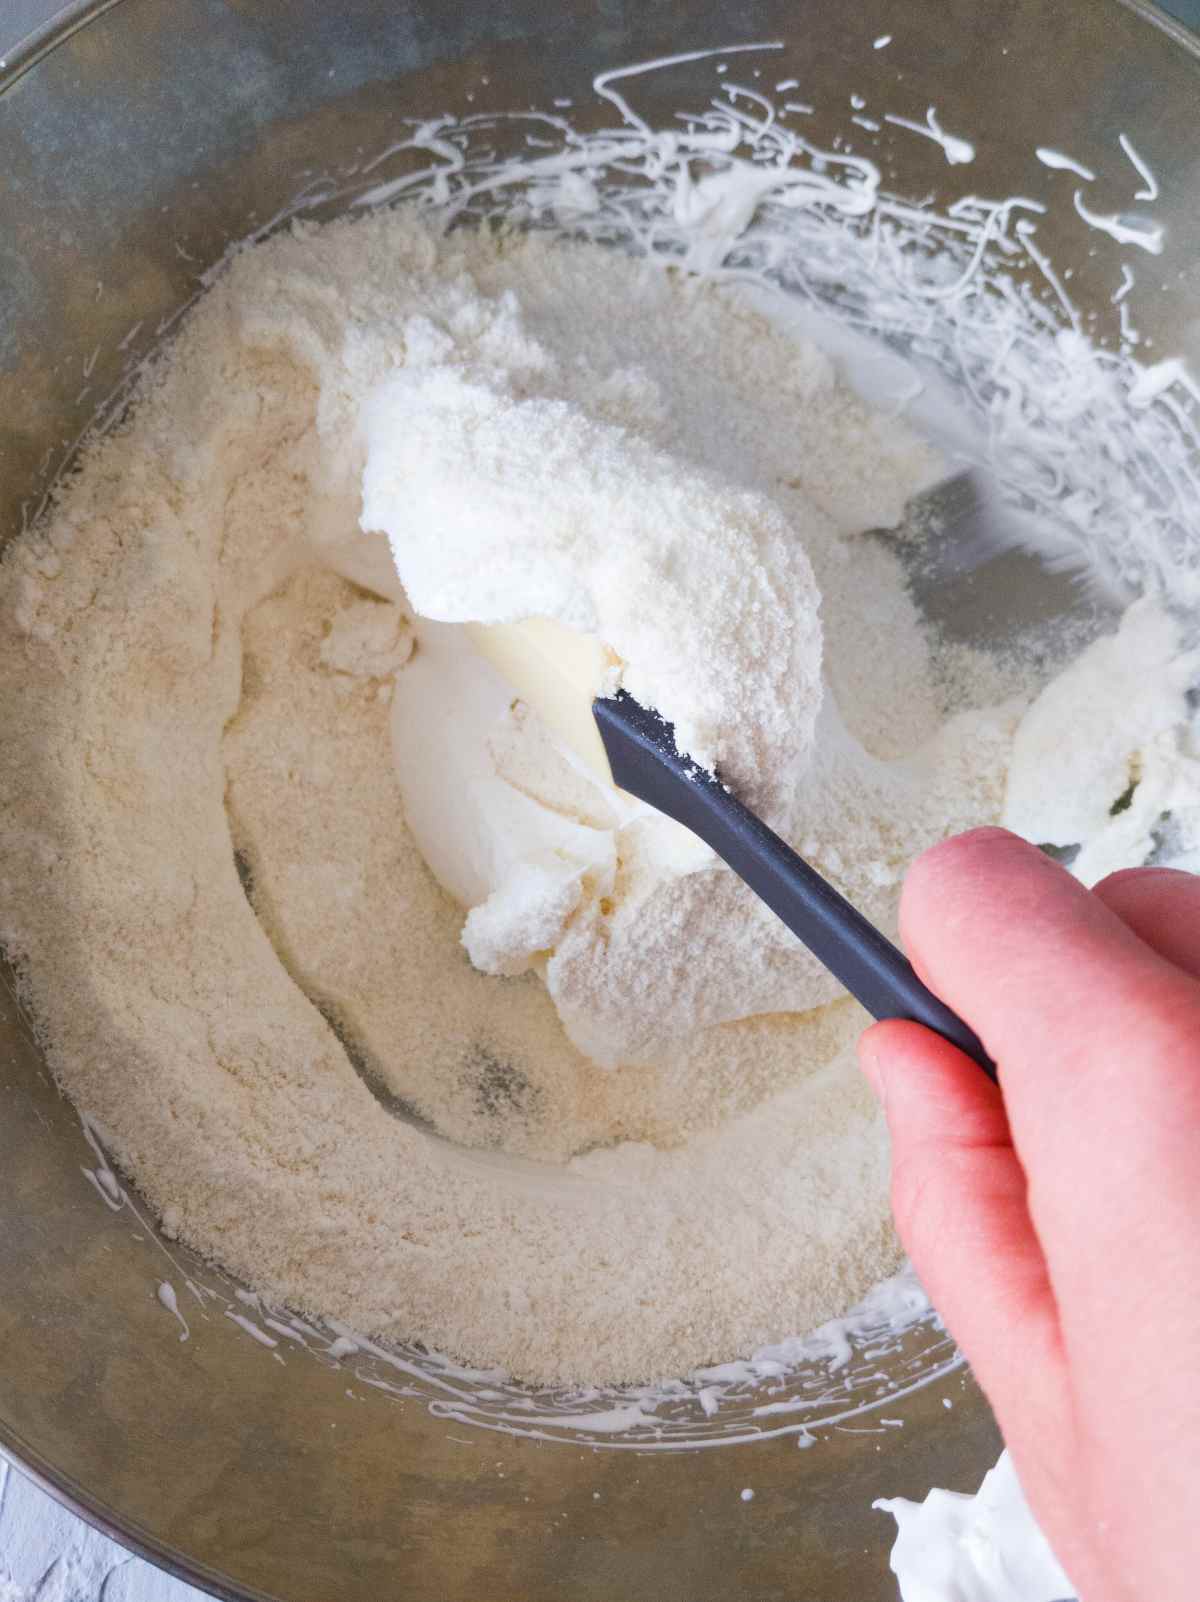
Macaronage is the process of folding almond flour into whipped egg whites. Simply add all of the almond flour with the powdered sugar to the bowl with the egg whites and start folding the mixture with a clean rubber spatula. Scrape the side of the bowl, then fold the batter on itself. You can do it gently or more vigorously, it doesn't matter so much. What you need to pay attention to is the consistency of the batter.
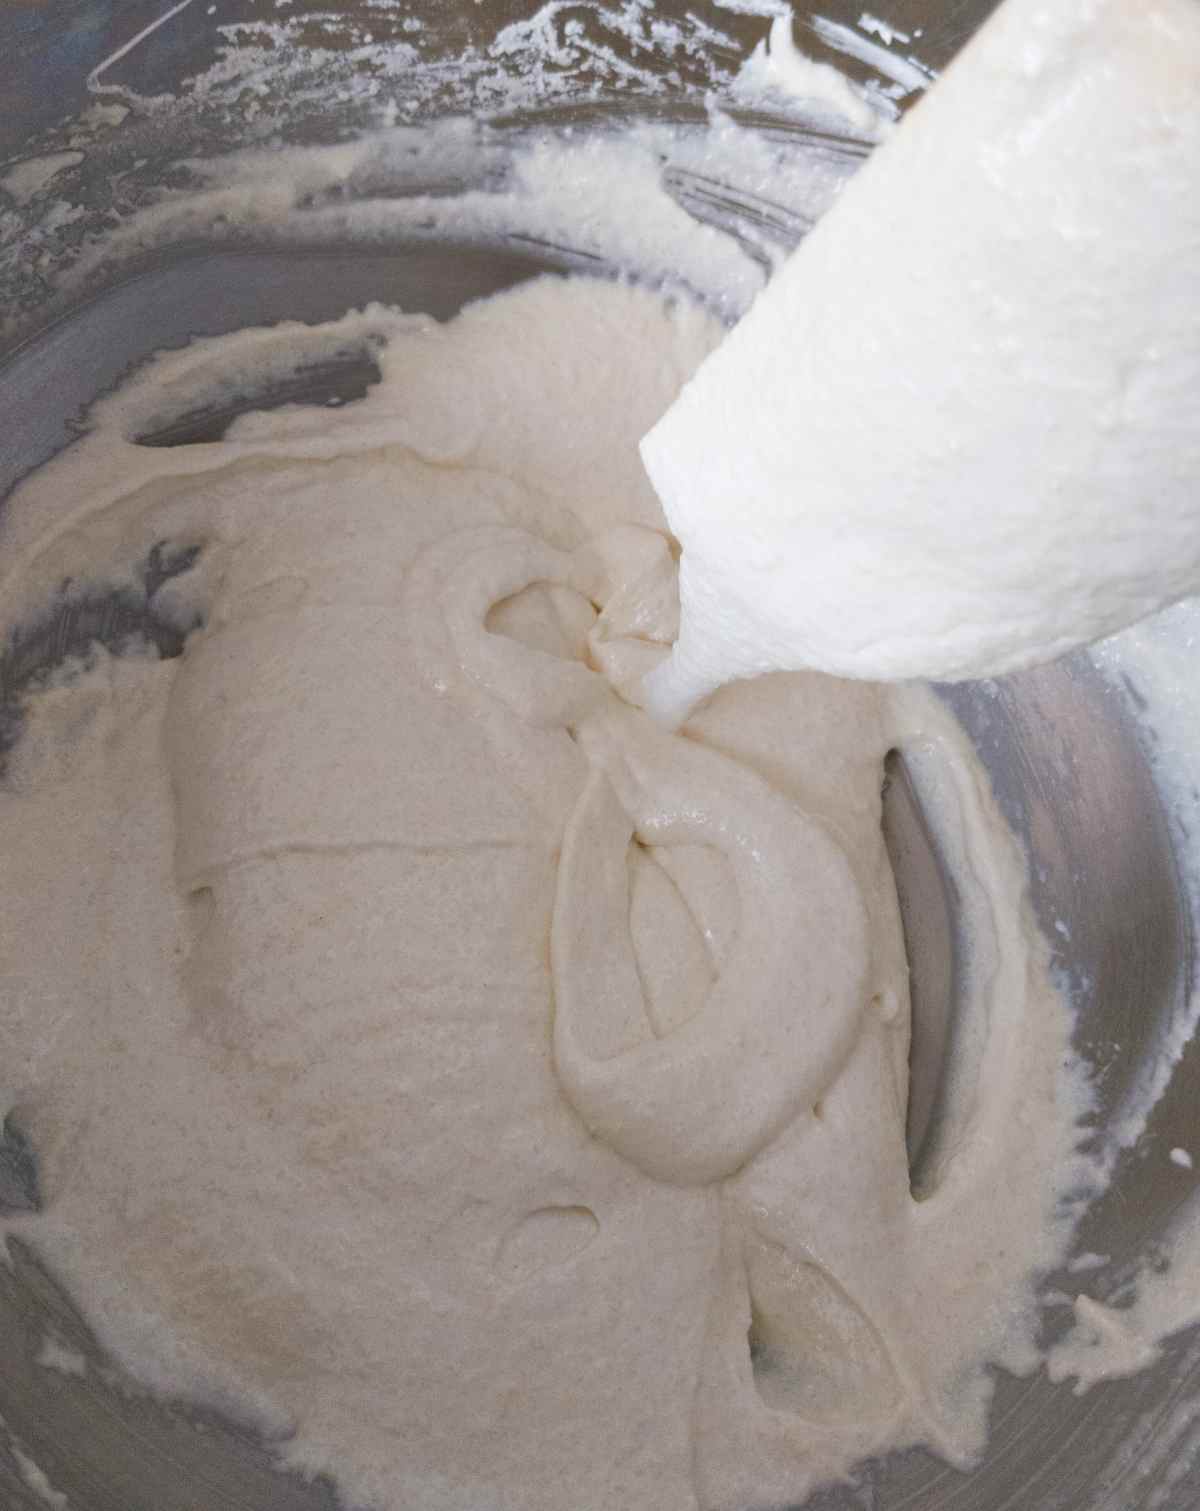
Keep folding until you are able to draw a few figures 8 one after another. If you can only make one figure 8, continue folding. The batter should be freely flowing from the spatula. It might break up sometimes but continue flowing freely right after. If you are not sure if the batter is ready, continue folding a little bit more. If you stop too soon, your macarons will have tips.
Piping
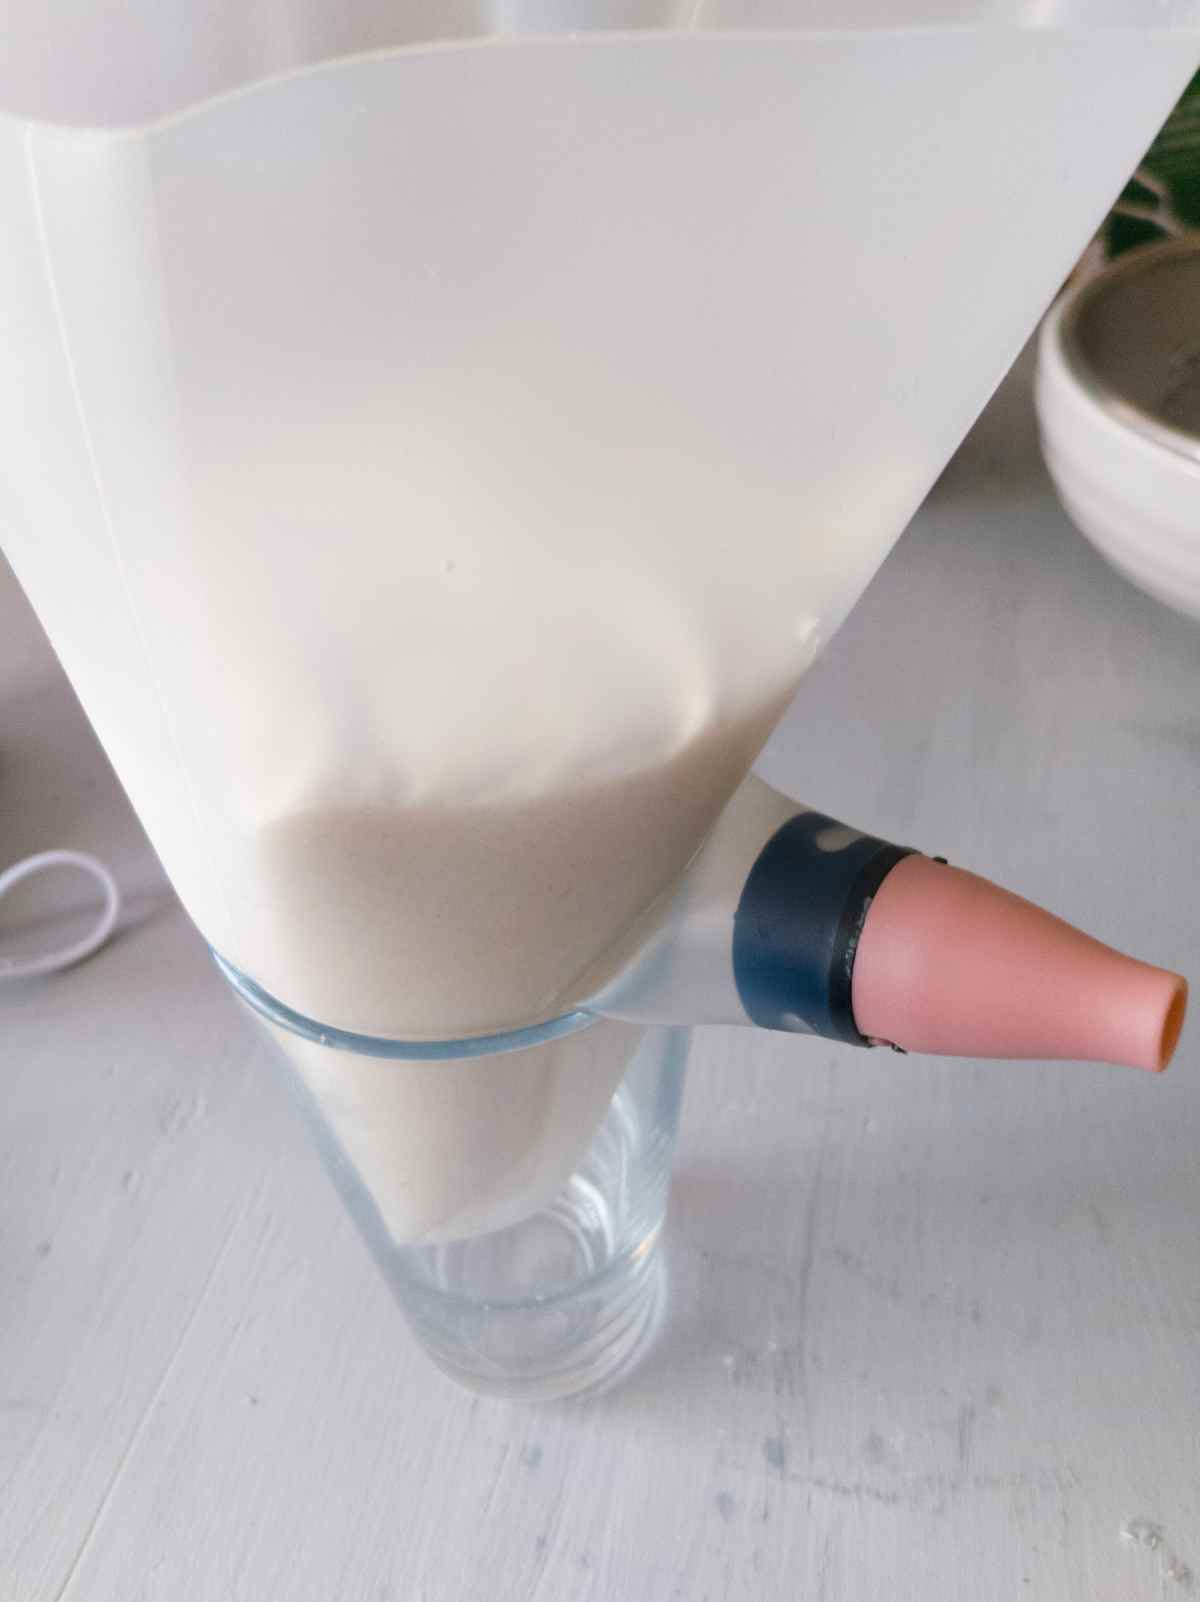
Once the batter is ready, transfer it to a piping bag. If you have too much batter or your bags are smaller, use two bags. You can keep the batter in the bag for a few hours. To transfer the batter, place the piping bag into a large glass with the tip looking up to avoid the batter flowing out. Pour the batter into the bag with the help of a rubber spatula. You can seal the bag to prevent the batter from escaping through the top when piping but I normally don't seal mine.
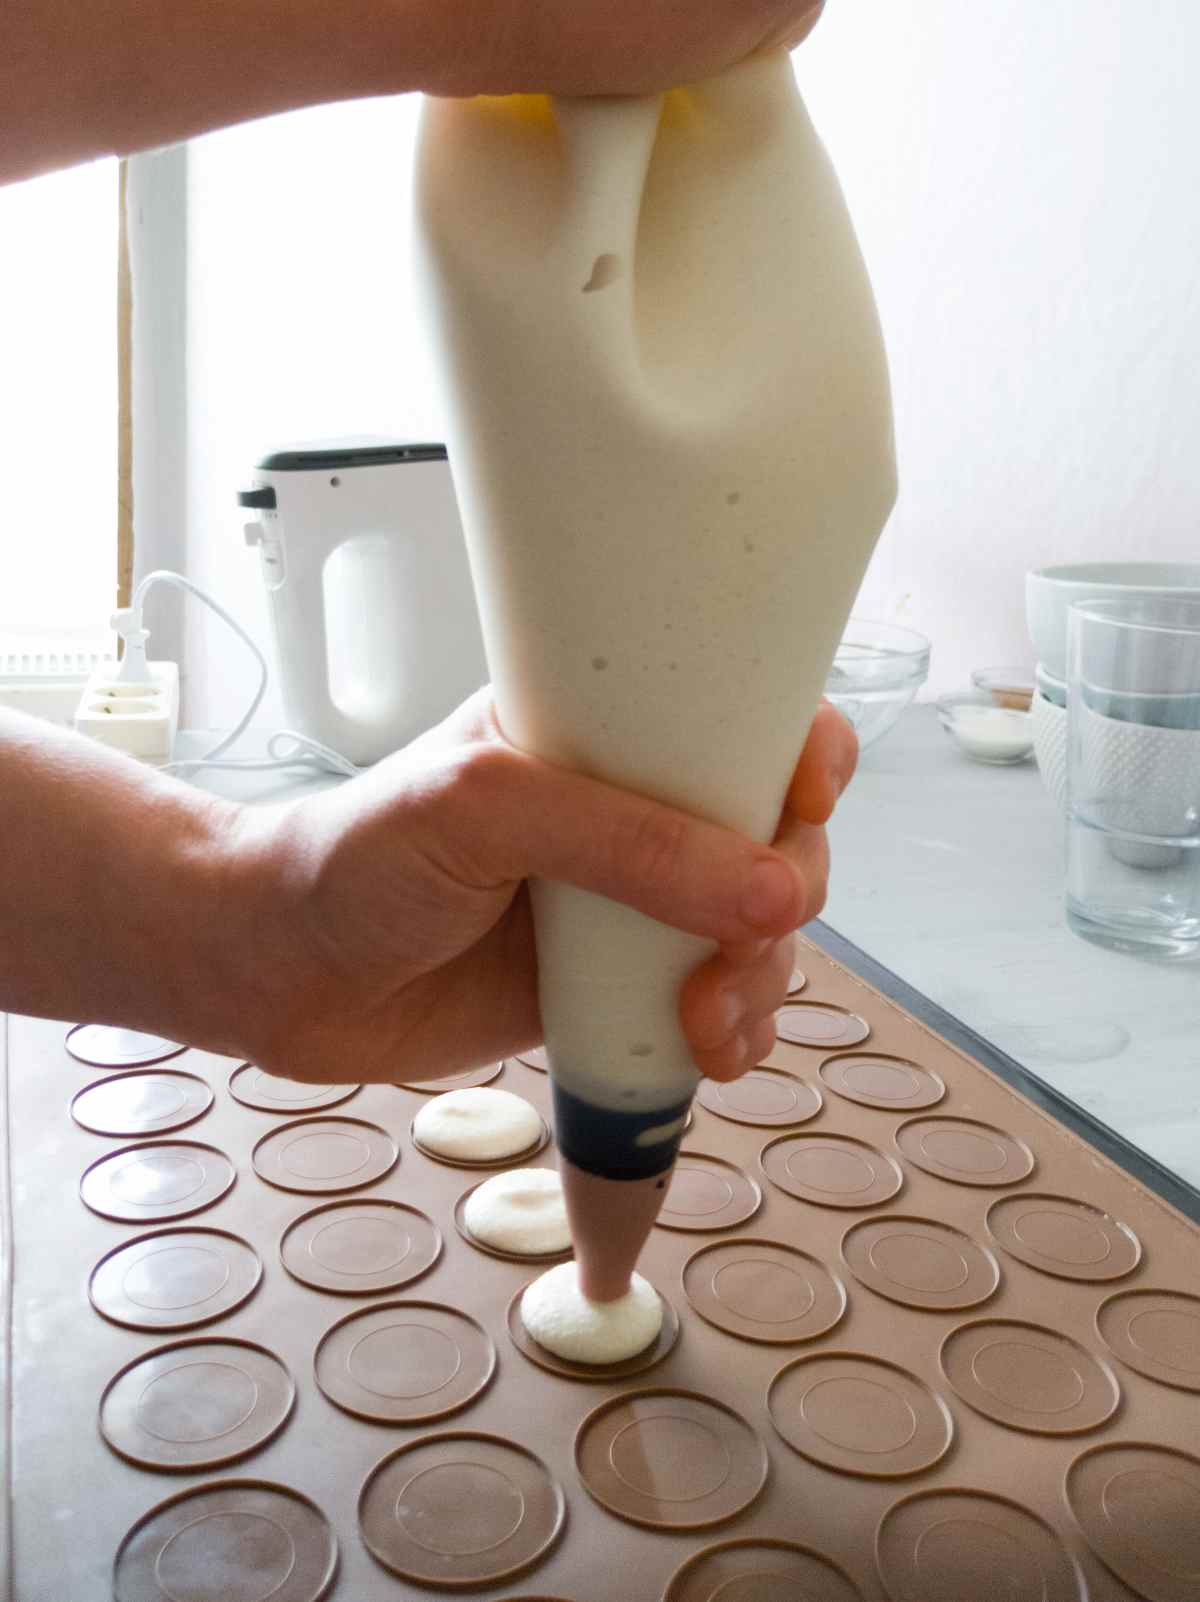
Once ready, start piping the macarons onto the silicone mats. You can either use a macaron template or a silicone mat with macaron circles already mapped out for you. Place the tip of the piping bag horizontally over the silicone mat about 1 inch (⅕ cm) above the surface. Push the bag, then stop and with a circular motion lift the bag off from the macaron. Keep in mind that the macarons will spread a little, so don't pipe them too close to each other. Continue piping until you run out of batter or space.
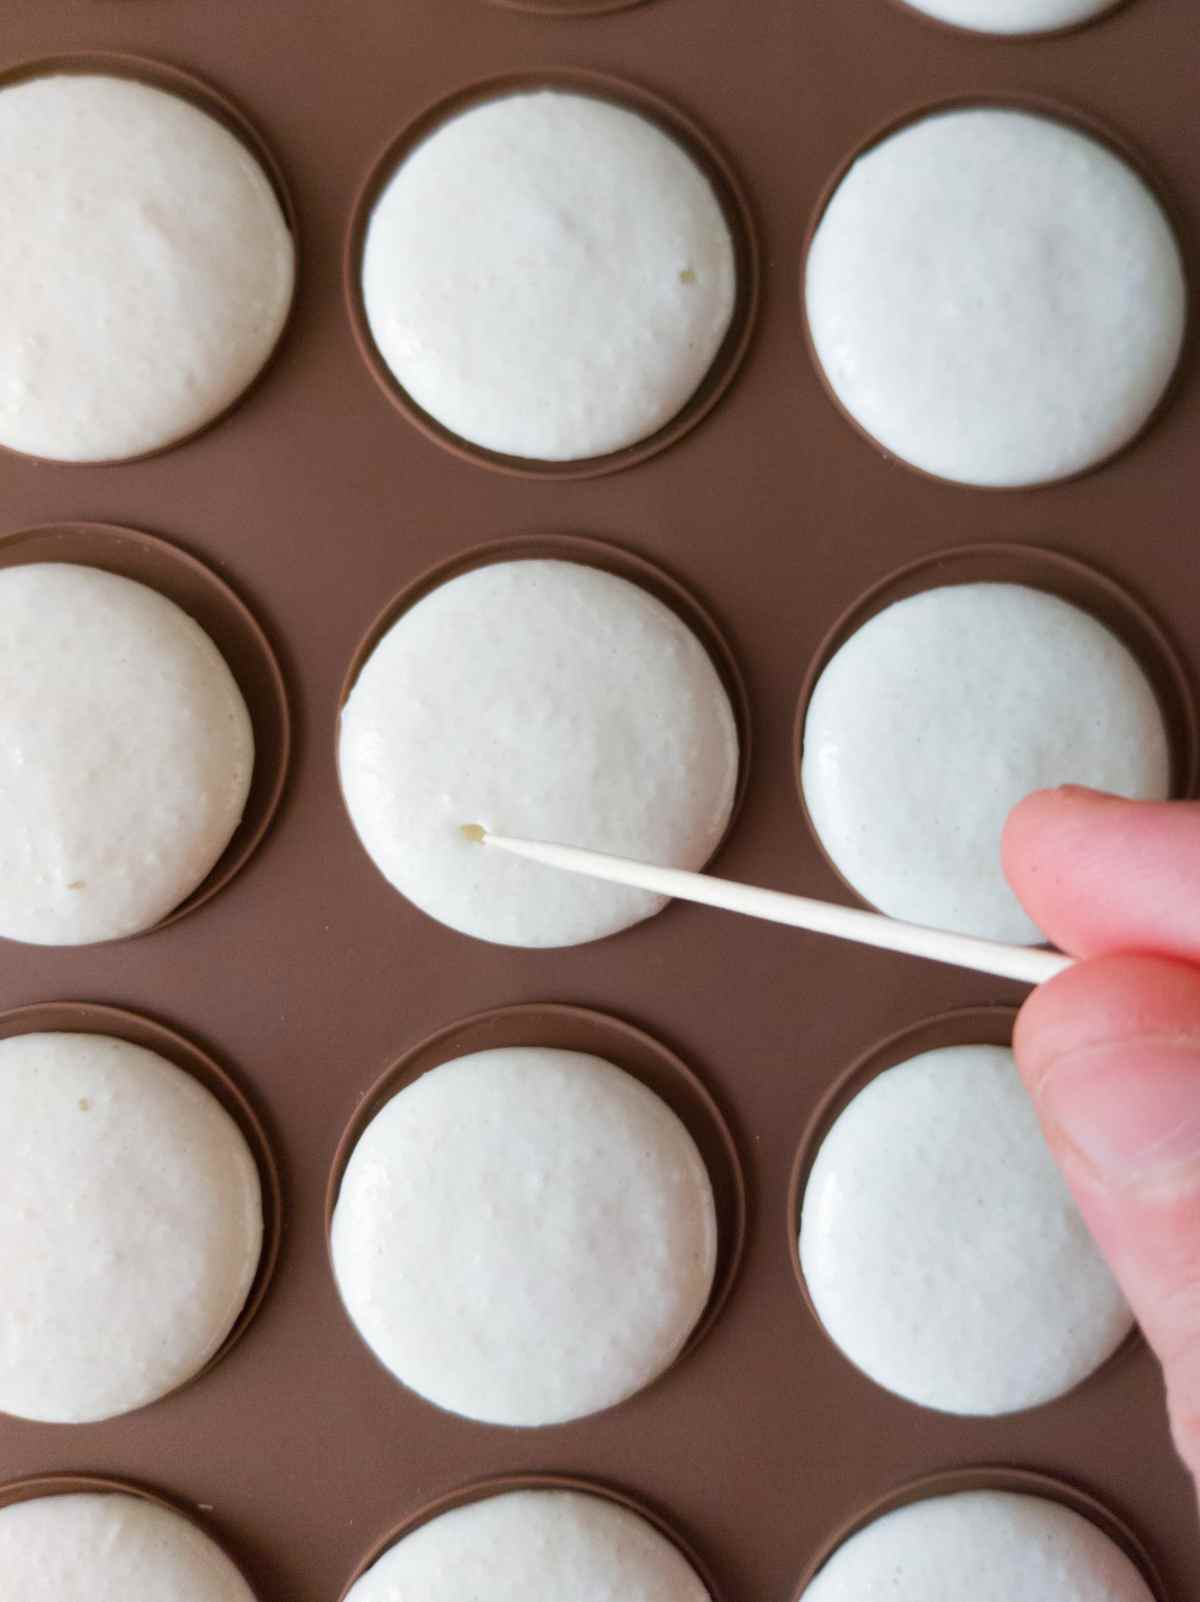
Once ready, tap the baking sheets on the table or on a softer surface if you don't want to be loud. Tap 10 times to get rid of bubbles. Then, using a toothpick pop any bubbles that came up to the surface but did not pop on their own.
Resting
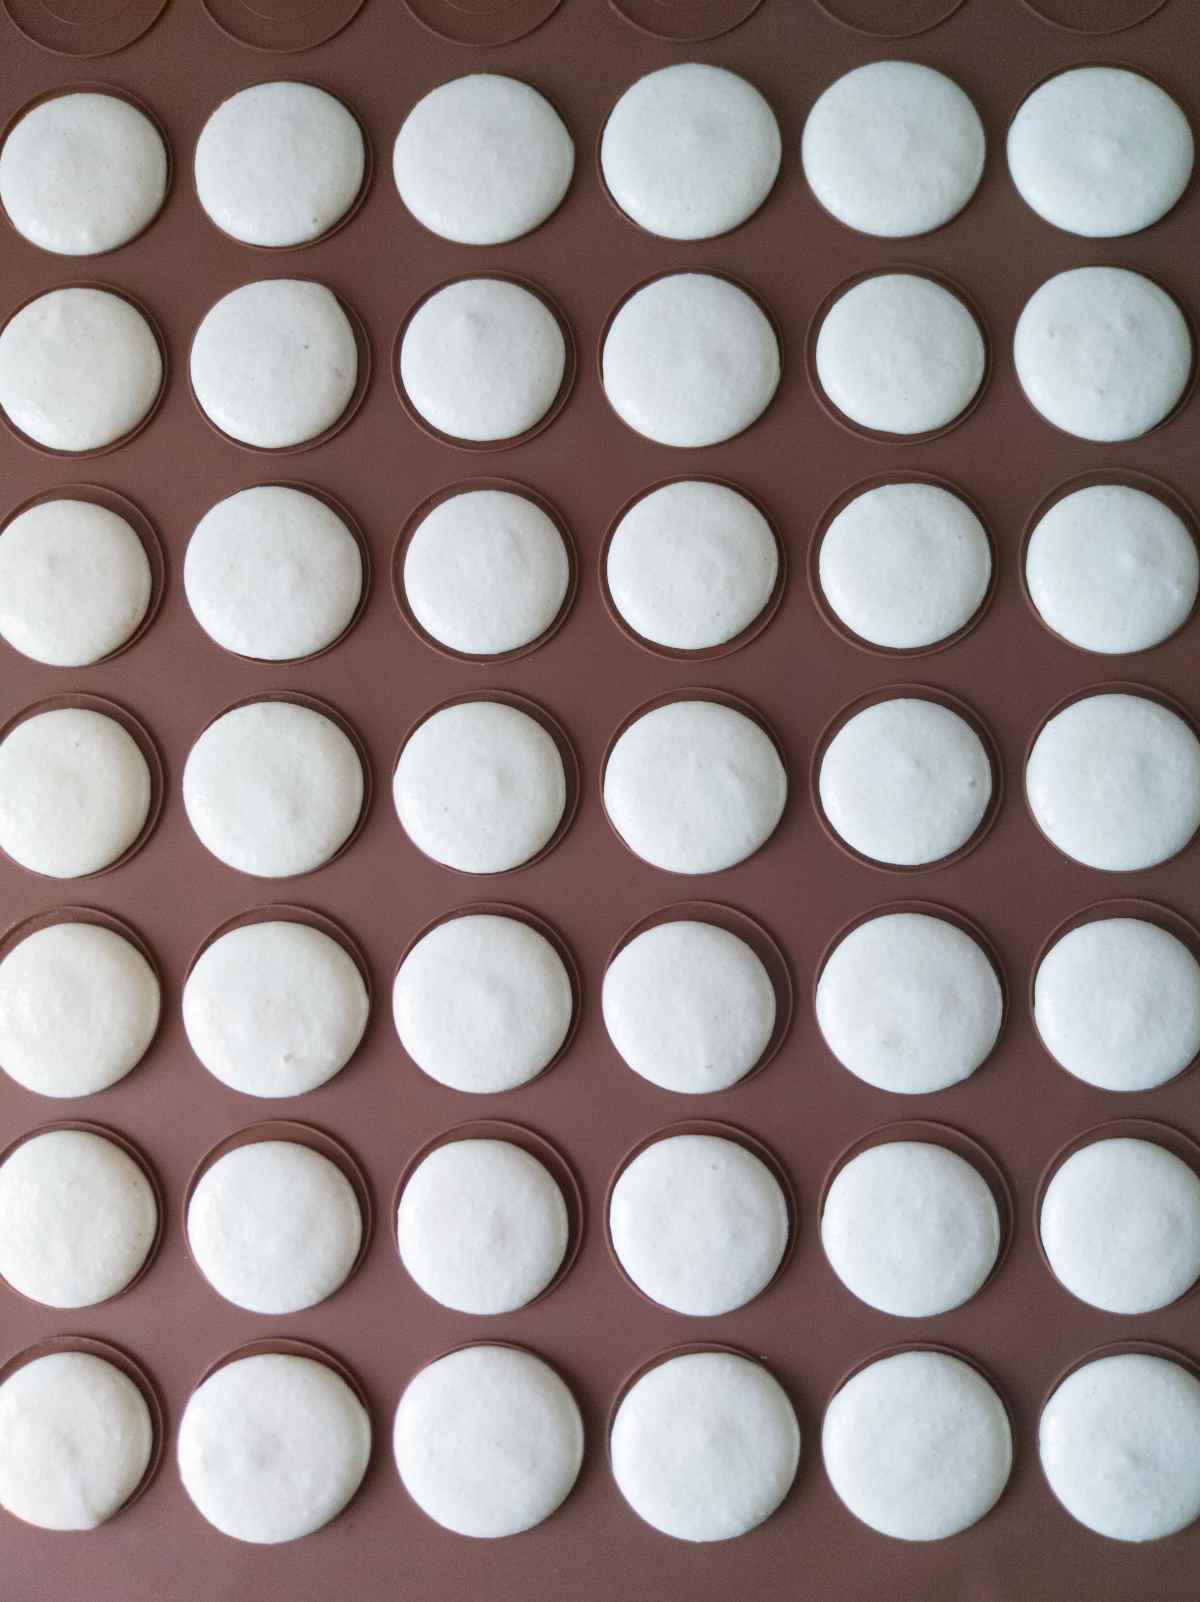
Now you need to rest the macarons until they form a skin. You know they are ready when the batter doesn't stick to your finger when you touch it. If it is sticky, let the macrons rest a little bit longer. Generally, 40-60 minutes should be enough to form the skin.
Once the macarons don't stick to your finger anymore, start preheating the oven to 275F/135C. I highly recommend using an oven thermometer to make sure your oven heats to the right temperature as many ovens run hot or cold. Mine runs hot too!
Baking
Once the oven is ready, place one of the sheet pans into it (somewhere in the middle, not too high or too low). Bake for 13 minutes, then check on the macarons. Touch the tops and if they are moving, keep baking for 1-2 more minutes then check again. Once the macarons seem sturdy, take them out. They shouldn't have any discoloration. If they look pink or brown, that means the temperature was too high.
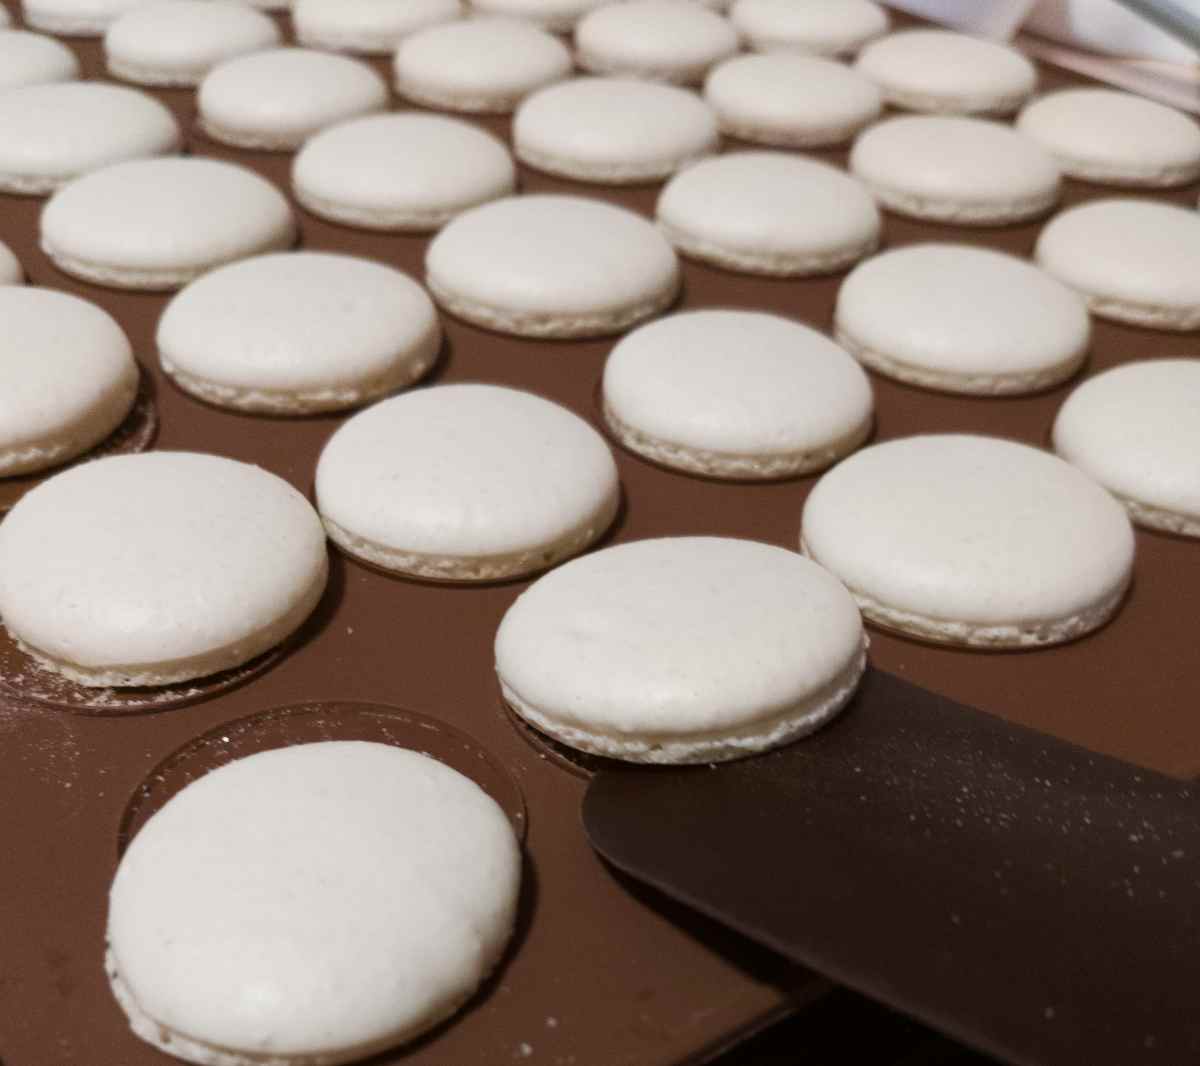
Let the macarons cool down on the mat, then you can take them off. You can use a metal spatula to separate the macrons from the mats to prevent any sticking (although if baked through well, the shells shouldn't be sticking to the mats). You can fill the macarons right away or later.
Storage
It is best to keep macarons in a refrigerator or a freezer. At room temperature, they will do well for a day or two without filling but it is best to keep them cool.
In the refrigerator macaron shells without filling will last for about 7 days provided they are kept in an air-tight container. If you are only planning to keep them in the fridge for a day, a loose lid/cover would be ok (let's say you are keeping them in a bowl, a plate, or on a tray).
You can also freeze macaron shells for up to 2 months or longer but they will start losing their fresh qualities after 2 months according to this macaron storage guide. To freeze the shells, place them in an air-tight container and put in the freezer. When you want to fill your macarons, take the shells out and fill them right away. No need to thaw the shells before filling! They will thaw naturally in the refrigerator during the maturing process.
For macarons with filling the same rules apply. Keep them in the fridge for up to a week, and in the freezer for up to 2 months. However, try not to leave filled macarons at room temperature for too long, especially if you used dairy. If you need to deliver macarons, you can either use a cooler bag or if it is a shorter delivery distance, make sure to instruct the receiver to place the macarons in the fridge upon getting them.
To freeze macarons that were filled you can either freeze them right away after filling or wait 1-2 days until they mature. It is better to freeze macarons with hard and sturdy filling than with more liquid ones (jam, for example). Moist macaron fillings will make the shells soggy if left in the freezer for 1-2 months.
The Best Filling for Macarons
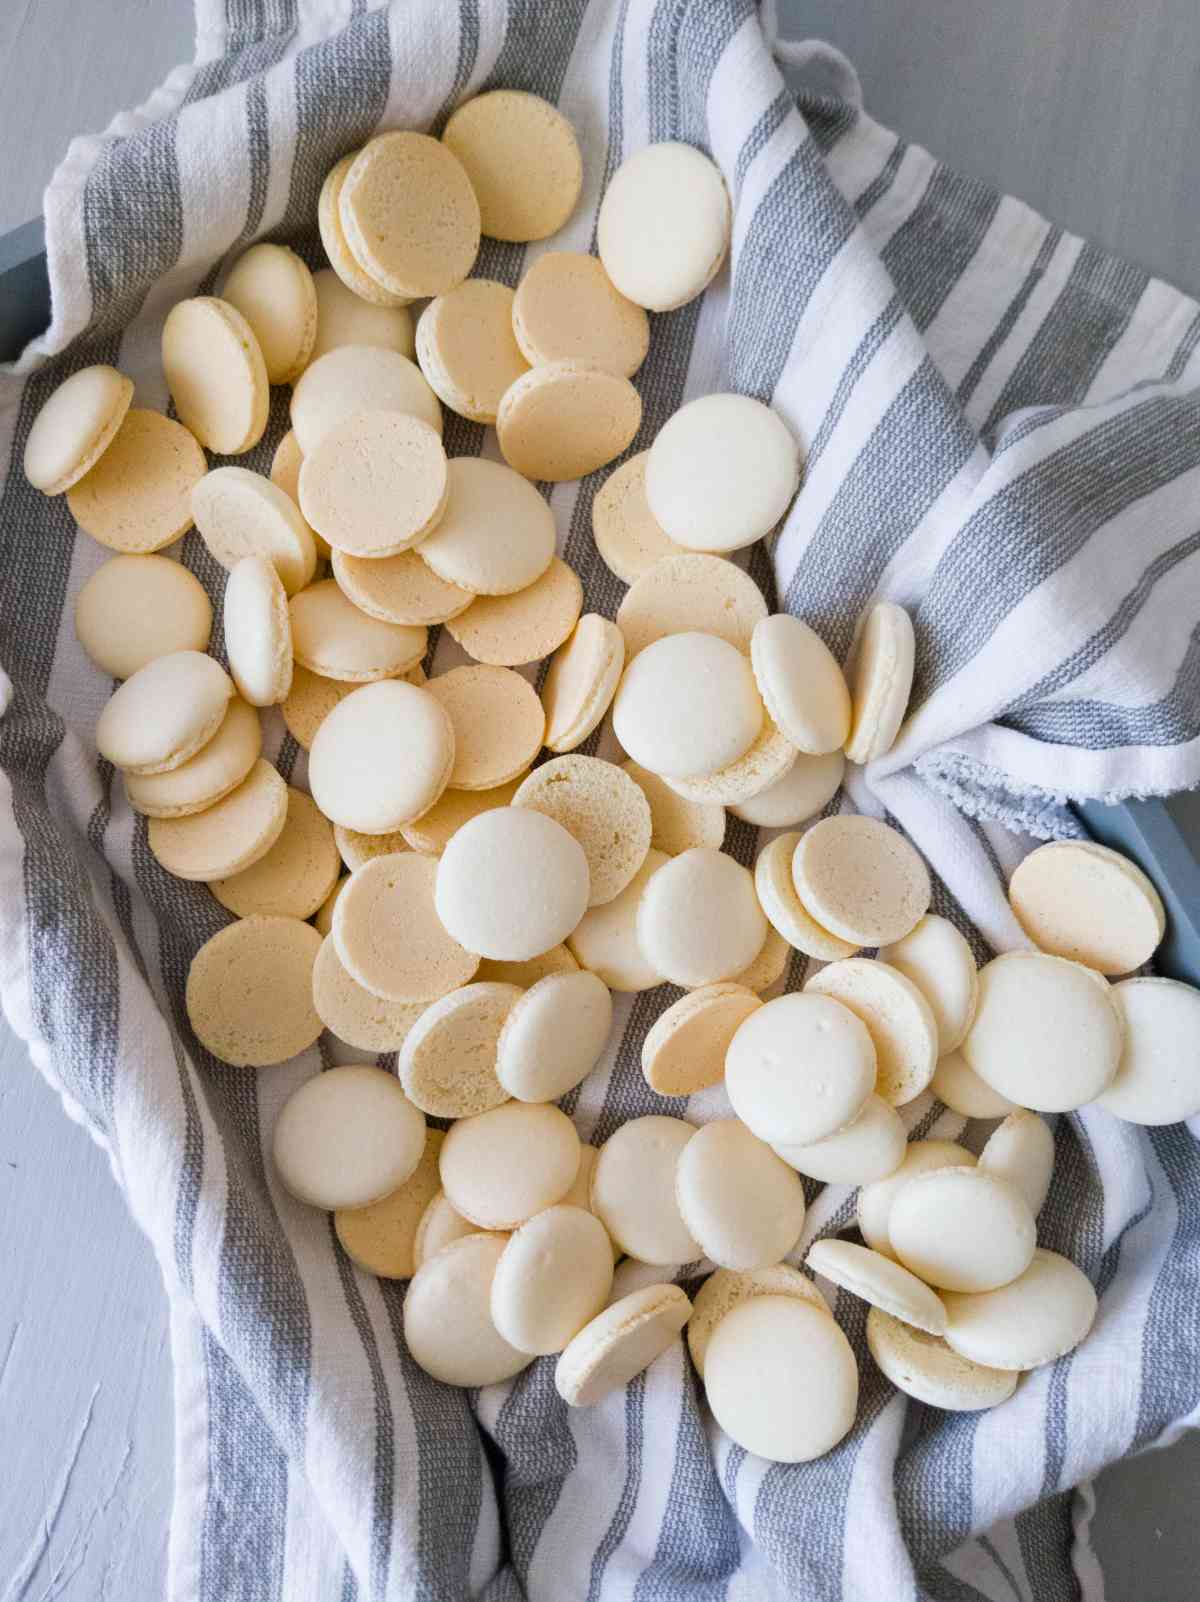
There are hundreds of various options when it comes to macaron fillings! One of my favorites is dulce de leche cream either mixed with buttercream (like in this dulce macaron recipe) or used as is, like in these churro macarons. Check out this macaron recipe collection from Pies and Tacos for some inspiration.
Maturing the Macarons
Once you filled the macarons with your favorite buttercream, ganache, jam, or curd, keep them in the fridge for 1-2 days to let macarons mature. Maturing is the process where the filling moisturizes the macaron shells and they become soft and chewy while the outside stays crispy. You might be tempted to eat them right away but the difference between matured and freshly filled macarons is very big! Try it once and see for yourself!
How To Serve
Serve macarons right out of the refrigerator after they have matured for 1-2 days. If you are taking them out of the freezer, wait until they thaw naturally in the fridge or at room temperature and serve then! I like my macarons along with a cup of unsweetened tea or coffee!
Troubleshooting
It took me at least 10 failed batches before I made the perfect-looking macarons for the first time! It takes practice, so don't get discouraged if you don't succeed right away. Here are some tips for fixing failed macarons.
Hollow Shells
Hollow shells could be due to too much air trapped in the macaron batter, under or over-baked shells, batter not mixed long enough, or other potential causes. To get a detailed breakdown of what causes hollow macaron shells, follow this hollow macaron guide.
No Feet
If you have any problems with feet (spread, ruffled, small, or none at all), follow this detailed guide on fixing macaron feet problems.
Lopsided
Most of the time I get lopsided macaron shells on the sides of the baking sheet which tells me that the temperature difference causes some shells to be lopsided. To prevent this problem, I would recommend leaving the sides of the silicone mats empty and piping the shells closer to the middle of the mat. If your oven is super uneven with temperature, place a pizza stone in the oven and keep it there during the entire baking process. A pizza stone will help minimize temperature fluctuations as it retains a lot of heat.
Browned
If your macarons change color during baking and become slightly darker (or much darker) it is because you either baked them for too long or the temperature was too high. Try reducing the temperature/time the next time around!
Cracked
If you are having trouble with cracked macarons, check out this super-detailed guide on all possible causes and solutions for cracked macarons.
Spread Too Much
If your macarons spread too much it is most likely because you overmixed the batter at the macaronage stage.
Bumpy
Bumpy macarons can be caused by underwhipping the egg whites, undermixing the batter at the macaronage stage, or due to using lumpy almond butter.
Download my FREE macaron baking template in PDF!
FAQ
Rest macaron shells until they stop sticking to your fingers. Generally, it should take anywhere from 40 to 60 minutes (or longer) depending on the humidity levels in your house.
1-2 days.
If made with almond flour, yes, they are gluten-free. If you use all-purpose flour then they are not gluten-free.
The Swiss method so far has been the simplest to make for me but the French method might be easier for some.
📖 Recipe
Swiss Meringue Macarons
Equipment
- 1 mixer hand mixer or stand mixer
- 2 silicone mats mapped out for macarons or not
- 1 large bowl stainless steel/glass/ceramic
- 1-2 piping bags silicone or plastic
- 1 large sieve
Ingredients
- 120 grams powdered sugar
- 120 grams almond flour after sieving
- 110 grams egg whites not boxed
- 110 grams granulated sugar
- food coloring optional
Instructions
Preparation
- First of all, you need to make sure all of your tools are clean. To ensure that no food traces stay on the tools, you can use a kitchen or a paper towel with a little bit of vinegar to wipe the tools and the bowl. You only need to wipe those tools that will be touching the egg whites before the macaronage. So, the sieve and the bowl for the almond flour don't need to be wiped.
- You also want to prepare the silicone mats ahead of time. Take the metal sheet pans from the oven and place them upside down on a flat surface. Then, place the silicone mats on top of them. Placing the sheet pans upside down will ensure a steady airflow!
- Measure the almond flour and the powdered sugar into separate bowls using a digital kitchen scale. Then, sieve the almond flour over a large bowl placed on a digital kitchen scale. You should have no more than 1 tablespoon of almond flour left in the sieve. If it is more than that, consider using a different flour brand next time! Place the leftover larger almond flour from the sieve into a small bowl and add it to oatmeal or a smoothie later.
- Add a little bit of almond flour to the sieve until the amount in the bowl reaches 120 grams. Then, sieve almond flour and powdered sugar together over a large bowl and set aside.
- Add some water to a small saucepan and start heating it over medium heat. Place the egg whites with granulated sugar into a separate glass/stainless steel bowl and put on top of the small saucepan with water. Make sure the water doesn't touch the bowl with the egg whites to prevent them from cooking.
- Continuously stir the egg whites with sugar as long as they are above the hot water to prevent cooking. Keep the egg whites over the heat until the sugar granules dissolve. You can touch the eggs with your fingers and if you still feel sugar granules, hold them over the heat a little bit longer. Take the egg whites off as soon as the sugar dissolves, don't heat for too long.
Whipping the Egg Whites
- Once the sugar is dissolved, you can start whipping the egg whites. No need to hurry here! You can whip them right away or set the egg whites aside and whip them hours later if you need to. Just make sure that the egg whites are at least at room temperature before whipping them.
- Continue beating the egg whites until the mixture shows stiff upward-looking peaks that don't bend. You should feel some resistance from the mixture when taking the whisks out (if there is none, continue beating a little bit more). Overall it can take anywhere from 7 to 16 minutes (or longer) depending on the speed and the type of mixer you are using.
- Once the egg whites are ready, you can proceed to the macaronage step.
Macaronage
- Note: if you are using food coloring, macaronage is the step where you want to add it. Use powder or gel form, avoid liquid food coloring!
- Macaronage is the process of folding almond flour into whipped egg whites. Simply add all of the almond flour with the powdered sugar to the bowl with the egg whites and start folding the mixture with a clean rubber spatula. Scrape the side of the bowl, then fold the batter on itself. You can do it gently or more vigorously, it doesn't matter so much. What you need to pay attention to is the consistency of the batter.
- Keep folding until you are able to draw a few figures 8 one after another. If you can only make one figure 8, continue folding. The batter should be freely flowing from the spatula. It might break up sometimes but continue flowing freely right after. If you are not sure if the batter is ready, continue folding a little bit more. If you stop too soon, your macarons will have tips.
Piping
- Once the batter is ready, transfer it to a piping bag. If you have too much batter or your bags are smaller, use two bags. You can keep the batter in the bag for a few hours. To transfer the batter, place the piping bag into a large glass with the tip looking up to avoid the batter flowing out. Pour the batter into the bag with the help of a rubber spatula. You can seal the bag to prevent the batter from escaping through the top when piping but I normally don't seal mine.
- Once ready, start piping the macarons onto the silicone mats. You can either use a macaron template or a silicone mat with macaron circles already mapped out for you. Place the tip of the piping bag horizontally over the silicone mat about 1 inch (⅕ cm) above the surface. Push the bag, then stop and with a circular motion lift the bag off from the macaron. Keep in mind that the macarons will spread a little, so don't pipe them too close to each other. Continue piping until you run out of batter or space.
- Once ready, tap the baking sheets on the table or on a softer surface if you don't want to be loud. Tap 10 times to get rid of bubbles. Then, using a toothpick pop any bubbles that came up to the surface but did not pop on their own.
- Now you need to rest the macarons until they form a skin. You know they are ready when the batter doesn't stick to your finger when you touch it. If it is sticky, let the macrons rest a little bit longer. Generally, 40-60 minutes should be enough to form the skin.
- Once the macarons don't stick to your finger anymore, start preheating the oven to 275F/135C. I highly recommend using an oven thermometer to make sure your oven heats to the right temperature as many ovens run hot or cold. Mine runs hot too!
Baking
- Once the oven is ready, place one of the sheet pans into it (somewhere in the middle, not too high or too low). Bake for 13 minutes, then check on the macarons. Touch the tops and if they are moving, keep baking for 1-2 more minutes then check again. Once the macarons seem sturdy, take them out. They shouldn't have any discoloration. If they look pink or brown, that means the temperature was too high.
- Let the macarons cool down on the mat, then you can take them off. You can use a metal spatula to separate the macrons from the mats to prevent any sticking (although if baked through well, the shells shouldn't be sticking to the mats). You can fill the macarons right away or later.



Comments
No Comments