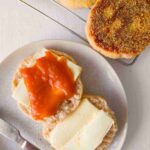
Gluten-Free Sourdough English Muffins
These delicious gluten-free sourdough English muffins are fluffy, soft, and full of flavor! A great idea for a Sunday breakfast.
Servings: 8 muffins
Calories: 205kcal
Cost: 5
Ingredients
- 15 grams psyllium husk If using psyllium powder, use 13 grams. For more details read my psyllium husk for baking post.
- 200-250 grams water, use 200g and add extra if the dough is too dry
- 75 grams (⅓ cup) plant-based milk or regular milk
- 2 teaspoon sugar or maple syrup/honey
- 2 tablespoon oil any vegetable or seed oil
- ½ cup (140g) gluten-free sourdough starter If you are using starter discard, add 7g of instant/active dry yeast or 20g of fresh yeast
- 286 grams (2 cups) gluten-free flour I am using my homemade blend with brown rice flour which for this recipe would be: 73g brown rice flour, 70g white rice flour, 143g starch of choice (cornstarch/tapioca/arrowroot/potato)
- 2 teaspoon baking powder check the package to make sure it is gluten-free
- 6 grams (1 tsp) salt
- cornmeal for coating optional
Instructions
- In a medium-sized bowl combine whole psyllium husks, milk, water, oil, and sugar.Whisk to incorporate and set aside to let the psyllium gel form (2 minutes). As psyllium husk absorbs water it forms a gel that will add a bready texture to the muffins.
- Combine the gluten-free flour, salt, and baking powder in a separate mixing bowl. Stir well to incorporate.
- Once psyllium gel has formed (1-2 minutes after you mixed it), add the sourdough starter to the bowl with the wet ingredients, and whisk to incorporate.If you are using starter discard instead of an active starter, add 7g of instant yeast to the dry ingredients (not active dry yeast as this type needs to be activated before using).The active starter is the one you feed and discard from; starter discard is what you take away from the mother starter during feedings and keep in the refrigerator.
- Add the dry and wet ingredients together and mix with your hands or an electric mixer with the dough hooks attached.The dough will be sticky but not too sticky to work with. It definitely shouldn't be dry and crumbly!If the dough is too dry to shape, add more water. If your muffins turn out too dry, next time add more water to the dough.
- Turn the dough over onto a lightly floured surface and shape it into a ball.Divide the dough into 8 equal pieces (mine were about 100g each) with a bench scraper or a knife.
- Grease your hands with oil to prevent sticking and shape each piece into a small ball, then slightly press each one into a disc.
- Add cornmeal to a plate and dip both sides of each muffin in it to prevent them from sticking to the frying pan.
- Place the shaped muffins onto a baking sheet lined with parchment paper, cover with a tea towel, and leave to ferment for 3.5-5 hours (or overnight in the refrigerator).The muffins will puff up slightly but won't double in size.If you are using instant yeast you only need to proof for 1-1.5 hours. In this case, your muffins will rise more and might even double in size.
- Once the muffins are ready, preheat a cast iron pan or griddle over low heat for a few minutes. Don't add any oil or grease to the pan!Fry each muffin for 10-11 minutes on each side over low heat until deep golden brown. Longer cooking time allows for the dough to cook through completely without burning on the outside.Transfer the cooked muffins to a cooling rack and let them cool completely before slicing! If you slice them too soon, they will be sticky inside.
- For visual instructions please refer to the post above!
Notes
Storing & freezing
Store these muffins in the refrigerator for up to 5 days and reheat before eating.
You can freeze these muffins in a freezer bag or an airtight freezer container for up to 3 months. To defrost, simply pop them into the microwave for 30 seconds or reheat in the oven at 350F/175C until soft and warm!
Expert Tips
- Use a mature starter, meaning a starter that was fed a few hours ago and is rising and bubbling. It will help with fermentation and airy texture in the muffins!
- Use a cast iron pan to help the muffins cook through before the sides get too brown! Non-stick pans don't transfer heat as well as cast iron does. However, if you don't have a cast iron pan or griddle, a non-stick pan will do, it just might need more time to cook through.
- Grease your hands with oil before shaping English muffins as the dough will be sticky. Don't add extra flour to the surface or to your hands!
Nutrition
Serving: 1muffin | Calories: 205kcal | Carbohydrates: 37.8g | Protein: 3.5g | Fat: 4.8g | Saturated Fat: 0.8g | Cholesterol: 1mg | Sodium: 161mg | Potassium: 261mg | Fiber: 3.5g | Sugar: 1.8g | Calcium: 71mg | Iron: 1mg
