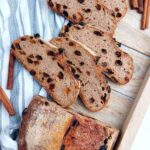
Gluten-Free Sourdough Cinnamon Raisin Bread
This delicious and rich gluten-free sourdough cinnamon raisin bread is perfect with a slice of butter and honey!
Servings: 1 loaf
Calories: 2059kcal
Cost: 5
Ingredients
- 20 grams whole psyllium husks, 18g if using powder
- 410 grams water, warm, not hot
- 15 grams granulated sugar, or honey/maple syrup
- 120 grams raisins, or cranberries
- 70 grams active gluten-free sourdough starter, it can be made of any GF flour
- 85 grams tapioca starch, or arrowroot starch
- 95 grams potato starch, or 95g (¾ cup) cornstarch
- 180 grams sorghum flour, or brown rice flour
- 10 grams sea salt
- 2 teaspoon baking powder, not baking soda
- 6 grams ground cinnamon
- 40 grams brown sugar, light or dark
Instructions
- First, add psyllium husk, water, and white granulated sugar in a medium-sized bowl and whisk to incorporate.Set the mixture aside for a few minutes to let the gel form.
- In the meantime, boil some water and soak the raisins in it for 10 minutes to hydrate them.This step isn't necessary but it adds to juiciness to the raisins!
- Break up the lumps in the brown sugar before adding it to the bowl.Then, mix all the dry ingredients in a large mixing bowl until well combined.
- Finally, add the sourdough starter, psyllium gel, and strained raisins to the dry ingredients and mix the dough either by hand or an electric mixer with dough hooks attached.The dough will be elastic and sticky.
- Turn the dough over onto a lightly floured working surface and shape it into a ball.I use an oval banneton basket, so I shaped mine into a batard.
- Place the dough upside down into a floured banneton basket or into a mixing bowl lined with a floured kitchen towel.Cover the dough and let it ferment for 5-7 hours at room temperature. Keep in mind that cinnamon slows down the fermentation process, so the dough will need more time to proof than regular gluten-free sourdough.If you do an overnight fridge fermentation, first let the dough sit at room temperature for 1-2 hours, then place it in the refrigerator for 12-18 hours and bake from cold.
- Once the dough is done fermenting, gently turn it over onto a piece of parchment paper and score it however you like. I usually make one deep cut close to the middle of the loaf.Lower the parchment paper with the dough into a cold Dutch oven, cover it with a lid, and place it into a cold oven. Start preheating the oven to 450F/230C. Once the oven is ready, start the timer and bake for 40 minutes. Then, lower the temperature to 350F/170C, remove the loaf from the Dutch oven, transfer it to the oven rack, and bake for another 30 minutes.Transfer the baked loaf to a cooling rack and let it cool until no longer warm to the touch. Slice and enjoy!
Notes
How to store
This cinnamon raisin sourdough will keep well at room temperature for up to 3-4 days, just make sure to cover it or place it in a bread box/bag.
To freeze, slice the bread and place a piece of parchment in between each slice, then transfer the loaf into a freezer bag/container. Freeze for up to 3 months.
To defrost, simply place the slices into the microwave until they get warm (1-2 min).
Troubleshooting
-
- Large hole between the top crust and the crumb - this is a common sign of overproofing your dough. Next time bake the bread sooner!
-
- Dense crumb - there could be many reasons why your bread is dense, and some of them are not enough proofing, not using baking powder, not using a Dutch oven, or your starter not being established enough.
-
- Gumminess - try baking your loaf 15 minutes longer and see if it helps. Alternatively, reduce the water by 20g at a time.
-
- Burnt bottom - try using a Dutch oven liner and remove the bread from the Dutch oven after the first 40 minutes of baking. Place a baking sheet in the bottom of the oven for the last 30 minutes of baking.
-
- The dough didn't rise during fermentation - you could be proofing in a cold environment or your starter is not active enough. Make sure to use room temperature water, not hot water for the dough to avoid killing the yeast bacteria.
Nutrition
Serving: 1loaf | Calories: 2059kcal | Carbohydrates: 493g | Protein: 27g | Fat: 8g | Saturated Fat: 1g | Polyunsaturated Fat: 3g | Monounsaturated Fat: 2g | Sodium: 4852mg | Potassium: 2701mg | Fiber: 45g | Sugar: 61g | Vitamin A: 18IU | Vitamin C: 10mg | Calcium: 759mg | Iron: 14mg
