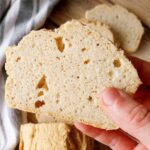
Gluten-Free 100% Rice Bread (No Gum)
This bread is made with white rice flour only and it is a good option for those who can't have starches or whole grain flours. This rice bread is airy and light!
Servings: 1 loaf
Calories: 1537kcal
Cost: 5
Equipment
- 1 electric mixer
- 1 bread pan
Ingredients
- 200 grams water
- 10 grams whole psyllium husk I don't recommend using powder
- 4 large eggs
- 330 grams white rice flour
- 2½ teaspoon baking powder
- 6 grams salt adjust to taste
Instructions
- Start preheating the oven to 350F/175C (don't use the fan setting).
- Add psyllium husk and water to a medium-sized bowl and whisk vigorously to prevent lumps. Set aside.
- Separate the egg yolks and whites. You can simply use your hands and let the egg whites slip through your fingers into the bowl. Place the yolks in a separate bowl. Make sure that none of the yolks get into the whites because fat will prevent egg whites from whipping into stiff peaks. I recommend separating one egg at a time using a separate bowl and adding the whites one by one to the larger bowl because you never know when a yolk will break and contaminate the egg whites.
- You will need an electric mixer for this step. Beat the egg whites on high speed until they form stiff peaks. It will take a couple of minutes.
- Then, beat the egg yolks until they look pale yellow. This should take a minute or so at high speed.
- Once egg yolks are ready, add psyllium gel to the mixing bowl with the yolks and mix with the electric mixer until evenly incorporated.
- In a separate bowl combine all the dry ingredients and mix to incorporate.
- Add the dry ingredients to the egg yolk with psyllium. Mix until you see crumbly dough.
- Add the egg whites to the rest of the ingredients and mix until it looks like a thick cake batter. Don't overmix!
- Now, line your baking loaf pan with parchment paper. You can do it however you prefer, but I found that if you make cuts from the corners of the parchment toward the center (about halfway), it makes it easier to line a bread pan with minimal wrinkles.
- I like using clothespins to hold the paper in place while I pour the bread dough into the loaf pan. Make sure to remove them before placing the pan into the oven!
- Smooth the batter using a silicone or an off-set spatula and bake the bread for 1 hour at 350F/175C. Take the bread out of the pan, remove the parchment paper, and transfer the loaf onto a wire rack. Let the bread cook completely before cutting into it! Enjoy!
Notes
Storage
I recommend either eating this bread fresh (the day of baking) or freezing it. Don't get me wrong, this is not the kind of bread that will crumble the next day, but I find that the texture does change 1-2 days after baking.
However, you can keep this bread at room temperature for 3-4 days in a bread box or an air-tight container.
I don't recommend putting this rice bread in the fridge, as it affects the texture.
To freeze:
Arrange rice bread slices on a tray lined with parchment paper and place in the freezer for 30-60 minutes.
Transfer the slices into a freezer bag or an air-tight container and keep for up to 3 months.
To reheat:
Pop the slices in a toaster or microwave for 30 seconds or until no longer cold to the touch!
Expert tips
Remove the bread from the loaf pan immediately after taking it out of the oven to prevent a soggy bottom. Cool the bread on a wire rack to ensure airflow on all sides.
Freeze the bread to keep it fresh.
Make sure to keep the egg whites clean. If any fat gets into it, it won't whip into stiff peaks! Use a clean bowl and whip the whites first, then go on to the yolks.
Nutrition
Serving: 1loaf | Calories: 1537kcal | Carbohydrates: 278g | Protein: 45g | Fat: 24g | Saturated Fat: 8g | Polyunsaturated Fat: 5g | Monounsaturated Fat: 9g | Trans Fat: 0.1g | Cholesterol: 744mg | Sodium: 3679mg | Potassium: 529mg | Fiber: 15g | Sugar: 1g | Vitamin A: 1080IU | Vitamin D: 4µg | Calcium: 770mg | Iron: 6mg
