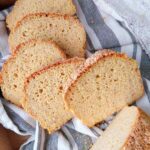
Easy 100% Millet Bread
This bread is soft, fluffy, squishy, and crusty. And all that with only one type of flour! Millet flour is not only cheap, it is so easy to make at home.
Servings: 1 loaf
Calories: 2478kcal
Cost: 5
Ingredients
Wet Ingredients
- 30 grams whole psyllium husk I don't recommend using powder, see my psyllium husk guide to know the difference
- 600 grams water if you are using active dry yeast, use some of the water to activate the yeast
- 50 grams oil
- 7 grams apple cider vinegar for the yeast
Dry Ingredients
- 500 grams millet flour not sorghum or amaranth, those are different
- 7 grams instant yeast if using active dry yeast, you will need to activate it before baking
- 2 teaspoon sugar for the yeast
- 12 grams salt adjust to taste
- 1 teaspoon baking powder optional but gives bread a lift
Instructions
- Add water, vinegar, oil, and psyllium husk to a medium bowl and whisk to combine. Set aside to let psyllium gel set.30 grams whole psyllium husk, 600 grams water, 50 grams oil, 7 grams apple cider vinegar
- NOTE: If you are using active dry yeast (not instant):Take half of the water and warm it up to about 115F/46C. Add sugar and yeast then stir. The yeast should get frothy after about 15 minutes, then proceed with the recipe.
- Mix millet flour, sugar (unless you are using active dry yeast in which case you already used the sugar), salt, baking powder, and instant yeast in a large mixing bowl.7 grams instant yeast, 2 tsp sugar, 500 grams millet flour, 12 grams salt, 1 tsp baking powder
- Add psyllium gel to the dry ingredients and knead the dough until well combined. If you are using active dry yeast, add it to the dough now.You can use an electric mixer with dough hooks, a wooden spoon, or mix by hand. To get an extra smooth dough mix for about 5-10 minutes. The dough will be very sticky, don't add extra flour!
- Line a 9x5in (22x12cm) bread pan (don't use glass) and transfer the dough to it. Smooth the dough out with a wet silicone spatula and cover it with a kitchen towel.
- Place the dough into a draft-free warm area and let it rise until it reaches the rim of the pan. Don't let it rise too high or the bread will collapse during baking.
- Once the dough is ready, preheat the oven to 350F/175C and bake the bread for 1 hour and 45 minutes. Remove from the bread pan and transfer to a cooling rack until no longer warm to the touch. Slice and enjoy!
Video
Notes
Tips:
- Don't let the dough rise too much above the rim of the pan or it will collapse during baking!
- Measure flour by weight using a digital kitchen scale. I can't overemphasize the importance of precision when it comes to gluten-free bread!
- Wet your hands when handling the dough to prevent sticking.
- Don't cut the bread while it's hot to prevent gumminess.
-
- Slice the bread with a serrated bread knife;
-
- Arrange the sliced on a tray and place into the freezer;
-
- After 30 minutes transfer the slices to an air-tight container or a sealed freezer bag and keep for up to 3 months.
Nutrition
Serving: 1loaf | Calories: 2478kcal | Carbohydrates: 404g | Protein: 57g | Fat: 72g | Saturated Fat: 6g | Polyunsaturated Fat: 27g | Monounsaturated Fat: 37g | Trans Fat: 0.2g | Sodium: 5129mg | Potassium: 1194mg | Fiber: 42g | Sugar: 16g | Vitamin C: 0.02mg | Calcium: 419mg | Iron: 21mg
