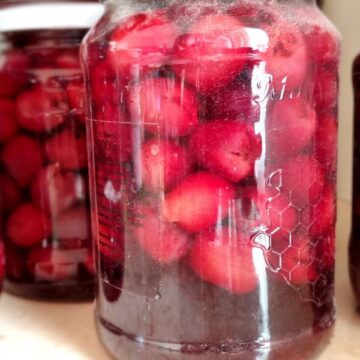
How to Can Cherries
Easy canned cherries at home to preserve them for the colder season!
Equipment
- 1 cherry pitter if using fresh cherries
- jars for canning (as many as you need)
- 1 large pot for processing the jars
- 1 Ladle
Ingredients
- Cherries as many as you need
- Water depends on how many jars you are making, details in the instructions
- Sugar details in the instructions
Instructions
Hot Pack Canning
- Pit the cherries using a cherry pitter or any other tool that works well for you. I used an old vegetable peeler with a narrow and a sharp end. To prevent your cherries from browning you can store them in a bowl with water that has lemon juice added to it (optional) until you are ready to proceed to the next step!
- Add 1 ½ cups of sugar to a pot with 5 cups of water. Feel free to increase the sugar levels if you desire, or add an additional cup of water if you think the syrup will be too sweet. Heat the water with sugar until all sugar dissolves. Set aside.
- Preheat your jars to avoid the glass shattering after you add extra hot cherries to cold jars. I heated my jars by placing hot water into them and letting them sit for a couple of minutes.
- Place cherries into a large pot and cover with the sugary water. I am not giving the exact measurements, because they will differ depending on how juicy your cherries are and how much liquid you prefer in your jars. You want to make sure that all cherries are submerged in liquid though. Some cherries will float to the top after you jar them, that is okay, the extra liquid will rather be seen on the bottom of the jars. Bring the cherries to a soft boil and then scoop them into the jars with the syrup leaving 2 cm of head space in each jar.
- Seal the jars with their lids really tight and place them into an extra large pot with hot water. Bring the jars to a boil and process for 20-25 minutes. Leave the jars in the hot water for 5 minutes, then take them out and let them cool slowly. Store in a dry place avoiding direct sunlight. Once opened, the cherries should be used within a week.
Cold Pack Canning
- Pit the cherries using a cherry pitter or any other tool that works well for you. I used an old vegetable peeler with a narrow and sharp end. To prevent your cherries from browning you can store them in a bowl with water that has lemon juice added to it (optional) until you are ready to proceed to the next step!
- Add 1 ½ cups of sugar to a pot with 5 cups of water. Feel free to increase the sugar levels if you desire, or add an additional cup of water if you think the syrup will be too sweet. Heat the water with sugar until all sugar dissolves. Set aside.
- Preheat your jars to avoid the glass shattering after you add extra hot cherries to cold jars. I heated my jars by placing hot water into them and letting them sit for a couple of minutes.
- Pack the cherries into the jars and cover with the hot sugar syrup leaving 2 cm of head space.
- Seal the jars with their lids really tight and place them into an extra large pot with hot water. Bring the jars to a boil and process for 20-25 minutes. Leave the jars in the hot water for 5 minutes, then take them out and let them cool slowly. Store in a dry place avoiding direct sunlight. Once opened, the cherries should be used within a week.
Notes
- Use fresh ripe cherries for the best flavor.
- Make sure the water covers your jars completely while processing the jars in the boiling water bath.
- Be creative with the cherry pitting tool! Look around your kitchen and see if you find something that fits the task. I used a vegetable peeler and it worked great!
- Make sure your jars are warmed up before adding hot syrup to them.
Nutrition
Calories: 100kcal
Tried this recipe?Let us know how it was!